The Grow Awards 2026 🏆 


Likes
Comments
Share
@Hologram
Follow
Sticky is proving again to be boss!
look how she is blooming!!😇
She does not have much sun and daylight.. but she is just doing her thang!
Blooming like she just not care!😎👏
She has grown only a few CM in height.. shes just busy making sure the hedgehogs get fat RN..👍
She is on the garden table when it is dry
and when its raining, and at night, she goes in her safehouse in my garden👍
So happy with it, bc i now do not have to put them inside anymore when the shit hits the fan..
Thats why i only had 3 at once in my garden last year..if you catch my drift😁👌
Im not gonna talk about the shitty weather anymore either..
Its just the way it is..
And dont forget:
FOR ALL MY GROWBROS/SISTERS IS A DISCOUNT CODE: ZAMMIGD2023
PS~
some 'wisdom' to ponder when u are smoking your blunt:
"..Dont believe the hype!"~PE (do not blindly accept information presented to the masses.)
"..Only crazy people want/try to make other people feel crazy .. "~CH (got to love the irony tho!😁)
#JUSTSAYING
smoke on! 👊

Likes
12
Share
@TappedN
Follow
Sorry For The Delay but I was kinda busy ......Anywho on 3/19 I Changed The light Schedule form 18/6 to 12/12 To Begin My Pre-Flower Stage I Also Bent The Last Few Uneven Tops To Have A Table Top like Canopy (LST) Also Cut Off all Little Branches (Lollipopping) To Prevent Getting Any Little Pop Corn NUGs. Then ON 3/20 I Increased My Light Intensity From 25% to 50% And began giving These Girls There Flower Nutrients Listed Above .
AN Updated Video Of the Week POSTED ABOVE Video Taken About 3 Days After Making These Changes And yes The are All Showing to Be Females


Likes
Comments
Share
@ThatsmyGrow
Follow
Love how goood she grows. It a very good strain, some water, some nutrients and good

Likes
30
Share
@magicbudsgrow
Follow
Cheiro muito forte de Pinho e baunilha.
Com certeza é o melhor resultado que já obtive cultivando com o coco.


Processing
Likes
4
Share
@inxxx
Follow
Beginning of week 6. Northern is getting very thick and burly. The gorilla clones are all iced in trichomes, very sticky. I love it, but very fluffy for some reason. I mean they look awesome and smoke is incredible too since these are clones and I remember they looked exactly the same at 7 weeks under 400w hps lumatek setup. 3 weeks left so hoping for better results this time :) CBD danceworld is doing ok, like I said in comments somewhere I don’t expect much from cbd strains in terms of yield. In few months I will be running medical mass just to see if I can get a decent yield as RQS advertises this strain as heavy yielder. Will see about that :) other than that no probs whatsoever.

Likes
9
Share
@pareto
Follow
She had her issues and is not a big yielder. But she makes up for it in beauty and aroma!
The trichomes look absolutely awesome!
--------------------------------------------------------------------------------------------------------------------------------------------------------------------------------
Set up cost (fixed costs)
-Lamp: 40€
-Timer: 3,5€
-Pot: 4€
-Total fixed costs: 47,5€
Given 5 years (or 15 grows) usage time translates to around 3,17€ per grow in materials.
Variable costs:
-Seeds: 6,33€
-Soil: 6€
-Fertilizer: 3,50€
-Power: 20,22€
-Total variable costs: 36,05€
-Total costs per grow: 39,22€
Likes
7
Share
@MadeInGermany
Follow
Hey everyone 😃
The time has come , On flowering day 72 the harvest was carried out 😍.
After spending two days in the darkroom at 62% humidity, they were now harvested cleanly by hand 😃.
After harvesting, they were laid out on the net as usual, where they can now slowly dry again for about 7-10 days at 62%.
Then they come with 62% in jars for 2-4 weeks, and then the 58% boveda packs are put in 👍.
Of course, I will come to the phenotypes themselves in detail in the last update.
Until then, I wish you all the best, stay healthy 🙏🏻 and let it grow 🍀👋
You can buy this Strain at
https://thecaliconnection.com/original-sour-diesel.html
You can buy this Nutrients at
https://greenbuzzliquids.com/
Type:
Original Sour Diesel ( Clone )
☝️🏼
Genetics:
Fem seeds- Original Sour Diesel to Original Sour Diesel BX3 RVSD Male
Reg seeds- Original Sour Diesel x Original Sour Diesel BX3 Male
👍
Vega lamp:
2 x Todogrow Led
Quantum Board 100 W
💡
Bloom Lamp :
2 x Todogrow Led
Cxb 3590 COB 3500 K 205W
💡💡☝️🏼
Soil :
Canna Coco Professional +
☝️🏼
Fertilizer:
Green Buzz Liquids :
Organic Grow Liquid
Organic Bloom Liquid
Organic more PK
More Roots
Fast Buds
Humic Acid Plus
Growzyme Big Fruits
Clean Fruits
Cal / Mag
Organic Ph - Pulver
☝️🏼🌱
Water:
Osmosis water mixed with normal water (24 hours stale that the chlorine evaporates) to 0.2 - 0.4 EC. Add Cal / Mag 2 ml per l water every 2 waterings . Ph with Organic Ph - Pulver to 5.8 .

Likes
6
Share
@Spazmagi
Follow
12/1 - Well, here we are. December 1st, start of week 9. She is absolutely loaded with buds and I just can't wait to see how they swell and ripen over the coming weeks. I switched over from Early-Bloom to Mid-Bloom nutes (DynaGro Week 5 Flower, Recirculating). This is the first week with Grow (FoliagePro) cut out completely. I still fed her at a 75% concentration of Bloom and of MagPro, but full strength of DynaZyme, ProTekt, and Hydroguard (At the amounts notated). This gives her a ppm right at 1000 (2.0ec), though she will likely go +/- 50-100ppm. This week the plan is to top off with pH'd water instead of topping off with nutes due to the higher EC, though target is to keep her between 800-1000ppm (1.6-2.0ec).
12/5 - Uploaded video from 12/4
Thanks again for stopping by the garden, and, as always, Happy Growing!

Likes
8
Share
@4F1M6
Follow
The ladies are starting to flower and the male is starting to drop some pollen. Most his more developed pollen sacs will be ripe and dropping in about a week a couple were aheadand already dropped. Giving the females plenty of time to throw a bunch of stigmas out there to catch it. Blessed.
I super cropped his main stalk over top of the ladies. I also added a clone from him in there for some more pollen for storage. For future crosses. All in all this breeding tent is doing swell. I also snipped of a couple really ripe sacs. Than dusted a couple sweet and sour buds with it. Get 1 more extra cross going.
Until next update. Happy growing and stay lit fam.

Likes
8
Share
@AustinRon
Follow
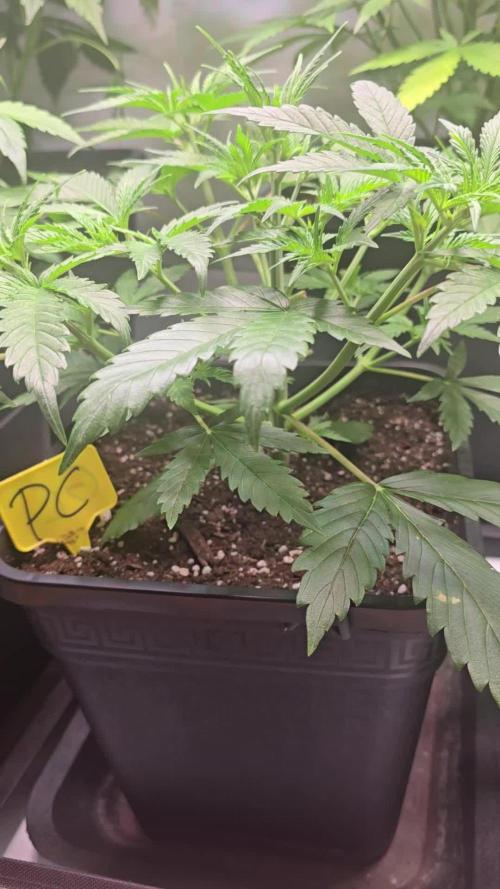
Week 2 - Seedling
Sangria - by Twenty20Mendocino
4Q 2022
Veg Week 2: Wednesday 11 January - Tuesday 17 January 2023
Start of Veg - 1 Node
Start of Week: [ 2022-01-11, SA20 15:V:2:1]
End of Week:
[ 2023-01-17, SA20 21:V:2:7]
HeightWeekStart: [ 2.5, in]
HeightWeekEnd: [ , in]
Start Date: 28.12.2022 # Seeds Wet
Harvest Window: 17 - 27 March 2023, 79 - 89 Days
EnvironmentGermination
- LightDistance: [ 14.5, in]
- LightStrength: [ 281, PPFD]
- Temp: [ 70, 85, °F]
- RH: [ 70, pct]
Fertigation
Germination/Seedling:
- 10 ml, 2x/day, 1” Band of H2O around jiffy peat as needed
Seedling:
- [x] Turn on BluMat
BioAg Feed Chart (Feed Water/Foliar)

SEEDS WET: Wednesday 28 Dec 2022
________________________________________
Wednesday 11 2022
SA20 15:V:2:1
- This morning, she was standing straight and tall for the first time. Light Foliar spray, and She fell Straight Over! Adding a cloning puck as support to help her stand up straight, again, will hold off on foliar until she can better support herself.
40 ml, 8 quads
Bendy Girl
LightIntensity∆: [ 16, µmol/s2/m2]
LightIntensity:[ 303, µmol/s2/m2]

Thursday 12 Jan 2023
SA20 16:V:2:2
- Tried removing support puck, Soft stem, laid over. Replaced support puck
- 20 Ml 4 quadrants
- BluMat ACTIVE - (Heavy pot. ;-| )
- Third Node Emerging - entering Veg

I think the roots just surpassed the “Seedling” Bowel created at top. We’ll see how water requirements are. I’ve been covering lightly the center quadrant to assure the top middle doesn’t dry more than desired, emphasizing lightly.
Friday 13 Jan 2023
SA20 17:V:2:3
Saturday 14 Jan 2023
SA20 18:V:2:4

Sunday 15 Jan 2023
SA20 19:V:2:5

- Lowered RH 1.5%, 68.5%
- Need VPD > 0.85 kPa
- LightIntensity: [ 363, µmol/s2/m2]
- Changed Res Water
- 2 Gallons
- Photosynthesis Plus: [ 28, ml, gal]
- Ful-Power Fulvic Acids: [ 10, ml, gal]
Monday 16 Jan 2023
SA20 20:V:2:6
Tuesday 17 Jan 2023
SA20 21:V:2:7
_____________________
Next week
Wednesday 18 2022
SA20 22:V:3:1

Likes
57
Share
@DudeGrowsWeed
Follow
Auto Lemon is soooo close to harvest. Buds are frosty, hairs are orange, she stinks really strong, the trichs are milky white, but no amber yet. Trying to wait for amber trichs. Gave her Recharge only in anticipation of flushing soon. 👍
Likes
62
Share
@Reyden
Follow
Purtroppo le 4 gorilla 🦍 hanno delle carenze importanti e anche dei moscerini che girano nella terra e nelle radici, penso siano i moscerini dei funghi e se tengo le piante senza annaffiare più tempo loro soffrono perché gli piace l umidità e materiale organico di cui nutrirsi, ho sbagliato due settimane fa a preparare quella soluzione forse un ambiente troppo dolce gli ha richiamati…spero di non avere ancora più danni ormai le piante


Likes
2
Share
@Ninjabuds
Follow
Divine jelly have some really special leaves. And an almost perfect growth pattern well atleast for what I’m doing. I’m excited to see how this one turns out when all is done
All of the plants have really taken off. Usually I have a couple plants that are much smaller but all of these plants are getting huge. Seeing I got a new eluefah uap1500 the other day and I have my 2 fastbuds plants under that now I have my spider farmer light free. So I popped up another 2x2 and moved 3 of the 10 plants into the 2x2 and left the 7 other in the 2x4.
Likes
11
Share
@plant
Follow
Germinated using a glass of water. After 12 hours into a bag with tissue paper. Then I hung the bag up so gravity could make the tap root grow straight down.

Likes
9
Share
@YD_59
Follow
The leaves are yellowing on one of the plants because it got hot and I forgot to water them for a couple days, two plants are flowering now and it doesn't have pollen sacs like the one with yellowing leaves has, the height measurement wont be 100% accurate as I don't measure my plants when I water them.
Likes
216
Share
@CRiSPrGrow
Follow
Week 5 : Auto Colorado in Vertafort
Great week of growth, filling out the canopy nicely by now ! seeing some promising side shoots, not seeing any excess or lack of nutrients - yet ! sprayed with micro and kelp twice a week , keeping VPD in the green zone to great effect. got watered with co2 twice and got watered once with beneficials and micro. I might have messed uo a bit on the pH watering the last time, but only time will tell. Hopefully the soil microbes etc will buffer it out without any significant pH fluctuations. just trying to follow their growth with some LST and raising the light every day or couple of days this week, keeping the distance constant and hopefully keeping the correct distance. I'm not planning a feed for a couple of weeks at least. Let's see how the buds develop first ! Any comments or constructive suggestions, fire away ! 🚀

Processing
Likes
10
Share
@LittleManGrow
Follow
Plants are doing well, The 84" inch tent is a must if your not training or topping. I removed all the sacks that appeared last week and I haven't seen anymore show up so fingers cross, I check daily. Bigger tent also helps with heat control as the air has more room to rise. Hope you all like the pictures, I started to take videos as they provide more detail with less work.


Processing
Likes
6
Share
@StoneyMelony
Follow
Overview of my grow:
Tent: Secret Jardin DS120 4 x 4 (120 cm by 120 cm)
Lights: 2 x 120 Watt CTlite c4 clusterled
Climat: Trotec Dehumidifyer 240 watt- 10L/24h
Filter: Prima Klima carbon filter PK2600
fan: 2 x Secret Jardin 20watt osc. fan
Pots: Gronest 4 x 11 liter airpots
Water : automated water system
PH: bluelab
Nutrients: Plagron cocos A + B
Plagron PK 13/14
ATA cal/mag
Epsom salt
Week 9 There is a lot off frost buds are not too big but they look and smell very tasty.
Likes
17
Share
@Vio_La_Grow
Follow
Week 7 -
-Overdrive added
-Nugs are weighing the branches down even more - using support from sidewalls of tent
-Trichombs are about 20-30% cloudy right now - some browning
-Some slight nitro deficiency which was fixed by adding nutes
-500ish PPM
-5.6-6.2 PH
-Warm+Cold days in bay area. Tent is 75-88F. Out door temps are 55-75F
-Nugs are huge and almost the size of baseballs. Use a 1 GALLON bottle which seems small vs. nugs


