The Grow Awards 2026 🏆 


Likes
Comments
Share
@SmokingDwarf420
Follow
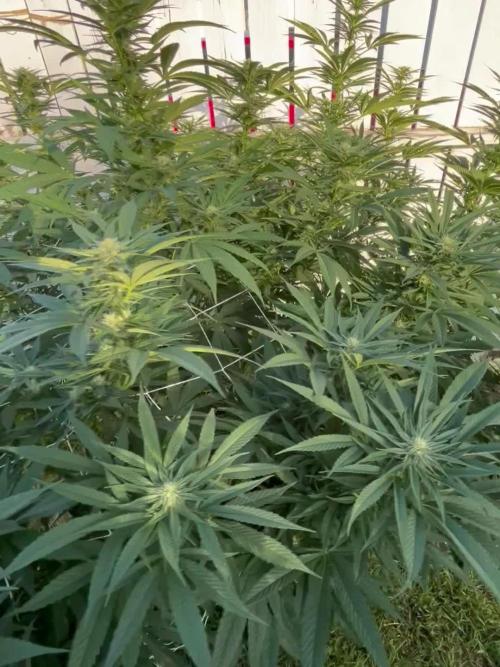
Growing it was quite a journey. Since I had a lot of changes in my life, I couldn't take the time I wanted to make a good diary, but I still managed to take some pictures.
I had some problems since I changed the size of my pots and didn't use LST. One plant grew so tall that it went above the LED, and other plants were too close to the LED.
Using three 20L pots in a 60cm x 60cm space was too much; they didn't have enough room. For the next grow, I'll use only two pots and employ SCROG and LST


Likes
76
Share
@Canna96
Follow
Absolutely LOVE this strain. She has only been curing for a little over a week but I had to try her. She is one of the 3 most potent strains I have ever consumed, tastes like grapes on the inhale, and then on the exhale it tastes like a classic chemdawg, piney and gassey. You will feel the effects by the time you finish exhaling. I lover her so much I am going to run her back after I take a little break to travel. The only thing I regret with this grow is that I used much too small of a final container. No fault of the genetics, it was all me. I will run her back in a 12.5 gallon container and see what happens. My goal is to run 2 photoperieods every year, and get a Kilogram off each plant. Might be somewhat ambitious but I enjoy challenging myself and improving. I cannot wait to squeeze this lady, but I want to give her a few more weeks in the jars first. I will post some videos down the line. If anyone wants a quick pound or two of some potent ass indica leaning flower, this is your girl. I honestly don't know how I could even bring myself to grow another autoflower after smoking this lady.....She blows every auto I ever grew out of the water.

Likes
7
Share
@Mr_nugs_lover_David
Follow
The seeds have germinated after around 59 hours to be exact very strongly I started to germinate the seeds on January 12th however it was 00:00 Am so it's almost like saying January 13th, the 2 out of 2 seeds have germinated very well without any problem! Quick germination, let's go for it! Stay tuned, this is a strain I love for her absolutely amazing terp profile!! Don't miss it👨🌾💚🔝♥️💛
Likes
34
Share
@Dunk_Junk
Follow
Day 91 - Still going. Harvested a little bit already as shown in video.


Likes
12
Share
@Northern_Ent
Follow
Aug 2: Mimosa Shot is hitting her stride now. She didn’t like the cooler temperatures as much as Sunday Punch EV, for example, but she’s loving this hot start to August.
Aug 3: done with force flowering and will now just leave her in the yard. So, back up to 15.5 h of daylight here now. Still using far red light at dusk.
Aug 6: Mimosa Shot has stretched again, likely mostly due to 3 days of hot weather.

Likes
119
Share
@Roberts
Follow
Divine indica is growing really well. She is definitely bulking up and getting frosty. She has a earthy smell coming from her. I am afraid to mess with her, she is growing so well. Don't fix what isn't broken is the saying I keep telling myself. She has had a minor nitrogen deficiency working it's way up from the bottom. I increase nitrogen a little, and added a lot more bloom nutrition. I am curious to see how much she bulks this week. There is nothing more to report. Thank you Spider Farmer, and Divine Seeds. 🤜🏻🤛🏻🌱🌱🌱
Thank you grow diaries community for the 👇likes👇, follows, comments, and subscriptions on my YouTube channel👇.
❄️🌱🍻 Happy Growing 🌱🌱🌱
https://youtube.com/channel/UCAhN7yRzWLpcaRHhMIQ7X4g

Likes
10
Share
@Mr_nugs_lover_David
Follow
Sorry for not being able to show you the transplant and the roots of this gorgeous lady but my phone died so I couldn't do anything about it, this lady was Transplanted to a 15L pot on day 39 since planted, on may 10th, I prepared the pots using the complete biotabs organic line, I've added 25G of startrex for every 5L of soil, also 1 biotabs slow release tablet for every 5L of soil (3 tablets) and then sprinkled a couple of grams of mycotrex on the planting hole before putting the plant, the I watered the plant immediately after the transplant with 1ml/L of orgatrex and 1G/L of bactrex, pretty easy as you guys can see, let's see the results that we get with Biotabs!! 🤤💯🔝👨🌾

Likes
38
Share

Likes
2
Share
@CuriosityWebster
Follow
Loving how these girls are growing
Fastbuds mystery #1 finally catching up, and may possibly in the end being a better producer than the RQS plant, which is surprising to me because of how badly I stunted this plant. Got me curious how good this plant could’ve been
Likes
39
Share
@flako
Follow
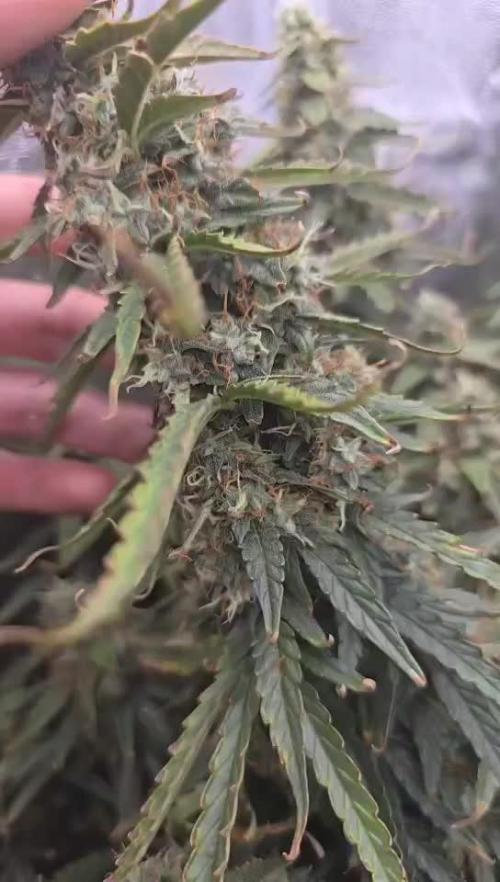
she's starting to smell so much , good days incoming,
ill buy flawless finish to final days💪💪
she still going fat


Likes
Comments
Share
@TyRun
Follow
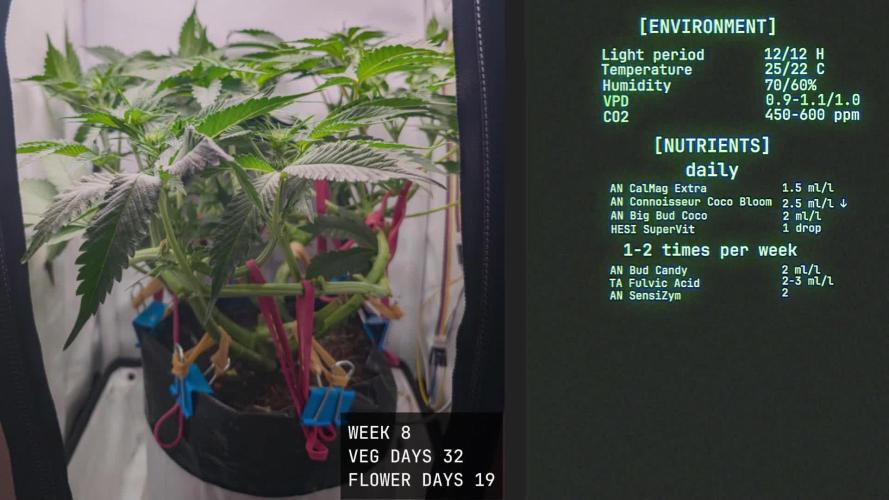
Decided to make a spin off for the new batch of clones. This time we will make this right and it will be in separate grow diary.
So, we are continue to flowering, got some EC spikes in runoff (and leaves tips starting to burn a lil bit) so I had to decrease the amount of base nutrients from 4ml/l to 2.5ml/l.
I suppose that comes after using AN SensiZym, so I'm stop using it for a while.
Also tried T.A. Fulvic acid but think it's too much with the AN connoisseur base nutes.
Likes
5
Share
@PollenGrow
Follow
Så har de søde kvinder da vidst nok lige taget fart på! :)
Vi har øget mængden af vores FloraDuo Grow Nutriens her i slutningen af vores vegative stadie og den kan sagtens mærkes.
Planten er steget med 10 CM så vi regner med at holde den i vegativ i en uge mere og så sætter vi den i blomst - vi vil gerne op omkring de 45-50 cm inden de skal blomste


Likes
17
Share
@Easygrower
Follow
Hello growers day 21 with the crystal candy and red poison had a lot of growth this week the tallest at 35 cm not bad at day 21 all 8 have started showing there first pistols so I’ve added top max and bio heaven to the mix now So in a couple of weeks should start seeing some buds forming can’t wait 😊 until next week be safe and happy growing ✌️

Likes
209
Share
@BioBuds
Follow
It was finally time to harvest her, what good times we had with her. Amazed with how beautiful this plant is, how easy to manage and train and how rewarding Orange Hill Special is.
So we said our thanks and goodbye, thanked her for all the joy she gave while growing her. I realize more and more how I love growing them even more than the end-product.
It takes my mind of all going on for a while, in my miniature jungle world in the attic.
Im sure all of you just sometimes sit there and watch them, in wonder, dreaming away with a good buzz on, watching them wave in the wind of the fans.
So with a heavy hart I apologize, play them their last music, sit with them and feel them and smell them, watch the glistening of the cristals.
In the end we had 209 gram dried Orange Hill Special, I will know the total of the grow, in a few days, since the final big whopper still has to dry: my XtraKush, be sure to check the harvest of that one *in couple of days) and see a one-dollar seed outperform two 10 dollar seeds.
I probably go over 500 grams for the total grow, which would be 1.6 grams per watt. Big success!
Consider an SP-3000 for your next light, you won't be disappointed! Check www.mars-hydro.com for the latest discounts!
Thank you @MarsHydroLED for letting us try out your light, it made this successful grow possible!
Greetings and all the best! Thank you to our friends here, our followers and the whole Growing Diaries community for just being there.
Big Hug,
Sunshine and BioBuds

Likes
11
Share
@HegauHillsFarmers_M11
Follow
Tag 35 - Ende der 5. Woche.
In dieser Woche an Tag 33 habe ich die Pflanze etwas entlaubt. Dabei habe ich die untersten Triebe entfernt und zusätzlich alle weiteren Blätter die im unteren Bereich nur im Schatten standen entfernt um die Luftzirkulation zu verbessern und die Belichtung zu erhöhen. Die Pflanze ist voll im Stretch und hat diese Woche nochmal ordentlich an Höhe dazu gewonnen.
Die Blüten entwickelt sich gut und wachsen.
An Tag 29 wurde die Pflanze gedüngt.
Nährstofflösung:
2 ml/l - Voodoo Juice Advanced Nutrients.
4 ml/l - pH Perfect Sensi Bloom Part A
4 ml/l - pH Perfect Sensi Bloom Part B
2 ml/l - Bud Candy Advanced Nutrients.
Davon hat die Pflanze 500ml an Tag 29 erhalten.

Likes
1
Share
@Pestitel
Follow
Amazing experience with the Mix Pack, I will try it again next summer for sure. Love the variety.
Likes
27
Share
@GrammaGriller
Follow
Делали маникюр 5 часов в 6 рук, все липкое
Вкусно пахнет, много фиолетовых оттенков
Много листвы сахарной и вторичного продукта
