
Likes
Comments
Share


@Daniel_Tri95
Follow
These ladies are doing beautiful:) keep growing remember it’s 420 somewhere

Likes
36
Share


@valiotoro
Follow
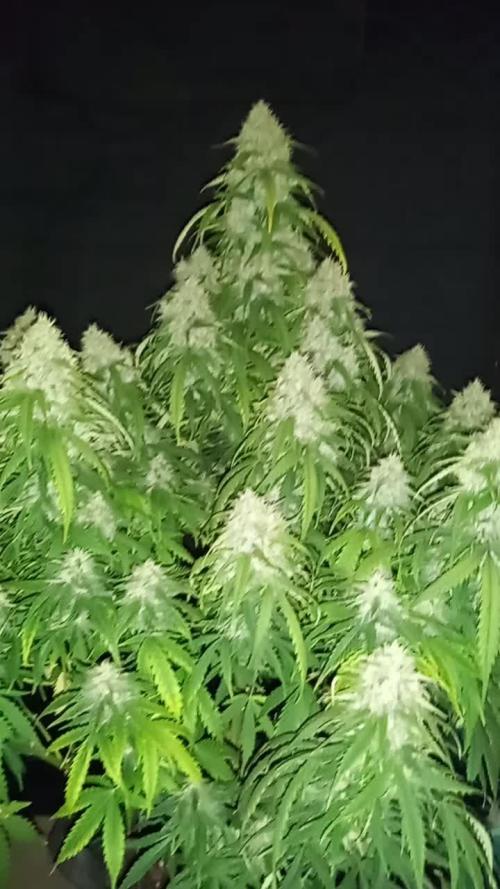
Super frosty & rock hard buds💥
Delicious terps🤤
Perfect buds leaf ratio
Likes
18
Share


@SpotWeed420Original
Follow
Bueno Fumetillaas ! Acá ya vamos con nuestras primeras hojitas ! Logrando obtener un crecimiento óptimo y esperando tener las mejores condiciones ... Tenemos un buen sustrato aún no fertilizamos ya que el sustrato tiene el alimento necesario.
Por este a la semana 2 o 3 haremos el primer riego de fertilizantes no se preocupen el reporte y el proceso lo subiremos para que vean cómo aplicarlos o diluir con eso llevamos el reporte.
De esta linda semana un saludo y un abrazo ! Dudas o consultas dejarla en los comentarios para ayudarnos mutuamente
Abrazo !

Likes
14
Share


@Terpyboyz
Follow
Hi everyone 👊🏻 thanks for checking in 😏, so we have started flowering this week on the bigger tent using the 2 Lumii 720w LEDs, we might or might not run into some hight issues well see…
And we have the other 1.2 tent set up for the clones there under 1 Lumii 720w led delivered until I can another one sorted few weeks 🤙🏻 get them under that for a few weeks then get them flowering as well. Keep eyes open for progress 👌🏻


Likes
15
Share


@BigDripFelgo
Follow
Pink Certz is ripening slowly but surely and she is nutrient depleted lol. She is looking very nice with deep coloration almost a black color. Her scent is lingering around the outside and inside of the house with a sweet, fruity, candy and minty smell! Lowered light intensity from 60% to 50%, cut hours from 12/12 to 11/13 and stopped supplementing UV light a week ago. Been feeding only water and Flawless Finish once a week for two weeks so I’m hoping by next week she is ripe enough to harvest.


Likes
9
Share


@Naujas
Follow
although the first week outside was not very good, there was little sun and cold nights, the temperature was +7 at night, but it seems the girls successfully endured it, now they promise better weather :).

Likes
57
Share


@Coopmc
Follow
Testing 9 seeds I expeckt 2 winners 2 losers and 5 ok let’s see how she rolls!
The plant the seeds and pollen cam from a seedling I grew from a seed found in a Bag of SFV that J was given 3 of I back crosses the best with itself !!
3 up already!!
6 playing peekaboo
7 of 9 up 2-3 look hands down better plants !!
8 out of 9 up!
9 up 3 losers and 6 to chose a few winners from!!
9 seams to be good number to ensure I find one exception copy usually 2-3
First cut down to the too3 all 9 did germinate!!
The three look strong


Likes
69
Share


@PEAKYPLANTERS
Follow
Oh yes, my friends .... Peaky is back stronger than before to compete with the best!
Take a look at my updates
The best crops and
best regards
Processing
Likes
3
Share


@Simon_Says_Smoke
Follow
01 December 2020
Do-Si-Wine
This lady is just getting frostier by the week and looks really beautiful, very white frosty thcA and orange hairs coming out.
The nugs are getting a lot thicker as-well giving more of smell off which smells very nice btw.
Did some more defoliation on this lady and light penetration is a lot more efficient as well
Sunset Sherbet
Week by week the nugs are just getting thicker and more frosty.
Throughout the week I did some nice defoliation on this lady to expose light to the lower bud sites to ensure that the nugs will yield a bit better.
Thickest mug so far is 4cm in width and is 6,5cm in height and smells absolutely dank🔥
In general this lady is doing very well and smells very potent to the touch, I’m just waiting to see this strain turn purple as the genetic is.
Another 4 - 5 weeks left until harvest.
Likes
9
Share


@Headies
Follow
fantastic smells coming out of the tent! The purple punch smells delicious. The sour diesel smells dank. The girl scout cookies smells like GSC
Likes
23
Share


@420DeepGrow
Follow
Toda esta fantasía se hace realidad gracias a Royal Queen Seeds y @James por confiar en mí. 🚀💥
Fiel a su linaje genético, la Hyperion F1 ofrece un aroma intenso que está dominado por notas frescas de pino y hierba, junto con un trasfondo terroso y un delicioso toque especiado. Aunque todos nuestros híbridos F1 producen excelentes concentraciones de cannabinoides y terpenos, no hay duda de que la Hyperion destaca entre el resto. Sus cogollos alargados y escarchados producen una resina rica y cargada de cannabinoides (sobre todo THC), y terpenos como mirceno, ocimeno, farneseno, terpinoleno, cariofileno y humuleno. Esto no solo da lugar a un aroma muy fuerte, sino también a un efecto bien equilibrado que combina una relajación física (en gran parte gracias al mirceno y al farneseno) con la euforia, risa y efecto motivador de otros terpenos. Al igual que el dios de la luz del mismo nombre, la Hyperion F1 causa un subidón esclarecedor que se puede disfrutar a cualquier hora del día.
🌻🚀 Consigue aqui tus semillas:
https://www.royalqueenseeds.es/semillas-de-marihuana-hibridas-f1/622-hyperion-f1.html
🍣🍦🌴 Xpert Nutrients es una empresa especializada en la producción y comercialización de fertilizantes líquidos y tierras, que garantizan excelentes cosechas y un crecimiento activo para sus plantas durante todas las fases de cultivo.
Consigue aqui tus Nutrientes:
https://xpertnutrients.com/es/shop/
📆 Semana 8:
Se pueden apreciar unos lindos erizos 🦔, pese al mal tiempo que hizo un par de semanas atras, el tamaño está quedando bastante bien XD.
Ahora empieza a cargarse de resina y a formarse los futuros cogollos 😍✌️.
Likes
10
Share


@Mancha
Follow
17/08 - I had a 5 days travel, which worried me a little, mainly because my irrigation system did not arrive in time. But when I came back the plant seemed very healthy. The medium was dehydrated but as you can see even after some defoliation the plant continues to be very bushy.
19/08 - Very wide canopy! I have a 60x60cm tent and half of it it's taken by the Rhino Ryder. Had to rearrange the tent. The Rhino is a bit behind the other plant.
21/08 - Did a defoliation to open more the canopy.
Likes
82
Share


@BigBadLion
Follow
Another fast update! 😃
Hey guys! I hope everything is going well for everyone. This is the 2nd week of flower and I'm here again to share what happened last week!
My babies now get thirsty really easy, nothing like how it used to be (and you can actually see them stressing over it in my photos) but gladly nothing that some water can't fix. The main colas are also starting to grow more and they are full of small developing flowers (they look super pretty! 😍)
Some side stems are also outgrowing the main branches... and I'm kinda unsure what I want to do (or if I should do anything). Maybe LST or supercrop them? (I might screw things up by doing it in flower and I have never done it before 😭) I don't know. I also want to trim some leaves away since the foliage is very dense but I fear I might end stressing them! I will probably make a grow question to know what others think.
I'm back on a normal nutrient schedule. I'm no longer "overfeeding" them and I water them 4 times a week (but with little water). Next week I'll try doing 3 but with more water and see if they like it more that way.
So far I love how the plants are developing! The small flowers look great and they look bigger everyday! 😃
Thanks everyone! See you all next week! 👋
Likes
3
Share

Likes
Comments
Share


@ShiokaraiGenetics
Follow
Day one of flower for the London Pound Cake and Purple Shah. I moved the Blueberry Muffin into another veg tent for a week or two. They’re early finishers so when I move them back everything should harvest around a similar timeline. Fed them all with an Organic Alf Alfa seed sprout fermentation. The triacantanol in the Alf Alfa makes these things go crazy if you don’t overdo it. Add some coconut water and aloe and youve got yourself organic plant steroids. The growth rate will cause you to have an increased need for ca mg and nutrients which in organics may not be readily available. Top dress or feed ahead of the curve.

Likes
9
Share


@Mazgoth
Follow
Little airy buds,not as fast flowering but really good colors,she needed one or two weeks for sure but i didn’t have time,I will grow it again for sure.


