The Grow Awards 2026 🏆 


Likes
57
Share
@Zengrower
Follow
The Fruity Donutz are doing great! Still stretching but not as much as last week. I turned on the airco in the growroom at a constant 21 degrees to keep the temperature under 25 in the GTools. Heat can also cause the plant to stretch more, and it has another advantage because it helps to keep the humidity down. The Sanlight is now fully raised to the ceiling and the plants have enough space to build those colas.
Removing the suspension cords all together and just attaching the clips to the ceiling was a great solution. Silly that I never thought of this before. Now I don't have to supercrop! Supercropping is HST for the plant, but also High Stress for the grower (at least for me 😅). Not much more to say at this point, but I will post more pics of the developing buds later this week ✌️. Cheers and happy growing!


Likes
Comments
Share
@eldruida_lamota
Follow
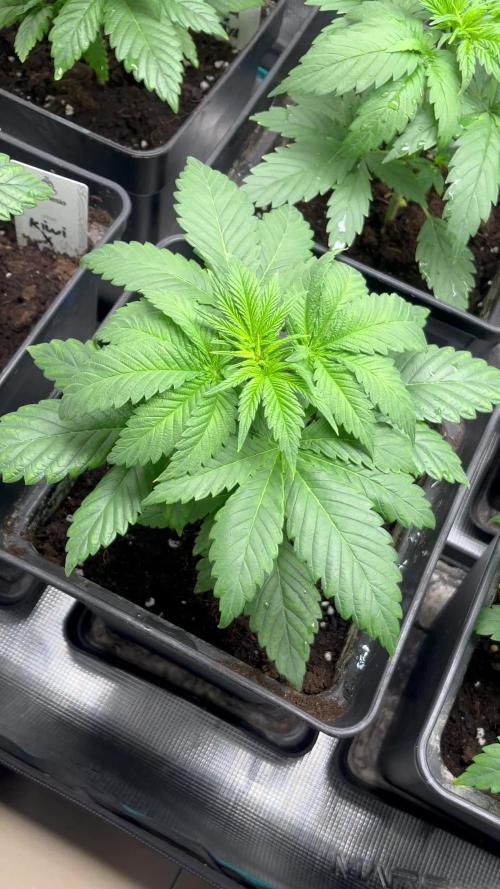
Que pasa familia, vamos con la cuarta semana de crecimiento de estas Kiwi x Papaya feminizadas de Mavericks .
Vamos al lío ,se trasplantaron en macetas de 7 litros definitivamente.
El ph se controla en 6.0 , la temperatura la tenemos entre 24/20 grados y la humedad ronda el 50%.
El ciclo de crecimiento puse 16h de luz, el foco está al 50% de potencia.
De momento van creciendo a buen ritmo y tienen un buen color, estaban muy bien enraizadas al realizarle el trasplante se notaba la abundancia radicular.
Gracias a Agrobeta de nuevo por el kit para esta temporada, unos grandes 🙌.
- os dejo por aquí un CÓDIGO: Eldruida
Descuento para la tienda de MARS HYDRO.
https://www.mars-hydro.com
Hasta aquí todo, Buenos humos 💨💨💨

Likes
3
Share
@TheSurfBud
Follow
Ganja Farmer Seeds
Amnesia Haze Auto
In @highpoweredorganics new ISLAND-BLEND.
Fed water soluble powders.
AQUA-MARINE Grow Formula 5.1.4 paired with OCEAN-POTION and RHIZO-MOJO in dechlorinated water.
Alternating ANTI-MATTER & DARK-MATTER feds weekly.
Foliar fed GREEN-SUPREME daily
Following High Powered Organics Island-Blend Feed Guide.
https://www.highpoweredorganics.com/
Happy growing friends 🇦🇺🇦🇺🇦🇺

Likes
17
Share
@Mastr
Follow
Very heavy plant hopefully get over 3 once dry bud I just cure half bud and rest leave it to cure after drying too learn whats different and witch better for me will update the weight soon as get dry around 10 days


Likes
28
Share
@PrairieFrostGrow
Follow
*
***************** Week 1 of Growth From Seed, April 11 to 17, 2020 - Days 1 to 7 from germination **********************
*
Okay, we are off running now. Through germination and was delighted to experience 100% success rate👍
Killer Kush in other diaries has been more squat but a thick grower........time will tell😀 So far this pheno has been slower coming out but I notice she was a fat seed and her leaves are already thicker as well on her first set of true leaves........maybe a slow Indica?? Sweet Seeds is always solid and expect this girl to bring a smile at some point👌👍
Greater focus on VPD this run. Already pushing the humidity higher than I ever have with having controller set at 72% with temperature at 79 degrees. I have been reviewing the numbers and I have normally been close but it looks like I have to raise everything by about 10% and for a few weeks long😬😬😬😬😬😬 Trust the science and lets learn some more from this grow!!!
*****Daily Detail:
Apr 11, Day 1:
- VPD - 1.2
- 500ml first watering given with nutrients as listed. (minus Velokelp)
- pH water to 5.6
- Girl is up and looking like she is ready to go.
Apr 12, Day 2:
- VPD - 1.0
- 500ml feeding with VeloKelp @ 2ml/L, Piranha & Voodoo @ 1ml/L. pH to 5.6
- lowered light intensity a bit more.
- leaves are wide already on her first set.
Apr 13, Day 3
- VPD - 1.2
- 500ml water with 0.5ml/L each of Piranha & Voodoo, Dual Fuel.
- 300ppm with 5.4pH.
Apr 14, Day 4
- VPD - 1.1
- 500ml water with Virtathrive and Piranha & Voodoo Juice @ 1ml/L, VeloKelp @ 2ml/L, and SensiCal @ 0.5ml/L.
- 210ppm with 5.5pH.
- She is gaining speed!!!! She is the fastest out of the bunch now. 2.5” tall and pushing out her second leaves pretty hard.😀👍
Apr 15, Day 5
- VPD 1.0
- 250ml water with VeloKelp @ 1ml/L.
- 95ppm with 5.4pH.
- She was a little slow in the seed but has been doing very will getting taller so far.
Apr 16, Day 6
- VPD 1.0
- 500ml water with Piranha & Voodoo @ 1ml/L, Vitathrive @ 0.5ml/L, Dual Fuel @ 0.5ml/L.
- 300ppm with 5.8pH
- Her leaf tips are staying more horizontal. Colour is good and she getting thicker leaves. Leaves really separating.
- Moved all the girls today one spot in a clockwise rotation.
- Noticed more residual moisture on the bottom of the pots than anticipated.
Apr 17, Day 7
- VPD 1.1
- Turned on flower light on UnitFarm this afternoon and they are happier.
- Dry out day today and no added water/feed, just misting.
- Let the medium dry out a bit and give a nice week 2 feed tomorrow.....they are ready for a little more nutrients now.
- She is doing well. Second set of leaves out, will be working on third soon. Wide leaves. She is leaning a bit🍺🍷😃👌

Processing
Likes
5
Share
@Major
Follow
hello everyone I had a very positive week on my BSB Bruce Banner colas are forming and hardening full of resin are on the flowers and leaves the harvest is coming soon I am very happy good luck everyone 😘😘💪💪👌👌👍


Likes
4
Share
@PrinceOfHerbs
Follow
The plants look optimal 80% milky 15% amber and 5% transparent trichomes
The plants were harvested and hung up.


Likes
7
Share
@Nofeckingclue79
Follow
Made sure the run off was 0.5ms, the water that I feed with has a reading of 0.3ms so I'm looking forward to when she has dried and cured so I can update with the smoke review

Likes
7
Share
@magonheiro
Follow
Thricomes starting to move from transparent to white ones, my idea is to harvest when I find any ocurrences of ambar
Starting from 2.2 EC and lowering to 0.5, then I will flush with tap water (50ppm) in 3 days before harvest.


Likes
2
Share
@Ninjabuds
Follow
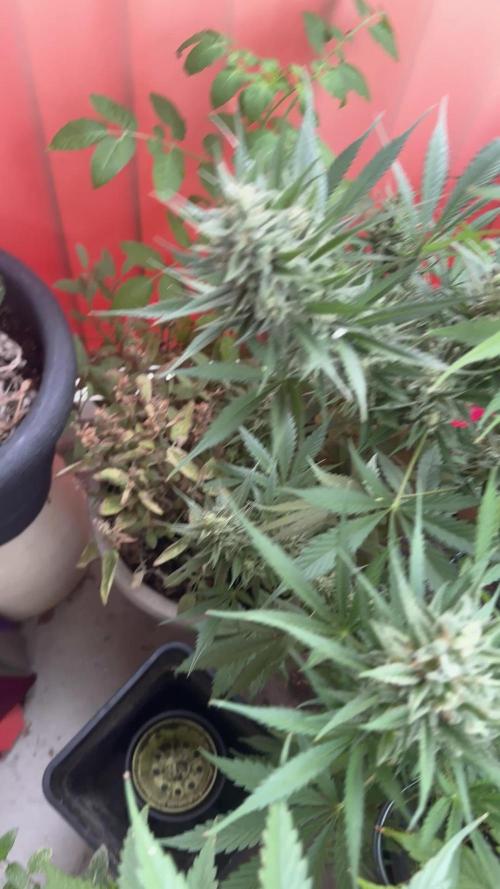
It's a nice change of pace to have these warmer temperatures, even if it's not quite spring yet. Low 40s during the day is a lot more comfortable than what we've been dealing with lately. Hopefully, this is a sign that spring's around
Those Bubble OG's are looking fantastic! It's awesome how two of them are starting to get that purple color – they look so cool. The third one might look a little different, but that just adds to the fun of growing them.


Likes
28
Share
@OrganicPower
Follow
Week 8 flower and the Sour Diesel is still fattening up and looks like about 2 weeks to go. Going to swell good I think. Lots of frost and getting thick. Turned the lights down now to 50% and they seem to be happy with that. Still just water through the drip and hand water once a week. Gnats suck and need to take care of them before next grow and do a better job moving forward. These TSW 2000’s from Mars Hydro are awesome and with two of them side by side are more than enough for this space. Blimburn Sour Diesel are turning out really good and smell like gas and are strong on the nose! Thanks for the view

Likes
8
Share
@Trinidad
Follow
Day 67. Today I will be harvesting as I am out of space and other plants have out grown their tents. The mixture of smell as you open the tent is like a kid in adolescent without deodorant, just dank. When you smell them individually the purple haze is a really sweet and fruity smell. As for the ztrawberriez it's difficult to put my finger on it but it have fruits and citrus.
Likes
2
Share
@PoppaGreenJeans
Follow
Ok so we're on day 44 of flower and she smells amazing packed full of frost. one pheno will be done a week early of the 55 day harvest time. The other pheno is way behind and will be 7-14 days past the 55 day harvest time. One pheno has far spaced out nodes with foxtailed buds. The others nodes are much closer together forming bigger colas..

Likes
74
Share
@Mr_Maes
Follow
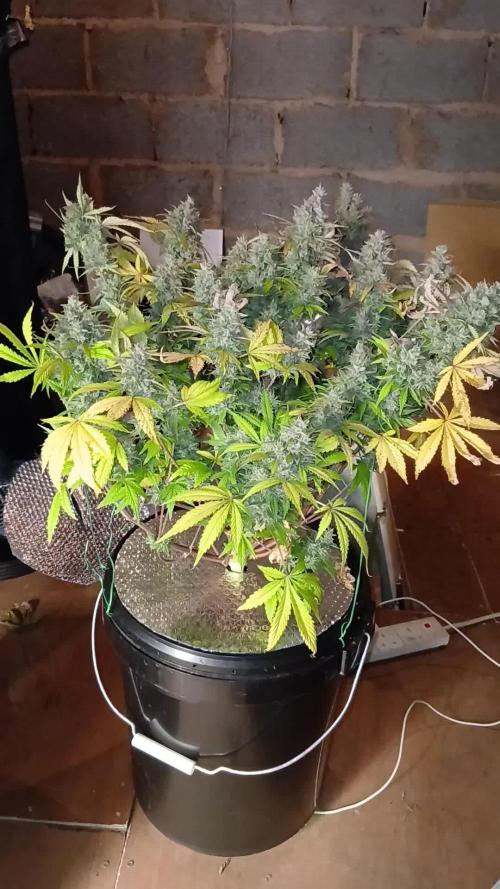
This week we will see the colas and buds really dense up. We are about 2 weeks away from harvest now. Next week I will start my flush.
