The Grow Awards 2026 🏆 


Likes
Comments
Share
@LSchnabel
Follow
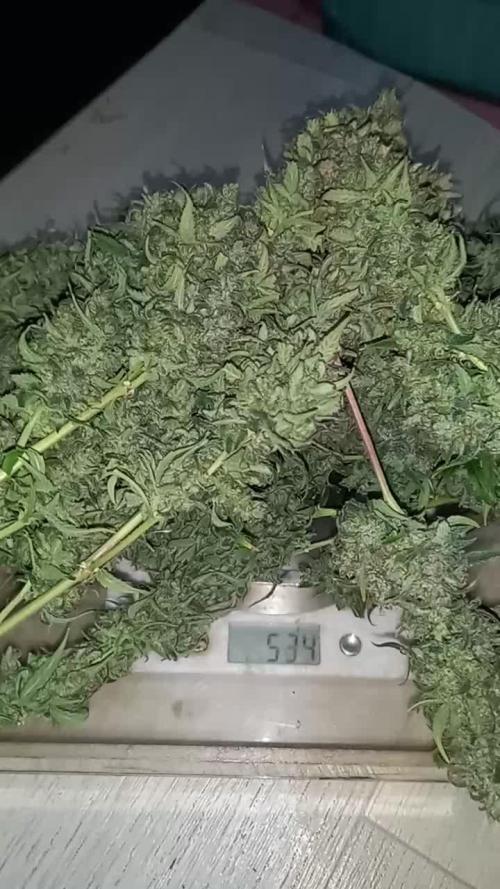
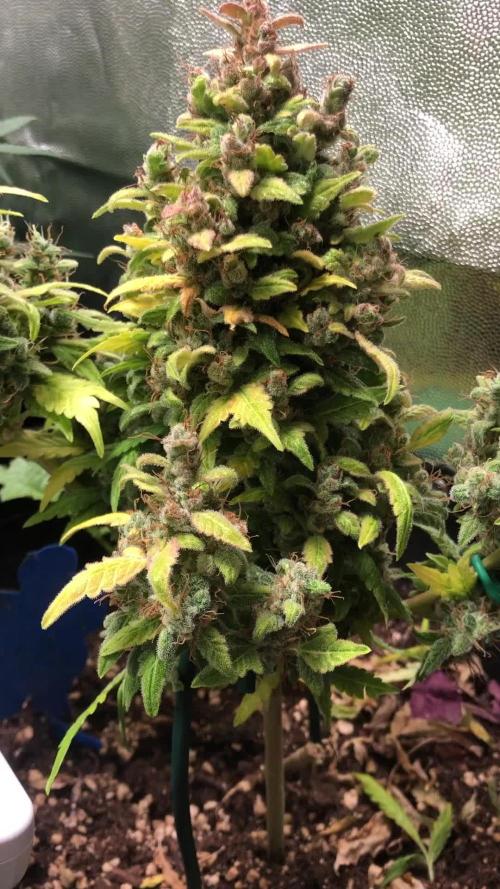
This plant was amazing from start to finish.
I will update a final comment soon as well as final weigh and a review of the smoke once sent out to a group of testers.

Likes
38
Share
@Snakeking
Follow
Guys i swear it’s like my girls are awakened after a few changes and i love to share with who interested about it.
One of them is put something under your fabric pots in outdoor growing to keep your bottom of your pot a little bit wet and don’t worry about water sitting in there because there will be no water after just a few hours.
There are 2 other things and i will answer to who ask only! Believe me you want to know about this

Likes
38
Share
@Wackytabacky_420
Follow
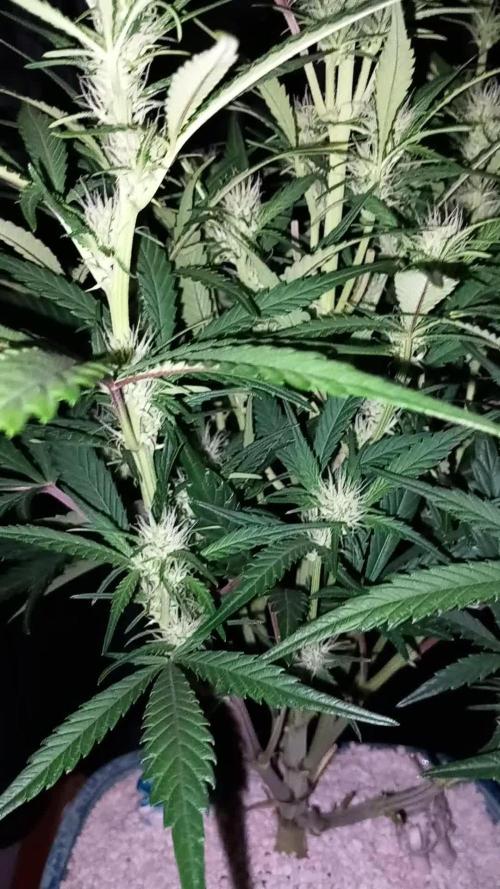
So my struggles are finally paying off my girls went into flower!!!
Northern lights- did some low stress training to bring main cola down away from light. Added some vinegar in bowls and shot glasses to grow tent to control these flying knats(which bite).
Pineapple auto- she's in flower I'm just concerned with all the lower leaf issue's that it's going to affect buds. I've over watered this plant which started the leaf issue's at like 3 weeks. At week 4 I trimmed all the fan leaves off which put it in stress almost haulting all growth for a week. Oh and the knats! I will never use walmart soil again for my grows or house plants. The neem oil has really knocked alot of them out. So the leaf burn and star leaves began at week 5 and it was the only feeding i gave my plants with cal mag and within 2 days the throwing star leaves and burning began.. not sure if it was the cal mag or the knats being so bad at that time. But thru all of it this plant has been a fighter!! You can see in pics the new growth and bud sights are healthy so I hope she fights all the way to the end!
I would like to thank Growdiaires and it's community for the opportunity to help and share with others. I appreciate all help, views, likes, comments and support. We all share a common interest and knowledge is power! Thanks again till next week.

Likes
27
Share
@Stickybudz420
Follow
Week 6 expecting some bud sites to appear soon, tied a few of the branches down to try spread some light through her she’s responded quite nicely I think, having some trouble with the temps as my tent is made up of duct tape and some reflective material I found on site, managing to keep it around 23•c will do for now hope you growers enjoy!!

Likes
4
Share
@YSLBeezn
Follow
Sehen alle gut aus 👍🏻
Fristed guava bekommt gelbe blätter aber davon lasse ich mich erstmal nicht verunsichern.
Die Blüten wachsen ja gut👍🏻👍🏻

Likes
2
Share


Likes
6
Share
@Prof_Weed
Follow
Wow, 50 cm now!!
Removed 2 leaves and some micro buds.
Da buds are bulking up.
Won't be a big yielder, i hope to get out 10g ahaha
Had to switch to 12/12, because she is in my Main tent were a photoperiodic strain was sent to flower.
Overall happy!


Likes
25
Share
@Appoldro420
Follow
10-05-2021: I am counting today as day One for Veg. Planning to hold them on 18/6 till the 20th of may (ten days) and then switch. Not sure if I will stress them a bit or not, time will tell. Yesterday was hot (26˚C) here so all values have shifted a bit. Won't be a problem as soon as they are on 12/12. Do you notice the lines (air/water) changing position on heat :) Didn't even notice that at first. Also pretty sure I need a more powerful chiller at the moment but will first make an attempt to replace the gas.
13-05-2021: Today I will be replacing my chiller. It doesn't keep up and the temperature of 28˚C is a bit too much. For the rest.. All great
15-05-2021: Added some paper sheets to reduce heat. Seem to work so today I'll go to hardware store and buy something to make a more permanent solution.... I have added some reflective foil to cover the boxes


Likes
6
Share
@Redweasel
Follow
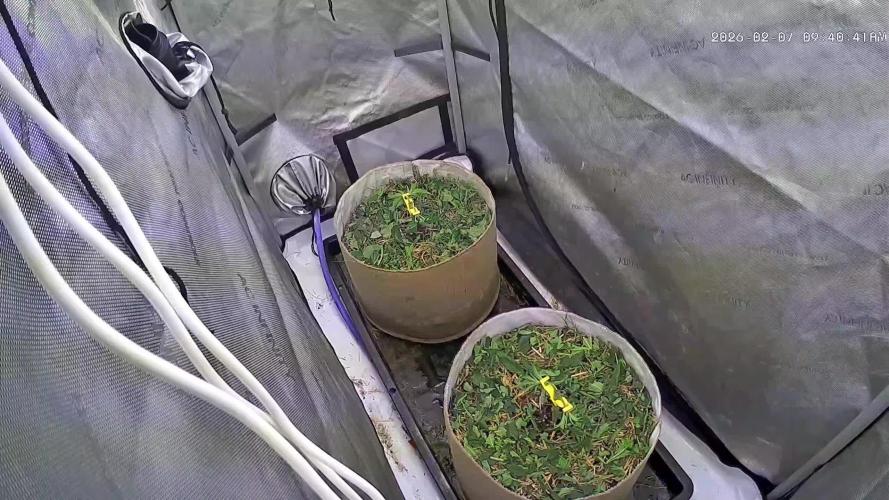
When attempting living soil in smaller containers, replenishing soil nutrients & refreshing biology often is an absolute necessity to keep root expansion & activity from stagnation. I top dress heavily every three weeks.
Total Tent Entry Time-40 min
Cover crop chop & dropped then integrated into existing straw mulch.
Top dress of 2 cups worm castings, 1 cup Build a Flower, 1/2 cup Craft Blend, 1/4 cup Kashi Gold, 2 tbsp Ocean Blend, 2 tbsp Kiss My Frass, blended together & mixed into mulch/cover crop layer.
6 cups of reclaimed & re-ammended soil, with fresh nematodes mixed in, used to cover mulch/cover crop/top dress layer of each pot.
Hand watered each container with 1/2 gallon plain 6.5 ph/11 ppm reservoir water, mixed with 1/2 tbsp each of Azos, coconut water powder, & quillaja saponaria extract powder.
Finally, added a 3/4 inch layer of fresh straw mulch that has been chopped to 1 inch lengths, & soaked in 3/4 gallons reservoir water mixed with 1/2 tsp each of coconut water powder, quillaja, & 1/4 tsp Recharge, giving me Azos at the root zone & recharge at the mulch level while keeping them apart.
DLI raised to 31
VPD raised to 0.90-0.95 kPa
Worm activity high in both containers & even saw some juveniles in the cap layer.
Expression #1
Height-5"
Width-14"×13"
-Week Prior-
Height-3 3/4"
Width-4"
Expression #2
Height-6.5"
Width-12"×11"
-Week Prior-
Height-6"
Width-4"
Week Total Entry Time-41 min


Likes
2
Share
@Skinnytalls420
Follow
Again not very happy but still gonna have some clean smoke but not want I wanted tbh
Likes
2
Share
@eldruida_lamota
Follow
Venga familia, cosecha de estas Black Rainbow de Seedstockers, tuve que adelantar una semana y dar machetazo.
No veas que pinta que tienen estas plantas.
Las flores aparte se ven resinosas, prietas, aparte son aromáticas huelen afrutado.
En general es una genética algo complicada que aún así disfrute cultivarla, la genética es perfecta para cultivos de floración corta 8/9 semanas con rangos entre los 20/24 grados en interior, es compleja cultivarla y hay que tener cuidado con las condiciones, es excelente para cultivadores avanzados.
Hasta aquí todo, agradecer Mikele y Giorgio de Seedstockers, y al equipo Agrobeta por hacer posible este proyecto espero que lo disfrutéis, buenos humos 💨💨.

Likes
29
Share
@Jjthejetplane79
Follow
Everything is smoothly sailing. I had to raise my lights and do a little defoliating. Still need to do a little more defoliating but I'm lazy
Likes
63
Share
@Ganjagrandaddy
Follow
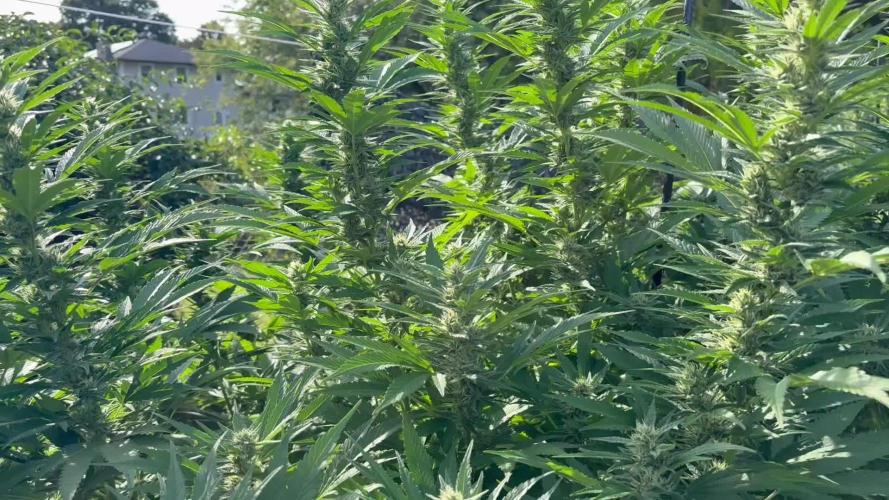
Day 28 flowering" Aloha grow buddies. Hope all have happy plants and greenery.
These amazing ladies have coped really well with the heatwaves we are going through here in the uk. None of them have held back with bud production and seen the mutant # Banana has decided to join in now. I did a very careful but needed defoliation of most of the ladies . The airflow now is a lot more useful bit it is still very warm.
Bamana mash are all stacking very nicely now and their stems are looking less spindley. There are a lot of really nice length limbs showing their potential now too. The canopy has evened out nicely for these ladies now.
Purple Monkey are really storming ahead with girth now and the buds different Phenos are all more obvious. Only the #2 has the Purple showing so far.
The middle row has now got a firm race on with the ladies there trying to dominate for the available light. I am stoked with the development in the experimental seeds and can see some nice harvests coming. Well done Exotic seeds. Hopefully sponsor some more autos to follow on ? , maybe ? . lol
They are all feeding really well now and on about 5L each per 1 days. No signs of any issues now at all and hopefully the next 4 weeks + will all be about swelling those stacks.
Be safe and well growmies .

Likes
13
Share
@Robeeriegenetics
Follow
I went ahead and transferred this week I also decided to start up my out door project things are looking good clones are Adapting well to new systems


Likes
4
Share
@Anon73
Follow
Still spraying with Monterey BT to control the boring moth larvae.
Leaned the area and provided the nutes. Watering is on the same schedule and flower production is booming. Next week I will provide video of the nutrient solution application method.

Likes
14
Share
@GoldenWeedGrower
Follow
D78/F34 - 17/06/23 - I changed light schedule hoping she's going better. (6 only red ligh and 7 red-white)
D79/F35 - 18/06/23 - New lights schedule is running
D80/F36 - 19/06/23 - Added water and integrators EC 1.0 and pH 6.4
D81/F37 - 20/06/23 - Nothing to report
D82/F38 - 21/06/23 - Added water and nutes EC 1.0 and pH 5.7
D83/F39 - 22/06/23 - Temp is too high for both water and environment. I see signals of suffering on the flowers (foxtailing)
D84/F40 - 23/06/23 - I'm trying to keep the Tremp under control but isn't easy. To lowering water temp (that now is about 26 °C) I'm adding some ice to the water
Likes
18
Share
@Sebb_growt
Follow
Was soll ich sagen… die Dame steht immer noch und wenn ich mir die Trichome angucke dann sieht sie leider immer noch nicht ansatzweise reif aus 🤯
Maximal 2 Wochen gebe ich ihr noch, dann kommt sie raus egal ob fertig oder nicht.
Aber sie riecht unfassbar lecker und ich bin sehr auf den Geschmack gespannt 🤤
Seit ein paar Tagen steht das Zelt auch auf 12/12