The Grow Awards 2026 🏆
Likes
Comments
Share
@Groweedo
Follow
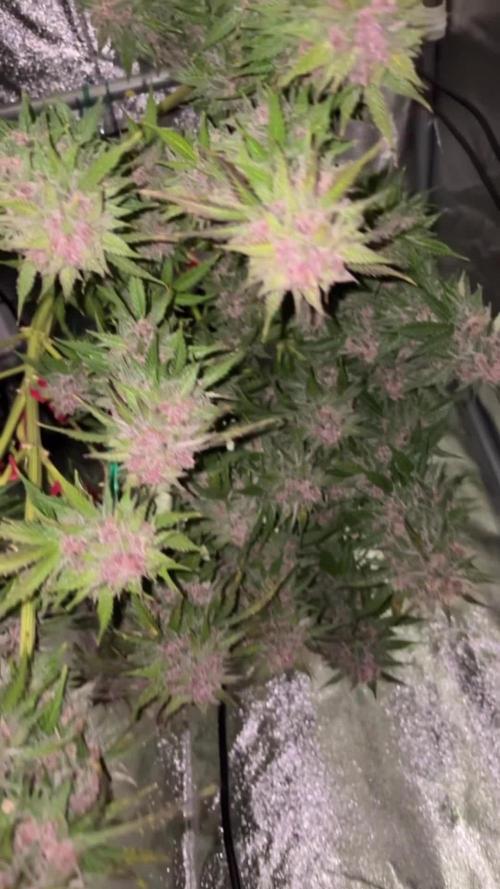
3 dernier jours avant rinçage, demain je met pour la dernière fois les nutriments, l’odeur est à tomber par terre surtout la runtz qui sent le bonbon 🍬 🍭
Likes
13
Share
Chopped earlier than expected. I thought it was finished., I dried for a couple of days until the branches snapped without bending. Usually the good old stuff you can find from websites concerning this.
Likes
37
Share
Día 15: 🔹 Primer riego con toda la gama de productos BioBizz, una EC ajustada a 900 y pH a 6.2. Le agrego Rootbastic para una mejora de las raíces. 🔹Sigo pulverizando las plantas con una EC de 400ml, con acti-vera y Rootbastic. Van de miedo, sin quemaduras ni signos de alguna carencia. 🔹Le incorporo al armario un higrostrato, que va conectado al extractor y al humificador que también incorporo para mejorar las condiciones del cultivo. Día 16: 🔹Pulverizo las plantas 2,3 veces al día con Rootbastic a 0,1ml/ y Acti-vera BioBizz a 1ml/l Día 17: 🔹Riego según la tabla de nutrientes con una EC de 1000ms y pulverizo las plantas cuando se despiertan con enraizante y una EC de 300 Día 18: Aplico foliarmente 2/3 veces al día una solución de Rootbastic a 0,1ml x litro. Día 19: 🔹Trasplante a maceta definitiva de 11 litros 🔹Aplico Special THC Plus foliarmente en base mínima establecida por el fabricante, ya que en unos 10 días aprox. la pasaré a floración. 🔹Riego con una solución suave de abonos EC de 900 y un pH de 6.2 Día 20: 🔹Aplico foliarmente 2 veces al día una solución de Rootbastic a 0,2ml x litro. 🔹Aplicación tierra de diatomeas en las nuevas macetas para evitar futuras plagas. Comentar que es la primera vez que la utilizo y ha sentado genial al cultivo. Espolvoreo una cucharada por cada maceta por encima del sustrato. Día 21: 🔹Descanso. Comentar que el trasplante las ha sentado genial.
Processing
Likes
5
Share
The smell is getting stronger, lots of citrus in it. All grows without any problem, as always with barneys seeds. Amnesia Lemon stopped stretching finaly and its now working on buds. looks like Im almost at the half of flowering. Will see how it goes next weeks. Cheers!
Likes
36
Share
Just as expected stated in our last weeks update this week is awesome! First signs of the flowers are showing and the plants look very beautiful and green. These plants are as good as it gets really loving these, the faint smell that they spread in the tent is very smooth and gives me a happy smile on my face every time i open the tent to give my lovely ladies some attention and nutrients. Next week i will make sure to have a picture of the developing flower. Talk next week. Cheers, Nibameca
Likes
15
Share
7/11 testing testing. harvest update? growdiaries isnt working 9/12 after a 2 month long cure, i can say that this is honestly my favorite weed ive EVER
Likes
79
Share
Greetings, fellow cultivators! Welcome to the Week 7 Report on our magnificent Epsilon F1, where the journey of green greatness continues to unfold with each passing day. Prepare yourselves for a detailed and immersive exploration of our botanical wonder as we delve deep into the heart of her flourishing beauty. Let's begin with a momentous decision: the Day 21 Flower Defoliation. With careful consideration and a keen eye for detail, I embarked on this transformative journey, gently removing select fan leaves to allow for increased light penetration and airflow. It's like giving our Epsilon F1 a botanical makeover, revealing her true splendor beneath the foliage canopy. This strategic pruning ensures that every bud site receives the attention it deserves, setting the stage for a bountiful harvest of epic proportions. But that's not all! As we bid farewell to the defoliation process, it's time to release all the bindings and restraints that were used to guide and train our green goddess throughout her growth journey. With a sense of liberation and pride, I untangle each tie, allowing our Epsilon F1 to stretch her leafy limbs and reach for the heavens. It's like setting a bird free from its cage, unleashing her full potential to soar to new heights of botanical glory. Now, let's talk about the environment. The TrolMaster controls have been instrumental in maintaining the perfect climate for our Epsilon F1's growth and development. From temperature and humidity to light and CO2 levels, these precision instruments ensure that our green queen receives the optimal conditions for flourishing. It's like conducting a symphony of growth, orchestrating each element to harmonize in perfect unity. And of course, we cannot forget the nourishment that sustains our botanical masterpiece. The Aptus Holland nutrients continue to be the lifeblood of our grow space, providing a balanced diet of essential macro and micronutrients. From the Micromix Soil to the Substrate Buffer Powder and All-in-One Pellet, each component plays a vital role in nurturing our plant to perfection. But let us not overlook the unsung heroes behind the scenes. Shout-outs to Royal Queen Seeds for bestowing upon us the genetic marvel that is the Epsilon F1, a testament to their dedication to excellence in breeding. To Aptus Holland, our main sponsor, whose unwavering support and innovative nutrients have propelled our grow to new heights of success. To TrolMaster, for providing the tools that empower us to create the optimal growing environment for our plants. And to Grow Diaries, the platform and community that fosters collaboration, knowledge-sharing, and camaraderie among growers worldwide. As we bid adieu to Week 7, let us revel in the glory of our Epsilon F1's progress and look forward with anticipation to the weeks ahead. Happy growing, dear readers, and may your gardens be forever green! Genetics -Epsilon F1 @rqs_esp @royalqueenseedssp @rqsglobal Food - @aptusholland @aptus_world @aptus_es @aptus_portugal @aptusbrasil @aptusplanttechaus @aptus_thailand @aptusplanttechnz @aptususa_official LES @lumatekeu Controls - @trolmaster.eu @trolmaster.agro @trolmaster.support As always thank you all for stopping by, for the love and for it all , this journey of mine wold just not be the same without you guys, the love and support is very much appreciated and i fell honored and blessed with you all in my life With true love comes happiness , Always believe in your self and always do things expecting nothing and with an open heart , be a giver the universe will give back to you in ways you could not even imagine so #aptus #aptusplanttech #aptusgang #aptusfamily #aptustrueplantscience #inbalancewithnature #trueplantscience #rqs #ApoloMission #MoonHarvestAdventure #playwithlego #lego #legotime #legovideo #tothemoonandback More info and complete updates from all my adventures can be found Link in the profile description Friendly reminder all you see here is pure research and for educational purposes only Growers Love To you All
Likes
5
Share
🗓️ Week 11 – Flower Week 7 (MAC n Cheese only) This week brought a noticeable shift: After raising the input EC to 2.0, runoff EC spiked to 2.2–2.6 – a clear sign of salt saturation in the medium. Despite that, pH remained stable between 6.2–6.3, and no visible signs of overfeeding or nutrient lockout appeared. 🔧 Adjustment planned: Starting next watering, EC will be reduced to 1.6–1.7 to rebalance the substrate and maintain nutrient uptake efficiency. 🌿 Current plant status: MAC n Cheese is looking incredibly strong – healthy, vigorous, and showing no stress despite the high EC in the runoff. Frost production is in full swing now, and the buds are packing on serious weight. 🧀 Visuals & Flower Development: The buds are massive, dense, and coated in a thick frost layer – already resembling little icicles. She’s maturing into something special. ❄️🔥
Likes
168
Share
⭐ TrolMaster tracking ⭐ I started to track my crop during week 15, when I got the Tent-X TCS-1 by TrolMaster. First impression was: this is too professional for me, I can't handle setting it up and using it well. Then I started reading some posts on Instagram, I visited their site and in 5 minutes my cultivation experience took a huge step forward with disarming simplicity, I couldn't believe it. I have uploaded tracking videos from the TrolMaster app for each week from the 15th to the 19th, as well as the two weeks of drying stage. ⭐ Controller Chronicles ⭐ Day after day I appreciated the clarity and precision for data, access to all settings and instant readings by connecting a WIFI router to the controller's LAN port. I loved the possibility to dim my lamps remotely, or even automatically based on the temperature in the box! 🌱 GERMINATION (2 days) Seeds in a glass of EC 0.4 tap water for 10 hours, then in root riots and under the lamp. They sprouted after 48 hours from dry seed. 🌿 GROWING STAGE (10 weeks and half) I decided to give these plants a long vegetative growth and this allowed me to do a lot of training on both. Starting from the 4th veg week I started with defoliation sessions every two weeks, for a total of four during the entire vegetative phase. The last defoliation was done a couple of days before the switch, in order to allow the lower parts of the plant to get as much light as possible. Furthermore I did Topping on week 6, cutting the apical branch, then on week 8 I did Topping again on several sites, as well as SuperCropping on the highest branches to make the canopy uniform. The light cycle I used is 18/6 and the last two veg weeks I lowered the light hours to 16/8 first and 14/10 then. During the veg stage I made 4 DWC change, PH was always between 5.5 and 6, about EC I started with 0.6 and was 1.4 on the last veg week. 🌸 FLOWERING STAGE (9 weeks) I started this phase after 36 hours of darkness, I then changed the DWCs solution (adding a flowering stimulator). Then I mounted the ScrOG-net about 50 cm from the base of the plants and I wove the phenotype #1 through the net occupying at least 60% of the available space; the phenotype #2 stretched shortly after the switch and I used the net only to widen the central branches. They showed the pre-flowers two weeks after the switch, then I made two defoliations on week 3 and 5 flo. During the last four weeks of flowering (weeks 6-9) I simply paid attention to the PH-EC levels to provide the roots with optimal conditions. I then kept the TEMP-RH-VPD-PPFD values ​​under control and this also thanks to the Tent-X controller by TrolMaster which allows me to provide optimal conditions also above. I chopped them when trichomes were about 85% milky and 15% amber. During the flowering stage PH was always between 5.8 and 6.2, about EC I started with 2 and was 2.3 on the last week before flush. ✅ HARVEST - From dry seed to harvest: 140 days (2 days germination + 75 days veg + 63 days flo). - Chopped after 4 days flush and 48 hours in dark; - Wet trim, removed fan leaves. ✅ DRYING STAGE - Time: 14 days; - Average: 20° C - 50% RH. - After that I made a dry trim, removed branches and sugar leaves. ⚖️ DRY WEIGHT - Phenotype #1: 230 gr buds + 25 gr larf; - Phenotype #2: 105 gr buds + 50 gr larf. So, the overall dry weight is: 335 gr buds + 75 gr larf. ✅ CURING STAGE - Curing is done after 30 days with Boveda 62%.
Likes
42
Share
Bonjour à tous les padawans et maîtres jedis Tout d'abord merci à Tom de seedsman pour ses graines ainsi que greenhouse de me permettre de faire cette culture en m'offrant le feeding greenhouse Je rappelle que cultive simultanément 9 pots de 10 et 11 litres dans une box prévu pour 4 et que je n'utilise que le strict minimum du matériel nécessaire à une culture correcte au prix le plus bas possible MATÉRIEL CONFIGURATION Box 80×80×160 Lampe led Lampwin 300 watts ×2 Ventilateur à pince 15 watts Xiaomi Deerma humidificateurs 5L Hygrometre thermomètre Extracteur PROFAN 107 m3/h - 100 Prise programmable électronique ×2 1 pot carré noir 10 litres Green house feeding enhancer Green house feeding biobloom Green house feeding biogrow Substrat biobizz ligthmix Fil de fer et pince coupante Microscope Petite balance de précision CULTURE ÉTAPE PAR ÉTAPE J'ai tout dabord fais germé ma graine avec le easy start de Royal queen seed et je suis agréablement surpris car franchement le taux de réussite est très élevé (17 graines sur 19) simple d'utilisation et très efficace. Une fois la plantule sortie et d'une hauteur de 2 ou 3 centimètres je la prend délicatement et la place directement dans son pot définitif. Je préconise des pots allant entre 10 litres et 15 litres pour des autofloraisons cultivées en intérieur. Le pot aura été préalablement préparé (video dans diarie) avec 30 grammes d'engrais greenhouse feeding biobloom et 30 grammes de greenhouse feeding biogrow, soit l'équivalent de 3 grammes par litre de substrat. Je dépose donc la plantule dans son pot définitif je recouvre un peu de avec de la terre je tasse légèrement et j'arrose pour garder le substrat humide pas plus Je place ma lampe led 300watts à environ 90 centimètres de la plantule avec un cycle de lumière de 24/24 pendant une semaine. Au début de la semaine 2 le cycle de lumière passera en 20/4 grace a un programmateur car c'est pour moi le cycle de lumière qui offre le meilleur rendement pour une autofloraison. Jour1: léger arrosage Jour2: léger arrosage Jour3: la plantule commence à être plus vigoureuse mise en place de la ventilation pour augmenter sa masse racinaire et léger arrosage Jour4: arrosage avec un litre et demi d'eau ph6.3 à laquelle j'ai ajouté 0.9 gramme de greenhouse feeding enhancer (soit 0.6 gramme par litre d'eau) Jour5: aucune technique spéciale Jour6: aucune technique spéciale Semaine agréablement calme sans problème ni carence apparente Que la force soit avec vous !
Likes
15
Share
Rolling into week 9 of veg... Flower substrate mixed and loaded. Charged with PLAGRON/Great White Solution. Time for those roots to stretch and fill. Going to veg until she almost fill up the 2x2. Added more clovers to regulate and fix nitrogen.
Likes
39
Share
Disclaimer: if you want to have a big flash like a big trip focus on the trichomes, really crazy colors. I still have to recover from the beauty of the Purple Urkle harvested last week that must amaze me again: even this time we are embarrassed by the beauty of the colors of this plant, this time it is a plant with shades of purple that if you go to see then in micro are fantastic very light trichomes on lilac and all shades of purple. We have nice big buds this time, of that type with a large calyx but really beautiful and elegant. ** Remember that for all the varieties we have at least two plants, one left to grow straight and one worked with the techniques (come back during the week to see). Today we talk about the harvest of the phenotype with shades of purple. Technique used // In this case we did topping repeatedly x16 and cleaned the sparse branches. Better with the techniques or normal? This time we have two very different phenotypes, one plant with medium internodal distance for beauty and color better than the other, this one beautiful flowers and beautiful quantity. Flower quality // From one to 10 stars 10. The plant has resinated very well on all sides, it is super mature, very mature pistils, mature trichomes, the flowers are very purple and of a very good general quality. There is also a fair quantity this time. We washed the flowers according to the procedure suggested by zamnesia. Check the article in your language // https://www.zamnesia.io/it/guida-growing-cannabis/333-lavaggio-delle-ceme Fertilizers// I am very happy with how I managed to unload the plant that at a certain point before going to flush was fed for a few days only with additives and then went to flush and we are very very well discolored, I predict a very tasty flower, grown organic and flushed successfully, the flavor and taste will be epic. All the fertilizers and additives of Plagron in the green / 100% organic version have fully satisfied me. Choose your soil based on your style and calculate the sheet on the website www.plagron.com - Bro if you are stubborn use additives listen every now and then....and then come and tell me. The fertilizers instead are found in convenient all-inclusive packages on the Zamnesia website. Purple dl CALI flavour ... ---- https://www.zamnesia.io/en/11168-zamnesia-seeds-purple-urkle.html Zamnesia Description // A direct descendant of a Mendocino Purps phenotype, Purple Urkle is a high-performance cultivar from Zamnesia Seeds. This feminized, indica-dominant strain is sure to win over any cannabis grower. With a THC content of 20%, Purple Urkle has a lot to offer from seed to harvest and beyond. Suitable for growing indoors, outdoors or in a greenhouse, Purple Urkle is a very resilient strain. Growers will be impressed by how easy this cultivar is to manage. Purple Urkle can reach 120cm indoors and 160cm outdoors, but if you want more control over the height, LST can be used. Purple Urkle has fantastic flavours and aromas that intensify during the flowering phase. Regardless of the method of consumption, Purple Urkle offers pungent and fruity flavors that lean toward notes of grapes, berries and plums. The effects of this strain are soothing and relaxing, with uplifting sensations that make the experience suitable for any occasion, both social and solitary. Music and frequencies // For about 4/6 hours a day my plants listen to 432 Hz frequencies created specifically for their well-being and sometimes a bit of black music to give them those vibrations that only music can give. www.radionula.com All the best that mother nature has to offer is at —— www.zamnesia.com
Likes
17
Share
I grew two plants and they couldn't have been and more different from each other. One plant grew quite well in my organic amended soil, the other suffered from pH issues and did not like any kind of stress. The plants leaves grew quite different some were webbed especially the ones on the larger flowers. The structure of the flowers on this plant are very chunky fox tail with absolutely gigantic caylex', almost had me thinking seeds. This plant also took almost 3 more weeks in flower than her sister. This plant also had a nice fade with some pink,red,violet,gold colors coming through. Both plant have similar smell with one being a little more pungent and gassy. Now for the normal plant, she grew like a rock star. Hey flowers are covered in sugar and are top shelf dense. She was too down about two weeks ago and is in jars and curing, let me say this though"when Barney's Farm says to use caution they mean it". This plant produced some very strong medicine so much so that I may have found a strain I would grow continually for a year or so. It's that good IMO. The plant did not give me a single bit of fuss 🤗, unlike her sister. Now I have the remaining plant hung up to dry and trim. Can't wait Cheers!!!
Likes
91
Share
@Drgreen13
Follow
Hi guys, Another week gone, these DC cures are tanking along. These are gonna be pretty big considering the size of the pot and the fact there's three of them in there. Started feeding nutrients a few days ago and it's showing 😁👍🏼. Please check out my other diaries and feel free to leave a like, maybe even a follow and I'll be sure to check out your diaries to. The light being used Is the Mars hydro SP150, its a great quality light and is very bright, ideal for a rectangular space. Drgreen13#6724 (discord) Stay high, stay fly, #420everyday. 🥃
Likes
4
Share
Week 2 day 1 plant is just happy but I would love to see some faster vegging. Day 2 Fan adjustment today, felt like the plant was getting little windburn ( slight curling on the edge and dry/rough leaves) Day 3 Added Horn- Bonemeal mix as Top dress today. It’s really fine grained so I hope this is going to help out with N + P in flower stage Day 4 Plant still not ramping up. My guess is the roots are not developed well enough to get to the edge of the pot where the majority of the pre fertilized soil is at Day 5 Drained the whole pot with 1l rainwater and tested run off water. It’s at 6.3ph. Hopefully the plant can reach all the nutrients now. I will add compost tea in about 3weeks. I need to wait for the compost to finish first at least partly. Next grow will be better for sure when I’m more prepared. Day 7 LST
Likes
18
Share
@Luca90
Follow
Today 23/07/22 We are two days into week 5, never talked about nutrient or water’ problems I had some leaves with few yellow marks but very small one beside that I always saw my plants green and happy, here you can see the scrog I set up yesterday not sure if this will work better but I think will help the branches grow further from the others increasing the light they riceve! I made it myself I will order one for the next grown when I will get my grow box! The watermelon is already flowering but the northern light no so today I started feeding the plants with different preparations.. I kept on giving the grow booster with a bit of bloom booster and viceversa for the watermelon! If you have any tips anything you think I’m doing wrong or you see it’s not ok let me know I don’t grow in a box I grow between the curtains and my window so the environment wasn’t always the perfect one