
Likes
Comments
Share


@Sieben
Follow
That was the first and definite not last grow of Greenhouse Seeds Lemon Orange.
She has grown very wide with strong and heavy branches, buds also really crazy exploded.
The taste should satisfy every fruity lover out there , the high is uplifting , not too much body, for me a pretty nice allday smoke.
I also find a medical aspect in it , i suffer under depression and it gave me nice moments.
Update:
After a time with it , i'm even more convinced, it also give me energy to get started / going.
I thank Arjan and all Greenhouse employees, especially Georgia from CS , for this wonderful plant.


Likes
25
Share


@BudHaks
Follow
Apologies for not updating last week, I have just been really busy!
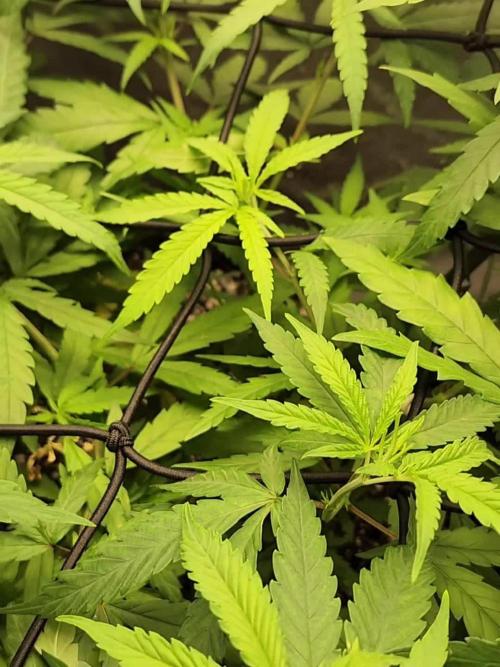
These last couple of weeks have been great - her growth is coming along very well. There are no signs of any deficiencies as of yet, what is your opinion!
In regards to defoliating and lollipopping - what growth would you suggest I get rid off?


Likes
8
Share


@pzwags420
Follow
On day 1 I did another light defoliation. The plants are progressing as expected. The only issue I'm dealing with is fungus gnats... ugh. I will keep applying BTI weekly until the population is under control. On day 3 the plants are putting out more pistils and seem to have stopped or slowed down their "stretch" phase. On day 4 I'm starting to see some trichomes forming on the sugar leaves, no smell that I can discern yet. I also changed out my reservoir and applied a BTI soil drench. On day 5 I adjusted the PH of my reservoir down to 6.1. I also purged my blumat system to make sure there are no clogs as my reservoir has fertilizer particles due to my water heater causing separation. I must keep the water heater on as I am growing in the northeast coming into the cold time of the year and can't have my reservoir freeze on me. On day 6 I adjusted the PH of my reservoir down to 6.1. On day 7 I adjusted PH in reservoir to 6.1.
Likes
3
Share


@AdirondackGreen
Follow
Some light defoliation this week to hopefully get more airflow and encourage upward growth before flowering sets in. (already well underway), might go heavier next week. Got some nasty visitor chewing my leaves, but not aphid or mites, possibly cricket or beetle... monitoring.


Likes
7
Share


@LACREME
Follow
Iniciei a desfoliação! Os ramos estão crescendo, porém lentamente.
Senti que a amarra estressou ela e deu uma travada no desenvolvimento.
Continuo com a nutrição mista, com GHE e chás orgânicos ricos em microorganismos.

Likes
55
Share


@nonick123
Follow
Día 92 (14/04) Riego con 500 ml H2O EC 0,45
Ha bajado algo la temperatura promedio
Día 93 (15/04) Riego con 500 ml H2O EC 0,45
Reviso los tricomas y aún le faltan unos días...
Día 94 (16/04) Riego con 500 ml H2O EC 0,45
Día 95 (17/04) Riego con 750 ml H2O EC 0,45
Tiene mucha sed! El tiempo está loco por aquí! Picos de 27 ºC en abril... 😵💫
Día 96 (18/04) Riego con 1.000 ml H2O EC 0,45
Día 97 (19/04) Riego con 500 ml H2O EC 0,45
Día 98 (20/04) Fiesta de la Cosecha!
Reviso los tricomas y están un 10% ambar, 85% nublados y 5% transparentes
Perfecta!

Likes
18
Share


@VI_Cannabis
Follow
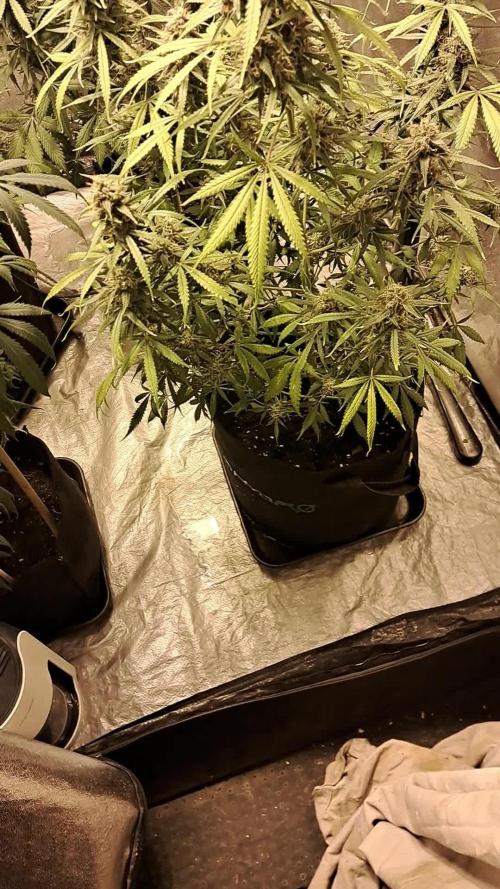
June 7 - We ordered some new lights last week, they are 240w kingbrite samsung lm310h with uv/ir, 3000k, and meanwell drivers.
We setup the new room and moved the girls into there. After a bit of LST and a watering (with nutrients) at roughly 7ph, they were ready to go under the 2 new lights and the same SF-1000 we have been using in this grow.
The new room is a 12 ft enclosed trailer. I moved everything from the small tent into this. I put clear poly on the walls, floor and ceiling. I put poly on the shelf I am going to be keeping in there as well. I bought 50ft of 6mm mylar and lined the floors, roof and sides with it. I plan to get some reflective tape to seal everything and to cover the wood. I did not get much of a chance to watch temp's today as they it was later in the evening after all was said and done. The inline fan blowing in air from outside.
June 8 -
9 AM i checked the plants, they were at 25.2 and 50% RH. Late through the day I had checked and we had gotten up to around 32 degrees. So I moved the inline fan to the closer vent, hooked up to that, and had the air blowing out of the trailer with the inline fan sucking it from above the lights.
I then added oscillating fan and had it blowing air on the left side of the room so it would somewhat circulate once I closed the doors. I then checked at about 9pm and we were at 22 degrees. Definitely noticed a decent amount of growth already. I have the lights on a 22/2 cycle as I was worried about the heat at night time.
June 9 -
Some great growth from the girls, still having problems controlling the temps in the afternoon. I decided to prop the door open a bit to have a constant breeze throughout the day while I am at work. Decided to do some more LST and also a bit of defoliation. I took about 25% of the leaf's that were blocking the new growth as it was getting a bit bunched up. I was then told the leaf's are almost solar panels for them. So from now on I will be trying to just do some tucking unless needed. The leaf's I removed were most of the damaged leaf's, I am not to sure if that makes much of a difference. I gave them a watering with only water as there is a potential I am getting a bit of a nutrient buildup along with the PH problem. Or potentially the reason for the ph problem is nutrient buildup. After watering with A PH of 7 I got some run off and tested it. The smaller plant gave me a PH of about 5.5 where the bigger one is around 5.0.
June 10 -
Plants are looking happy and showing tons of growth. Seems to be trying to stretch outwards. Not a ton of sign of PH issues showing so potentially getting it under control. Still a bit of damage to previous leaf's but it is what it is! The last few days I have been leaving the door open a bit in order to keep the temps down. I decided to test something and turn the lights off (automatically) at 11AM and back on at 5PM so light schedule has now changed to 18/6 and it seems I may have figured out the issue. We haven't had lots of sun the last couple days so it hasn't been to hard and I have yet to know if it truly fixed the heat issue for now. (I will be looking into a ac unit as well since it typically gets to around 30-35 around here.
June 11 - Pulled some of the branches back down and added a few more LST spots. Seems we have a good amount of growth from the smaller plant out of the 2 topped spots. Unfortunately it looks like I fucked up on the bigger plant and only one of the nodes seems to have new growth. I will continue to monitor that but I think I cut the node to low and also to soon. Other then that, the girls are doing great. They seem to be absolutely loving these new lights. I gave them some nutrient water today as well. roughly 3L each. They seem to be A hell of A lot more thirsty under these new lights.
June 12 - The girls are doing great , they are still just doing growing away. Lots of progress everyday. I am going to be getting a go-pro so I can set-up a time-lapse for the rest of this grow. I received my new inline fan, I got A ac infinity CLOUDLINE T4 with the temperature humidity controller. I am going to be having one fan pushing fresh air in and one fan pulling out the hot air. I will be doing that tomorrow since I have to work today.
June 13 - I ordered another 50ft of mylar and that showed up today. I have decided to remove the shelf and add another 3+ feet to the grow space. So today I installed more poly, mylar, the ac infinity fan. I have it set-up to pump in air if it gets to warm. I am thinking of switching it to the output that way if it gets to hot or to humid I can have that air pulled out of the trailer. Right now my other inline fan is the outtake and I just have it set on full. Overall I think everything is set-up a bit better and more accessible. I will be putting my 2x2 tent in there at the left of the doors so I can have a veg room when these 2 are in flower. I plan to have 4 in veg and 4 in flower for the next grow. Still waiting on JOTI seeds, ordered 3 weeks ago and still have not been shipped. I will be getting those going the moment they arrive.
The girls seem to be happy still, did a bit more LST to try to keep everything even, mainly I'm just pulling down on the spots I already have tie wire on.
Likes
4
Share

@GREENPHOENIX6262
Follow
09/07 - Reveg still in process - Mother plant in recover from clone clipping - unhealthy clones disposed - cutting new clones this week - Myco and Superthrive feed increased - Net dropped an LST.
09/10 - Mother reset in motion - clones are healthy and rooting effectively - humidity 89% at 18 hrs.

Likes
36
Share


@Mazgoth
Follow
It’s growing really well,I like a lot the cycle she made,a lot of photos are day by day captured

Likes
5
Share

@GANJAT
Follow
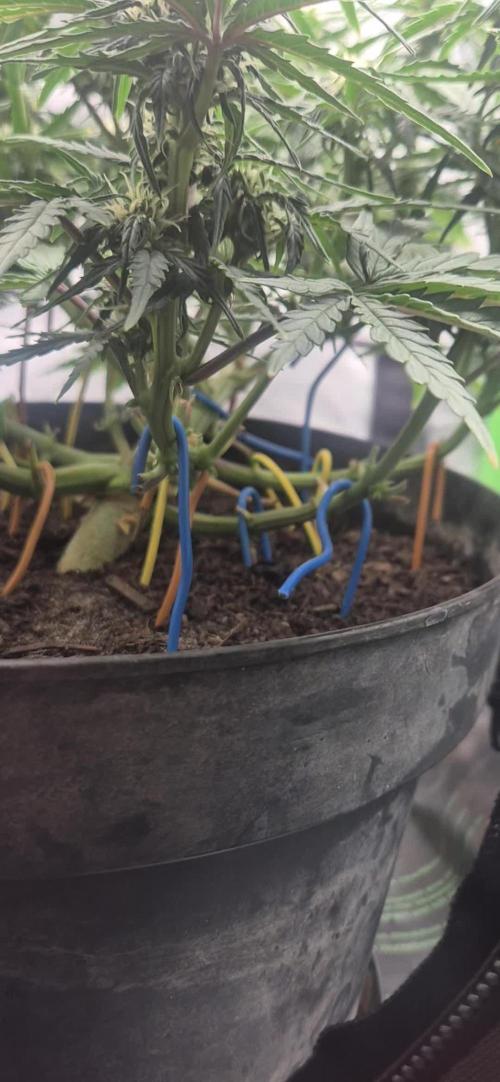
Die Pflanze gedeiht gut und mit der Entlaubung und etwas Lollipopping lege ich den Fokus auf gleichmäßig große Buds.
Die Luftfeuchtigkeit hält sich bei 40 bis 55%, je nachdem ob gegossen wurde.

Likes
8
Share


@GirlGoneWeed
Follow
Week three, seedlings were not as root bounded as I though but still time to transplant. I am transplanting them all into 1gal rapidstacks.
I noticed the roots look nice and healthy, that live soil is packed with nutrients and beneficial bacteria the plants love it!
Follow me on IG for more details on my gardens @girlgoneweed
Want to save on grow equipment, medium and much more ?
Check the link below to have access to all my discount codes!
Including ACInfinity use code GGW FOR 15% off on acinfinity.com! PetraTools use code GGW and much more!
Whoever uses my codes to make a purchase will get a free seed pack from Divine Seeds! Send me a Dm and I’ll give ya the deets ;)
https://linktr.ee/Girlgoneweed
Happy growing!

Likes
18
Share


@prebiancagrower
Follow
...and here I am, at the end of this fantastic journey, with so much knowledge I have got in this process, including regarding myself! Fantastic!!
I harvested one week early because I got some issues with mold!
Thank you people for helping me when I got into some trouble hahaha
Love you all! :-)
Peace and freedom!


Likes
51
Share


@DogDoctorOfficial
Follow
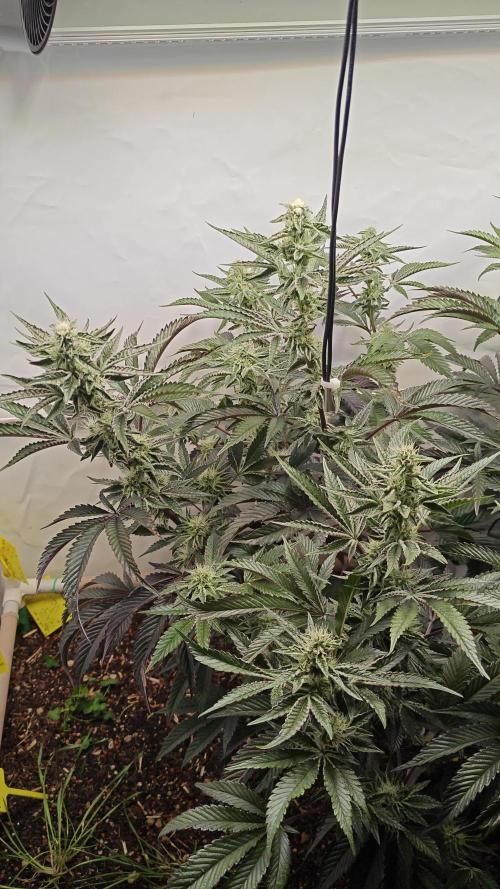
The freak keeps growing and getting taller, i think she might be having some trouble dealing with to much N for her needs, i hope she corrects that now that she is entering flower.
She still looks amazing lets see how the week goes.
And she is getting so tall, in fact she is becoming the biggest of them all, despise her freaking freak curved leafs , she is a non stop mode , very curious to see were she is going to be next week, i mean look at her and the speed she as put on her grown
Them room is getting so full need to clean this up asap
As always thank you all for stoping by for the love and support and for it all, i truly appreciate it all <3 <3 <3
Genetics - Fast Buds Tester 2308
Ligth - LUMATEK ZEUS 465 COMPACT PRO
Food - APTUS HOLLAND
#aptus #aptusplanttech #aptusgang #aptusfamily #aptustrueplantscience #inbalancewithnature #trueplantscience #fastbuds #dogdoctorofficial #growerslove
With true love comes happiness <3 <3 <3 Always believe in your self and always do things expecting nothing and with an open heart , be a giver and the universe will give back to you in ways you could not even imagine so <3 <3 <3
All info and full product details can be find in can find @
https://2fast4buds.com/ wen released
https://aptus-holland.com/
https://autopot.co.uk/
https://lumatek-lighting.com/
Have a few good more diaries going on fell free to drop by and say hi <3 <3 <3
<3 <3 <3 Growers love to you all <3 <3 <3
Likes
12
Share

@Melacola
Follow
Bien et bonnes graines 12 zaines de graines fractal et blak opium euphorias 60graines enfin heureuxde la participation au concours divine seed mercis a tout ces acteurs de la culture tous confondut petit et grand merci a growdiaries


Processing
Likes
37
Share


@CBD_Sweden
Follow
Week 5!
Starting adding Bio-Bloom and Bio-Grow from now on, she is an Auto so she needs nutrients! Besides that I'm removing Root-Juice (I'm empty and haven't gotten any time to go buy more yet, and don't wanna use my credit card to order on the net, cash is king!).


