The Grow Awards 2026 🏆 


Likes
Comments
Share
@Thigh
Follow
- she was plant instant after germination.
Pott size 11 Liter. Soil is Biobizz Allmix. 👨🏽🌾
-Habe sie sofort nach dem keimen in den Eintopf gesetzt (11 Liter ). Substrat ist Biobizz Allmix. 👨🏽🌾

Likes
17
Share
@halexxo
Follow
Empiezan a oler bastante bien. El primer riego de esta semana fue de 1200ml.
Les he conectado un extractor con salida a la calle porque empezaba a oler toda mi casa.
Último riego de la semana 1500ml
Likes
19
Share
@Tropicannibis_Todd
Follow
So , if you look back to her beginning, she started off really good in terms of growth 👍 but she had horrific internode branching😡 , even going into week 6 she wouldn't even show her sex even when put on a 12 / 12 , so just to on the safe side I had know choice but to chop her 💀
Sad ...... very sad 😭
👉Oh well growmies , fortunately I have other diaries and plants on the go👈
Until next time .........

Likes
3
Share
@BioGrowBayer
Follow
Keine Komplikationen, alle Pflanzen sehen gesund aus und entwickeln sich gut.
Der Lichtzyklus wurde über 6 Tage hinweg schrittweise reduziert, jeden Tag eine Stunde weniger Licht.
Heute ist der erste Tag mit 12/12 Licht-Dunkel-Zyklus und damit der offizielle Start der Blütephase.
Erste Anzeichen der Blüte sind sichtbar, Internodienabstand nimmt zu, das Wachstum verlagert sich in die Höhe.
Keine Mangelerscheinungen oder Stressanzeichen.
In den kommenden Tagen wird das Stretching genau beobachtet.
Ab nächster Woche beginnt das Monitoring der Vorblüten.
Likes
16
Share
@Daddyhancocc74
Follow
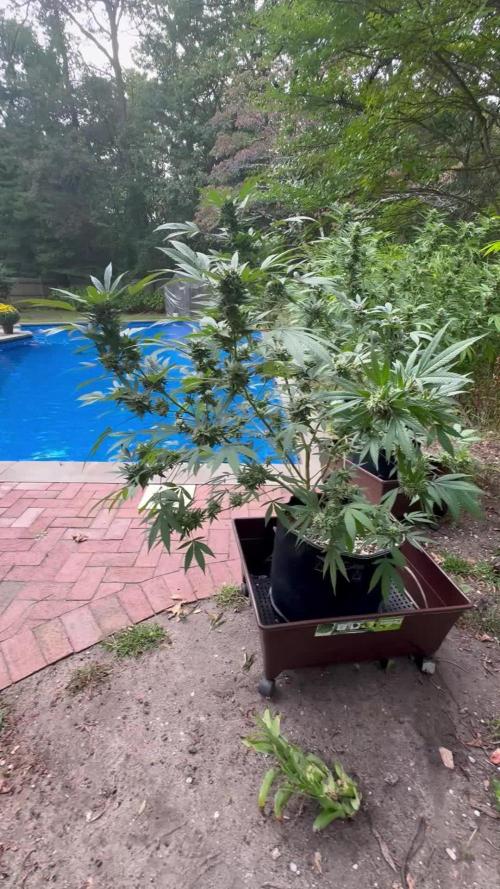
As you can tell getting more top heavy buds definitely filling in the smell definitely picked up trying to push to day 70 I don't have a microscope yet but if somebody can tell through the pictures if the time may be sooner than 70 day please speak your mind

Likes
41
Share
@AsNoriu
Follow
Day 78 from seed touching soil. #1 was eaten by bud rot, really heavy, buds all in dirt, she was very low, overstreched from lack of light and water, so went all to bin. Two plants were worthless, last hope on late one . #2 is still going, shows preflowers, big plant.
Happy Growing !!!

Processing
Likes
15
Share
@eldruida_lamota
Follow
Hey familia, nuestras 2 cookies, Han cogido carrerilla, notamos como advanced nutrients trabaja para dar lo mejor en sus productos.
Estos ejemplares están bastante sanos, tienen buen futuro también, prometen por su potencia .
Ph 6,5 . 55% humedad, 18/26 grados. Riegos cada 3 dias.


Likes
24
Share
@ElChicoDelaWeed
Follow
14 días desde EASY START.(4 semillas,1 venía solo la cáscara de un lado)
Maceta RQS 10L.
-EASY BOST ORGANIC NUTRITION.(preparación del suelo con 50g en 10 litros de sustrato con perlita)
-EASY COMBO BOOSTER PACK.
-En la 2ª semana riego las 4 plantas con agua mezclada con la pastilla EASY GROW BOOSTER (la dividí en 4 trozos para la semana 2,3,4 y 5 diluyendo en 1L. de agua la mezcla).
-Las 3 que están en vaso de plástico para la próxima semana le voy añadir al vaso uno granos del EASY BOOST ORGANIC que no le mezclé cuando las planté).
👌

Likes
17
Share
@Budophile
Follow
Day1: Tent is getting a bit crowded so I had to flip the switch and let the stretching begin! Raised the lamps about 10cm to get some more spacing between the nodes and removed a lot of the leaf mass to promote the lower branches grow. Sunset Sherbet #1 had its newest growth tips turning a little yellow and I'm not sure yet is it overdose/deficiency/heat issue or just a little pH mishap from overwatering.. gave her a little less nutrients to see how it responds. Gonna wait a little more time between next watering to let the soil dry up a little better (saw a fungus gnat flying in the tent and I don't want those f*ckers to overpopulate.)
Day3: Some training, all seems fine
Day4: Raised the lamps a bit again, not sure if the other Sunset Sherbet and now OG Kush too is suffering from mild nutrient burn or light stress
Day6: My hydrohomie fucked up the Gelato#45 cuts I gave him so I took Peyote Critical as my next mother victim. Took 12 good sized shoots from below which I would've lollipopped anyways.. Hope she wont mind since I wasn't planning on defoliating/lollipopping this soon. Planning on training at around day 10 and 20 give or take and then I'll let them grow stress-free. Stretching ain't so crazy at least yet and the canopy is staying pretty much at the same height. Next defoliation/lollipopping I think I will remove all the bindings to avoid snapping the stems. All girls are now showing at least few pistils. Tried using the blooming leds on Viparspectra for two days and the temps are staying pretty much at 28C at most but switched back to just blues since not sure if there's a bit of light stress on SS/OGK. Will switch to full power when the stretching ends.


Likes
11
Share
@DmbTexasRanger
Follow
Doesn’t smell great doesn’t look great. Outdoors better than indoors


Likes
36
Share
@TerpTurtle
Follow
Took some clones & defoliated/lollipopped
I started building a veg tent and went with a 2x2 AC Infiniti equipped with the 4inch cloud line duct system
was a boring grow week.. ready for flower
Likes
21
Share
@gr3g4l
Follow
Esta semana a los 73 dias de floracion decidí que ya tenia que cosecharlas. No podia dejar pasar mas dias puesto que se corria mucho riesgo de botritis y los tricomas estaban ya suficientemente maduritos, igual demasiado.
Jamás me habia encontrado con unas jack con tanta cola de zorro pero de oler huelen a gloria.
hasta el último dia estubieron siempre dentro del armario y posiblemente por la extracción no pude percibir el olor tan agradable que desprenden, intenso . Algo mas terroso de lo que pensaba.
Cogollos duros como piedras, algo exsagerado.
Con 74 dias al secadero, calefactor 80w más un par de ventiladores con ventilacion indirecta, extraccion, intraccion pasiva

Likes
11
Share
@TerpTurtle
Follow
PURPLE GELATO x UNICORN POOP
Goes down smooth when I get a clean hit of the skunky, PHUNKY, smelly green sh*t
Likes
14
Share
@ao_grows1978
Follow
The OG Kush has wrapped up week 4 of flower. She got a healthy defoliation to expose bud sites, and is now on track to bulk up. She's been moved to the center of the tent for the rest of the grow. She's recharged and on cruise control from here on out...only removing dead leaves. Starting to smell like a funky citrus fruit. Still pretty light on the nose and trichome production has been minimal.

Likes
Comments
Share
@FlavoursUk
Follow
Just a little outdoor test run project with minimal maintenance. Smells divine
Likes
8
Share
@Dysons12
Follow
Nutrients completed on majority of the plants some smaller plants will remain being fed until Wednesday before flushing
I rearranged the tents ready for drying purposes with 4 plants that were flushing in the dry room. I came gone to find one had collapsed. This is the heaviest plant (I am interested to see what it yields)
Because it snapped at the stork I hung it up to dry and will be dry Tuesday 29th this week
The rest will be ready after a successful flush.
Earlier in my diary I did a test for which coco was the best. I can assure you that coco eco-thrive produced the tallest and most stacked plants
Plain coco was the next which produced a medium yield plant of medium height.
Last was coco with pebbles. I wanted this to win but believe me it has the worst growth and the least yields for this particular grow.
So I would advise buying the eco thrive coco. It is such a good product if you can get your hands on it.
It’s a very strong smelling this grow please note this when you start. But to be honest value for money I will definately grow this again. (Under $2.00 per seed
This will probably be the last post before the chop.
Stay tuned
05-07-20
30-09-20

Likes
10
Share
@JeyGanesha
Follow
Questa panty punch inizia a ingrossare i fiorellini.bene bene...
Ancora non si sentono profumi ma la prossima settimana esploderà di buoni odori in tutto il box😜💪👍


Likes
48
Share
@Hashy
Follow
This week has gone good.
The pineapple is 50 days old and is doing fine, it's looking like when I topped her I may have fimmed one of the top colas.
Jack herer is also 50 days old and is looking real nice.
Gorilla cookies is 56 days old and furthest along. She is really throwing out the pistils.
Lemon pie is 51 days old and I can't tell what's wrong, she is very droopy. I have tried 24hr without water and she looked worse. I will just let her run the course but am now not expecting a good outcome.
Max 26.5 deg
Avg 23.1 deg
Min 18.2 deg
Max 60%
Avg 50%
Min 40%