
Likes
Comments
Share


@HanfConnoisseur
Follow
Week 1: Transition to Flowering
Welcome to the fifth weekly update of our cannabis cultivation journey in Germany! As we transition from the vegetative stage to the flowering stage, our strains—Pulp Friction, Cookies Haze, Eleven Roses, Poddy Mouth, Critical Lemon Kush, and OG Kush—are ready for the next phase of their growth.
Before entering the flowering stage, we took a few important steps to prepare the plants for optimal flowering.
Key Developments:
1. Pre-Flowering Preparation:
- The plants were defoliated to remove excess leaves and improve light penetration and airflow.
- Each plant was repositioned to ensure they have ample space and light exposure.
2. Growing Medium and Setup:
- The plants are grown in a mix of living soil, coco coir, perlite, and clay pebbles.
- The soil mix includes mycorrhizal fungi cultures to support healthy root development.
3. Watering and Nutrient System:
- The plants are watered from the bottom using an AutoPot system, which provides a consistent supply of nutrient solution.
- The pots are equipped with air domes connected to an air pump, delivering oxygen directly to the roots to enhance growth.
Steps Taken:
1. Defoliation and Positioning:
- Carefully removed excess fan leaves to improve light distribution and airflow within the canopy.
- Repositioned the plants to ensure each one has enough space to grow and receive adequate light.
2. Watering and Nutrient Management:
- Set up the AutoPot system to supply a balanced nutrient solution to the plants.
- Ensured the nutrient solution is appropriate for the flowering stage, with a focus on supporting bud development.
3. Air Domes and Oxygenation:
- Connected the air domes to an air pump to deliver oxygen to the root zone.
- Monitored the air pump to ensure consistent oxygen flow to the roots.
Next Steps:
- Monitor the plants closely for signs of flowering and adjust the light cycle to 12 hours on and 12 hours off to initiate and support flowering.
- Continue to observe the plants for any signs of nutrient deficiencies or excesses and adjust the feeding regimen as needed.
- Ensure the AutoPot system and air domes are functioning properly to maintain optimal hydration and oxygenation.
Stay tuned for next week’s update, where we’ll discuss the progress of the first week of flowering and any adjustments made to the care routine. Feel free to ask any questions or share your own experiences in the comments below!


Likes
24
Share


@S_Dubz
Follow
This OGgelato is a champ! Not the heaviest producer, but its been a real pleasure and was easy to grow. No matter what nutrients I throw at her, or aggressive pruning, she bounces right back.
This week I found bud rot on one of my other plants in the greenhouse but this plant has so far been resistant and is healthy. I thinned the canopy and defoliated out quite a bit to create more air flow. I now have fans on 24/7 and sprayed with a mycorrizhal fungicide that suppresses botrytis.
Also this week I have stopped pulling the tarp on and off each night (for total darkness) because it seemed to trap in too much humidity at night. The humidity outside has been 80-90% for over a week! And the rain was so heavy all last week. This week is slightly warmer with less rain so hoping we can make it.
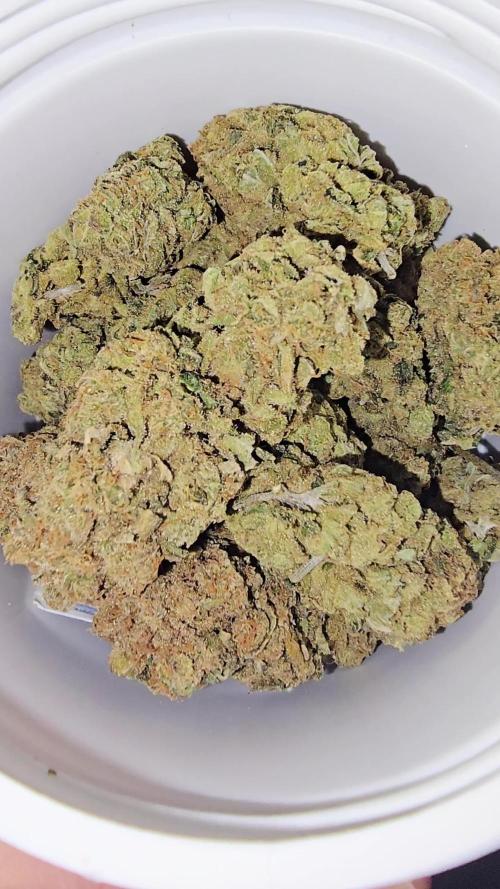
The trichomes are starting to get milky. I imagine I have 1-2 weeks left but am not sure.
This has been a pleasurable experience for sure, but this is stressful right now! The smell is so strong you can smell it on my block. You can see *everything* from the alleyway adjacent to the greenhouse. I'm worried about mold and thiefs and can not wait for this to be dried and in jars!


Likes
7
Share


@Totistefanini
Follow
Día 21 de floración, se realizo una desfoliacion parecida a la técnica del schwazzing.


Likes
4
Share


@KrazyK
Follow
Plant went hermie. Has some seeds. Really a heart breaker. Still frosted everywhere.


Likes
17
Share


@FirstTimer007
Follow
Today very big day has come HARVEST DAY hurayy lol was very hard to chop them for first time grower last step left .drying amd curing .will update the waight after drying


Likes
8
Share


@Spliffi
Follow
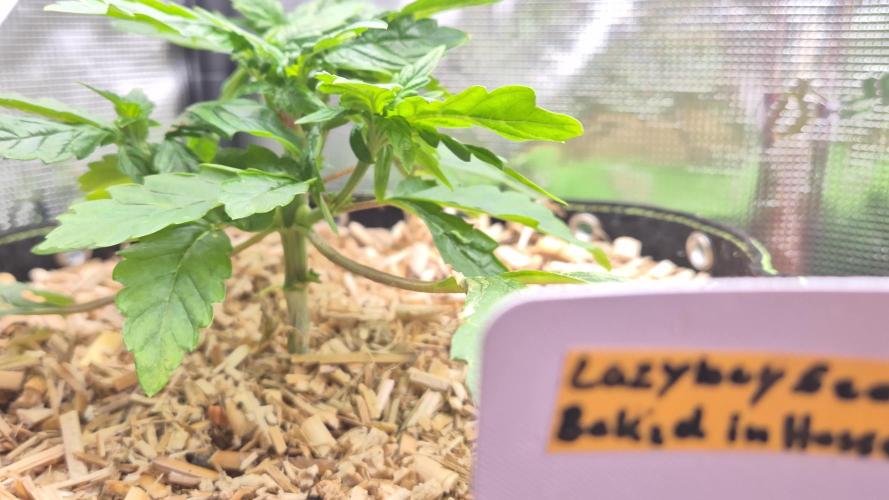
Heya👍🤙👍🌱
Off to a good start. Welcome to your new home ladies.
Check out my Facebook profile:
https://www.facebook.com/share/v/H6PnoahTHrEzm63U/?mibextid=oFDknk
Big BIG BIG thank you to Sebastien, Heather from Fastbuds420. You guys are the best. Can't wait for the next live.
Even Bigger shout out to Hydroponic.co.za. My local Hydro Shop and Sponsor. Thank you Sir.
👍🤙👍🌱


Likes
5
Share


Likes
1
Share


Likes
6
Share


@Tosca
Follow
i'm just in love with what my babies !!!
Everything is going pretty well, the girls are doing well and they are recovering step by step their green and beautiful color !
I'm just kinda scared with my girl scout cookie on the middle left... turning kinda brown.
I'm waiting the next week like a child.
Love guys <3

Likes
2
Share


@Easygrower
Follow
Hello growers day 29 with the hulkberry auto what to say about this beautiful girl truly impressive she is a beast her trunk and branches are hulking out she eating everything I give her with ease and iv done some very heavy defo and hasn’t even effected her so happy with her I will carry on doing the same thing hopefully she starts packing out soon that’s all for now until next week be safe and happy growing ✌️
Likes
14
Share

@Chucky324
Follow
Hello. This is the end of week 13 and the beginning of week 14 of veg.
Did some light SCRoG training last week, but mostly worked on my second vegie garden
I've run in to a snag putting up my top net... I forgot about the middle pole in the 10x10 foot tent.
So I guess I've got to cut the net, and tie back up, the cut part. I'll work on that for next week.
Plant's # 5 and #6 are less yellow now. I gave them some food with a lower ph -5.5 -to see if that would help with the yellowing.
They aren't so quite so yellow today, so I think it helped.
I'll do a stronger SCRoG training this week. Getting ready for flowering in a few weeks.
OK. Be Great.
Chuck.
Likes
36
Share


@TerpTurtle
Follow
Took some clones & defoliated/lollipopped
I started building a veg tent and went with a 2x2 AC Infiniti equipped with the 4inch cloud line duct system
was a boring grow week.. ready for flower
Likes
13
Share


@420DeepGrow
Follow
Gracias al equipo de AnesiaSeeds, Marshydro, XpertNutrients y Trolmaster sin ellos esto no sería posible.
💐🍁 Oracle Octane:
Oracle Octane es una cepa altamente potente y con un alto contenido de THC elaborada a partir de una Blackberry Octane seleccionada, excepcionalmente rica en THC y aromática, y de la pesada Blackberry Oracle, inédita, de nuestro propio acervo genético. El desarrollo de esta carismática e impresionante variedad abarcó 8 generaciones y un enorme esfuerzo de cría.
La variedad tiene un sabor intenso e inolvidable que recuerda a bayas dulces y limones frescos.
Las plantas a partir de semillas crecen increíblemente hermosas y sus hojas y cogollos a menudo desarrollan tonos de rojo, morado intenso e incluso casi negro.
Esta cepa vigorosa y ligeramente índica dominante tiene un tiempo de floración de unas 9 semanas, produce hojas grandes y alcanza una altura de unos 120-130 cm en el interior.
🌻🚀 Consigue aqui tus semillas:
https://anesiaseeds.com/product/oracle-octane/
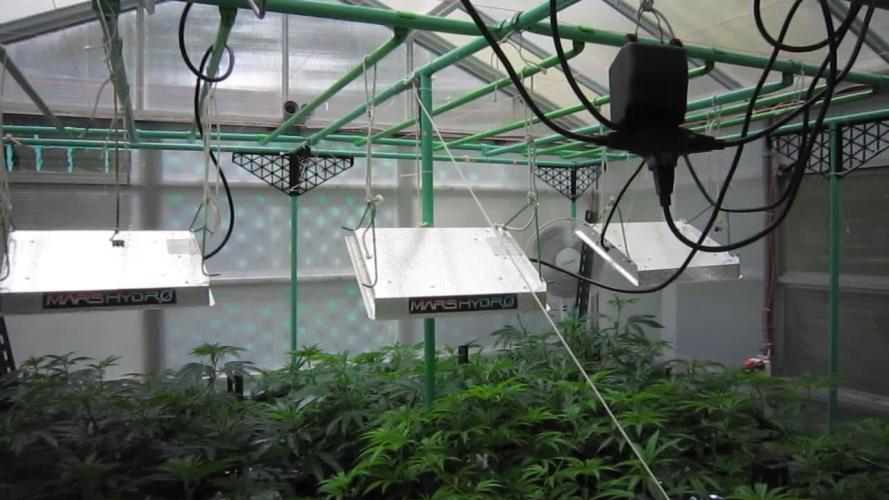
💡TS-3000 + TS-1000: se usaran dos de las lámparas de la serie TS de Marshydro, para cubrir todas las necesidades de las plantas durante el ciclo de cultivo, uso las dos lámparas en floracion para llegar a toda la carpa de 1.50 x 1.50 x 1.80.
https://marshydro.eu/products/mars-hydro-ts-3000-led-grow-light/
🏠 : Marshydro 1.50 x 1.50 x 1.80, carpa 100% estanca con ventanas laterales para llegar a todos los lugares durante el grow
https://marshydro.eu/products/diy-150x150x200cm-grow-tent-kit
🌬️💨 Marshydro 6inch + filtro carbon para evitar olores indeseables.
https://marshydro.eu/products/ifresh-smart-6inch-filter-kits/
💻 Trolmaster Tent-X TCS-1 como controlador de luz, optimiza tu cultivo con la última tecnología del mercado, desde donde puedes controlar todos los parametros.
https://www.trolmaster.com/Products/Details/TCS-1
🍣🍦🌴 Xpert Nutrients es una empresa especializada en la producción y comercialización de fertilizantes líquidos y tierras, que garantizan excelentes cosechas y un crecimiento activo para sus plantas durante todas las fases de cultivo.
Consigue aqui tus Nutrientes:
https://xpertnutrients.com/es/shop/
📆 Semana 3:
Muy buena semana, he aplicado un riego solamente con agua de manantial para reducir la cantidad de sales acumuladas en el sustrato y se ha notado una mejoria .
Creo que le quedan unas dos semanas por estirar, parece que va a ser una buena cosecha.
Se mantiene un buen control del cuarto de cultivo gracias a @marshydro y @trolmaster.
Mantengo las dosis de 1/3 de nutrientes recomendados por el fabricante.
Potencia del foco 80%

Likes
18
Share


@Staffedition
Follow
Привет друзья. Моей растихе сегодня 96 дней.
Заметил паутинного клеща.
Сегодня обработал раствором.
Растение почти пришло в себя.
20.10 перевёл свет в режим 12/12
Начал применять LST технику на 19 дне и продалжаю применять её через день, а 18 августа добавил ДЕФОЛИЗАЦИЮ
С 20.08 ДЕФОЛИЗАЦИЮ делаю каждые 3,4 дня
С 20.08 LST технику делаю каждые 4.6 дней
На сегодняшний день влажность 54%
5.09.2023 заметил высокий Ph 7.9
С 48 дня Ph не ниже 5.8
На сегодняшний день Ph 6.0
Начал кормить с 60 дня Canna Terra Vega
PPM 770
Всем мира и добра!
Не забудь поставить лайк❤️, если понравилась как прошла неделя
Likes
2
Share


@dauntless
Follow
Week 12 Started on June 19, 2022
Finally recovered and lots and lots of defoliation happened, I am talking a compressed ball of leaves and stems the size of a softball.
That means I got rid of most the weight below the buds, snipped the buds I didn't want to see straggling, and lollipopped colas -- left a few leaves on. Took a few clones to see what happens.
She is doing well, more pics soon. I cleaned the reservoir again, fresh water, drained the autopot and made sure my Ph is 6.3 to 6.7
Adding weak calmag+ to deter the iron lockout I think I saw in early week 11, figuring out dosing now, might need a bit more.
Not a ton of nutes added as the plant is progressing well, added a tiny amount of MOAB, also just thinking my single COB flower light is gonna be too weak on its own. We'll see it's early yet. Might need to turn on the supplemental light next week, old school HPS 150 Watt on its last grow. The heat will drive the humidity way way down, and that will be a good thing, just gotta crank the fans on high and no looking back after that. That will be 400 watts in a 3x3 -- HPS is hot as can be.
When compared with growth like this: https://growdiaries.com/diaries/135853-grow-journal-by-kushdoctor/week/766680#gallery=5630051
I worry about the size right now on day 18 of flower, not that big and no sugary stuff yet, I think I need to let her just grow and perhaps add just a bit more flower nutes, but I will wait until she fills in just a bit more, I seriously took off SO MUCH, but last grow I should have taken more off than I did, I was was super aggressive, I don't want larf.