


Likes
19
Share


@Lilside
Follow
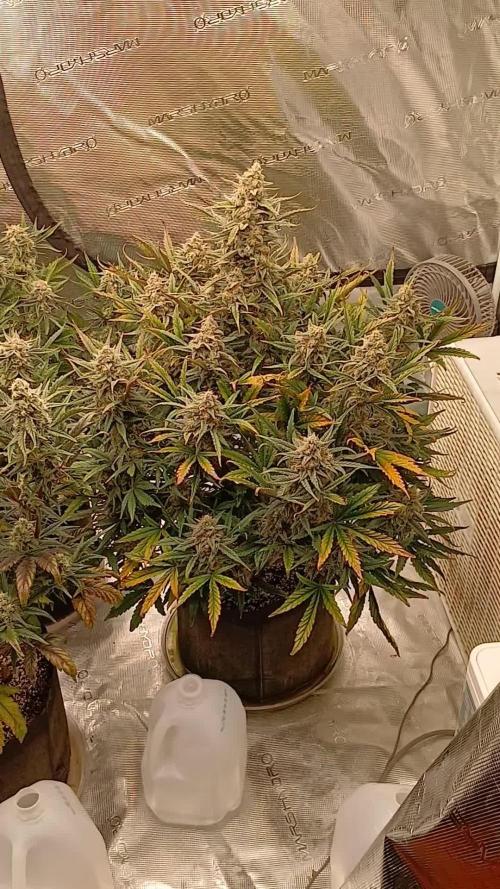
This my last week of 4ml The plants are really starting to bud and they all grew with the own differences and size but it the last couple weeks the small one have really caught up and the biggest seem to slow down a lil
Started this week with 1 ml overdrive starting to get the green back on the biggest def learnt to keep up on watering all in all happy for first grow

Processing
Likes
15
Share


@Andres
Follow
She is vrowing strong and healthy. My tent its outside of my house. and i need to take out to take some.picture. i aleays fivht with the worms. One week more fornthis lady.

Likes
44
Share


@ILoVeThiSpLaNt
Follow
Giorno 74 (14 fioritura)
Le piante stanno abbastanza bene.
Per il prossimo giro autunno/inverno dovrò stare attento con le temperature perché tra vegetativa e ora inzio fioritura hanno sofferto un po' di basse temperature (nulla di preoccupante ma preferisco avere 23/24° piuttosto che 17/18°).
Come detto la settimina scorsa ho dovuto flushare una Pink Gasoline perché tutte le foglie avevano macchie chiare distribuite in modo non uniforme.Ora, dopo dieci litri di acqua con gli ultimi due con una leggera dose di fertilizzanti finalmente i nuovi getti sembrano stare meglio.
Tutte le altre piante stanno bene, sta solo a me non dare troppo cibo e monitorare il colore delle foglie per correggere eventuali eccessi/carenze.
Non posso fare danni con questi incroci 😃 🙏
A settimana prossima sperando di vedere un po' di resina 😋


Likes
23
Share


@MadeInGermany
Follow
Day 20 since time change to 12 / 12h.
Hey everyone ☺️.
This week she continued to develop very well 🤗.
It absorbs the nutrients from Green Buzz Liquids very well.
I am very thrilled .
otherwise there is nothing more to report this week 🙈.
I wish you a nice week, stay healthy 🙏🏻 and let it grow 🍀
You can buy this Strain at
https://thecaliconnection.com/seeds/girls-scout-cookies-34.html
You can buy the fertilizer at
https://www.greenbuzzliquids.com/
Type:
Girls Scout Cookies
☝️🏼
Genetics:
GSC Tint Mint
👍
Vega lamp:
2 x Todogrow Led
Quantum Board 100 W
💡
Bloom Lamp :
2 x Todogrow Led
Cxb 3590 COB 3500 K 205W
💡💡☝️🏼
Soil :
Canna Coco Professional +
☝️🏼
Fertilizer:
Green Buzz Liquids :
Organic Grow Liquid
Organic Bloom Liquid
Organic more PK
More Roots
Fast Buds
Humic Acid Plus
Growzyme Big Fruits
Clean Fruits
Cal / Mag
Organic Ph - Pulver
☝️🏼🌱
Water:
Osmosis water mixed with normal water (24 hours stale that the chlorine evaporates) to 0.2 - 0.4 EC. Add Cal / Mag 2 ml per l water every 2 waterings . Ph with Organic Ph - Pulver to 5.8 .

Likes
14
Share


Processing
Likes
6
Share


@ganjaman24
Follow
Week 5 I believe and they’re doing great..topped them lil over a week ago. Thinking another week or two then flip to flower! 😎


Likes
35
Share

@MadeInGermany
Follow
Unfortunately, I had to find out that my account is used for fake pages in social media.
I am only active here on growdiaries.
I am not on facebook instagram twitter etc All accounts except this one are fake.
Flowering day 49
since time change
to 12/12 h.
Hey everyone :-).
We are slowly getting closer to the last few weeks :-)
There are still 2-3 weeks and The buds develop very well towards the end :-).
It is slowly starting to use up its nutrients.
This week it was poured 3 times with 1 l each time.
Everything was cleaned and checked.
Have fun with the update.
Stay healthy 👍
You can buy this Strain at :
https://www.exoticseed.eu/
Type:
Herz Og
☝️🏼
Genetics:
Larry OG X Kosher Kush
Indica 60 % / Sativa 40 %
👍
Vega lamp:
2 x Todogrow Led
Quantum Board 100 W
💡
Bloom Lamp :
2 x Todogrow Led
Cxb 3590 COB 3500 K 205W
💡💡☝️🏼
Soil :
Canna Coco Professional +
☝️🏼
Fertilizer:
Green House Powder Feeding
☝️🏼🌱
Water:
Osmosis water mixed with normal water (24 hours stale that the chlorine evaporates) to 0.2 EC. Add Cal / Mag to 0.4 Ec Ph with Organic Ph - to 5.5 - 5.8 .

Likes
12
Share


@Seymour_buds
Follow
Have 2 problems with the girls.
1. 3 plants showing signs of cal mag deficiency on lower leaves.
2. 1 plant showing what seems like potassium deficiency.
Ph has been perfect all week between 5.8-6.3
I flushed for 1 day with ph water and then added nutes with increased calmag and bud blood since i will be sending into flower in 3 days.

Likes
9
Share


@HashtagHerbs
Follow
Seeds were directly off the mother plant, soaked in water for 24 hours. They were pretty slow to popping and required me to use my fingertips to pop them gently. After that it was 100% successful.
Likes
3
Share


@Passionatos
Follow
Screwing my homemade rdwc together for a quick leak test . After the roots came out the rockwool cubes I transplanted the plants into the rdwc system.


Likes
31
Share


@MrJones
Follow
MrJones VIPARSPECTRA XS1000 LED
📜 SUMMARY - I have been given the opportunity to run the next generation of LED lights by VIPERSPECTAR, the XS1000! I set up a Stealth Cabnient and moved 3 Cream Manderain Auto XL.s under these lights, the cabinet set up is automated with WIFI light controllers, and INKBIRD Temperature and Humidity Controllers, I am very excited about this opportunity!
Specs and Discount Codes Listed Below.
🔹🔹🔹🔹🔹🔹WEEKLY GOALS 🔹🔹🔹🔹🔹🔹
🌞Environment - 80F and 50%Humidity - using Humidfyer as needed.
💧 Feeding - Feeding with FOOP Canna Organic Nutrient Line
🍃Training / Keeping Stems Stable and Strait
🕷️ IPM - Will be using Green Cleaner" 1 OZ per Gallon, and CannControl from Mammoth alternating between product each month for Integrated Pest Management.
💡 Vegetation & Flower (new) Viparspectra XS-1000 Release on March 15th.
🔹🔹🔹🔹PLANT UPDATES🔹🔹🔹🔹🔹
🌱 Plant #1 - Week 5 Flowering is starting to happen, should see more stretch this week, she is about 15 inches wide not.
🌱 Plant #2 - Week 5 Flowering is starting to happen, should see more stretch this week, she is about 12 inches wide not.
🌱 Plant #3 - Week 5 Flowering is starting to happen, should see more stretch this week, she is about 12 inches wide not.
🔹🔹🔹🔹🔹🔹🔹🔹🔹🔹🔹🔹🔹🔹🔹
▶️Monday 03.23.21 / Plants are starting to flower, I decided to defoliate and remove many of the small sucker branches, I would prefer the hormones being spent in the larger and more productive colas, I also fear that these plants may outgrow their space, we will see,I am moving the feed up to the next level as well. I am amazed that just at a week under these VIPARSPECTRA XS1000 LEDs they have almost doubled in size, the FOOP Canna nutrients are so easy to use and the plants just love them!
▶️Tuesday 03.24.21 / These girls just keep stretching, not much room left under the lights feeding FOOP 30 ounces each day.
▶️Wednesday 03.25.21/ Feeding FOOP 30 ounces per day.
▶️Thursday 03.26.21 / Feeding FOOP 30 ounces per day.
▶️Friday 03.27.21 / Feeding FOOP 30 ounces per day.
▶️Saturday 03.28.21 / Feeding FOOP 30 ounces per day.
▶️Sunday 03.29.21 / Feeding FOOP 30 ounces per day.
🔹🔹VIPARSPECTRA XS1000 LED🔹🔹
Amazon US:
XS1000 10% off: in10MrJones http://yx-8.cn/0y-6
XS1500 5% off: in15MrJones http://yx-8.cn/0yA
XS2000 5% off: in20MrJones http://yx-8.cn/0y2Y
XS4000 5% off: in40MrJones http://yx-8.cn/0y5k
Amazon Canada
XS1000 10% off it10MrJones https://amzn.to/38udUVe
XS1500 5% off: it15MrJones https://amzn.to/3esVUyr
XS2000 5% off: it20MrJones https://amzn.to/3l5zAfg
XS4000 5% off: it40MrJones https://amzn.to/3l7k5Uj

Likes
13
Share


@Growyourownathome2x2
Follow
25th April day 46 4 plants stripped I will give them a few days to recover and flip to the 12/12 cycle
Likes
35
Share

@MadeInGermany
Follow
Info:
Unfortunately, I had to find out that my account is used for fake pages in social media.
I am only active here on growdiaries.
I am not on facebook instagram twitter etc All accounts except this one are fake.
Have fun with the update.
Hi everyone :-) .
This week she has continued to develop very well.
She reacts very well to the training :-).
It was poured twice with 1.2 liters each this week.
Everything was cleaned and refilled.
Stay healthy 🙏🏻
You can buy this Strain at :
https://www.exoticseed.eu/
Type:
Herz Og
☝️🏼
Genetics:
Larry OG X Kosher Kush
Indica 60 % / Sativa 40 %
👍
Vega lamp:
2 x Todogrow Led
Quantum Board 100 W
💡
Bloom Lamp :
2 x Todogrow Led
Cxb 3590 COB 3500 K 205W
💡💡☝️🏼
Soil :
Canna Coco Professional +
☝️🏼
Fertilizer:
Green House Powder Feeding
☝️🏼🌱
Water:
Osmosis water mixed with normal water (24 hours stale that the chlorine evaporates) to 0.2 EC. Add Cal / Mag to 0.4 Ec Ph with Organic Ph - to 5.5 - 5.8 .
Processing
Likes
97
Share


@DudeGrowsWeed
Follow
Week 2 and the girls are looking more yellow and funky than I like. I'm pretty sure my soil is just way too hot. I tried flushing it through, but that just seemed to lead to general overwatering issues. I'm planning on transplanting to larger pots with more neutral soil this weekend and hope that will help straighten things out.


Likes
Comments
Share

@piggysperpetualGrow
Follow
Pulled some of the dropping leaves that were more crunchy than soft.

Likes
16
Share


@nonick123
Follow
Día 36 (17/02) Riego con 500 ml H2O EC 0,45
Un stretch espectacular!
Día 37 (18/02) Riego ligero con 250 ml H2O EC 0,45
Ha disminuido un poco el consumo de agua
Día 38 (19/02) Riego con 250 ml H2O EC 0,45
El stretch es increíble y precioso 😍💥
Día 39 (20/02) Riego con 500 ml H2O EC 0,45
Hoy se muestra más sedienta después de unos días con menos demanda de riego
Día 40 (21/02) Riego con 350 ml H2O EC 0,45
Día 41 (22/02) Aplicación foliar con Sales de Epsom a 4 g / L (La planta presenta carencia de Magnesio con manchas necroticas en las hojas de abanico inferiores)
Riego con 350 ml H2O EC 0,45
Día 42 (23/02) Lollipopping y defoliación ligera!
Debido a que tiene un stretch espectacular (alrededor de 57 cm de altura) elimino todas los nudos / ramas que no superan el 50% de la altura de la planta
Elimino un par de hojas de abanico grandes
Riego con 400 ml H2O EC 0,45
🚀 FastBuds 15% DISCOUNT code "NONICK" 2fast4buds.com @fastbuds.official
💦 BioTabs 15% DISCOUNT code "GDBT420" biotabs.nl/en/shop/ @biotabs_official
🌱Substrate PRO-MIX HP BACILLUS + MYCORRHIZAE @promixmitch @promixgrowers_unfiltered
💡2 x Mars Hydro FC1500 EVO Led Grow Light (2024 NEW FC 1500-EVO Samsung LM301H 150W LED) - https://marshydro.eu/products/fc1500-evo-led-grow-lights/ - https://www.amazon.de/dp/B0CSSGN5D8?ref=myi_title_dp
Likes
149
Share


@CBD_Sweden
Follow
Hi all the happy people here in GrowDiaries.
This is my second cultivation ever and it will be fun to try a bigger space than my closet grow.
First, I'm just going to say I'm done with the construction of my new growroom.
I put some pictures on the construction here in week one.
The room is 2.14 meters by 1.7 meters and has a ceiling height of 2 meters.
It provides a floor area of 3.6 square meters.
I use a 54 Watt Lightwawe T5 for germination and 2 Pcs 400 Watt HPS lamps.
I have a channel fan that replaces the room air about 40 times an hour to get a comfortable theme in the room, the air enters a fresh air intake from the outside.
The air is purified through a carbon filter to then leave the room to the rest of the basement.
Then I use that heat to heat the rest of the basement.
I will use 8 pcs 15 liter Autopots to grow with and a 100 liter water tank that supplies the pots of water and nutrition.
I will grow completely organically in soil and will watercure my buds to get the best possible medicine for me.
But there are no cultivation rooms to be displayed here, so I continue with what is most important.
Today I have put my seeds in my moisture dome and hope the seeds have germinated within a few days.
I am very excited to see how the new growroom will work and how this Blue cheese Auto from Royal queen seeds will turn out.
Blue Cheese automatic cannabis seeds are a cross of Blueberry Automatic and Cheese Automatic that has been perfected over five years of breeding and careful selection. The result is a feminized, autoflowering strain with superior yield, flavor, and effects to either of its distinguished parent strains.
THC: 16%
CBD: Low
Yield Indoor : 325 - 375 gr/m2
Yield Outdoor: 60 - 110 gr/plant
Height Indoor: 40 - 70 cm
Height Outdoor: 60 - 110 cm
Flowering: 7 - 8 weeks
Harvest month: 9-10 weeks after planting
Genetic Background: Blueberry x Cheese x Ruderalis
Type: Sa 35% In 40% Ru 25%
Effect: Cerebral and uplifting
Climate: Mild
..............................................................................................................................................................................................................................................................................................................................................
2017-09-11. Kl 12.00. Week 4 starts. I have cleaned the whole room for the new week and gave the girls water and nutes. Added videos and pics. Girl nr 1 is 27 cm high and girl nr 2 is 50 cm high and nr 3 is 15 cm high.
-------------------------------------------------------------------------------
2017-09-12. Kl 10.00. New pics and video. Nr 2 has grown 5 cm in 23 h, its incredible.
---------------------------------------------------------------------------------------------
2017-09-13. Kl 22.00. Everything is great in the garden right now. Updated with new video.
----------------------------------------------------------------------------------------------------------------------------
2017-09-15. KL 10.00. New pics and videos. Girl Nr 1 is 33 cm high, Nr2 is 70 cm and girl Nr is 22 cm. Nr 2 has grown 20 cm the last 3 days. Look at the stem of girl Nr 2 😍
The girls are starting to smell a lot now. Its a intense smell in the grow room.
-----------------------------------------------------------------------------------------------------------------------------------------
2017-09-16. Kl 10.00. The girls grow like crazy, i have to defoliate about 20 leafs a day. Nr 2 is 76 cm tall now, i wonder when she slows down?. Added 2 liters of water and nutes this morning and 2 new videos.
------------------------------------------------------------------------------------------------------------------------------------------------------------------
2017-09-17. Made a time laps of the girls first 28 days.

Likes
25
Share


@Kakui
Follow
Veg22, riego con 3.0 EC y pH 5.9, drenaje promedio de 5.8 pH y 2.6 EC(muy bien), primer riego con Sensizym para limpiar un poco las raíces, y este será el último riego de vegetación con Voodoo Juice, Tarantula y Piranha.
Se hizo una pequeña defoliación de las hojas abanico más bajas y se volvió a ajustar el LST, ya van tomando la forma final.
Veg23, creciendo bien.
Veg24, se mide la temperatura de las hojas 22°C y se compara con la temperatura del indoor 23°C, con una humedad de 50% RH, la calculadora arroja un valor de VPD=1.24 kpa, lo que está dentro del rango óptimo.
Veg25, hoy toca una pequeña defoliación y probaré también hacer un último apical en 2 o 3 plantas a modo de prueba.
Al final, tomé un gran riesgo, y hice varios apicales extra y una defoliación más grande de lo que tenía en mente, tengo fe que resultará bien 😎👌
Veg27, riego con 0.8 EC y pH 6.0, drenaje de 6.0 pH y EC 2.0, se están alimentando y creciendo bien, quedan casi 2 semanas para pasar el fotoperiodo a 12/12, espero que crezcan suficiente para esa fecha.
Veg28, un par de hojas de 2 plantas presentan mordidas tipo oruga, revise y no encontré nada, aplique spray insecticida, espero no siga pasando. A parte de eso siguen creciendo bien, quedan un poco más de 10 días para el paso a 12/12.
