
Likes
Comments
Share


@420DeepGrow
Follow
Gracias al equipo de MSNL Seeds y XpertNutrients sin ellos esto no sería posible.
💐🍁 CBG SOUL FEMINIZED:
CBG Soul es un híbrido rico en CBG con una proporción Indica/Sativa 50/50, creado por sus efectos calmantes y relajantes. Sus sabores dulces, limón y cítricos se complementan con terpenos limoneno y mirceno, ofreciendo una mezcla única para el alivio y disfrute terapéutico.
🚀🌻 Consigue aqui tus semillas:
https://www.marijuana-seeds.nl/cbg-soul-feminized-seeds
🍣🍦🌴 Xpert Nutrients es una empresa especializada en la producción y comercialización de fertilizantes líquidos y tierras, que garantizan excelentes cosechas y un crecimiento activo para sus plantas durante todas las fases de cultivo.
Consigue aqui tus Nutrientes:
https://xpertnutrients.com/es/shop/
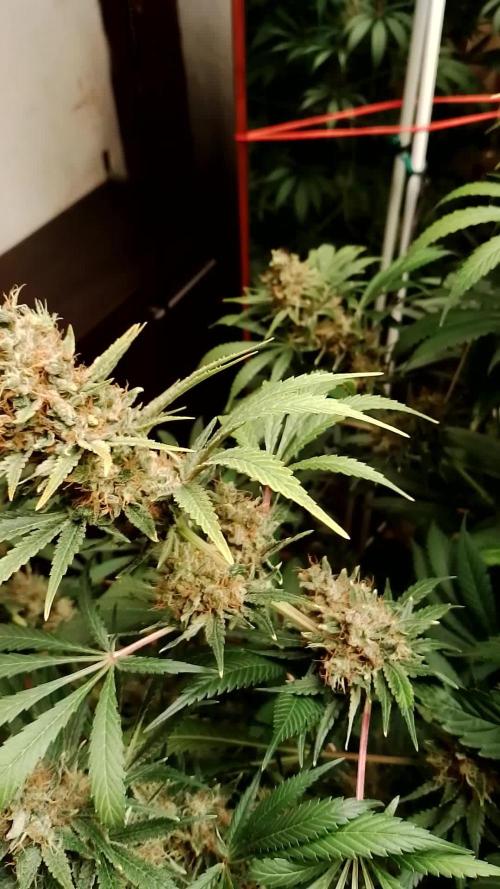
📆 Semana 12:
Gran semana en la cual ella sigue creciendo de forma considerable.
Parece que centra toda la fuerza en la cola principal, las ramas laterales no se están desarrollando todavía.
Continúo con las dosis de nutrientes recomendada por el fabricante.

Likes
18
Share


@valiotoro
Follow
Hello everyone 😎
Week 7 of flower for the Amnesia Zkittlez🍭
Only 1 plant left then finito✔️
Very nice smell super sweet🤤
The buds are super sticky🔥

Likes
9
Share

@World_Breeders
Follow
Week 2 Flowering
Pilot #1 continues its transition into the flowering cycle with remarkable vigor, entering week two of bloom with a clear and sustained stretch response. The plant has expanded significantly compared to the previous week, developing a wider canopy and increasing the number of active flowering sites across the entire structure.
The training applied during vegetative growth is now showing its full effect. Branches remain well distributed, creating an open architecture that allows excellent light penetration throughout the canopy. Multiple tops are developing simultaneously, with strong lateral branching contributing to a balanced and highly productive structure.
Flower formation is becoming increasingly visible, with pistil production intensifying at every primary and secondary flowering site. Internodal spacing remains favorable, providing enough room for future flower stacking while maintaining a compact and efficient canopy.
The plant exhibits outstanding vigor and uniformity, with healthy foliage and continuous vegetative activity still present during the stretch phase. Stem strength is excellent, supporting the rapid growth of new flowering shoots and demonstrating a strong capacity to sustain future flower development.
At this stage, Pilot #1 stands out for its efficient canopy management, extensive branching, and high number of developing bud sites. Its combination of structure, vigor, and floral initiation suggests excellent production potential as flowering progresses over the coming weeks. 🌱🔥
Seed: World Breeders
Grower: Piperoots
Likes
2
Share


@vilahaze
Follow
en una semana se cosechan estas flores , el color de las hojas es debido a un buen lavado de raizes desde hace unas 3 semanas


Likes
4
Share


@Bigdaddyblue
Follow
Day 76 (4/22)
Day 77 (4/23)
Day 78 (4/24)
Day 79 (4/25): just fed plain water. 5 more days and this one is coming down assuming all the trichomes are looking right.
Day 80 (4/26)
Day 81 (4/27)
Day 82 (4/28) hung to dry around 10pm.

Likes
29
Share


@Ultraviolet
Follow
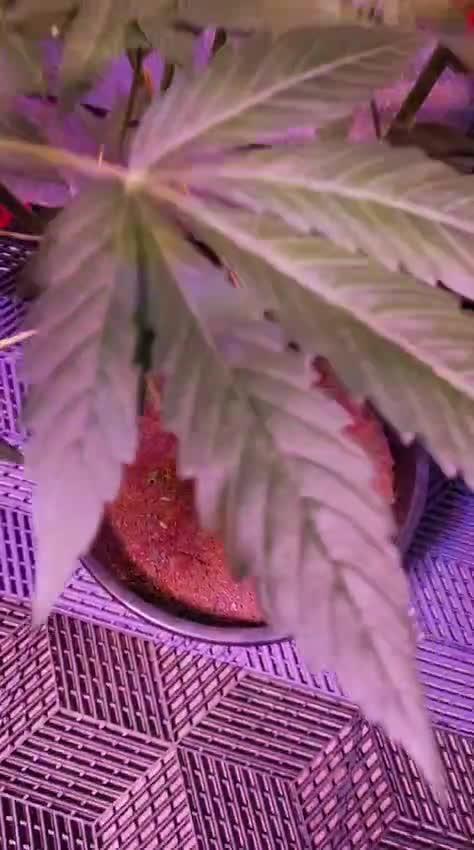
Hope you are well. Thanks for taking the time.
Little main line defoliation to focus growth.
ATP (adenosine triphosphate) is the primary energy carrier in cells, including plant cells. It powers various cellular activities like nutrient uptake, protein synthesis, and cell division. Without ATP, the plant's metabolic machinery would grind to a halt, regardless of the presence of nutrients, oxygen, or carbon. Nutrients, like nitrogen, phosphorus, and potassium, are essential for building plant tissues and various molecules. They are incorporated into proteins, nucleic acids, and other vital compounds. While crucial, their uptake and utilization rely on ATP-driven processes. Oxygen is vital for cellular respiration, a process that generates ATP. While plants can produce ATP through photosynthesis, oxygen is essential for maximizing ATP production in mitochondria through oxidative phosphorylation. Carbon is the backbone of all organic molecules, including carbohydrates synthesized during photosynthesis. It's the fundamental building block of plant structures and fuels. However, its incorporation into organic molecules is also ATP-dependent.
We don't grow we facilitate energy conversion.
Processing
Likes
6
Share


@ganjaman24
Follow
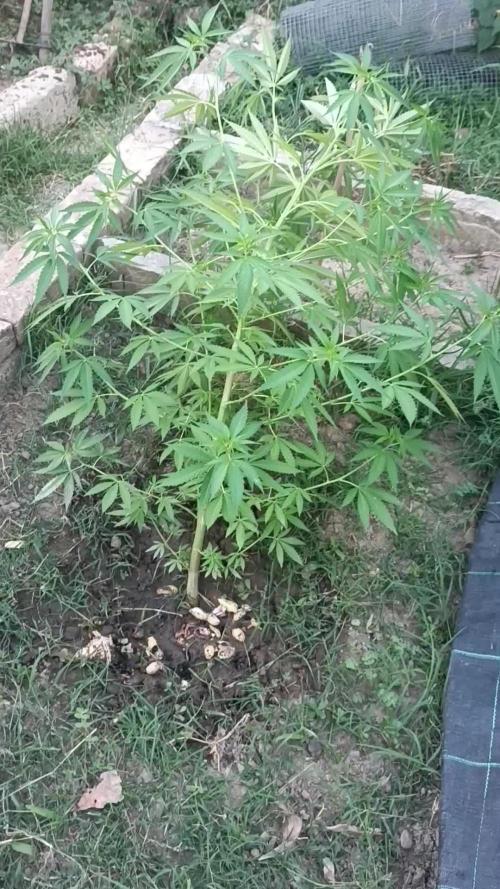
***Update*** have switched 2 of 3 to 5 gals will do the other one as soon as I get more coco..looking to veg maybe another 2 weeks then going to flip. Recently acquired LED light for my veg room so have 250w hps n 300w LED..ladies seem to be loving it.


Likes
12
Share

@all_about_420
Follow
In der achten Woche erreicht diese Kreuzung aus White Runtz und Spritzer (Seeds of Anarchy, via Wunderbohnen) eine beeindruckende Dichte. Das Aroma ist mittlerweile voll ausgeprägt: Ein süßer, fruchtiger Duft nach reifen Beeren und weichen Bonbons vermischt sich mit einer eleganten, floralen Frische, die den gesamten Raum erfüllt. Tatsächlich hatte ich vor einigen Tagen schon festgestellt, dass sie irgendwie 'runtzig' duftet – ein Zeichen für das komplexe Terpenprofil. Die Buds sind inzwischen so massiv und schwer geworden, dass die stabilen Äste unter der enormen Last sichtlich gefordert sind. Obwohl die Struktur bisher hervorragend standgehalten hat, wird es nun Zeit, die Zweige zusätzlich zu stützen – ein erstklassiges Zeichen für den Ertrag am Ende dieses Testgrows. Die Harzschicht überzieht die kolossalen Blütenstände wie ein frostiger Teppich und kündigt die nahende Ernte an.
Likes
55
Share


@Bread_n_Buds
Follow
And here we are at the end of this magnificent journey on the spaceship Black Orchid Automatic, a phenomenal strain from Zamnesia, it is the last beauty harvested more or less at the same time as the others but shown separately for the amount of important photos that I am taking.
Please take a look at the macros (micro) and let me know what you think.
This week I'm talking about the harvest of the third and last lady, the purple one, very purple to be clear.
She grew a lot, she matured quite quickly and produced a lot of resin. The flowers are quite hard and of a wonderfully wonderful color.
The smell is very particular probably from the purple / cookies / cake area but the strong point of this beauty are the trichomes. The girl offers a park of trichomes of a disarming beauty, the more I shot the more I wanted to shoot, I was left speechless for real. We have purple stuff in the stem, purple noba in the gland, totally purple stuff in the stem with amber gland, glands in various shades of purple. Wonder for real. There is still something transparent but it had to come venia, like animals feel earthquakes I start to feel the mold in advance, or maybe I'm paranoid, anyway we are mostly cloudy, something amber and a thousand shades of purple and something even transparent.
For me it's fine like this baby. Harvest time, in the drying room.
I strongly recommend you to try this strain both in the feminized version and this one in the photoperiod version, if this plant doesn't convince you wait to see the next two that I will publish in the next two weeks but they have already been harvested.
The taste is still CALI in sense of purple part of cookies family. We feel like we're teleporting to Los Angeles with Snoop making a blunt, incredible California flavor, to be clear in a coffee shop in Amsterdam you would pay 25 to 30 euros per gram.
Everything has always been grown with Plagron Pro Mix soil which I found exceptional, I was used to using Light Mix but I had probably underestimated the power and cleanliness of going 100% organic. It has an absorption coefficient that I find very pleasant, it dries with less aggressiveness than the light mix so you will not have that phenomenon that when the plant is too dry the water goes down. With this soil it is more difficult as it is more difficult to have midges. In my MODEST opinion pre-fertilized are fertile ground for ground midges with this soil I have had ZERO GNATS, before ever.
Information and personalized cards on the Plagron website
---- at the link --- https://plagron.com/en
The plant has eaten the 100% Organic feeding of Plagron: Alga Grow and Alga Bloom as basic nutrients, the rooting Power Roots, the amino acids of Sugar Royal, the Enzymes of Pure Zym that eat the dead parts in the soil, Power Buds that always gives us immense satisfaction with rapidity of start of flowering and composition of the buds, the legendary Green Sensation that now needs no introduction, a name a guarantee. Also the foliar Vita Race used for the first time with success.
The fertilizer kits that you can find on the Zamnesia website are perfect for this purpose, there is everything. Choose them based on their mineral/organic composition and the soil you have chosen.
at the link --- https://www.zamnesia.io/it/11457-plagron-easy-pack-natural.html
The growbox is the DS120w by Secret Jardin as well as the DF16 ventilation system and all the fans
at the link --- https://www.secretjardin.com
The light was supplied in the past by Viparspectra and it went crazy but it came back to me to produce very well too...
at the link --- https://www.viparspectra.com
A fantastic selection of seeds, a headshop and a selection of exceptional accessories on the world of cannabis, many other things about mushrooms, health, well-being and all the beautiful things that nature offers only on the Zamnesia website
at the link --- www.zamnesia.com
Instagram ----
@zam.nesia - @zamnesiawebshop - @zamnesia_usa - @bread_n_buds

Likes
30
Share


@SkunkyDog
Follow
Hallo zusammen 🤙.
Sie wächst sehr schön und macht keine Probleme 🤙
https://seedsmafia.com/de/

Likes
17
Share


@FrankieBones
Follow
Hi 420 Family.
The past 6 weeks have been up and down a bit here and there, some noob mistakes made also.... But nevertheless, things are starting to look great. All of these plants are showing quite hairy bud sites and the pistils are mostly milky. WW's are ahead by about a week or two from what I have heard from other friends and growers but we will see. I have upped the nutes a little bit this week, and also added a small about of BioBizz Bio-Bloom. Let's see how it goes!
D47 - 22 Aug - So far so good. Buds are swelling up nicely and they are starting to stink (the good kind). White Widow has quite a spicy, potent smell. Purple Lemonades smell sweet and fresh (some purple in the stems and the stems of certain leaves but no purple flower yet; I do hope I get at least SOME purple flowers!). Otherwise, they seem to respond well to the nutrients I have been feeding the past 2 runs. I think for the next feeding I will add some more grow tho, the PL's seem to have a slightly larger appetite for Magnesium/Nitrogen perhaps. After that, proper flush and then some worm tea that I will brew from my leftover worm castings and the normal flowering schedule to follow. I am happy thus far and I really am enjoying this so damn much, I think I've already won this round. :)
D50 - 25 Aug - Ladies are responding well to the extra nutrients, and the smells are just next level... The WW's are much more dense and are fattening up nicely. PL still a little behind I rate, pistils are mostly still straight and not as milky. Otherwise, all systems are good and happy to start week 8 tomorrow! :D I have added a heaped cup of worm castings to the top of the soil, let's hope for a great flavor and even more intense smells over the next 2 weeks!
Happy growing.


Likes
8
Share

@Oldwied
Follow
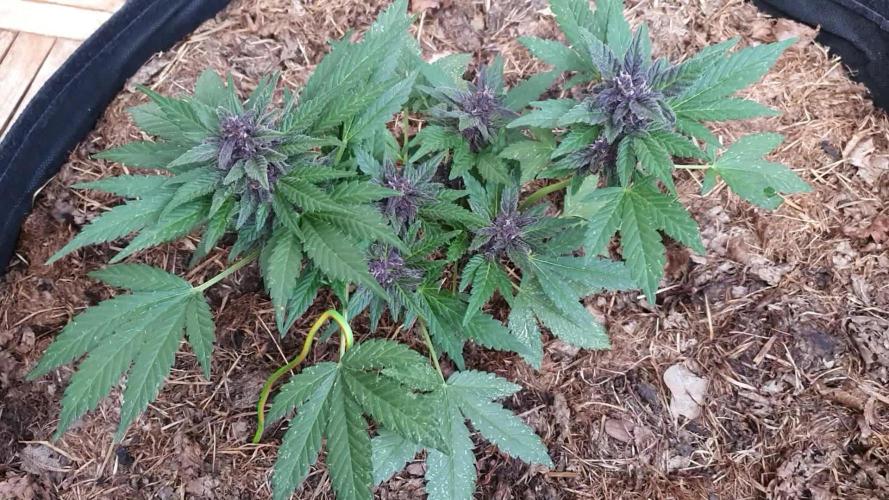
My little cherry bonsai becomes denser and the resin glands glisten across the entire flowers.
Under the spotlight, the lady shows how she can glitter.
I'm very happy that the first side branch, getting thicker and thicker.
Day 65
Photoshooting


Likes
6
Share


@IamCy
Follow
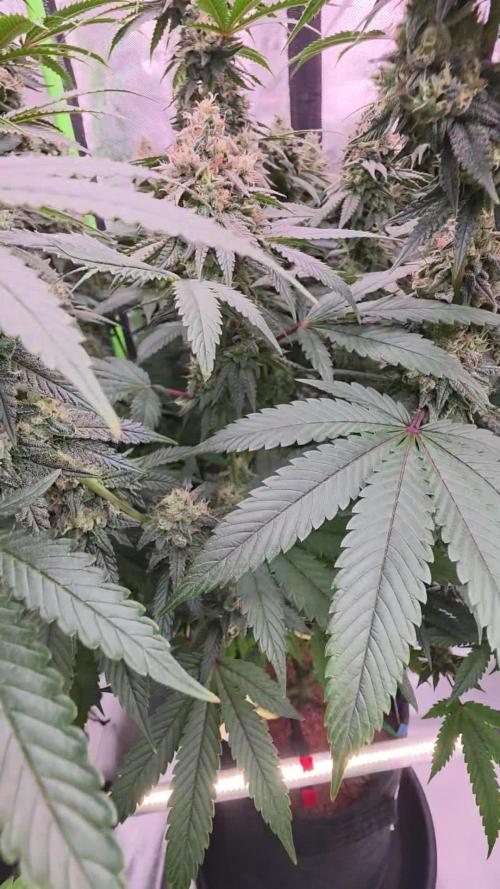
Week 3. This is where the fun begins. The smell is amazing.
The stretch is crazy and the stems are stiff like bamboo. There's no loss in terps. They're actually getting a lot stronger!!
Likes
8
Share

@viejo
Follow
June 1st
A lot of indecision regarding when to take her down to begin drying, so I haven't updated for a little longer than usual. I thought I'd be updating this grow with drying/harvest photos by now, but the trichomes just aren't there yet.
The plant is beginning to look a little worse for wear, especially thanks to the main cola drying out and dying after being found to be full of mold. That's another reason I've felt ready to take her down, but after some thought I realise that just means I'm ready, not that the plant itself is.
We're still turning final, but I'm dialing things in for the final spurt of trichome development. Light schedule is now 11 on 13 off. Watering is still frequent, which apparently indicates a plant in full production. I'm going to take care to let the pot dry out completely while avoiding a big droop, and I've also decided to remove nutes and water without anything other than pH amendment.
According to a little research larger plants operate slightly differently when it comes to the maturation process, meaning a longer term to fully mature. While the RQS data sheet suggests something like 65 days for flower, in reality it might look something like 90. Patience is the thing here, so it's all down to the trichomes at this point, which are still mostly clear, with a small percentage of cloudy/amber.
As soon as we're in an obviously milky majority, she's coming down. Fingers crossed as always!

Likes
2
Share

@Oyziphar
Follow
🌿
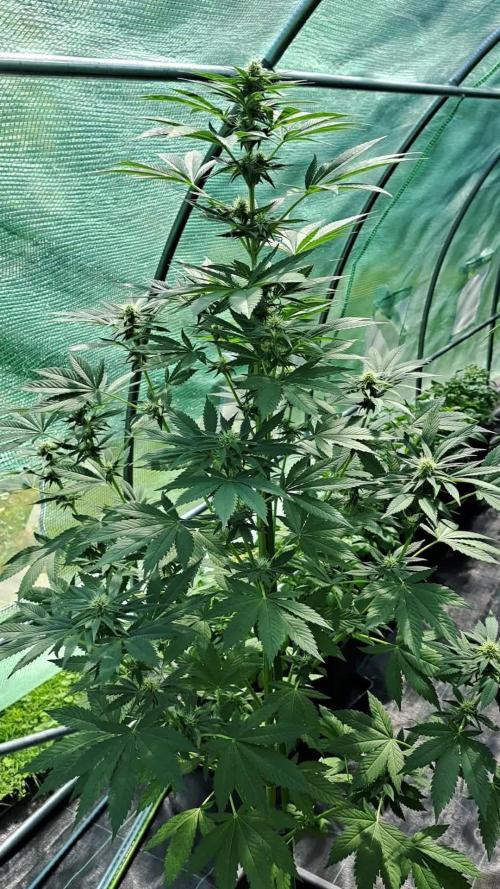
Once again, we had very sunny days this week 🌞🌞🌞and another heat wave is coming 😍😍😍
Fourth week of Light Deprivation
👉👉👉👉Every morning at 8:30 am I move the plant in the greenhouse.
👉👉👉👉Every evening at 8:30 pm I move the plant (together with some other strains) inside the growroom (which I don't use in the summer)
The plant is making new flowers everyday and she is starting to smell now 👃👃👃
👉 I give the plants every other day a liquid booster with OPF 4:2:8 ; Fulvic 25 ; Yuccah ; Biovin liquid ; Earthworm compost extract.
Big Thanks to Luc from Plant Health Solutions / Bioplantenvoeding dot nl 🙏🙏🙏

Processing
Likes
2
Share


Likes
7
Share


@YehGreen420
Follow
Umas estão indo melhores que outras mas havemos de ver o que saíra daqui.

Likes
8
Share


@GrownwithLED
Follow
Both plants have almost stopped growing in heigth now and are in full flowering mode now. Barbarian (=AK-47 x Barbara Bud) Plant #1 is 15 cm shorter than plant #2, but a little bushier. Both have grown very well and are strong and healthy. They get more and more flower clusters now and start to fill up all branches. Trichomes start to appear all over...the plants start to get sticky and develop a weak sweet aroma now. Its time to take off the biggest fan leaves now for defoliation, I took a round of pics before and after.