Likes
Comments
Share
@la_piper
Follow
22.04 1day 12/12 ола начало 5го дня 12/12. вижу дефициты - меняю бак. на 40л свежей воды из под крана в 200ppm по 100мл А/Б+30мл силиконики+20мл ph[-] итого: ppm 940 ph 5.6 ола 7дней 12/12 долил свежего 18градусного компота 40л прям перед поливом) и того в баке около 70л. на улице душанбе , в боксе тож жарковато, ну чую руками , что прибор подпёздывает и к тому же он под лампами, хоть и на уровне растих, пластик всё равно нагревается, поэтому там меньше 30 явно. так же для личного удобства сделал перестановку и чуть подзагнул всё таки хейзы, куча побегов открылось под свет. пол ещё не показали. мутант продолжает болеть, он сам выбрал свой путь, ещё шепнули что с виду оч сативный фенотип попался, и поэтому ебёт голову, мол сатива иначе кушает
Likes
19
Share
Switched to GH flora 3 part. Playing around with flood times. The are taking up water at an exponential rate. Started with 3, 3 minute floods, up to 6, 4 minute floods and they're still drying up the puddles within an hour. Plant 1 is ahead of plant 2 by a day but it is half the size🤷‍♂️ Topped day 16. Not obvious in the photos as I had hoped but they bounced back within minutes Thank to evryone who gave their input, every little bit helps🙌 After all your suggestions, I've, backed off the light, backed off the flood time and count. We will see if these girls perk up a little more👍 Day 17 I noticed progression of what I believe to be a calcium deficiency? That's on me, forgot the calmag originally🤦‍♂️ another thing I decided to look into was the twisting of the leaves as the plant 1 is also starting to show. Could my ph be alot higher than I think? 4 gal res I added a couple ml of phosphoric acid at the start and about 1ml a day since(I didnt prep my cube as well as I should of) seems like alot to me. The system would rise from 5.3 to 6.3 throughout the day. A flood cycle doesnt seem to affect the ph, more over time. I am constantly stirring the mix and no my meter is not yet calibrated. I have ordered what I need but I'm considering calibrating with the chemicals I have and doing a res change. Good news is, they do seem a little more lifelike after implementing all your suggestions. Okay drained and rinsed my res, ro water into the tank was holding 6.97ph, good enough for the girls I go out with🤷‍♂️ gonna mix up a batch, do a top feed to waste, and see what happens. It has been nearly 24h since my last flood. Also, struggling with lows of 30% humidity sometimes. Dont know if that plays a role here. Okay something was off.. I did a top feed to waste with fresh 5.3 nutes and the runoff came out at 7.5.. so I did it again...and again...maybe a half doesnt times to each block with no change. I started to reuse the runoff as I wrote off the batch at this point. I then switched to a pump and did recirc feed to each block aprox 20 litres at a time, stopping to rebalance. Literally 100s of litres later I am stable at 5.5....going to drain rinse and refill. The interesting part is that what ever was saturated in those blocks is non conductive, the ec didnt change the entire time🤷‍♂️ Spent the next couple days recovering. Looking better now. Sardine catcher installed.
Likes
55
Share
What's in the soil? What's not in the soil would be an easier question to answer. 16-18 DLI @ the minute. +++ as she grows. Probably not recommended, but to get to where it needs to be, I need to start now. Vegetative @1400ppm 0.8–1.2 kPa 80–86°F (26.7–30°C) 65–75%, LST Day 10, Fim'd Day 11 CEC (Cation Exchange Capacity): This is a measure of a soil's ability to hold and exchange positively charged nutrients, like calcium, magnesium, and potassium. Soils with high CEC (more clay and organic matter) have more negative charges that attract and hold these essential nutrients, preventing them from leaching away. Biochar is highly efficient at increasing cation exchange capacity (CEC) compared to many other amendments. Biochar's high CEC potential stems from its negatively charged functional groups, and studies show it can increase CEC by over 90%. Amendments like compost also increase CEC but are often more prone to rapid biodegradation, which can make biochar's effect more long-lasting. biochar acts as a long-lasting Cation Exchange Capacity (CEC) enhancer because its porous, carbon-rich structure provides sites for nutrients to bind to, effectively improving nutrient retention in soil without relying on the short-term benefits of fresh organic matter like compost or manure. Biochar's stability means these benefits last much longer than those from traditional organic amendments, making it a sustainable way to improve soil fertility, water retention, and structure over time. Needs to be charged first, similar to Coco, or it will immobilize cations, but at a much higher ratio. a high cation exchange capacity (CEC) results in a high buffer protection, meaning the soil can better resist changes in pH and nutrient availability. This is because a high CEC soil has more negatively charged sites to hold onto essential positively charged nutrients, like calcium and magnesium, and to buffer against acid ions, such as hydrogen. EC (Electrical Conductivity): This measures the amount of soluble salts in the soil. High EC levels indicate a high concentration of dissolved salts and can be a sign of potential salinity issues that can harm plants. The stored cations associated with a medium's cation exchange capacity (CEC) do not directly contribute to a real-time electrical conductivity (EC) reading. A real-time EC measurement reflects only the concentration of free, dissolved salt ions in the water solution within the medium. 98% of a plants nutrients comes directly from the water solution. 2% come directly from soil particles. CEC is a mediums storage capacity for cations. These stored cations do not contribute to a mediums EC directly. Electrical Conductivity (EC) does not measure salt ions adsorbed (stored) onto a Cation Exchange Capacity (CEC) site, as EC measures the conductivity of ions in solution within a soil or water sample, not those held on soil particles. A medium releases stored cations to water by ion exchange, where a new, more desirable ion from the water solution temporarily displaces the stored cation from the medium's surface, a process also seen in plants absorbing nutrients via mass flow. For example, in water softeners, sodium ions are released from resin beads to bond with the medium's surface, displacing calcium and magnesium ions which then enter the water. This same principle applies when plants take up nutrients from the soil solution: the cations are released from the soil particles into the water in response to a concentration equilibrium, and then moved to the root surface via mass flow. An example of ion exchange within the context of Cation Exchange Capacity (CEC) is a soil particle with a negative charge attracting and holding positively charged nutrient ions, like potassium (K+) or calcium (Ca2+), and then exchanging them for other positive ions present in the soil solution. For instance, a negatively charged clay particle in soil can hold a K+ ion and later release it to a plant's roots when a different cation, such as calcium (Ca2+), is abundant and replaces the potassium. This process of holding and swapping positively charged ions is fundamental to soil fertility, as it provides plants with essential nutrients. Negative charges on soil particles: Soil particles, particularly clay and organic matter, have negatively charged surfaces due to their chemical structure. Attraction of cations: These negative charges attract and hold positively charged ions, or cations, such as: Potassium (K+) Calcium (Ca2+) Magnesium (Mg2+) Sodium (Na+) Ammonium (NH4+) Plant roots excrete hydrogen ions (H+) through the action of proton pumps embedded in the root cell membranes, which use ATP (energy) to actively transport H+ ions from inside the root cell into the surrounding soil. This process lowers the pH of the soil, which helps to make certain mineral nutrients, such as iron, more available for uptake by the plant. Mechanism of H+ Excretion Proton Pumps: Root cells contain specialized proteins called proton pumps (H+-ATPases) in their cell membranes. Active Transport: These proton pumps use energy from ATP to actively move H+ ions from the cytoplasm of the root cell into the soil, against their concentration gradient. Role in pH Regulation: This active excretion of H+ is a major way plants regulate their internal cytoplasmic pH. Nutrient Availability: The resulting decrease in soil pH makes certain essential mineral nutrients, like iron, more soluble and available for the root cells to absorb. Ion Exchange: The H+ ions also displace positively charged mineral cations from the soil particles, making them available for uptake. Iron Uptake: In response to iron deficiency stress, plants enhance H+ excretion and reductant release to lower the pH and convert Fe3+ to the more available form Fe2+. The altered pH can influence the activity and composition of beneficial microbes in the soil. The H+ gradient created by the proton pumps can also be used for other vital cell functions, such as ATP synthesis and the transport of other solutes. The hydrogen ions (H+) excreted during photosynthesis come from the splitting of water molecules. This splitting, called photolysis, occurs in Photosystem II to replace the electrons used in the light-dependent reactions. The released hydrogen ions are then pumped into the thylakoid lumen, creating a proton gradient that drives ATP synthesis. Plants release hydrogen ions (H+) from their roots into the soil, a process that occurs in conjunction with nutrient uptake and photosynthesis. These H+ ions compete with mineral cations for the negatively charged sites on soil particles, a phenomenon known as cation exchange. By displacing beneficial mineral cations, the excreted H+ ions make these nutrients available for the plant to absorb, which can also lower the soil pH and indirectly affect its Cation Exchange Capacity (CEC) by altering the pool of exchangeable cations in the soil solution. Plants use proton (H+) exudation, driven by the H+-ATPase enzyme, to release H+ ions into the soil, creating a more acidic rhizosphere, which enhances nutrient availability and influences nutrient cycling processes. This acidification mobilizes insoluble nutrients like iron (Fe) by breaking them down, while also facilitating the activity of beneficial microbes involved in the nutrient cycle. Therefore, H+ exudation is a critical plant strategy for nutrient acquisition and management, allowing plants to improve their access to essential elements from the soil. A lack of water splitting during photosynthesis can affect iron uptake because the resulting energy imbalance disrupts the plant's ability to produce ATP and NADPH, which are crucial for overall photosynthetic energy conversion and can trigger a deficiency in iron homeostasis pathways. While photosynthesis uses hydrogen ions produced from water splitting for the Calvin cycle, not to create a hydrogen gas deficiency, the overall process is sensitive to nutrient availability, and iron is essential for chloroplast function. In photosynthesis, water is split to provide electrons to replace those lost in Photosystem II, which is triggered by light absorption. These electrons then travel along a transport chain to generate ATP (energy currency) and NADPH (reducing power). Carbon Fixation: The generated ATP and NADPH are then used to convert carbon dioxide into carbohydrates in the Calvin cycle. Impaired water splitting (via water in or out) breaks the chain reaction of photosynthesis. This leads to an imbalance in ATP and NADPH levels, which disrupts the Calvin cycle and overall energy production in the plant. Plants require a sufficient supply of essential mineral elements like iron for photosynthesis. Iron is vital for chlorophyll formation and plays a crucial role in electron transport within the chloroplasts. The complex relationship between nutrient status and photosynthesis is evident when iron deficiency can be reverted by depleting other micronutrients like manganese. This highlights how nutrient homeostasis influences photosynthetic function. A lack of adequate energy and reducing power from photosynthesis, which is directly linked to water splitting, can trigger complex adaptive responses in the plant's iron uptake and distribution systems. Plants possess receptors called transceptors that can directly detect specific nutrient concentrations in the soil or within the plant's tissues. These receptors trigger signaling pathways, sometimes involving calcium influx or changes in protein complex activity, that then influence nutrient uptake by the roots. Plants use this information to make long-term adjustments, such as Increasing root biomass to explore more soil for nutrients. Modifying metabolic pathways to make better use of available resources. Adjusting the rate of nutrient transport into the roots. That's why I keep a high EC. Abundance resonates Abundance.
Likes
6
Share
Likes
12
Share
Day 63 This plant has been trained into a wide, flat shape, with multiple tops spread out evenly across the pot. The structure is low and bushy, clearly influenced by topping or LST, which has opened up the canopy for better light penetration. Leaf color is generally healthy, a strong green with decent vibrancy, though some variation is visible. The lower leaves show stress — one is yellowed and deteriorating, likely from nutrient deficiency (older growth being consumed) or simply natural fading. The canopy looks vigorous and responsive to training, but growth is still somewhat restrained; the plant doesn’t yet have explosive vertical energy. The root zone may still be recovering from earlier stress, but the overall appearance suggests it’s adapting well. Going forward, the key will be to maintain even watering and steady nutrition, supporting strong root activity. Some light defoliation could help airflow under the canopy and direct energy into the developing tops. If conditions stay stable, this plant should be able to bounce back and continue filling the space effectively.
Likes
24
Share
@Daweed83
Follow
Yooo 🖖🏽 Ladies are going well, buds are growing nicely and now that im in the middle of it im expecting them to get even fatter. I dont see any problem but please if you see any let me know :) In my plan they have 4 weeks still with full nutes and a good week of flush. Same open to opinion on that ! Thank you 🖖🏽🖖🏽
Likes
29
Share
@Sadhus
Follow
**Semaine 6 : Sixième Semaine de Floraison – Phase Bulking (25-31 mars 2026)** **Note :** Mise à jour hebdomadaire complète. Tout est RAS, les plantes sont en pleine forme et le bulking se passe parfaitement. Données regroupées TrolMaster + GrowOps (semaine 6 / semaine 10 globale). ### Contexte et Objectifs de la Semaine On est maintenant en plein cœur du **bulking** (gonflement massif des buds). Le stretch est terminé depuis plusieurs semaines, l’énergie de la plante est entièrement redirigée vers le remplissage des calices, la production de résine et la densité florale. Steering : **végétatif maintenu** (irrigations fréquentes, runoff 20-30 %, dryback modéré 8-12 % la nuit, VWC stable). Objectifs : maximiser le volume et la densité des buds, booster la résine avec UV 90 min/jour, maintenir une stabilité parfaite des paramètres jusqu’au pic de trichomes (semaines 7-8). **Petit point éducatif : Pourquoi le bulking est la phase la plus importante en flo ?** Après le stretch (semaines 1-4), la plante passe en mode « remplissage ». C’est là que l’on gagne le plus en poids final. Le steering végétatif (irrigations fréquentes + VWC plus haut) permet une meilleure absorption des nutriments et une expansion cellulaire maximale dans les buds. À ce stade, l’ajout de **PK 13/14 + Sugar Royal + Green Sensation + Pure Zym + Silica Force + Cal-Mag Amino** est idéal : - PK 13/14 → phosphore/potassium pour la formation des fleurs et la résine - Sugar Royal → sucres et carbohydrates qui augmentent le poids et les terpènes - Green Sensation + Pure Zym → bio-stimulants + enzymes qui améliorent l’uptake racinaire et la santé microbienne en coco - Silica Force + Cal-Mag Amino → renforcement cellulaire et prévention des carences classiques en flo (Ca/Mg) Le tout à EC 2.6 et pH 5.8-6.0 donne un équilibre parfait sans risque de lockout ou de burn. ### Observations des Plantes La plante dominante (la plus belle) mesure maintenant **150 cm** de hauteur. Elle a clairement pris le dessus avec une structure énorme, une canopée dense mais bien aérée et une vigueur exceptionnelle. Le stretch est complètement terminé (+10 cm seulement la semaine dernière, stabilisation totale). Les buds grossissent rapidement, les calices s’épaississent, les trichomes deviennent de plus en plus visibles et brillants sur les sites supérieurs. Pistils encore majoritairement blancs mais commencent à s’enrouler. Santé générale : excellente, vert profond, aucune feuille jaune ou brûlée, zéro pest, zéro stress, zéro carence ou excès. La plante secondaire suit bien. Clones toujours très vigoureux. Les plantes sont concentrées à 100 % sur le gonflement des fleurs. ### Paramètres Environnementaux (TrolMaster + GrowOps – synthèse semaine 6) - **Température jour** : 20-23 °C (moyenne live 23.3 °C, cible 24 °C) - **Température nuit** : 18-20 °C - **Humidité jour** : 60-70 % (live 58.9 %, cible 62 %) - **Humidité nuit** : 49-59 % - **VPD** : 0.8-1.2 kPa (live 0.94 kPa → parfait pour bulking) - **PPFD moyen** : 750-777 (max 814) → DLI 32 mol/m²/jour (optimal) - **UV Light** : 90 min/jour (augmenté cette semaine) - **Far Red Light** : 30 min en fin de cycle (lights-off) - **CO₂** : setpoint 900 ppm jour (enrichment actif) - **EC solution** : 2.6 mS/cm (live 1.85-2.95 selon relevés) - **pH solution** : 5.8-6.0 (live 6.43, runoff 5.8-6.2) - **Runoff EC** : 4-5 mS/cm - **Irrigation** : Fréquente (4-5 cycles/jour) - **Runoff % daily** : 20-30 % - **Night dryback** : 8-12 % - **Steering** : Végétatif confirmé ### Nutrition et Irrigation (Soupe actuelle) **Nutriments utilisés cette semaine (doses par litre) :** - Cocos A → 1 ml - Cocos B → 1 ml - CANNA PK 13/14 → 1 ml - Green Sensation → 0.1 ml - Pure Zym → 1 ml - Sugar Royal → 1 ml - Cal-Mag Amino → 1 ml - Silica Force → 1 ml - pH- → 0.5 ml (pour ajuster à 5.8-6.0) Eau à ~20 °C, temp solution ~15-18 °C (normale en coco). Irrigation fréquente avec dryback contrôlé → parfait pour maintenir un VWC stable tout en évitant les excès d’eau en phase bulking. ### Problèmes et Ajustements **RAS** – Aucune problème, aucune alerte GrowOps, aucune intervention physique nécessaire cette semaine. Les paramètres sont très stables, le steering végétatif fonctionne parfaitement et les plantes répondent idéalement aux boosters de résine. ### Plans pour la Semaine 7 - Maintenir steering végétatif + EC 2.6 (possible léger pic PK si besoin) - UV rester à 90 min/jour - Légère défoliation sélective (seulement les grandes fan leaves qui bloquent vraiment la lumière sur les buds inférieurs) - Photos rapprochées pour suivre l’évolution des trichomes et du gonflement - Évaluer les clones pour sélection finale Ce journal sera mis à jour hebdomadairement. #GrowLegendary #Zamnesia #Plagron #EternityGrowCup2 Les buds gonflent vraiment bien, les trichomes commencent à briller et la plante dominante à 150 cm est superbe. On sent que le rendement va être excellent ! 🌱✨
Likes
38
Share
Utopia Haze is a rare heavily sativa dominant hybrid (90% sativa/10% indica) strain created through back crossing Brazilian Sativa strains. This tasty little bud took home 1st Place for Best Sativa in the 2008 High Times’ Cannabis Cup and for good reason – with its potent 18-22% average THC level and long lasting cerebral effects, Utopia Haze is one powerhouse smoke. The Utopia Haze high comes on soon after you finish your first toke, hitting you with a strong cerebral lift that infuses you with a sense of hazy relaxation. Type: Feminised/Photoperiod Cultivation: Indoor/Outdoor Flowering Time (days): 70-75 Indoor Yield (g): Up to 650 Feminised Outdoor Harvest Month: October Feminised Outdoor Harvest Month Week: 3rd-4th week Aroma: Citrus, Woody, Pungent, Mint Effect: Cerebral Lift, Hazy Relaxation, Sleepy Welcome Everyone to the Final Entry of my Utopia Haze Grow ! There is so much to discuss ! I have been extremely busy as of late trying to get this Harvest together, but i am happy to have it here for you now ! I Seriously under estimated the amount of time, help from others, and my own necessary skills to pull this off.. and i still kind of screwed it up lol ! But its worth noting i have never actually done this before and trying to document it during....was extremely hard. It is next to impossible to work an iPhone with rubber gloves on ! First I want to discuss everything step by step so before you jump straight into the comments on how the end product is so small in "quantity" Rest assured i am happy with its"quality"...and thats all that matters to me because Life is a journey not a destination! and i have learned so much from this grow that I couldn't be any happy even if i messed some things up :) But at the very least I hope you read through this entry in its entirety with an open mind and focus more on the process, rather than just the outcome! I ran out of Ice & i was only able to wash three times..(normally I've heard you should go sometimes 5-6 washes) Preparation is Key & things will be much better next round :) Photos 1-22 These are pretty self explanatory but for those of you just tuning in now.. this is what happens to a very happy plant when you don't have the necessary tools to monitor key components of growing cannabis.. Ph, as well as EC levels play a very key role in the outcome of your grow lol that being said I was just able to save this plant by purchasing both tools but that doesn't mean the plant didn't suffer because of the prior events.. This was a Huge reason behind me choosing to turn this harvest into what i would consider "Solventless Hash Rosin" from "Ice water extracted Bubble hash". Pictures 23 The idea here is the process of using "fresh Frozen Cannabis" this has been discussed many a time online on such sites as instagram and here on grow diaries as well.. I personally have Never tried the process so i decided to try it out and make a judgement for myself.. Video 24 The Cannabis has now been in the freezer for 72 hours making it very well frozen.. as you can tell i struggled getting it all into the 25u Screen Wash Bag. One thing of note i would do differently is i will de-stem my next batch as i also believe this played a part in the amount of plant matter that escaped through the sieves. Photo/Video's 25-28 The idea here is "ice water Seiving" & especially with the bags that I am using here that are only have screen material on the bottom portion of the bag it is very important to have spaces in-between the screens to allow the water to pass directly through the screens into the bottom bucket with the least amount of resistance.. because the hash is so extremely temperature dependant if it gets warm on the side of the bag.. it will stick there and not make it to the bottom to become use able product.. 29 You do not need to use as much Ice as i used here lol... the idea is to keep everything very cold..i certainly achieved that but at the sacrifice of using so much that i ended up grinding product and producing "contaminants" but in the end they are just plant matter that i would be smoking when i rolled up my joint either way so.. I'm not super disappointed.. But it should be noted that what you want to achieve here is a Layering effect where you have the wash bag between two small layers of ice while the "water current" washes the Trichomes away allowing them to be separated by the screens setup below :) Before Starting the machine you should allow some time (i.e.;10-12minutes pre soak to allow the product to become saturated) before the first cycle. By video 32 I have just ran out of ice lol.. Video 33-34 Here I have a tip for you.. to separate the screens that you sieve through.. cut 5 gallon buckets to stretch them across nice and tight.. it'll make scooping your Bubble that much easier ! i learned this from the many "Frenchy" videos I have watched :) Picture 35 Here in lays the problem for most people.. drying your hash without loosing vast amounts of "Terpenes" whilst also stay ever vigilant against mold ! Thanks to all those videos I've watched on youtube.. id like to think this was one of my most successful parts of this process.. Things to Note; Terpenes start to seriously evaporate at temperatures 68F or 20C you need to stay as cold as possible whilst bringing the Relative Humidity in the space down into the 40-30% to stay away from that nasty mold ! I used my cold storage room in the basement.. with a dehumidifier running to keep the space at 45% RH & staying at a constant 15c. All while spreading the hash as thin as possible across parchment paper, on top of the white screens with a fan moving air across both sides of the paper. Pictures 36-38 These are some macros i took in the middle of my drying session I fell in love with the colour. Yes i know the black spots are plant material but they will get caught when i bag the hash & squish the oil out. Thing to Note; at this stage it is important to ensure you 'micro plane" the hash down as fine as you can whilst staying weary of the temperature... any "chunks" will hold pockets of moisture.. that lead to potential problems..ie; mold ... Picture/Video 39-41 Successfully planed bubble hash ready to be bagged and Squished ! Picture 42 Ive decided to follow Pedro.. from Pedros Grow Room and double bag to be on the safe side so i don't have any blow outs. So thats One 25u bag inside one 160u bag ! :) Pictures 43 This is almost 3 grams of the bubble hash from above, already melting in the bag.. this is where i ran into trouble again lol things started getting to warm in the house and i was only able to get one of the three squish's i did on video :( things started getting sticky. Picture 44 This is basically just a photo of the equipment I'm using; 3x5 LowTemp Cage in the frame I built myself, with a 20Ton bottle jack. Something to note here is this is an older Lowtemp model with only a single heating zone which is which i have it closed here heating Both sides of the press :) As well as the importance of having adequate pressure on your plates.. my rig is very overkill for the size of hash bags..lol Video 45 Here is the lovely press video.. its didn't quite work the way i wanted either lol my directional folding wasn't quite tight enough for a big "drip" :) &the Press was set to 65°c Photo's 46-50 are pretty self explanatory :) I had a blow out.. but still managed to pull an 80% return from the hash once squished...& yes it tasted amazing :) Was it worth it in the end... that could be debated.. for some..i understand..its not your thing, but for those of us that are interested in making our own concentrates.. free from Solvents... I wouldn't make it any other way :) If even ONE of you reading this diary finds it helpful to reference for ANYTHING.....even if its "what not to do" ill consider it a success ! Thanks again for tagging along on this garden adventure.. its been one heck of a journey ! Much Love from B.C. Canada, Until Next time, Cariboo
Likes
21
Share
@Hempcules
Follow
WEEK 14 Not much happened during the final week. Most of the trichomes turned milky, which was exactly what I was hoping for. PPFD: 1000µmol/m²/s Water: 2x plain water Vpd: 1,9Kpa
Likes
22
Share
A great week!! Chloe grew 8 inches!! Sofie grew 6!! I fed them yesterday and moved them into the flowering tent!! Looking forward to another great week... hoping they adapt to the new environment! Also, I can't believe they started flowering so early!! Unbelievable!! Otherwise, steady as she goes!
Likes
35
Share
Que hay familia, adelantamos semana de las red hot cookies, ÚLTIMA semana antes del machetazo, estoy deseando cortar estos caramelos llenos de polen, que parecen caramelos de fresa, olor Muy afrutado, cepa muy bien trabajada de sweetseeds que antes de cosechar, ya la recomendaría. No tienen ni 60 días de floración , y a mi parecer , están bien hechas. 50% tonalidades rojas , 50% tonalidades verdes con toques rojos. . La humedad esta al 45% la temperatura está entre 21/27 grados , y como siempre el ph , ya que es de lo más importante,está en 5,8/6,0. . Nos vemos de nuevo para la COSECHA, un saludo y buenos humos fumetillas💨💨💨.
Likes
18
Share
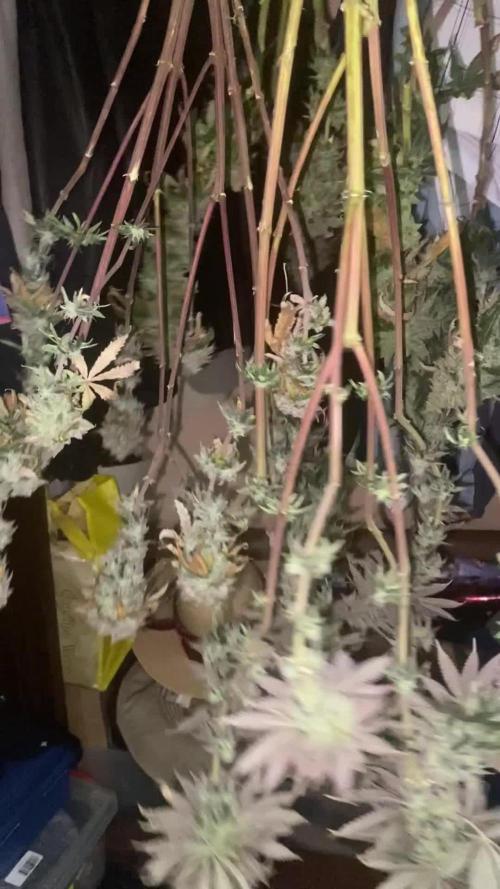
Endish week 8 - taken for safety - shame not to run to good trichomes - weight wise ok, don’t like too post weight very little leaf as you see
Likes
35
Share
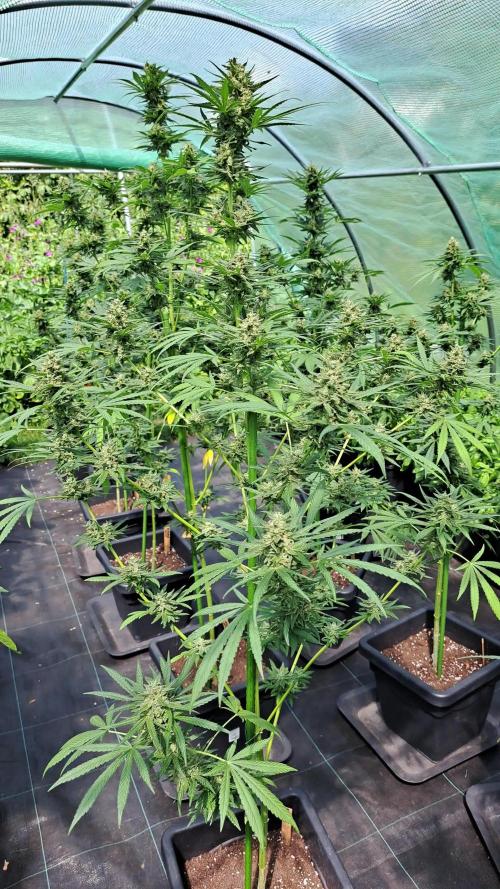
🍼Greenhouse Feeding BioGrow ⛺️MARSHYDRO The ⛺️ has a small door 🚪 on the sides which is useful for mid section groom room work. 🤩 ☀️ by VIPARSPECTRA (models: P2000 & XS 2000) 🌱 by Seedsman
Likes
2
Share
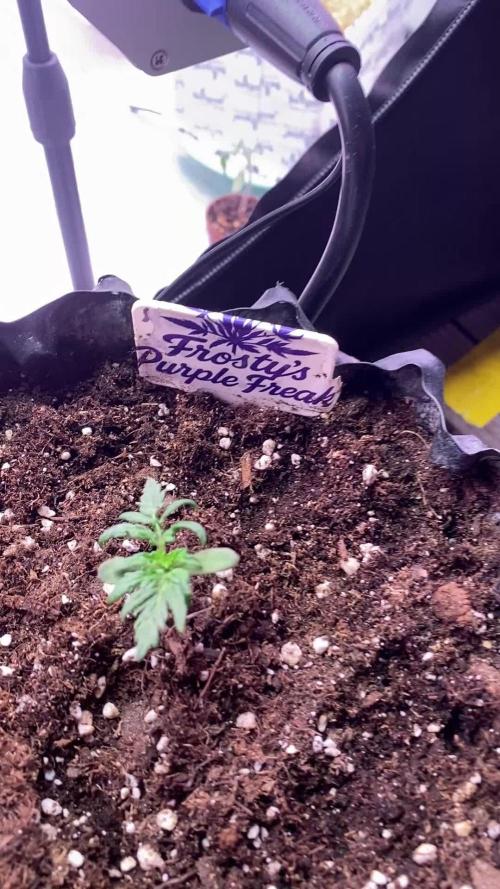
Took less than a week to get her from seed to 5 gallon pot!
Likes
174
Share
@Roberts
Follow
A little over a week in the fade. She is just starting to show deficiency signs a little. Will likely be harvesting next week. Got some beautiful frosty buds, that smell amazing. Thanks again fast buds Thank you grow diaries community for the likes, follows, and all of my YouTube channel subscribers. I greatly appreciate the support, and glad to help others when I can. Happy growing 🌱🌱🌱
Likes
28
Share
@BB_UK
Follow
So it’s day 29 of bloom 💚🙏 very exciting things happening! Close to approaching half way through and you can see ata going to happen! Going to be big ole resinous buds! Trichromes are spreading already and aromas are catching the olfactory bulb and Making it go crazy just a whole variety of greatness! Got some more barneys to do after too! So if sponsorship goes as planned I’ll be in a bigger tent real soon!
Likes
6
Share
@BLAZED
Follow
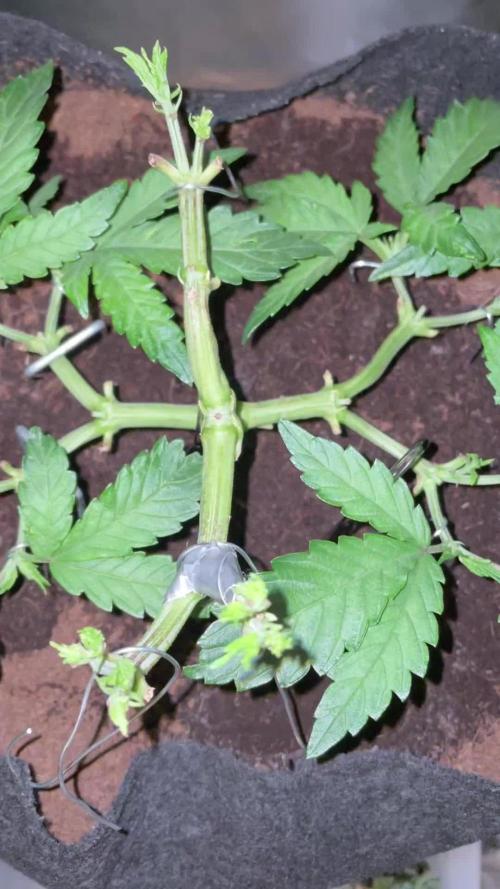
Week 8 (17-3 to 23-3) 17-3 Temps: 17.4 to 21.9 degrees Humidity: 60% to 72% 18-3 Temps: 17.5 to 22.2 degrees Humidity: 54% to 65% 19-3 Temps: 17.9 to 22.4 degrees Humidity: 52% to 61% Watering: Both 500 ml. EC: 0.4 Watering: Both 1000 ml. EC: 1.4 Defoliated both plants and attached some shoots to the rack. She got really big fan leaves! I also supercropped some branches. 20-3 Temps: 18.2 to 22.8 degrees Humidity: 59% to 69% 21-3 Temps: 18.5 to 23.4 degrees Humidity: 57% to 67% Watering: Both 1000 ml. 22-3 Temps: 19.4 to 24.1 degrees Humidity: 55% to 67% Watering: Both 1000 ml. Set the strength of the light to 50% 23-3 Temps: 19.8 to 24.8 degrees Humidity: 58% to 67% Watering: Both 1000 ml. As you can see, instead of removing the leaves, i tucked down all the leaves to open up the canopy. I will see if i like this method as its the first time i try this. I also attached some more shoots to the rack, its looking nicely spread out now :) The #2 makes my fingers very sticky and smells really strong! I love it!
Likes
4
Share