The Grow Awards 2026 🏆 


Likes
Comments
Share
@nonick123
Follow
Día 2 (03/06) A su marcha haciendo las raíces...
Día 3 (04/06) N/A
Día 4 (05/06) N/A
Día 5 (06/06) A su marcha haciendo las raíces...
Día 6 (07/06) N/A
Día 7 (08/06) Elimino la cúpula de humedad al estar en el día 7
Día 8 (09/06) Riego con 100 ml de H20 con Wholly Base 1,25 ml/l + Solid Green 0,50 ml/l + Rise Up 1 ml/l de GenOneEleven
🌱Substrate PRO-MIX HP BACILLUS + MYCORRHIZAE - www.pthorticulture.com/en/products/pro-mix-hp-biostimulant-plus-mycorrhizae


Likes
11
Share
@HerrnBubatz88
Follow
17.11:
Sup Guys, starting Off Week 5 beautifully - Great smell and Stack. Got you a Look around again. If you Insist of Any Pictures just ask. Adjusting the Nutes a Little as the CO2 will run out in 2-3 Days. Hopefully they keep stacking good as I dont wanna Hang another CO2 Bag. Stay Tuned!
Any questions or Tipps? Feel Free to Comment.
21.11: Night temps dropping with the first negative Degrees.. You Can definitely see a difference between Lob #1 and #2 forming, #2 leaning more to the Zangria side #1 more to the Blue Lobster. All buds are still stacking nicely. ChemD still a little behind but as I said that’s due to genetics as from the breeders info she’ll need a week more than the others, maybe she will catch up we will see.
Current setup as I got asked:
BBC x WC (Topped)
2x Blue Lobster x Zangria (#2 topped)
ChemDogg x Papaya
4x15L Autopot
480W Spiderfarmer SE5000
2x 15w Fan / one canopy one Cooling the LED
1x 50w 360 Rotation Fan
2x Trellis net
Dehumidifier 380 w from comfee
4“ Incline Fan spiderfarmer
50/50 RO + Tapwater mix starting EC 0,25
Athena Ag on Coco


Likes
216
Share
@Ju_Bps
Follow
Hello growmies 👩🌾👨🌾🌲🌲,
👋 The buds start to forming and stems coming alone full of little buds 😍😋.
Nothing to say, was long to start but now look in fire 🔥 .
💧 Give water each 2/3 days.
1,5l Water + RQS Bio Flo Pack
PH @6
- Bio Flowering Booster Pack
Thicker Flowers 1 ml/l
Bigger Flowers 1 ml/l
Sweeter Flower 0.5 ml/l
💡Mars Hydro - SP 3000
100% 53 cm.
🔥 Thanks community for follow, likes, comments, always a pleasure 👩🌾👨🌾💚🌲.
Mars Hydro - SP 3000 💡💡
https://www.mars-hydro.com/sp-3000-samsung-lm301b-greenhouse-led-grow-light
Zamnesia - Gelato Auto🌲🌲
Discount code -20% with GROWITGD code 🔥🔥
https://www.zamnesia.com/7688-zamnesia-seeds-gelato-automatic.html

Likes
7
Share
@Chucky324
Follow
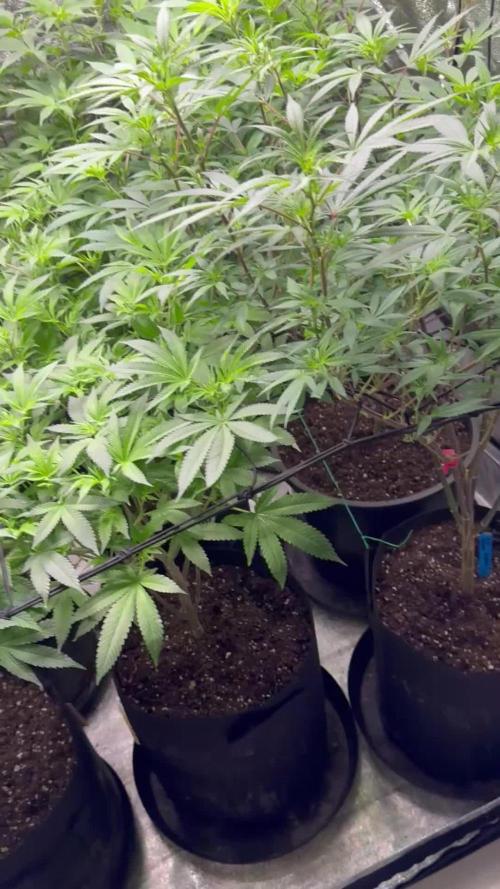
Hello. This is the end of week 9 and the beginning of week 10 of veg.
Quite week for the plants and us. It's above freezing now, but it's one storm after another here.
The plants are dong well and I'll turn over to flowering next week. I'll make clones at that time.
I'm after the best plant so I'll whittle the 14 plants down to 1 or 2 plants when I'm done.
But I have to take 3 clones of each to be sure I get 1 to regrow when it's done. So I'll be doing that this week.
My next trim/prune will be before the 3 week of flowering, before the resin starts to flow.
Through this veg I've been giving a full feeding and then just watering and then a full feeding and then just watering.... You get the idea...
I let the pots dry and hopefully water/feed before I get any wilting.
We've started a new Freak Bros. book. Comic Book #10 Published in 1987. It's the 3rd in the trilogy.
You'll find the first 2 comic books in the story in other diaries. Have a look around in my other diaries and you'll find them.
OK. Have fun out there.
Chuck
Likes
20
Share
@GrowmieDeLaStreet
Follow
A lot has been going on this week.
I performed a slurry test at the start of the week to get updates on the soil. pH is way too low and it's starting to miss nutrients, so I started feeding again once a week at low dosage.
I noticed that the new leaves are slowly yellowing probably because of the low pH. I plan a curative flush at high pH to reset it. The runoff should give better readings on what's going on than the slurry test. I built an elevated platform made from metal trays I found at the dollar store to collect it more easily. Game changer really.
LST has begun. Stems are chunky and already hard to bend but the job was easy with the new floral wire I use. I used to have a very thin one that I couldn't stick in the ground.
The irrigation system Is fully working now and all automatic. I still need to adjust the time it's on and off to get the perfect watering. The algae problem is solved and I didn't have to use any algaecide or filtration system. I simply put 0,5ml/L of 29% H2O2 in my reservoir. Hydrogen peroxide is antibacterial and it also helps with the oxygen levels of the water. With continuous aeration, protection from light and H2O2, the water in the tank is good for at least 5 days. 7 in fact if I count the 2 days for chlorine evaporation.
I also now have a 3000L/h water pump and the sprinklers can respectfully be called by their real name. The video shows what it was before with an 800L/h pump. I didn't had the chance to record with the new system.


Likes
8
Share
@HighOhioAn
Follow
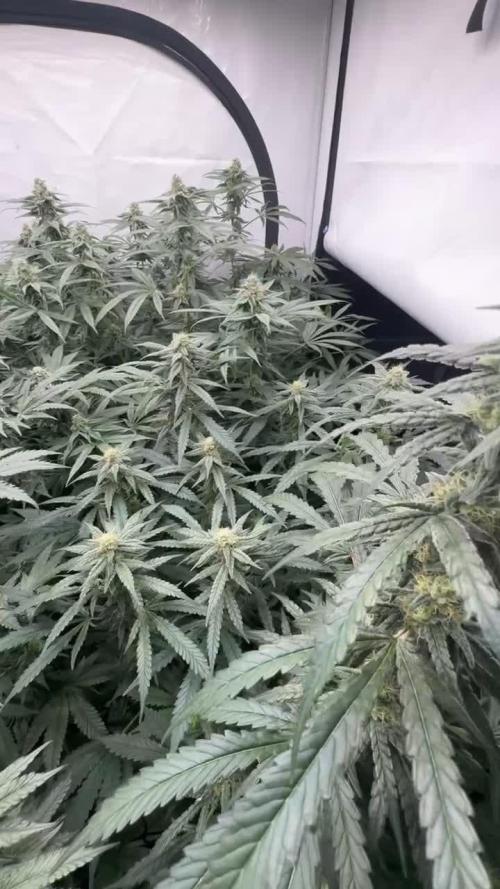
Truly been a pleasure to grow this plant cannot wait to grow another papaya. Sherbet is one of the beefiest plants I’ve ever grown consistent thick buds all around on every branch and her fade is beautiful. They really knocked it out of the park this time.🔥🙏


Likes
14
Share
@555ABKY555
Follow
finally the scorching sun came having moved the plants from under the canopy outdoors a downpour created a bit of mold in a small part of the skywalker and also to the little cherry i later removed it and sprayed the plants with garlic infused water now i'm the bomb i'm fertilizing with long awaited organic vermicompost, the plants are perfect, i think i will delay the harvest for the cherry to make it gain a little more weight at the expense of the flavors the flavors are amazing absurd...i ordered some clones by freakshow humbolt seeds I also made new transfers with old seeds tried to germinate and they went splendidly.honey cream and special queen by royal queen seeds


Likes
23
Share
@Horseluisweed
Follow
Teniendo el sustrato preparado con antelación un par de días antes.. nos animamos a germinar, tengo una tremenda ilusión con esta pequeña, me hace muy feliz verla crecer!🌱 Ojalá todo salga bien y pueda acompañarla hasta el final en este precioso viaje 👽❤️🌱
Nos hemos marcado tres objetivos en este cultivo:
1-hacer un cultivo seguro y no ser detectados👮♂️🥇
2-conseguir una cosecha en menos de 2 meses con éxito 🏇🥈
3-gastar la mínima cantidad de recursos posible con el máximo rendimiento posible🤑🌍⚡🥉

Likes
74
Share
@AsNoriu
Follow
Day 82. First of two is down.
Day 88. Second down. Both will be decent by weight and structure, but smell and taste .... maybe after cure ? ;)))
Day 92. First went to jars. Will be hard to keep fingers away ... ;)))
Day 98. Both in jars ! 170 g of my very likeable smoke ;)
Will update later
Happy Growing !!!


Likes
12
Share
@Bncgrower
Follow
Another week is over, one of these girls is in the final stretch and very close to harvest, but Xingu and Volta ao Mundo are now showing signs of maturation, Moranguinho do Nordeste has some very dense, resinous and fragrant buds, and soon it will be time for ✂️, otherwise everything is as expected, I noticed some yellowing of some leaves in Xingu, but I believe it is because of the last few weeks.
Thank you for following and happy growing! 🍁🌱🌱
Likes
14
Share
@reirrac1
Follow
Training was hugely successful, and all colas are spaced nicely and pointing at the sky. Starting her out on early flower nutes this week. Feed pH 6.3, EC 1.4.

Likes
4
Share
@Big0zGrower420
Follow
Learned a lot from this grow and am very happy with the results. Pulled 2.8 Oz and 1.1 Oz of trim/popcorn buds in a one gallon pot. Definitely wont be doing that again, but had a lot of fun throughout the entire process. Going to be starting another grow soon! Very excited for that.


Likes
24
Share
@Dr_Sampson
Follow
This experiment has taught me a great deal about all of these strains. I switched half way to NPK Raw and watched all the Harley Smith videos I could find. These strains all displayed differing deficiencies at different times. My 10L res PH, supporting 4 x 5g Buckets, plummets Daily failing from 6.5 to 5.3. Exclusivly H20 topups. Co-planting deficiency overall is that you can’t cater to anyone on a shared resivoir.


Likes
10
Share
@Plzgrow4me
Follow
Still feeding them flower food. Today, June 11 I’m finally updated!
I’m thinking I can get a few more weeks out of them. What do you guys think?


Likes
3
Share
@hillbilly705
Follow
the week went we'll they grow by the day. I fed them sillica , Alaska fertilizer and molasses. there not showing many hair yet one is a little. I topped one of the plants the larger one. the gentics are top notice .i think there vigger is amazing. lots of structure should yield well