
Likes
Comments
Share


@DogDoctorOfficial
Follow
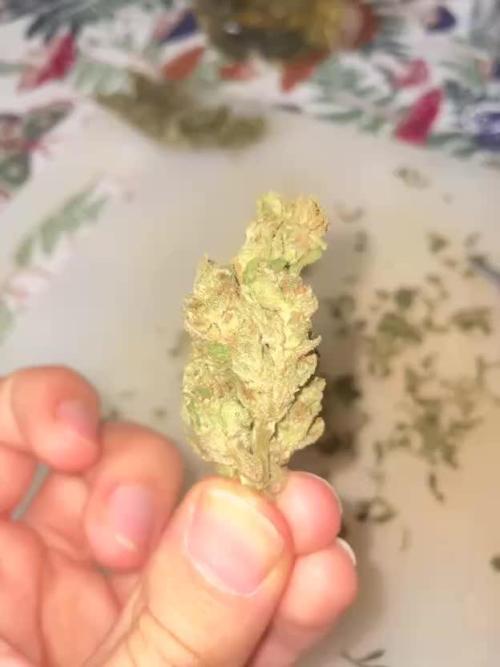
Hey Grow Diaries fam,
Welcome back to another update on our PCR adventure! We're at Week 9, which marks Week 4 of the flowering stage, and things are getting exciting!
Overview
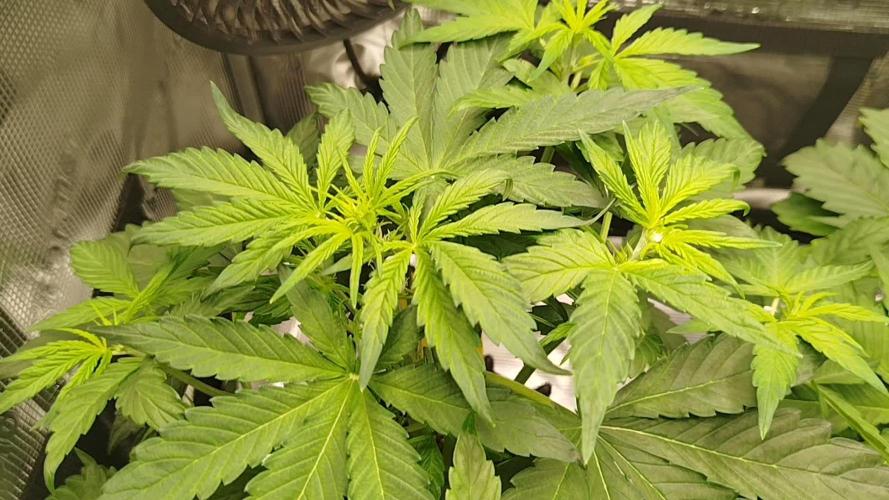
The PCRs are flourishing, and the transformation is nothing short of spectacular. The tent is buzzing with energy, and every day brings new developments. The buds are swelling beautifully, and the trichome production is off the charts. This week has been all about maintaining optimal conditions and ensuring our ladies get everything they need to reach their full potential.
Environment and Conditions
Tent: 3x3, cleaned and prepped from top to bottom to ensure a pristine environment.
Lighting: ViparSpectra P2000, delivering a perfect spectrum for this stage of growth. The balanced PAR output and efficient energy use keep our girls happy and thriving.
Watering: TDS at 410, pH 5.8, and water temperature at 21°C. This ensures the nutrients are perfectly balanced and readily available.
Nutrient Regimen
We’ve kept up with our Aptus Holland feeding schedule, and it's paying off big time. Here's the current mix:
Nutritional Spray: Aptus Holland NutriSpray to keep those leaves lush and healthy.
TopBooster: Replaced StartBooster with TopBooster to promote flower development.
P-Boost: Added to the mix for that extra phosphorus kick, crucial for blooming.
K-Boost: a must for them to go fat as we like.
The results speak for themselves – lush green foliage and robust bud formation.
Defoliation
At the end of this week, we performed a mass defoliation. It's always a bit nerve-wracking, but the results are worth it. Removing excess leaves ensures better light penetration and airflow, reducing the risk of mold and pests. Plus, it allows the plant to focus its energy on bud production. And let me tell you, after the defoliation, the PCRs look sexy as ever with their long legs and sculpted structure!
Clones Update
Our clones are thriving, showing the longest and whitest roots I've ever seen. We treated them with a water mix that included K-Boost and Mycor Mix at 1 gram per liter. This combination has worked wonders, promoting vigorous root development and overall plant health.
Reflections
This week has been a testament to the importance of a clean environment and precise nutrient management. The PCRs are responding exceptionally well, and I couldn’t be more thrilled with their progress. We're well on our way to an incredible harvest, and I can't wait to see these beauties in full bloom.
A huge shout out to:
Aptus Holland: For the top-notch nutrients and constant support. You guys rock!
Art Genetix: For creating such an incredible strain. The PCRs are truly something special.
Grow Diaries Community: Your support and feedback are invaluable. Keep the positive vibes coming!
Here’s to another fantastic week of growing! Stay positive, keep pushing forward, and enjoy every moment of this beautiful journey.
Genetics - P.C.R. @Art_Genetix_Team https://artgenetix.world/
Nutricion @aptusholland https://aptus-holland.com/
LED Power @Lumatek and @viparspectra
As always thank you all for stopping by , for the love and for it all, i fell blessed to have you all with me for one more love journey Thank you Thank you Thank you , you guys are great and have been amazing , thank you for everything !
#aptus #aptusplanttech #aptusgang #aptusfamily #aptustrueplantscience #inbalancewithnature #trueplantscience #dogdoctorofficial #growerslove
With true love comes happiness , Always believe in your self and always do things expecting nothing and with an open heart , be a giver and the universe will give back to you in ways you could not even imagine so !
Growers love to you all


Likes
Comments
Share

@GreenEldritchGardens
Follow
The plant stretched a bit and was this week in pre flower.
I had to move her to a smaller tent with a 100w led, half on what she had before but since she was a new plant, she could not get much light, now she seems happier.
She is still looking a lot like Critical, bushy.

Likes
81
Share


@Tripaholic88
Follow
ok guys so its day 42 for the FastBuds CBD strain and she is growing just great! i decided to do a video update since we are starting to begin Flower but she is still stretching. check out the Video for more info!


Likes
74
Share


@Mr_Maes
Follow
The girls are really starting to take off now. They are growing on average 1-2 inches a day. we should start to see clear preflower this week.


Likes
11
Share


@Sticky_bandit84
Follow
The strain is a easily maintained but yet very durable plant to grow from nutrient deficiency, climate to even pests. A recommended strain if you are looking for a nice smooth smoke that's a hard hitter and a lasting effect

Likes
Comments
Share

@StartGrowingShxt
Follow
Got my f2 seeds we selected the pheno that looked like it would finish fastest to pollinate. Got a couple strays but nothing crazy. Nose goes from lemon cherry ma to straight diesel fuel and a mix of two in one pheno and it’s more diesel heavy. Great grow overall
Likes
11
Share


@Barbagrows
Follow
Day 29 - Topped both ladies at the fifth node and removed any growth below. Growth exploded since transplant and first dose of nutrients.
Day 30 - Watered both ladies with around 100ml of water. They recovered from the topping and look as healthy as can be. Very happy with progress.
Day 32 - Misted both ladies.
Day 33 - Watered both ladies with around 250ml each. Increased dosage slightly from last feed to see how they take it.
Day 35 - Misted both ladies to keep them hydrated.
Maria is doing well, showing vigorous growth. Planning to top her again next week and remove any growth below the topped nodes.
Juanita has fallen behind, new growth points seem to be growing sideways. Keeping an eye on her progress, hopefully she turns out ok. Not planning to top her again until normal growth resumes, do not want to stress her out.
Likes
19
Share


@LordSpl
Follow
Stanno iniziando i primi segnali di fioritura sono molto soddisfatto delle mie bimbe.


Processing
Likes
24
Share


@MadeInGermany
Follow
Hi everyone 🤗.
They continued to develop well this week 👍.
Slowly they stop growing and put their energy into flower production.
So that this energy is not wasted, the lowest shoots on which only popcorn buds grow anyway have been removed.
Next week the new update will follow as usual, stay healthy 🙏🏻 and let it grow 🌱
You can buy this Strain at :
www.Zamnesia.com
Type:
Runtz
☝️🏼
Genetics:
Zkittlez x Gelato
👍
Vega lamp: 2 x Todogrow Led
Quantum Board 100 W
💡
Bloom Lamp : 2 x Todogrow Led
Cxb 3590 COB 3500 K 205 W
💡💡☝️🏼
Soil : Canna Bio
☝️🏼
Nutrients : Canna Bio
☝️🏼🌱
Water: Osmosis water mixed with normal water (24 hours stale that the chlorine evaporates) to 0.2 EC. Add Cal / Mag to 0.4 Ec Ph with Organic Ph - to 6.0 - 6.3

Likes
25
Share


@Redupgrower253
Follow
Continued with the ripen only this week. Going to water with it one last time that would be 10 days using the ripen.
Going to start the flush with canna flush!
The blueberry has started fading out nicely. The smell coming from these plants are amazing.
Can't wait to chop the girls down. My anxiety is going crazy wait on this girls. Been keeping my eyes on the trichomes.
Peace growmies thanks for taking the time to look at my diary. 😁🌱


Likes
38
Share


@OutForReal
Follow
Monday
It’s beginning of week 4 and they are doing pretty well. The main stems are hard and strong and it’s impossible to bend them at that point.
I am practicing a very light hand LST everyday like I am showing in the video.
Tuesday
Watering for both of them , you can follow the (simple) process in the videos. The plants are doing great except for a little issue on one of them that I will show you tomorrow.
Topping or not ? May be beneficial so I’m about to do it. Fiming maybe ?
Thursday
Topping on video ! Simple method
Likes
69
Share


@Natrona
Follow
*****DIVINE SEEDS *****
*****FRACTAL*****
SPONSORED GROW
Week 4 This week 4/28-5/4
Germination April 6.
Week 1 water only
Week 2 water only
Week 3 added recharge and TPS1 increased ppm to 570.
Week 4 continues with recharge and TPS1. I added Fox Cal mag increasing ppm to 685 - 805.
5/1 That was a fun feeding week. I got heavy handed with the TPS1 which put the ppm to 1600= so I had to dilute with more water which changed the ph. So I carefully added the smallest amount oh PHdown..then the PH was 5.08 so then added ph up. Oops too high, let’s try again. Ok finally within range with 6.02. Am I the only one??
Hopefully next week I have better control on the nutes.
With my AC controller in charge of the humidifier, I must add 3-4 gallons of water a day. (Getting my lifting exercises in regularly).
Girls are fed 2 liters of water every other day.
Nutrients: TPS1 7ml per gal
Recharge 5 ml/gal
Fox Cal-mag 5 ml/gal
Took pics /51 and 5/3 which show the vigorous leaf growth after only 2 days following defoliation and training. Divine Seeds recommends keeping its Fractal profile wider and flatter. To achieve this, I am aggressively pinning down each branch coming off the main stalk while defoliating regularly to keep the top open. Today 5/4, she is only 9inches tall but has a beautiful, mounded canopy showing multiple bud sites.
With my upcoming vacation, I am going to be hardening off these ladies to relocate to their outside location.
Until the plants are big enough to go outside, I will be using my AC Infinity tent and equipment. Once outside, I will be watering with well water and recharge and any additional fertilizers or amendments will be determined at that time.
Thank you @DivineSeeds
Thanks for the likes and comments, I appreciate all the plant love💚.
Have fun & love what you grow 💚
Sending love and light 💫
💫Natrona 💫***FRACTAL***
Rating:
Fractal is an especially psychedelic strain that Divine Seeds developed for esoteric and mystical experiences, meditation and creativity. A potent and vivid landrace variety from Southern India was crossed with a sticky leaning Indica (mostly Afghani), then Skunk #1 joined this company. Their progeny underwent multiple selection experiments, until its massive built, resin concentration and hypnotizing powers reached an ultimate level. The result is now known as Fractal – resinous, spicy and productive. Best choice for commercial growing: a compromise between bigger yields and fast ripening! A great source of hashish that has something incense-like to its musky smell.
Indoors expect 170 сm height, out of doors plants grow up to 200 сm. Fractal fits for all types of growing environment: grow boxes, hydroponic or aeroponic setups, outdoor plantations, balconies, terraces and green houses. For more weight it is recommended to train Fractal plants to broaden their structure and limit their vertical growth. For that purpose use ScroG or SoG, LST, FIM or topping, supercropping or mainlining – there are no limitations for the strain itself, but certainly low-stress methods are recommended to smaller samples. Fractal has an inherent immunity to molds and insect pests, but since its colas are thick, protect your plants from stale air. Also during rainy weeks your plantation may need to be covered. Ready for outdoor harvesting in October. Big and dense buds the color of olive, hunter green heavily coated with crystals.
Whole Fractal buds smell hashy and earthy, while cedar and fruity hints are noticeable on breaking. Measure your portion carefully: the potency is above average! With Fractal you experience an overall stoning that either keeps you put or slows your motion down, also vertigo is possible. However, in moderate dosage the impact is described as a pleasant sensation of well-being and placidity. Perfect for spending a night by a bonfire without talking, therefore is more often enjoyed as a solo smoke. Efficiently relieves muscle spasms and seizures, inflammations, combats insomnia and increases your appetite. Up to 3 hours of altered state of mind can be expected. Best consumed at night time.
Pots: 5gallon Air pots
Soil Fox Farm Happy Frog Amended with worm castings, dolomite lime and mychorihiza
👉👉Seeds provided by Divine Seeds
Divine Seeds breeding company
The link to Fractal Feminized Seeds
Fractal - Divine Seeds breeding company
The link to Fractal Auto Seeds
Auto Fractal - Divine Seeds breeding company
=================================
Equipment: AC Infinity
CLOUDLAB 844 – Advance Grow Tent 48”x48”x80”
CONTROLLER 69 PRO – Grow Tent Controller
CLOUDLINE LITE 6 - Inline Fan 6"
IONBOARD S44 – LED Grow Light Board 400W
CLOUDRAY S6 – Oscillating Circulation Clip Fan
Carbon Filter 6”
Nutrients: Total Plant Solution
TPS1
Canopy
Signal

Likes
27
Share


@Dunk_Junk
Follow
I note this strain is super frosty!!!!!!!!!!!!!!!!!!
Still weeks to go!
Likes
8
Share


@Gardens_of_Of
Follow
8th week of Flowering is over. Buds almost doubled in size except Lemon Orange. Smell is pretty heavy and frosting continues. Mimosa Evo and Runtz can not carry their buds anymore. I had to tie them up.
Trichomes almost fully milky for all ladies but waiting another week to get 20% Amber.
Target VPD is still set to 1,5 with 23 Celcius Target Temp.
Top Left: Wonder Pie (GHSC)
Top Right: Lemon Orange (GHSC)
Middle: Mimosa Evo (Barney’s - Clone)
Bottom Left: Runtz (Barney’s - Clone)
Bottom Right: Exotic Runtz (Exotic Seed)

Likes
6
Share


@Walter_the_Ragamuffin
Follow
More Big changes this week! The flowers seem to be growing and getting bigger every day - I anxiously look in my tent each morning to see the new developments and there seems to be new changes each time - very cool to smoke a bowl in the morning and go check your garden! I was able to get some pretty cool photos with my macro lens - I found the ONLY flower site and first signs of red colors on one of the lower flowers of Cherry Gorilla #3 - I was able to get some pretty sweet pics of that. If you have a smart phone or tablet, definitely check out some of the macro shots and pinch/zoom in! I did add a fan on the bottom blowing underneath the canopy, in efforts of opening up the stomata of the ladies. We are finally having our first relatively hot week up here and it has absolutely tested my environment management skills - AC, Dehumidifier, Fans, Window open and close - this silly temp VPD and humidity control dance all day will not be too much longer, very much looking forward to the lower temperatures of the fall and winter months!
When opening up the tent - you are blasted with a unfamiliar smell that can be explained as a sweet dank. I have touched some of the lower buds on each of the plants and WOW! - They are SWEET and Cherry flavor like crazy - The GMO is just as I expected - Garlic Gas Sweetness when touching her leaves - You are left with a very sticky goo on your finger that absolutely smells of its particular strain. Again - I could not be happier with the garden, and especially this being my first grow ever. Looking forward to more changes and absolutely some input from the Grow Diaries Community!
Likes
13
Share


@SaucePan
Follow
Topped and taking off... she looks healthy.. I’m excited to see where she takes me
Likes
Comments
Share


@BeggarsBelief
Follow
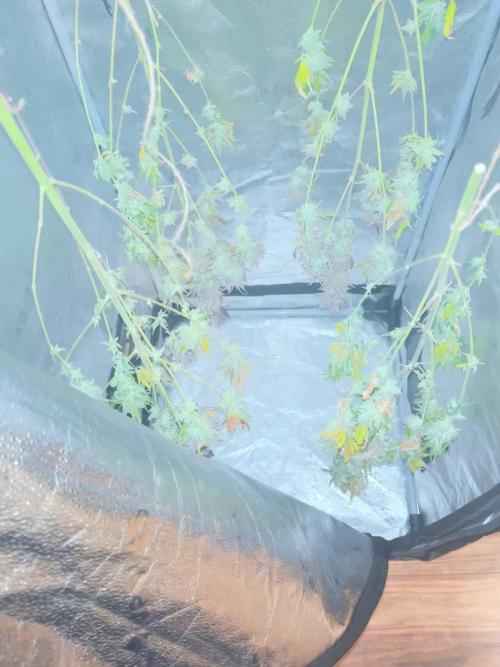
So everything took off in flower, I was super harsh with the defoliating which initially I regretted, but was surprised with how they packed out during the following weeks. In general it's impressive how hardy these plants are. Even the outdoor grows yielded some quality. Add some more nuets (overdrive and carbo load), before flushing about 14 days before harvest, next time I'll do this earlier and really the Runtz could have gone another week but my drying needs to happen in the same space as my growing for now. Apologies for the quality of image, I'm just using my phone and some bits I have to document, I collect records too, so expect weird noises lol. Build a rotating plat from a lazt susan I found, has been the best piece of kit added this season.
Likes
Comments
Share

