The Grow Awards 2026 🏆 


Likes
Comments
Share
@Foggedaboudit
Follow
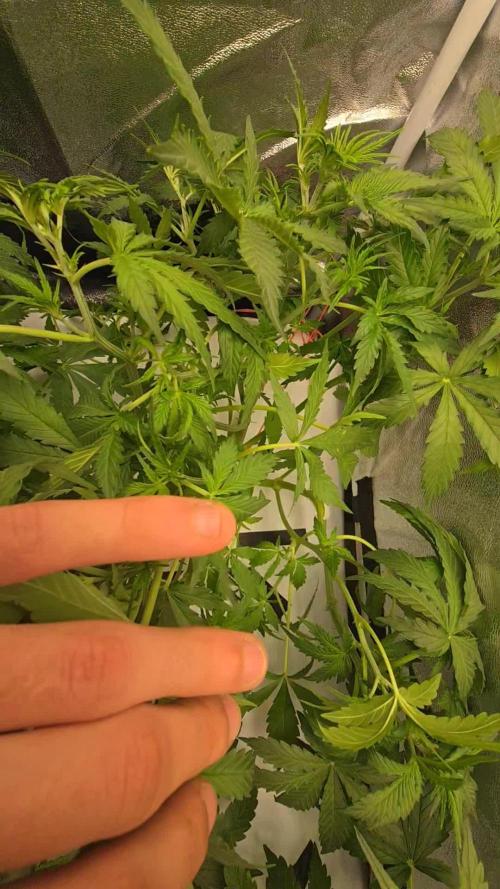
These are faster than expected. The smell is wonderful too. Pineapple and candy, the second pheno although it has less trichomes is bigger and has an added creaminess to its aroma. Truly great stuff even if they really don’t match the NTF description. Added some PK supplement too. Should be another week or two for these.

Likes
17
Share
@Italian_Cannabis_Top_Strain
Follow
E' DAVVERO INCREDIBILE!!! COME IO ABBIA AVUTO TALENTO PUR ESSENDO ALLE PRIME ARMI.... QUASI MEZZO CHILO .. IMPRESSIONANTE ANCORA NON CI VOGLIO CREDERE!!! TUTTO QUESTO GRAZIE ALLA MIA PASSIONE... E COSTANZA ... HO ADOTTATO IL TOPPING DALLA TERZA SETTIMANA E DA LI GIA HO NOTATO CHE IL RACCOLTO E LA PRODUZIONE AUMENTAVA... DOPODICHÉ HO ADOTTATO UMA MIA TECNICA SIMILE AL LST E ALLO SCROG.... PRATICAMENTE HO PIEGATO IN GIU TUTTI I RAMI UNO PER UNO CON DEI FILI COME LO SCROG MA SENZA RETE...A MANO ..CON DEI FILI.. COSI CHE LE CIME AVREBBERO POTUTO PRENDERE LUCE IN TUTTI GLI ANGOLI POSSIBILI E COSÌ È STATO SIGNORI E SIGNORE DA LÌ HO NOTATO CHE IL RACCOLTO TRIPLICAVA!! NON HO DAVVERO PAROLE SONO ULTRA SODDISFATTO VEDREMO IL PESO DA ASCIUTTE ASCIUTTE
Likes
18
Share
@Growbody
Follow
Hallo und herzlich willkommen zu meinem Growbericht Outdoor 2025 mit den Sorten Power Flower Feminized, Royal Medic Feminized und Special Kush #1 Feminized, alle 3 von Royal Queen Seeds. Es ist das erste Mal, das ich Töpfe für den Outdoor grow verwende, bisher waren alle Gorilla grows und direkt in die Erde gepflanzt.
Die URL der Power Flower Feminized: https://www.royalqueenseeds.de/feminisierte-hanfsamen/120-power-flower.html
Die URL der Royal Medic Feminized: https://www.royalqueenseeds.de/cbd-samen/148-royal-medic.html
Die URL der Special Kush #1 Feminized: https://www.royalqueenseeds.de/feminisierte-hanfsamen/138-special-kush-1.html
Die Planung für den Grow ist, die Samen in easyplug Anzuchtwürfeln keimen zu lassen und danach in 0,6L und 2,2L Plastiktöpfen, dann letztlich in die neuen komplett doppellagigen ROOTIES 15 Liter Wide Version Stofftöpfe umzutopfen. Sobald die Witterung es zuläßt, sollen die Pflanzen an die frische Luft.
Es ist schon eine Weile her, das der Grow losging, die Bilder sind jetzt aktuell.
Tag 155: Endlich wieder 30°C und strahlender Sonnenschein bei leichtem Wind. Die drei Großen sind hinten am Zaun befestigt, so viel Coctailsauce kann ich gar nicht in die Töpfe füllen damit die bei stärkerem Wind stehen bleiben. Die Power Flower fem. ist jetzt 2 Meter hoch, die Special Kush #1 fem. misst 190cm und die Royal Medic fem. 155 cm. Alle haben mehrere Hauptstämme bekommen und sind sehr buschig.
Tag 159: Bei den Temperaturen brauchen die Mädels 3x am Tag Ihren Cocktail. Mal sehen, ob ich die Töpfe etwas beschatten kann.
Wenn's dir gefallen hat, schau wieder vorbei ✌️😎
Likes
7
Share
@Elguacho420
Follow
Buenas a tod@s... Décima semana de floración de estás runtz x layer cake, décima y última semana, ya pueden despedirse, la semana q viene ya entran a poda, está semana un buen lavado de raíces un poco de defoliación y listo, la planta tiene cogollos compactos y pesados, buen aroma, bastante recina... A mí me gustan, aún q no tengan buen aspecto, no juzguemos las apariencias 😉 tiene muy buena pinta, contento con el resultado pero a seguir mejorando... Buenos humos para tod@s 💨💨💨😎⚕️
🇦🇷🤝🏻🇪🇦


Likes
11
Share
@Nookandplant42o
Follow
sorry for this week of delay, I didn't have internet modem broke in the week of the photos, but we're back and moving on with this beautiful girl, increasingly fat and fragrant something like high color cake and very compact buttons as usual at Hydro I look forward to this coming soon!😉

Processing
Likes
10
Share
@levensfiets
Follow
Starting to feel like autopilot. Running into some minor problems this week in terms of feeding.
Plant #3 had a runoff PPM of around 4000. Immediately decided to fllush her, but because of the medium's waterholding - the earth feels really heavy, even multiple days afterwards. She will be enjoying a two week flush and will then be chopped.

Likes
4
Share
@SamDo
Follow
Hey growers, welcome back!
This week marks week fourteen of the Pineapple Upside Down grow, and things are looking really good inside the tent.
It’s been a smooth, steady week — no drama, no surprises, just solid, consistent growth.
The plant has fully bounced back from the previous weeks and is showing great vitality.
The new apexes have stretched out beautifully, filling the canopy in a balanced way.
Every leaf looks healthy, rich in color, and there’s not a single sign of deficiency or stress.
Environmental conditions have stayed right on target — temperature and humidity are stable, keeping the VPD in the sweet spot. The setup’s running quietly and efficiently, and it feels like the system has found its perfect rhythm.
It’s been one of those weeks where you don’t really have to do much — just keep an eye on the parameters, enjoy how she’s developing, and let nature do the work. Watching her push out new growth every day is honestly the best part of the process.
So yeah, a calm and satisfying week overall. The Pineapple Upside Down is thriving, and we’re right on track for the next stage.
That’s it for this week’s update, growers. Thanks for following along — see you next week for a new chapter in the grow.
Until then, peace and happy growing!

Likes
11
Share
@Bread_n_Buds
Follow
Our #3 or rather this new creation by Seeds Mafia that we are growing with love is starting to get serious.
autoflowering like this. She's a bit floppy and not in good shape but we hope she recovers
We have started with fertilizers for growth which we give in reduced doses together with the rooting agent for the entire vegetative phase.
Music of the week provided by Radio Nula from Slovenia.
https://radionula.com/
Thanks to friends of Seeds Mafia try this and their other creations
seeds > https://seedsmafia.com/en/
Light and tent > https://marshydro.eu/products/marshydro-sp3000-led/?lang=it
Likes
198
Share
@DevilsBud
Follow
Marshydro supported grow
Spliff Seeds
CBD Spliff Berry/Afghani Gold
Anesia Seeds
Hyper Glue/IMPERIUM X/Captain Future/Blackberry Moonrocks
All strains except imperium x/blackberry moonrock are topped and the main got LST clip on i snapped a Branch off one of the hyper glue by being to Hasty the other ones where no problem good week for the 9 plants
A update of using the new marshydro set-up
The FC-4800 is a absolute beauty of a beast the change from growing under a marshydro TS-1000 to a FC-4800 is night and day nothing bad about the TS-1000 it deliver me a great first run with 4 plants absolutely amazing lamp to start with no doubt . But since i am growing 9 now and soon maybe 12 the FC-4800 will for fill that task with no problem what so ever 💪🏻👌🏻 Marshydro gets your bud's frosty and reaching for the ✨
Also the new 120X120X200 tent
Is of class of it's own bin growing in a 100x100x180 tent and has worked fine and will stil be used for plants that are en early grow stages together with the TS-1000 . The 120x120x200 makes everything much easier for me and my back 🤣 the 2 side holes now where I can reach the back for my grow 🤘🏻🤘🏻
Also the space i have now is great for the amount of plants i will be growing i am loving it
visit www.marshydro.eu
for your best gear and use the PROMO CODE: DEVILSBUD
Some info about the Marshydro FC-4800
Superb Quality LED Chips: The whole light is composed of 1206 pcs Samsung lm301b and Osram 660nm chips. More than two times as many LEDs are used to drive the grow lights at low currents and to avoid overdrive. Quality is guaranteed and efficiency is up to 2.8 μmol/j.
Even PAR Distribution and High PPFD Output: The multi-light bar design and the densely distributed light chips enable the LED grow lights to achieve the optimum PPFD required for plant growth over the entire effective coverage area.
Specifically Designed Spectrum: To ensure even plant growth, blue and red light are enhanced on the basis of a full spectrum combination. Not only does this accelerate plant growth, but it also improves the yield and quality of the plants at the same time.
Dimming Daisy Chain Function: The dimming function saves on electricity costs and enables brightness from 10% to 100% for the different stages of plant growth. A single master light can connect up to 30 lights in a daisy-chain system.
Business LED Grow Light: The light's wavy heat sink dissipates heat quickly and the IP65 waterproof allows the light to operate in humid conditions. 180° collapsible feature for easier installation. All these features provide favorable assistance for commercial cultivation.
And some tent info
●【Lock All Light Insid】MARS HYDRO Grow Tent Interior is made of diamond mylar. Non-toxic to the environment, no harm to plants. High-quality 1680D canvas being double stitched, (ALL OTHERS BRAND grow tent is 601D canvas) which is tear-proof for perfect light locking, No light leaks or rips at all.
●【Durability Grow Tent】Stable Metal corner adapters and poles are the trustful supporters of the tent. No rusting nor paint-falling. Quick easy tool-free installation. Carries strong heavy-duty SBS zippers, double layer lining to create a light-proof seal.
●【Easy Observation of your Plants】Special peeks window made by double layers of cloths. Observe the growing conditions of your plants without opening the tent and avoid disturbing plants. The peek window also serves to dissipate heat and ventilate air.
●【Removable Tray Keep Clean】The package includes a removable waterproof floor tray to hold soil and fallen leaves. The tray can be taken out easily to wash. Removable and water-proof makes cleaning easy.
●【Good Ventilation&Fast Assembly】 Circular double-sleeved vent holes with adjustable nylon strap for air circulation by exhaust fan, ducting, carbon filter, or reflector. Better allows proper light, heat, and airflow. Quick tool-free installation. Reinforced by a sturdy metal frame to ensure security and stability, supports up to 140lb. Perfectly safeguard your plants to thrive even in winter


Likes
20
Share
@eldruida_lamota
Follow
Vamos familia que ya actualizamos la cosecha de estas lava Cake de Zamnesia .
Y es que me han sorprendido para bien , vaya flores que se han marcado repletas de tricomas y las flores se marcan aromas dulces
Temperaturas máximas en 28 y mínimas en 25 y una humedad estable en torno al 36%.
Os comento que tengo un descuento y para que compréis en la web de Zamnesia de un 20%, el código es ZAMMIGD2023
The discount 20% and the code is ZAMMIGD2023
https://www.zamnesia.com/
Agrobeta:
https://www.agrobeta.com/agrobetatiendaonline/36-abonos-canamo
Mars hydro:
Code discount: EL420
https://www.mars-hydro.com/
Espero que lo disfrutéis, buenos humos 💨💨💨
Likes
Comments
Share

Likes
128
Share
@PapaNugs
Follow
Girls got topped this week. I decided to only top once due to the herming last time. But they are growing well after the transplant last week. I'm happy with the growth and we'll look to flip in about three weeks. That'll put trim time around Christmas which I have off.
Likes
24
Share
@1_Plant_Wonder
Follow
Day 63 from seed, about 5 weeks into flower 🌹✌️🏽🌱
Plant has finally stopped growing vertically, stopped at 57 cm,
Considering the topping and LST, that's pretty high i would say.
Had to do another huge defoliation and cutting down all immature branches and popcorn buds.
Also started to add Atami bloombastic (pk14-15) for the second stage of flower.
All in all everything is going smoothly now, buds getting bigger in size, although still fluffy.
Hopefully they'll get danser in the next week or so🤞🏽
Until next week ppl 😎✌️🏽💚

Likes
10
Share

Processing
Likes
10
Share
@Cocogrow1234
Follow
Week 6 flower : I stopped the pk half way through week 6 so it had a total of 10 days feed with pk13/14 I also cut out the silicone and calmag on the same day .
I defoliated a little as there was a lot bud sites covered . I am going to start the flush in 3 days which will be
. .6 1/2 weeks into flower , going to give them 2 weeks flush with plain water .
Still have a bit of leaf curl from the light being so close I did move it but because the canopy is not so even it’s hard to get it right .

Likes
11
Share
@India_Calcoen
Follow
02-02-2026
Burger Kush Early Version stretched a lot during last week! She is a tall girl now with big white, fluffy, hairy pistills.
Likes
18
Share
@BufoAlvarez
Follow
7/19 I’ve come upon the realize that I had been under watering to an extreme degree. I have since adjusted accordingly today and hope they look better tomorrow.
Did remove some leaves and then found out I really shouldn’t have, hopefully I didn’t stunt them.i believe they are now flowering and next watering I will be adding some tiger bloom at very low strength. the newts I’ve given them have shown tip nute burn often and I have been very minimally watering so my conclusion is my soil was so full of nutes I could have waited until now most likely to start my first feedings. I’ve read about this and w ocean forest this seems to be the trend. Still really happy about the progress. Peace

Likes
6
Share
@Roller
Follow
Semi Jealousy-Zamnesia, messi ieri nel bicchiere, si aspetta che germini, intanto sto preparando il box e la lampada, per quando saranno pronti per la vegetazione
Likes
9
Share
@Lazuli
Follow
She starts to drink a lot now , final week stretch then she goes full flower

Likes
9
Share
@GrowPassionItalyChris
Follow
Non riesco più ad aggiornare il diario come sempre comunque è stata una settimana bellissima! Ogni varietà sta completando le fioritura in maniera abbondante. Infiorescenze dure e molto resinose si formano in ogni parte delle piante. Sembrano tutte XXL di dimensioni! Molto profumate ogni varietà ha il suo raffinato aroma, non manca molto alla fase finale della fioritura. Sono felice di ogni varietà, complimenti a chi le ha create! Un abbraccio a tutti

