
Likes
Comments
Share


@SecretTreasures
Follow
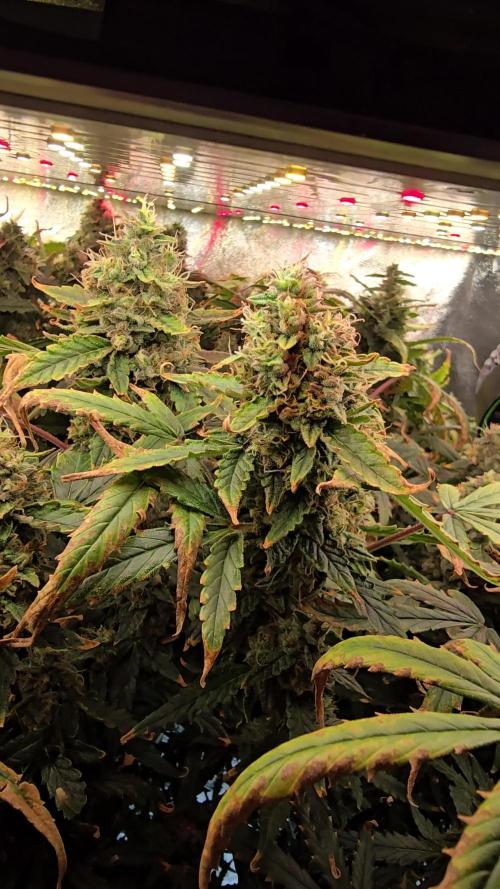
The ninth week of flowering is now over and the last days of the ladies have begun. The stated 9-10 weeks flowering time is definitely correct. One plant of the Hardcore Zoap was ready a little earlier, but as I want to harvest everything at once, everything is left standing until the majority looks ready. I also preferred to harvest the plants a little more mature than too early. In terms of appearance, I like the Miracle Gushers flowers best, as they have a fine and compact structure. The Banana Creamz seem to be able to develop very thick flowers, whereas the Hardcore Zoap seems to have the lowest yield. I will be able to say more after drying and weighing.


Likes
5
Share

@lasonda
Follow
We're almost ready to harvest. I delayed the process a bit because the trichomes weren't as ripe as I'd hoped. After flushing, I watered only with pure water, and the ppm is now 538. I plan to harvest soon, but I'll wait a few more days so the soil is thoroughly dry. 😍😍💪💪😎


Likes
42
Share


@GanjaReaper
Follow
End of week 22:
Overal it was a good run with the Shamans from @DutchPassion_Official . Didn't had mayor problems besides having to harvest them earlyer. I really wanted to flower them another 2 weeks but the weather/climate didn't allow me to.
Still the buds came out decent as you can see for an early harvest.
I will cure those buds for some time in my pots before they get smoked and will update how much weight I got out of the two plants.
As you can see I made the bigger buds smaller. There is no use for me to keep big buds for showing off. Big buds just have big long stems in it, harder to dry and to fill your cure pots with.


Processing
Likes
23
Share


@eldruida_lamota
Follow
Como estamos familia, a día de hoy, viernes, llevamos exactamente 7 días en la fase de floración y todas ellas están marcadas por su sexo.
Todo va sobre ruedas, tenemos mínimas de 20,5 y maximas de 28,5 grados. la humedad no supera nunca el 60%.
Altura mínima lemon kush 25cm.
Altura maxima northern light xl 42cm.
•las power plant xl Han pegado un estirón serio, están empezando a ensanchar bastante.
•una marea verde desde semilla, con tan solo 5 semanas de crecimiento y un solo trasplante desde que se germinó, para controlar un mal crecimiento.

Likes
11
Share


@DreamIT
Follow
Sponsored by:
🦎THE HIGH CHAMELEON🦎-💡VIPARSPECTRA💡-💐GREEN BUZZ LIQUIDS💐-🛠️WEDRYER🛠️
🏁 10/8 New sponsor at DreamIT. I am delighted to warmly welcome The High Chameleon to my journals and growboxes. The shipping was fast and the package was anonymous. Instead of the usual plastic to keep the seeds in place, I found a nice bag of chopped hemp, a smart and ecological choice. In addition, a very practical grass holder with attached grinder, really practical and comfortable. I will open a diary for each seed that I will try to grow with different types of training techniques, I will decide which ones along the way. let's begin !!
12/8 about 48 hours after sowing here it is sprouting from the jiffy. I gave a little help by removing the seed
18/8 everyone is doing well, 2 out of 3 have been born of this variety which is still fine. yeah!
__________________________________________
Personal advertising (contains affiliate links)
__________________________________________
🦄 Check out The High Chamaleon website, their first selection criterion is the strong signature of terpenes by taking rare strains while being 100% organic and respecting nature. Safe anonymous shipping!
✅ https://bit.ly/TheHighChameleon
__________________________________________
Did you know that Green Buzz Liquids fertilizers are 100% vegan? A complete line of products ready to give the best to each of your plants! Visit the site and see my journals to see how they work 🦄
🤯 And with the code "dreamit" you will immediately receive a 15% discount on your purchases
✅https: //bit.ly/GreenBuzzLiquidsPro
__________________________________________
👀 Are you looking for a good lamp to start with? 👀
🌞Viparspectra has something more than the others, take a look at their site.
⏩ Use "GDVIP" for an extra discount or "DREAMIT3" for an extra 5 %% discount
👀 Search for it on Amazon
✅Amazon USA: https://amzn.to/30xSTVq
✅Amazon Canada: https://amzn.to/38udUVe
✅Viparspectra UE: bit.ly/ViparspectraUE
✅Viparspectra USA: bit.ly/ViparspectraUS
______________________________________________
🌈 Tired of blowing on your weed hoping it dries quickly? Check out the Wedryer website! You will find a well-made accessory that will help your weed dry in just 8-10 days without the annoying risk of finding mold or other annoyances! (no affiliate links)
✅https: //bit.ly/Wedryer_
______________________________________________
📷🥇Follow the best photos on Instagram 🥇📷
https://www.instagram.com/dreamit420/
Backup
https://www.instagram.com/dreamit4200/
🔻🔻Leave a comment with your opinion if you pass by here🔻🔻
🤟🦄💚 Thank you and good growth 💚🦄🤟

Processing
Likes
4
Share


Likes
5
Share


@Tacofever88
Follow
My first outdoor grow.
This is around week 9 of growth. I got these 2 clones from someone and grew them indoors for about a month or so before hardening them off.
They have been through plenty of training and topping and even more since this picture. As of 5 days ago they were nice and wide so I'm excited to see the growth since the.
I have done a great deal to keep deer and bugs at bay. Neem oil, dog and human urine, dried blood, ground pepper and powdered, oregano, garlic and onion. The site is very difficult to access. Poison ivy, thorns, steep ravine and large logs to climb over. No paths there and I take different ways constantly, as well as through some fertilizer in my wake.
There's a small creek near by and a larger one it fees into about 75 yards away.
There's 3 bags of FFOF and 1 bag happy frog between the 2 holes, with amino acids and great white mixed in as well as some water polymer crystals.
Likes
307
Share


@Ju_Bps
Follow
Hello growmies 👩🌾👨🌾🌲🌲,
👋 Stretch continues, hedgehogs coming along 🦔🦔
Weather start to be better with up temperatures.
💪 Just let Grow for the moment, try to kick off Fan leaves
💧 Give water each 2/3 day
2 l Water + Roots + Bloom + Zym + Sugar Royal (1 + 3 + 1 + 1 ml/l)
2 l Water + Roots + Bloom + Zym + Sugar Royal (1 + 3 + 1 + 1 ml/l)
PH @6
💡Mars Hydro - FC 3000
50% 35 cm.
Mars Hydro Fan kit
Setting 7
Have a good week and see you next week 👋
Thanks community for follow, likes, comments, always a pleasure 👩🌾👨🌾❤️🌲
Mars Hydro - Smart FC3000 300W Samsung LM301B LED Grow Light💡💡
https://www.mars-hydro.com/fc-3000-samsung-lm301b-led-grow-light
Mars Hydro - 6 Inch Inline Fan And Carbon Filter Combo With Thermostat Controller 💨💨
https://www.mars-hydro.com/6-inch-inline-duct-fan-and-carbon-filter-combo-with-thermostat-controller
Anesia Seeds - High Mars 36% THC🌲🌲
https://anesiaseeds.com/product/high-mars/

Processing
Likes
19
Share


@Targona
Follow
The girl is getting bigger and stronger, she grows beautifully, the branches have grown all over the box. Like her sisters, I will give her PH Down from Jungle Indabox next week - the nutrients I use will be given to this girl as a precaution so that the PH does not increase. Keep it up 😍

Likes
Comments
Share


@ykscotttyk25
Follow
A new version of the classic. The old classic strain now improved and in auto version!
Just like the name suggests. Expect up to 500gr/m2 of super big buds.
Ideal for beginners. Top-quality buds without much maintenance or extra effort.
Indica-dominant hybrid. A relaxing high that comes hand-in-hand with a pleasant head buzz.

Likes
19
Share


@CanabisLoverHobbyGrower
Follow
Looks amazing, smells amazing, again can not wait to taste 👌
Likes
9
Share


@Ieiogrow94
Follow
Eccoci di nuovo qui!!!
Super eccitato per questa nuova collab con Anesia Seeds, team davvero al top, che mi ha dato l’opportunità di testare questa nuova genetica e di condividere i progressi con tutti voi!!!
Una genetica molto interessante che unisce le cime compatte a dei sapori unici davvero consigliata a tutti..
Ho trovato molto interessante anche lo sfogo di colore violaceo che hanno avuto nella fase finale della fiioritura e che le hanno rese molto più intriganti, emanano un forte odore fruttato..
Grazie a tutti per il supporto ❤️🍀🔥
Likes
10
Share


@HegauHillsFarmers_M11
Follow
Tag 35 - Ende der 5. Woche.
In dieser Woche an Tag 33 habe ich die Pflanze etwas entlaubt. Dabei habe ich die untersten Triebe entfernt und zusätzlich alle weiteren Blätter die im unteren Bereich nur im Schatten standen entfernt um die Luftzirkulation zu verbessern und die Belichtung zu erhöhen. Die Pflanze ist voll im Stretch und hat diese Woche nochmal ordentlich an Höhe dazu gewonnen.
Die Blüten entwickelt sich gut und wachsen.
An Tag 29 wurde die Pflanze gedüngt.
Nährstofflösung:
2 ml/l - Voodoo Juice Advanced Nutrients.
4 ml/l - pH Perfect Sensi Bloom Part A
4 ml/l - pH Perfect Sensi Bloom Part B
2 ml/l - Bud Candy Advanced Nutrients.
Davon hat die Pflanze 500ml an Tag 29 erhalten.

Likes
2
Share


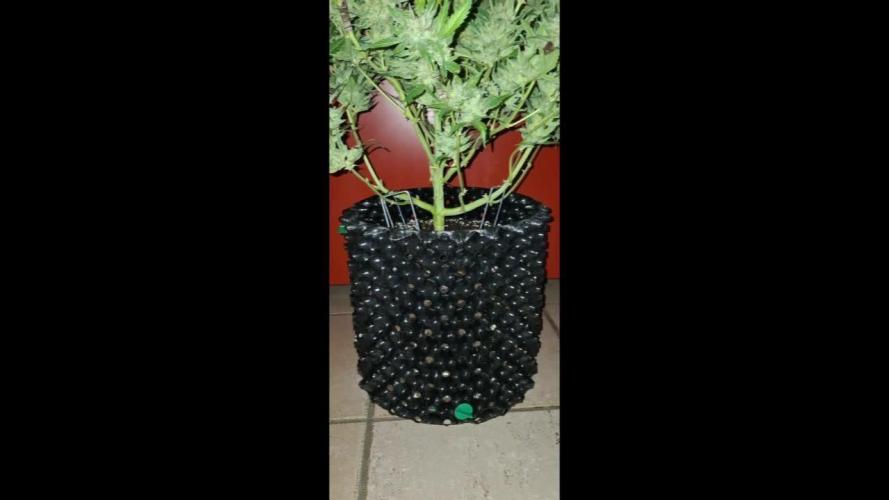
@ao_grows1978
Follow
Week 3 for the solo is officially complete. She's been growing with no trouble. Root development has been excellent. As you can see, I decided to mainline. Seeing as she's in a solo cup, I'm not too worried about stunting. I'm horrible at measuring the water intake, but the cup needs to be watered daily. It's as lite as a feather everyday.

