The Grow Awards 2026 🏆 


Likes
Comments
Share
@Smoking_Joe_Frazier
Follow
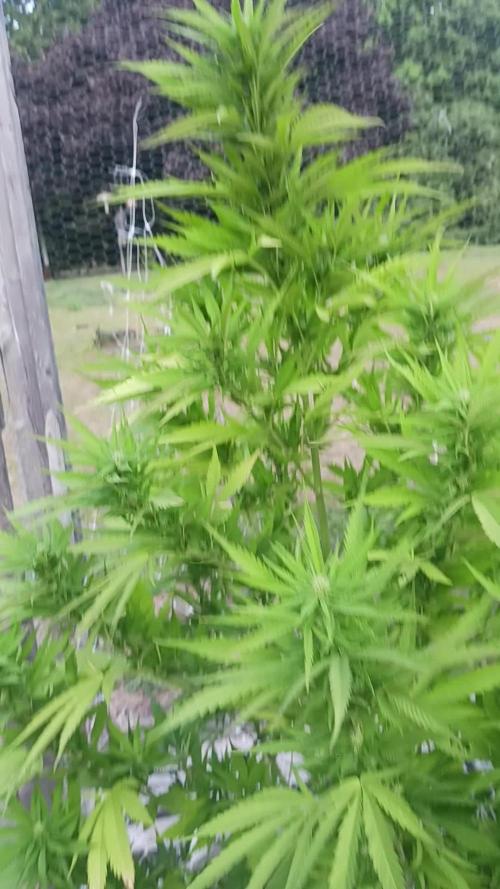
Week 4: Growth Spurts and New Challenges
Continued Growth and Health
As we move into the fourth week, the plants are showing impressive growth. Their leaves are a lush, vibrant green, and the stems are becoming stronger. The transition to the larger 11-liter fabric pots has clearly paid off, providing the roots with ample space and better aeration.
Adjusting Nutrient Levels
Given their positive response to the nutrients, I decided to continue with 2/3 of Terra Aquatica Tripart feeding schedule, adjusting slightly to meet their increasing demands. Here's the updated feeding plan for this week:
CalMag: 2.5 ml/l (Starting EC before adding nutrients: 0.50 mS/cm)
Grow: 1.5 ml/l
Bloom: 1.0 ml/l
Micro: 0.5 ml/l
EC: 1.2 mS/cm (600 ppm PPM-500/TDS)
pH: 6.0
Each plant is watered with approximately 20% runoff to ensure there's no nutrient buildup in the coco mix. I will maintain this nutrient level until the pre-flowering stage to avoid the risk of nutrient burn due to over-fertilization.
Weather Improvements and Adjustments
The weather has been steadily improving, with temperatures expected to rise to around 25°C starting Wednesday, accompanied by abundant sunshine. This upcoming forecast is excellent news for my plants, as I anticipate a final growth spurt before flowering begins. Every centimeter of growth counts at this stage, and I'm optimistic about maximizing their potential under these favorable conditions.
Strengthening with Wind Exposure
On days with good weather, I move the plants out of the greenhouse to expose them to natural wind. This practice helps strengthen their stems, improving overall stability. Additionally, the wind creates a more challenging environment for pests, helping to keep them at bay.
Smart Watering Strategy
I only water the plants when the pots feel noticeably lighter. This encourages the roots to search for water, promoting the development of a stronger and more extensive root system. This method helps ensure the plants remain healthy and resilient.
Pest Management: Observations and Actions
At the beginning of the third week, I noticed dark discolorations on the undersides of some leaves. A few days later, these spots turned into yellow patches. I am still unsure about the cause of these spots. To prevent a potential insect infestation, I sprayed all the leaf surfaces, both top and bottom, with a mildly dosed neem oil mixture. Since then, the spots have not spread further.
Because these discolorations are only affecting the lower leaves, they are not causing me significant concern at the moment. Regular inspections and preventive measures are crucial to maintaining the health of the plants and ensuring that any issues are caught early.
Decision Against LST
At first I have decided against using LST. But some of your comments made me try some LST on two of my plants. I choose Tangie and Gorilla cookies to try out and learn some stuff. Blue dream and Banana purple punch stay without any training. Thanks guys for your advice 👍
Monitoring and Care
My daily routine involves checking the plants every morning and evening. This includes:
Monitoring the moisture level of the coco mix.
Inspecting the plants for any signs of pests or nutrient deficiencies.
Growth Observations
The plants are responding well to the controlled environment and balanced nutrition. They are growing rapidly, with new leaves appearing almost daily. The stems are thickening, and the overall structure of the plants is robust and healthy.
Looking Ahead
As we head into week 4, I am optimistic about the continued growth and health of my plants. The combination of a stable environment, appropriate nutrient levels, and diligent care is proving successful. I’m excited to see how they progress and adapt as they move closer to the flowering stage.
Seeking Feedback and Tips
Your feedback and tips are valuable to me! If you have any suggestions on how I can improve my growing techniques or insights based on your own experiences, please feel free to share them in the comments below. Let's grow together!

Processing
Likes
15
Share
@HisHope
Follow
9/22
Week 10 update... finally
Looks good but going to add more Phos due to some red stems showing upping to 3ml/g
These pics caused my husband to do a serious defoliation, 😏
Changed nuets to lower Bloom 10% increase PK by adding Peak need to use it up.
9/23
Vid up
9/24
After looking at things this morning have decided to start moving the FFT9 and FFT11 to flush.
Begin slowly cutting Bloom nuets tomorrow for those two strains so we can start flush at week's end.
9/25
Feed is changing as we move them into flush.
Lower Bloom A/B to 5/5 raised Koolbloom to 5ml Peak to 5ml
9/26
Like things where they are for now hold here till flush
Vid/Pic

Likes
6
Share
@Mr_nugs_lover_David
Follow
I have topped one of the 5 phenos because this plants looks like they had a few more days of growth before flowering and wanted to get more colas, they are developing awesome one pheno ended up too small but it will definitely give something, let's see how this beautiful ladies keep developing

Likes
8
Share
@DWCpaqy
Follow
New week! Tips and help from last week, I had around 1500 ppm and I did flush my roots in water and change everything. Now is around 1000 ppm and dropping 150 ppm a day.
Did read about water level in DWC and how to increase the grow with water. I had the water almost up to the root or the level of there the basket is. Now I have 1-2 inch (2-5 cm) below where the roots come out. This create air roots. I'm not sure if it's the air roots or the ppm but my flower is boosting. Can se buds grow!!
Trimming so I can keep the same hight.
Have any tips or rekomandation?
Only have one question for next week and this is: it's looking a bit thigth between the buds and all of the leaf is cristal on it. Should I cut some more leaf? And what leaf should I trim? Is so thigth in there. Or will it grow fine?

Likes
16
Share


Likes
42
Share
@Canna96
Follow
This week went very well, I did some minor LST, and some light defoliation. I believe I have a nice base built for her, now I am just hoping she grows a little bit before flower. She is starting to show some tiny white hairs, but I think I have another week of growth left.
Thanks for checking me out and blaze on.
Processing
Likes
20
Share
@Mr_nugs_lover_David
Follow
She looks very healthy and super super big,I did not expect such a big stretch in her first 2ndbweek of flower,she's such a big bushy girl,can't wait to see her in full flower 😍 💚. Love what I do man.

Likes
2
Share
@taisoncreamcaramel
Follow
Blüten werden immer dichter ....
Tag 66 : Planung : Wetter mit viel Sonne nächste Woche .... Nochmals knapp 2 Wochen düngen, dann spülen ... wahrscheinliche Ernte Woche 14 !

Likes
11
Share
@Professor_Daank
Follow
SPREADSHEET: Jack's vs. Advanced:
https://docs.google.com/spreadsheets/d/1HtHnZOxMHtBK5DFQjpBun2lbhDxYVhI7lJaq4W6xbyk/edit?usp=sharing
10/5 - Day 44: Things are good. Trellis netting is working and I'm spreading the canopy pretty well. We'll see what happens! I would recommended against the actual net I purchased, this shit is bulky, big and too stretchy.

Likes
29
Share
@Reaper
Follow
All details will be added every day/week if u have any questions feel free to ask.
December 4th:starting in the winter, veg and bloom will happen under 400watt hps to keep the grow room warm. the seeds have been germinating for 2 days with the wet paper towel technique, they got root and are now in soil and the rockwool cube.
for now im just waiting for the seeds to show root coming out of the rockwool, then i transplant to the netpot with clay pellets straight in the dwc, untill then they get fluorescent light (max 7 days)
these are autoflowers so they get 18 or 20 hours light.
nutrients General hydroponics
three part :micro gro bloom
and calmag
water: rainwater (25ppm)
i hope the room wont cool of too much when the lights go out.
Day 1 (December 5)
seeds start to come above the rockwool and the soil
Day 2 (december 6)
stems start to stretch i give them both pure rain water with 100ppm calmag when they feel dry.
Day 4 (december 8)
still no root visible out of the rockwool
Day 5 (december 9)
root visible outside of rockwool cube and transplant to the 55Liter rdwc
air pumps 10l/minute
Day 7 (december 11)
root comes trough netpot, i lowered the water by removing 3Liters
Likes
30
Share
@TightNugs
Follow
Plant 2 harvest.
No weights,will post next week with smoke report.
Stunning plant,she went 7 days longer than plant 1 and the buds are rock hard compared and smells like ribeana 😋loveliness.
Last few straggler plants to finish before just using Garden of Green and Expert seed genetics 😉.
Happy growing 🤞🏴🍁
🍁🍁🍁
Light-Voost VST 120 veg
🍁🍁🍁
Voost VST 240 flowering
https://voost.com/
Code- TightNugs
🍁🍁🍁
Breeder-White label purple bud auto.

Likes
15
Share
@masterofsmeagol
Follow
8/3 Went over to treat the 10th planet that needed water with plant doctor around 10:30. I was in the garden at 6 but didn't have much time. That plant seems to be curled up or "droopy". It DID need water. I defoliated a few sep leaves off it but I didn't see any today. I guess I don't ever really see the leaves "up" or praying like I do with the rest of tge plants. It's starting to flower like the rest though. Today is the day everything is supposed to get its second or third plant doctor dose but I decided to wait until they need the water. I don't think 24hrs will mean much. I've been staying on top of defoliation but I'm seeing some pillar damage. I'd like to spray bt but what my buddy said about spraying with septoria is still in my head. Maybe I can use citric acid. That way it won't "wash away" spores it will just eat them. At least I think. And I hope lol. Birds get most of the pillars but I hand pick some too. I need to pick up nutes. Wondering if I should just get grow big again. I don't use much but plants are switching to flower and leaves are fading. I have big bloom and kool bloom bit neither have nitrogen. I still need some sort of nitrogen. Especially since that could be a deficiency. Not sure if it's the transition or a condition with the sep. I see some interior small leaves bleeding out and some dying. I'm wondering if what I thought was earwig damage years prior was really a combo of sep and they just ate the evidence. I'm super grateful though. I've got some resilient girls and they're doing well. The special kush in flower is gorgeous as well. Looks like I'll have an early plant. Short flowering time on this strain. Smells pungent.
8/4 Treated everything in the garden with plant doctor except the 10th planet I got yesterday. I need to take a closer look at that plant. It rarely looks "happy" like my others. I'll check it again later. 3tsp per gallon and 1gal a plant. The 10s got a half gallon. This seems to be working great. I have some defoliation to do on the tenth planet I was talking about earlier. Everything is in some form of flower. The flowers on that early special kush are getting bigger. I'll update this later.
UPDATE: WENT BACK OVER AT NOON TO TAKE A LOOK AT THAT OTHER 10TH PLANET TO SEE IF IT PICKED UP AT ALL. IT DID. IM GLAD I CAME OVER TO CHECK THOUGH. MAKES ME FEEL BETTER. THE OTHER 10TH PLANET LOOKS HORRIBLE O. FILM FROM ONE ANGLE LOL BUT ITS REALLY A GREAT LOOKING PLANT AND IM USUALLY FILMING AT LIKE 6AM. JIST WANTED TO STICK UP FORCMY GIRL AND HER BAD HAIR DAY. ITS BEEN HIT AND A FEW OF HER LEAVES ARE TACOED. SHE GOT HER FIRST "PREVENTATIVE" DOSE OF PLANT DOCTOR WHICH WAS HALF A TSP/GALLON. IT REALLY SEEMS TO BE DOING SUBSTANTIALLY BETTER. EVERYTHING IS. IM HAVING TO LOOK HARDER AND AM HAVING TROUBLE FINDING LEAVES EFFECTED BY SEPTORIA. KNOCK ON WOOD. IM EXCITED. THIS IS GOING BETTER THAN I THOUGHT. IM STILL GOING TO BE MONITERING LIKE I USUALLY DO.
8/5 Watered the 10th planet I dodnt get yesterday. Looked and didn't see any sep leaves. Phone was dead so I vouldnt do a video. Went back over at like 130pm and did a quick video and checked out the girls. Everything is looking good and transitioning well. I WANT to use a diy Dr. Zymes with citric acid as I've noticed a few pillars. Only reason I've hesitated is because my buddy said not to spray it. But if what I spray it with "eats" it I would think it's ok. But what do I know. Birds get a great deal of them. I watch them on the camera sit on the cage and wait for one to stick it's head up before snatching it up. Still need to get either more grow big or a bloom product with nitrogen. I was able to defoliate that other 10th planet of anything suspect. It's hard work but it's worth it in the end.
8/6 It's like 81 at 4pm. I didn't have time to video this morning but i went back over. WATERED EVERYTHING THIS BUT THE 50 AND THE 10TH PLANET I GOT YESTERDAY. Temps are supposed to pick up soon and it will be in the 90's again. We've had like NO rain. I searched for leaves that had signs of sep to defoliate. I may find one or two but for the most part things are doing great. Overall I'm happy.
8/7 Bought a new bottle of grow big. Wanted to switch to the roots organic teas but I cant do that invthe middle of an already complicated grow. I'll switch nutes next season. I'm noticing some pillar damage. Not much amd I've been hand picking them. I've found a few in curled up leaves. I watered the 10th planet in the front corner that didn't get it yesterday. I hope the watering yesterday will hold them until the morning. I'm still thinking about doing an application of diy Dr. Zymes to clear up any random pests. I'll ask a question and see what other growers on here have to say.
EDIT: MY SPIDEY SENSES STARTED TINGLING SO I WENT OVER TO CHECK ON THE GIRLS THIS AFTERNOON. THE MK ULTRA THAT I LEFT NATURAL WAS STARTING TO DROOP. THE REST OF THE GIRLS COULD WAIT. I MIXED WATER FOR ONE OF THE TENS BUT DECIDED AGAINST IT. I DONT WANT TO OVERWATER AND I THINK IT CAN MAKE IT. I GAVE THE MK ULTRA A FULL WATERING CAN WHICH IS ALMOST TWO GALLONS. IT WAS PUCKING UP BYVTHE TIME I LEFT AND WASNT EVEN ALL THE WAY DOWN. IM GLAD I CHECKED.
The ONLINE cannabis community can be such a joke. There ARE good groups but this places sucks. I put a question up as PART of the research I was doing and ive received some dumb answers but this was aggressive too. I had it figured out prior to reading the answer but it caught me off guard. I decided that since Im able to keep it suppressed with what im doing (leaf septoria on a couple of plants) than don'tchange it. I've dealt with it before and kept it suppressed but not nearly as well. It was a yes or no question really. Stated for outdoor experienced growers as I was looking to avoid the copy paste/ look how smart I am bullshit. I just have an anxiety disorder and like to hear numerous responses before I act. I figure it out and log on and I get some smart ass response from an INDOOR grower. When I SPECIFICALLY asked for EXPERIENCED OUTDOOR growers (as the question is unique to the outdoor environment and indoor growers seem snobby and seem to get jealous when they see my massive plants a quote what they just searched on the internet). I can read shit on the internet as well and had prior to posting. I'm sorry if my success with a product (that you are unaware of "but can't see how it could work" (despite not knowing the active ingredients by your own admission) and lots of hard work have prevailed. When I have to ditch a plant it's 1/4 to a full elbow. Not an 1/8th. So I won't be burning shit. I hate when people say that. There are cases for it but many new growers have been led astray with stupid advice like this. ESPECIALLY if everything is going GOOD! If a plant was less than perfect I'd put it in my concentrates bag. Not much fits through a 25 micron screen. But by all means burn your plants. I have no idea how I have ZERO wpm this year but I would hear shit like this for a couple leaves "with gravel on them" on a 10ft tall plant that yielded like a pound. So I don't know why I listen or why I even responded. Even if it WAS wpm I would've kept it and washed it. It must be nice to be able to work 20 weeks on something numerous times a day put a bunch of money in it and when you hit flower burn it because you don't want to do the extra work. You can easily tell the people that don't grow outdoors. It's a completely different game. But since I've already written it I'm leaving it. One more thing. You didn't even know what the active ingredients in my product were. How can you make ANY statements about the efficacy of ANYTHING without knowing what it is? You said "unless it's a bunch of silica" that provokes an immune response. It's not silica hun. I've been hunting for years for something that works. Go back to your closet.
8/8 The Lion's Gate Portal. Watered everything but the mk ultra and 10th planet upfront I got yesterday. I was going to feed but I ran out of time. I may still feed today I'm not sure. I found a couple septoria leaves on that pink kush that has "some" soil from last year in it. That is a mistake I won't make again. I'm checking a few times a day and defoliating anything suspect. The girls are looking good. I'm proud of them. Very resilient. They've withstood pretty much everything nature can throw at them. HAIL, torrential downpours, 30mph winds, disease and still they are thriving. There's really no way to explain the feeling that I get when I come to the garden in the morning and see everything looking good and smell that familiar odor. Serenity I guess. Pure serenity. I'll update if I feed or do anything else.
EDIT: WENT BACK OVER AT LIKE 5:30 since it was over 90°. Everything was fine waterwise though. Caught a HUGE grasshopper and found a pillar the likes I've never seen. It was a scary looking bastard! Looked like one of the worms from tremors and it almost seemed like it had some silk around it. It opened its mouth when I went to grab it. It was brown but neon green when I squished it. I need to find a good mulch. They say that helps with septoria. I defoliated a few leaves while I was there. It's close to the time for app of plant doctor. I decided to not feed. I saw a couple leaves that had SLIGHT nute burn on the tips. I'll observe and treat accordingly.
8/9 I decided to not feed this week. All new growth looks great and I noticed SLIGHT burns on tje tips of a few leaves so I figured I'd back off this week. Boy that early special Kush keeps getting bigger. It's going to be nice to have one plant ready long before the others. I'm wondering about my other 10th planet. The one that's had all the plant doctor treatment is doimg fantastic! The other not as much. It's droopy more often than not and doesn't really have many leaves effected by sep. What it LOOKS like is that beat curly top virus. The plant was one of the largest but it's much smaller sister has surpassed her (by far) and looks extremely healthy. I think I may move the plant out of the enclosure. It's a big plant and maybe after it's gotten treatment it will improve but I'm not sure it's worth the risk. It's spaced pretty far from everything else but still. Has me worried. I was reading that like 90 something percent of cannabis coming from California is infected with a virus. Don't remember where I read it but it wad a reputable source that was cited. Looks like I'm not doing ethos outdoors again. I may do some indoor this winter if external things come


Likes
15
Share
@Drgreenthumb627
Follow
Day 26, what can i say this plant is a beast, been a dream to grow and the structure on the plant is very desirable for my style of training. the terps on this one overpower all other smells when i open the tent.

Likes
11
Share
@CampExotic
Follow
Starting week 2 and the bud sites have come outta nowhere. Got some LST hooks in but I’ll take them out soon. Gonna use more CalMag but besides that she looks cool!
Changed the nutes to flower nutes of course. Adding some new LST to see what happens.
So far the buds are growing and expanding. Went from one cola to many. Not sure if I’ll remove the hooks yet

Processing
Likes
10
Share
@Kroniclesofnarnia
Follow
Buds have really shot out since I last checked them smells like lemon and sweets with a subtle sour to it smells unreal can't wait for this to be done
Processing
Likes
4
Share
@ReelEyezEnt
Follow
Still have these ladies in there Solo cups will most likely pot these girls this week
Finally moved these ladies over to there pots looking good for now
Oh yea no nuts just yet still going with PH bal water

Likes
3
Share
@Tweak
Follow
I switched lights and lighting schedule last week, the stretch is in full swing and I’m starting to see some baby buds.

Likes
16
Share
@Big_Rade_SCLA
Follow
Hello fellow growers. Croptober is here. Still displaying flowering on the week because I only harvested 2 of 5 plants. I checked the trichromes and they were T-d off and all milky white. I will wait a few more weeks for the remaining plants. The goal is to have a couple plants at the beginning of the harvest window and harvest the rest when they are more mature and ripe.
The 2 plants I harvested were the bigger ones and each yielded about a pound each. One was the tall purple nug plant and the other was the bushy one. The shorter one smelled like gas once you got all the flowers bundled together, definitely can smell the sour diesel in the genetics. The tall purple one also smelled gassy, but also fruity. I would describe it as a mango/orange smoothie kind of fruity aroma. I didn't get a lot of popcorn and even the smallest nugs looked at least like a grams worth. The bud was sticky and gave a lot of finger hash. The leaves also looked packed with trichromes so I will save them for making medicine. The plants didn't grow as tall as I expected. I've honestly had indicas grow bigger, but the quality of the herb is there. Next time I will start these seeds earlier in the year to get bigger plants. I started them in May, but usually start my seeds in late March to get the roots to develop earlier. Usually they get stunted in height when you start them early, but the roots are developing. Once they take off, they tend to grow bigger because they already have an established root system. IMO BTW.
The DRY. I placed the nugs in one of those multi-level mesh containers for drying. I used the top three levels. They started off displaying around 85% humidity on the first day and on the third day are now down to 68% humidity at 76°F. They are not moldy. I handle them once daily so they don't flatten out too much on one side. This is the down side of using this type of drying technique. By the fourth or fifth day, they should be ready to start jarring. I've left them longer in the past, but they start getting really dry if you leave them in the mesh too long. Smells like it's going to be at least a two to three month cure to get that smell out, but the one I already had curing from 2 weeks ago is already smokeable. We will see how good it gets by the end of the year.
I can't wait to see how the remaining plants turn out. I will let them go as far as I can to see how the smoke differs from the early and the late harvest. Sativa dominant genetics should go at least another month, but I will start with the let's check in 2 weeks rule. Thanks to everyone following. This has been a great year for growing.

Likes
67
Share
@Hashy
Follow
Grow diary 11 stage 8.
Day 71 to 80
This girl has developed quicker then the other strains and because of the o.g taking up so much space I decided to put up my older ds60 tent with my old mars hydro purple light. After 3 days my old extractor fan broke and she stunk the house out. I pulled her out the other tent on day 75 and gave her ripen for 5 days before moving onto flawless finish. When I'm happy she flushed its harvest. Not expecting much, maybe 1/2 oz, its hard to guess, she is tiny but solid.
Likes
103
Share
@DeepWaterGrower
Follow
🗓️ WEEK RESUME // DAY 71-77 (from dry seed)
⚡- Light: 30 cm / 150 watt;
⌛- Schedule: 14/10;
🌡️- 20.5° C - 65% RH average;
📑- PH 6 - EC 0.4;
💧- 6° change DWC. Flush until harvest!
🌸- Buds are heavy, all of them!
🌱- According to trichomes and pistills this lady is ready on day 74!
✅ HARVEST
- From seed to harvest: 74 days (2 days germination + 23 days veg + 49 days flo).
- Chopped after 4 days flush, no dark time;
- Wet trim, removed fan leaves. This plant had a ridiculous calyx-to-leaf ratio, it was just big buds!
- Now begins the drying stage, two weeks more or less.
👯♀️- She shared the box with:
Biscotti - Zamnesia: https://growdiaries.com/diaries/183150-grow-journal-by-deepwatergrower
Likes
7
Share
@HIAZ_urbanbudfarmer
Follow
All has gone good this week topped #2, #3, #4 , for the 2nd time, continuing training.forming good flat canopy, switching them over to flower as it's the end of week
