
Likes
Comments
Share


@Backtotheroots2222
Follow
Throw seeds as ... Smells like sweet kush/haze/old leater shoes/earthy lite pepper..no Berry no peach...i am happy with it..verry easy to grow..fast... have good body ratio..

Likes
19
Share


@Chubbs
Follow
420Fastbuds
FBT2306 Week 9
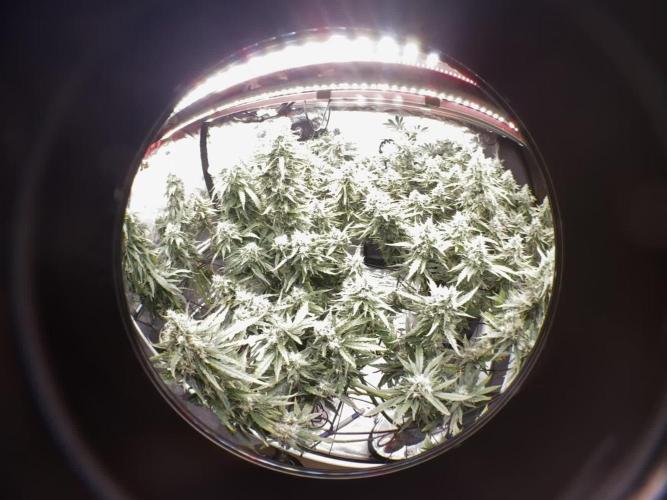
What up everyone. Weekly update on these two show stoppers and all I can say is 👌. They both are showing some really crazy colors and buds are nice and dense covered in trichs. I checked them under magnification and trichs are still clear and cloudy and I'm shooting for an 80/20 split of cloudy to amber. No major issues besides some fading in the leafs but that's expected at this point in flower. Guessing maybe another week or two before the chop. All in all Happy Growing.

Likes
Comments
Share


@Greenfingers666
Follow
Into week 4 stretch now complete bud sites now forming and swelling all along the top shelf as I planned no defoliation was required this is my own advanced growing method using my own invention scrog/spacers a personalized spacer was made to fit the plant this is what gives you the structure and shape to work from{idea required}.
for more information on scrog/spacers contact us??

Likes
50
Share

@Hologram
Follow
@
@@}}-}}@@-]}}}/*
@
Happy growing 4 all✊
***KISS! growingtechnique: KeepItSimple, Stupid!

Likes
14
Share


@Snickelfritters
Follow
11/15
Coming along but not without problems. 3+ weeks in now I'm in the stage where I'm just trying to push all the right buttons and guide it to harvest. They've all demonstrated some level stress but bud formation is coming along well. I dont know if I'm just used to the smell but it hasn't really gotten much stronger. I'll try to take some more pics later on. The past week has been a little busy.


Likes
97
Share


@Zurban_Poison
Follow
HEY!
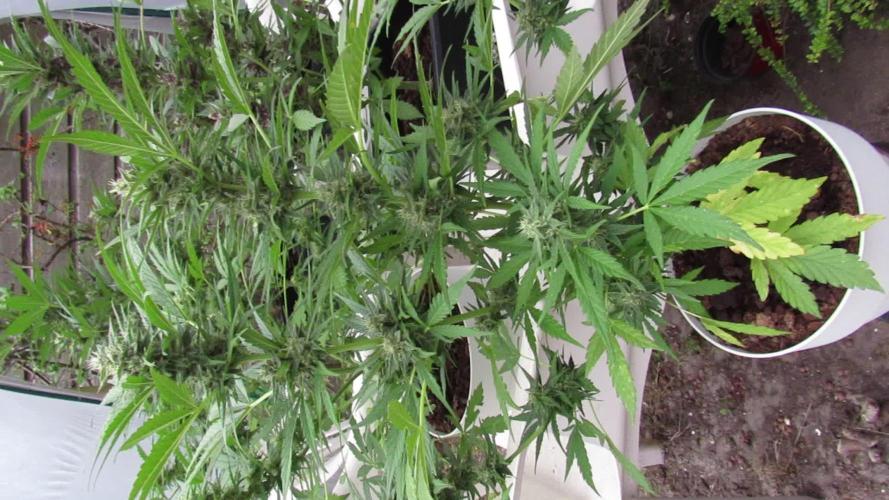
the beginning of flowering. and there are many hopes that it will be completed before the end of the competition from Green House! well, everything goes perfectly in ostolny) the trunk gets fat. branches grow longer and flowers bloom))
it is very difficult to understand its size from the photo) but believe me, it is huge. and occupies an area of 80cm-80cm wide ..

Likes
95
Share


@hannabis420
Follow
Quality strain but my buds could have been denser/chunkier, growers error, my first LST and I stressed her into flower too early

Likes
6
Share

@Antarctic
Follow
11.02.2026 – 17.02.2026
Canopy Adjustment: To ensure an even light spread, I’ve raised the Wonder Pie by placing it on a container. Now, all tops are leveled for maximum photon absorption.
The "Draft" Hack: To combat the late-flower heat, I’ve implemented a new ventilation strategy. By opening windows in both the grow room and the adjacent room, I’ve created a cross-ventilation effect (draft).
Temperature Drop: Success! I managed to drop the peak temperatures from 30°C down to a perfect 24°C. This drop is crucial for preserving terpenes and increasing resin production as we head toward the finish line.
Current Specs: pH 5.8, PPM 1000. Stability is the name of the game right now.
Likes
6
Share

@Stonerapaisana
Follow
Colhi um pouco mais cedo porque começaram a amarelar muito e acho que o solo estava com muito sal, fiz flush esta última semana e colhi, vamos avançar para o próximo. Está a secar, daqui a uns dias falo de quanto deu cada planta seco e do fumo. Obrigado a todos 🤜🏽🤛🏽

Likes
21
Share


@reirrac1
Follow
Started this week off strong. Decided to switch out the extra Grow Big for extra Tiger Bloom since it’s a lower concentration on N and higher P. New growth is a good color and no tip burning. Raised the lights and turned them up to 100% for the rest of flower. Sour Kush is starting to stink up the tent! NCH is looking like she wants to finish soon, but buds haven’t fattened up and trichomes are still a mixture of clear/milky. Feed pH 6.2, EC 1.8. Water pH 6.3, EC 0.8.

Likes
50
Share


@DogDoctorOfficial
Follow
🌟 Eternity Grow Cup – Week 3 Veg Report 🌱
Another week in the books, legends, and though the temps aren’t perfect, our Runtz babies are growing strong! 💪 This week marks a pivotal moment as we get serious and start to push these girls toward greatness.
🌱 Growth Update:
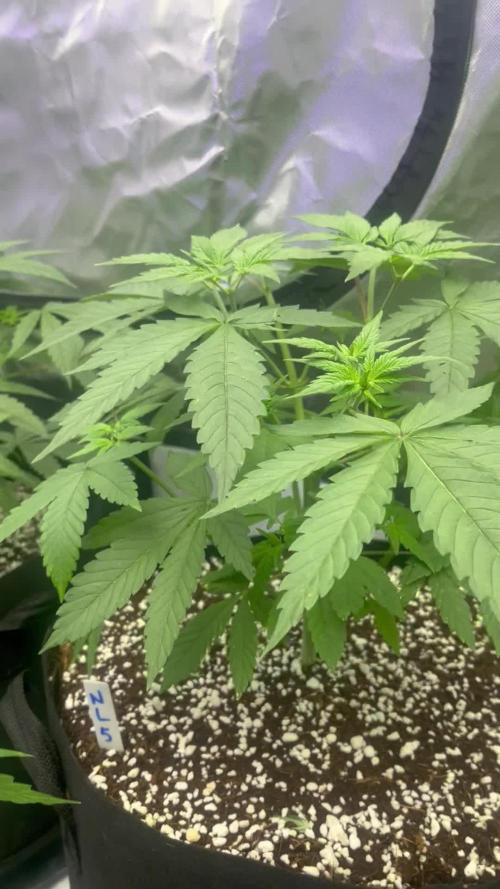
• The girls are officially showing their third pair of leaves, and while they’re growing slow due to cooler temps, they’re consistent. Standing at 6 cm tall, these beauties are ready for the next steps in their journey.
• The yellow sticky traps have also done their job, catching some gnats—always a win for pest management!
Let’s talk about the unexpected guests making an appearance in the grow room—gnats! These tiny critters can be a common nuisance for growers, especially in environments with moist soil. While they’re not devastating, they can be a sign that things need a bit of tweaking.
Why the Yellow Stickers?
Yellow sticky traps are like candy for gnats—they’re irresistibly attracted to the bright color, which mimics flowers. These traps are a simple, non-toxic way to monitor and control the population. It’s not just satisfying to see them stuck (though, let’s admit it, it kind of is)—it’s also a great way to keep tabs on how many are lurking around and take action if necessary.
What Causes Gnats?
Gnats love moist environments, and overwatering or humidity that’s a bit too high can create their perfect breeding ground. Using high-quality soil like Pro-Mix HP with Mycorrhizae helps, but these little critters can still sneak in.
How to Handle Them?
While yellow stickers are a great first line of defense, staying vigilant with watering practices is key. Letting the top layer of soil dry out between waterings can disrupt their life cycle. Plus, products like beneficial nematodes or soil conditioners can help keep them under control.
They may be tiny, but we’ve got our eye on them! Let’s not let the gnats steal the show—our Runtz have got all the spotlight! 🌟
Nutrient Regimen:
This week, we’re sticking with the Aptus Clean Mineral Line for Veg, a powerful combo designed for optimal plant health:
• Regulator: 0.15 ml/L – This keeps the plants strong, aids in stress tolerance, and boosts nutrient uptake.
• RO Water Conditioner: 0.8 ml/L – Balances the water profile and improves nutrient delivery.
• All-in-One Liquid: 1.25 ml/L – Provides a balanced mix of essential macro and micronutrients for sustained growth.
📌 Key Stats:
• pH: 6.05
• EC: 1.0
• Temp: 18.3°C
🔧 Tech, Tools & Building the Dream Studio
Behind the grow, I’ve been fine-tuning my workspace. Using just a piece of wood, carefully cut feet, and some imagination, I’ve elevated my monitors for better editing. It’s not fancy, but it works! 💻✨
For the grow, my trusted TrolMaster gear (from the Tent-X to the AMP-3) has been my go-to for precision. Every measure—pH, EC, temps—is logged and tracked to keep these plants thriving.
🌟 Exciting Milestones:
💚 Huge thank you to the community for helping me reach:
• 500 YouTube Subscribers 🎥 – Weekly episodes are dropping, so make sure to tune in for detailed updates!
• 4.5K Instagram Followers 📸 – Join the fun as we share the Runtz journey and so much more!
💨 Welcome, Ziggi Papers!
A warm welcome to Ziggi Papers, our newest sponsor! 🌟 Ziggi’s high-quality rolling papers are the perfect addition to any smoke session. They’re all about sustainability and precision—just like this grow. Check them out at ziggioriginal.com.
💚 Shoutouts:
To the diary sponsors, to my sponsors and this incredible community:
• @GrowDiaries, @Plagron, @Zamnesia, @AptusHolland, @ProMixSoil, @TrolMaster, @ThinkGrowLED, @FutureOfGrowLED, @CannaKan, @ZiggiPapers
Thank you for believing in the craft and making this journey possible!
To the community—supporters, lovers, and yes, even the haters—you all inspire me to give my best every day. Together, we’re writing history with this grow.
This week, I’m dropping:
• A photo set of all 5 phenos, showing their progress.
• Behind-the-scenes shots of my workspace build.
• A closer look at the tools and products making this grow epic and more.
For next week only God knows but one thing is for sure this promisses to be epic 💚
Let’s keep the momentum going, legends. This grow is more than just a competition—it’s a journey of learning, growth, and passion. Good luck to all the participants—may your grows be epic, your spirits high, and the journey fun for everyone involved! Stay tuned, and let’s make history together!
Genetics - Runtz https://www.zamnesia.com/6000-zamnesia-seeds-runtz-feminized.html
Nutrients - Plagron https://plagron.com/en/hobby
- Aptus Holland https://aptus-holland.com/
Controls - Trol MAster https://www.trolmaster.eu/
LED - https://www.futureofgrow.com/en
LED - https://www.thinkgrowled.com
Soil - https://www.promixgardening.com/en
Germination - Cannakan https://cannakan.com/?srsltid=AfmBOopXr-inLXajXu3QFgKXCXXos4F1oEvScjMKIB5MR5dk8-GJ-F49
DOGDOCTOR 15% off
Smoking Papers - https://ziggioriginal.com/
Terpene saver - https://grovebags.com/
As always thank you all for stopping by, for the love and for it all , this journey of mine wold just not be the same without you guys, the love and support is very much appreciloved and i fell honored with you all in my life
With true love comes happiness Always believe in your self and always do things expecting nothing and with an open heart , be a giver and the universe will give back to you in ways you could not even imagine so
As always, this is shared for educational purposes, aiming to spread understanding and appreciation for this plant. The journey with nature is one of discovery, creativity, and respect. Let’s celebrate it responsibly and continue to learn and grow together!
Growers Love To you All 💚
#EternityGrowCup #RuntzHunt #GrowersLove #CannabisCommunity #AptusHolland #ProMixSoil #TrolMaster #Zamnesia #Plagron #ZiggiPapers

Likes
14
Share


@BLAZED
Follow
W16 (15-5 to 21-5)
15-5
Temperature: 27.4 degrees (lights on) 21.2 degrees (lights off)
Humidity: 58% (highest) 43% (lowest)
As its very hot outside i decided to turn down the light's strength to 50% so the temps will not be so high anymore.
Opened the reservoir for a couple of minutes.
16-5
Temperature: 26.7 degrees (lights on) 20.5 degrees (lights off)
Humidity: 60% (highest) 47% (lowest)
Dry weight:
Kush #1: 4.9 kg.
Kush #2: 5.1 kg.
17-5
Temperature: 26.4 degrees (lights on) 21 degrees (lights off)
Humidity: 60% (highest) 51% (lowest)
No pictures.
18-5
Temperature: 26.7 degrees (lights on) 22.6 degrees (lights off)
Humidity: 56% (highest) 43% (lowest)
No pictures.
Dry weight:
Kush #1: 4.3 kg.
Kush #2: 4.6 kg.
19-5
Temperature: 27.5 degrees (lights on) 19.2 degrees (lights off)
Humidity: 59% (highest) 42% (lowest)
No pictures.
Opened the reservoir for a couple of minutes.
20-5
Temperature: 27.8 degrees (lights on) 21.8 degrees (lights off)
Humidity: 58% (highest) 44% (lowest)
No pictures.
21-5
Temperature: 27.4 degrees (lights on) 21.2 degrees (lights off)
Humidity: 58% (highest) 47% (lowest)
Dry weight:
Kush #1: 4.5 kg.
Kush #2: 4.9 kg.
Opened the reservoir for a couple of minutes. (Only watering the Gorilla Kush #1)

Likes
8
Share

@Greybeardbud
Follow
Defoliation happened mid week before a trip away for a few days got home today to see they have just popped. Growing very nicely even the little one that was pegged down to spread it out. Plants ranging from 20cm to 35cm and all looking very happy with themselves. They have also been getting some 90’s grunge music that apparently they dance along to
Likes
6
Share

@Mxrcel09
Follow
Had to Chop. Consistent RH of 65% the last few days. Dont want to risk the single plant to be moldy. In better environment I would have gave her another week to ripen. Smells very loud! Fruity, tropical smell with gassie Zoap. Very excited to smoke it. Will dry it in the tent. Currently at 62.3% RH + 22C (cant get it cooler).
Will Update after 2 weeks cure 🙏🏼
Dry weight: 98.5g / 1 plant

Likes
8
Share


@Oldwied
Follow
Day 10 of flower
The first flowers are growing.
Happiness grows very fast.
The living soil works great.
Big thanks to florganics!

Likes
11
Share


@SackShopG
Follow
I did a 5 day flush and 5 days of 24 hour light before harvest. Dried for 16 days with 60% humidity

Likes
1
Share


@Timmytrichrom3z
Follow
left only the top four main cola leaves on each plant. lights down to 12/12 stretch has been induced. The plants have been mainlined continously.


Likes
1
Share


@braxat420
Follow
It's below zero outside and my heater can't keep up. Also the humidifier for this tent broke and I can't afford to replace it right now. It's starting to smell like fruit roll ups, so that's nice. Hopefully reaching the end of stretch.

Likes
Comments
Share


@ShatterHahWax
Follow
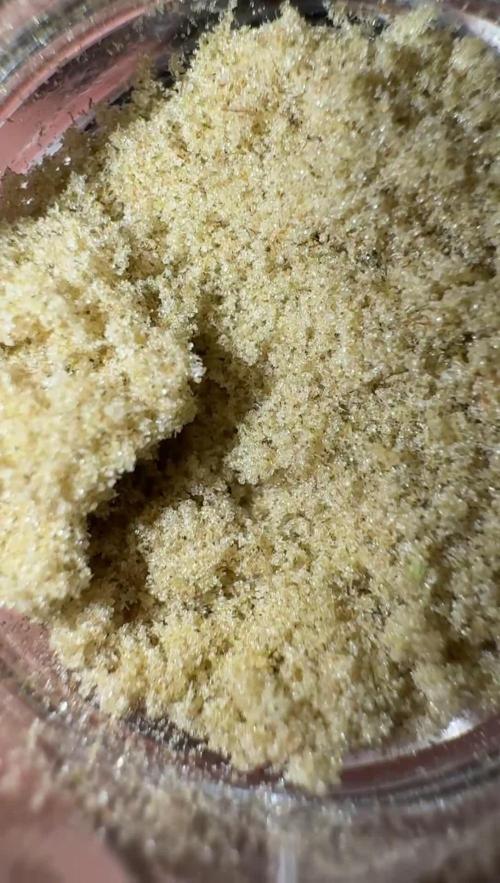
In the ever-evolving world of cannabis, enthusiasts are constantly on the lookout for the highest quality products to enhance their experience. Whether you’re a seasoned connoisseur or a curious newcomer, understanding the different types of cannabis products available can elevate your high to new heights. Among the most sought-after options are Grade A+ products, including shatter, hash, and more. Explore these premium offerings with https://t.me/cerianberigam a trusted supplier on Telegram, ensuring you have access to the best cannabis products available.
Telegram contact:https://t.me/cerianberigam

Likes
49
Share


@masterofsmeagol
Follow
7/25 Did two videos this morning. One where I was only going to water the 3 gallons I had mixed up but it's going to be very hot this week. Didn't want to make the same mistake as last time so I watered everything AT LEAST A GALLON. I need to bump up the volume during these really hot, humid days abd it doesn't get worse then this. Things are getting dusty. Found an inch worm and some minor pest damage. Once it cools down ill spray something. Also noticing small nitrogen deficiency that takes a leaf and moves up the plant a little bit. I'm going to need to start nutes this week. I'll keep this updated. Went back over around one and everything was looking fantastic! Took a few pictures and defoliated a few leaves.
UPDATE: I GOT A MESSAGE FROM DAD SAYING MY PLANTS LOOKED DROOPY. I HADNT MADE IT OVER FOR MY NIGHTLY INSPECTION BUT HAVING WATERED YESTERDAY I WAS THINKIBG OF SKIPPING IT. GOT THERE AND SAW THE FIRST 10TH PLANET DROOPY. ALL THE TENTH PLANETS LOOK RELATIVELY THE SAME BUT ONE OF THEM IS MY "CANARY IM A COAL MINE" AS IT DROOPS WAY BEFORE THE OTHERS. THE TWO BLUE CHEESES IN 20S THAT DRY OUT FASTER GOT TWO GALLONS AS DID MY 10TH PLANET CANARY AND MY BIG BLUE IN THE 50. ITS BEEN 90S AND SUNSHINE AND ITS ONLY GOING TO GET HOTTER. I HAVE THINGS GOING ON IN THE MORNING SO I WONT HE ABLE TO WATER. I NOTICED MORE NITROGEN DEFICIENCY RISING IN THE BLUECHEESE THAT DRINKS ALL THE WATER. OBVIOUSLY ILL NEED TO ADD NUTES SOONER THAB LATER CONSIDERING IM IN FLOWER BUT THE PLANTS ARE STILL A NICE GREEN AMD ONLY LOSING VERY FEW LEAVES. I ACTUALLY SAW A COUPKE BURNT LEAF TIPS ON A COUPKE PLANTS AFTER I WATERED WITH THE KELP ME/YOU. THIS SOIL IS AWESOME. WHAT IS THIS? WEEK 16 AND STILL GOING STRONG. WHEN I DO DECIDE TO START NUTES ILL TEST IT ON THAT BLUE CHEESE THATS FURTHER IN SENESCENCE. I TOOK A QUICK VIDEO ILL UPLOAD TOMORROW.
7/26 Had a bear come around my cage and getting into out bird feeders. Bent the iron shelerds hook all the way to the ground! Getting AMMONIA now to try and keep him away. Bags were heavy this morning but it's going to be really hot again. It'll be on the 90s the next few days so I need to be very careful. After we get through this I'll do an app of BT. Garden looks fantastic!
UPDATE: ANOTHER SCORCHER OF A DAY WENT BACK TO THE GARDEN. NOTHING WAS DROOPING SAVE FOR MY CANARY. THAT AND ANOTHER WERE BONE DRY. THE TWO PLANTS IN THE MIDDLE OF THE CAGE ARE SURROUNDED ON ALL SIDES SO I ASSUME THATS WHY THEY DONT SRY OUT AS QUICK. I GAVE EVERYTHING IN THE GARDEN ONE GALLON EXCEPT THE 10 GALLON PURPLE PUNCH, AND THE TWO IN THE MIDDLE. ONE TENTH PLANET ONE BLUEBERRY CHEESE. I ONLY GAVE THOSE 1/2 TO 3/4 GALLON. THE TWNTH PLANET IN THE MIDDLE IN THE THIRTY LOOKED HAPPY AND WAS STILL HEAVY TOO. I GAVE THAT A HEARTY HALF GALLON AND I WOULDNT EVEN HAVE DONE THAT IF TOMORROW AND FRIDAY WERENT GOING TO BE THE HOTTEST DAYS OF THE WEEK. I DEFOLIATED SOME. I NEED TO DO MORE BUT I HAD TO BEAR PROOF. I SOAKED THE BOTTOM BOARDS OF THE CAGE IN BLEECH. VERY CAREFUL NOT TO GET ANY ON THE PALLETS OR GROW BAGS OR ANYWHERE IT COULD GET TO PLANTS. I TACKED DRIER SHEETS TO THE CAGE. I CUT A COUPLE PILL CASES IN HALF AND SOAKED THEM IN BLEECH AND DROVE THEM IN BY THE WOODS WHERE HE WNTERED AND BY THE FEEDERS HE EMPTIED. PUT UP ANOTHER CAMERA FACING THE OPPOSITE DRECTION SO I CAN SEE HIM NO MATTER WHAT. I WOULD STAY AWAY MR. BEAR.
7/27 Plants are looking FANTASTIC this morning. Soil is still damp this morning and bags are heavy as hell. They look super happy. Obviously my watering situation depends on the weather. Today and tomorrow are supposed to be the hottest days so I wanted to make sure the plants had sufficient water before this. I'll let them dry out totally before watering again. There's another four lined plant big somewhere that sat there and destroyed another leaf. I'm AT LEAST spraying with BT after this heat wave. Supposed to rain a little today with thunderstorms. I haven't got my supports up yet but if i need to I coukd throw my tarps up real quick. Don't think I'll need to though. These are some tough freaking plants and I am super proud of how they've turned out thus far.
UPDATE: WENT BACK OVER AND RE APPLIED BLEECH TO THE RAGS AND ON THE PERIMETER OF MY CAGE. I TACKED A FEW MORE DRYER SHEETS UP. REASON I DID THIS WAS BECAUSE WEVE BEEN GETTING HORRIBLE THUNDER STORMS WITH TORRENTIAL RAIN. THE WEATHER MAN HAD BEEN WRONG SEVERAL TIMES WARNING OF THUNDER STORMS AND WE WOULDNT GET SHIT. THIS TIME IT WAS PRETTY BAD. TOOK A SHORT VIDEO. IT WAS SUPPOSED TO BE THE HOTTEST DAYS TODAY AND TOMORROW. I DIDNT NOTICE ANY BREAKAGE AND I DONT SEE ANY ON MY CAMS. IM SURE ITS NOT THAT MUCH RAIN AND THOSE NAHS WILL DRY OUT SOON. I NEED TO GET MORE PH DOWN AND DECIDE WHAT IT IS IM GOING TO DO FOR NUTES IN FLOWER AND MAKE UP MY MIND.
7/28 Huge thunderstorms all day yesterday and through the night with high wonds. Plants made it through unscathed despite the lack of a trellis. Today is supposed to be the hottest of these days. I think the hear wave ends today. I really need to get my supports up. I'm super lucky to not have had any breaks during the storm. I have a couple of videos I did but I didn't upload them earlier and now that I'm back in the woods I doubt they'll upload now. I'll give it a shot. If not I'll put them up tomorrow. OH! I found that four lined plant bug that had been fucking up my leaves and squished him. Well I hope it was him. If not I killed a sibling at least.
UPDATE: JUST WOW. This morning all drooped over from the storm went over at 4 and its still 90 and they seem to have grown sic inches and jumped forward WAY more into flower. I am amazed. I'll upload a photo or two but I took a video I'll put up tomorrow. Super stoked. Oh and you can give me a red smile face for not using nutes every week @growdiaries but you point out the deficiency then I'll fix it.
7/29 Plants looking fantastic this morning.
UPDATE: PLANNED ON NOT GOING TO THECGROW TOMOGHT SEEING THAT IT HAD RAINED SO HARD AMD THAT WE ARE SUPPOSED TO GET RAIN TONIGHT. I GET THERE AT ABOUT FIVE AND MY CANARY AND A FEWCOTHERS WERE DROOPING! IT WAS IN THE 80S ALL DAY. I GAVE EACH PLANT A GALLON OF WATER. THE GROW BAGS ON THE TEO WORST PLANTS WERE SUBSTANTIALLY LIGHTER THAN THE REST. I HOPE IM NOT OVERWATERING. THE PLANTS SEEMED TO PICK BACK UP AFTER WATERING BUT ILL HAVE TO WAIT UNTIL TOMORROW TO UPLOAD MY PICTURES AND VIDEOS. I NEEDED TO ADD TEMPORARY SUPPORTS TO A COUPLE DIFFERENT PLANTS. IM CERTAINLY GLAD I GOT THE URGE TO GO OVER. WHAT A CHANGE IN A FEW HOURS
7/30 Plants are really growing fast and transitioning quick to flower. We got almost no rain so I'm glad I watered like I was supposed to even though the bags had some heft to them. I'm noticing more pest damage. I'm thinking a bt spray tonight might be beneficial. I'll look through what I've got on hand. I may just give them an application of spinosid but we'll see. I still need to move things and put my supports up. Medical problems have slowed me down.
UPDATE: Went to check the plants around 3 and they looked great. Bags were still heavy and a little bit moist. I think with the added rain some of the plants may have been overwatered. I should have only watered tue bags that felt light. There is only one plant now that looks a little overwatered and even that is looking good. I found some more minor pest damage. Winds were fairly high. I wondered about my trellis netting but it hadn't been sanitized and my plants are very healthy so I decided to wait. I watched them dance like willows in the wind. I know it won't be like that with big ol colas on them but for right now it's working out just fine. Goal for next week is to move the front row back and move things around to better utilize space, possibly spray for pest and add supports for final flowering after I get the plants situated how I want them. If I do it right I may be able to lst some. Also took a 2 minute video but I cant upload until tomorrow.
7/31 I'm wondering about my watering habits. This morning I watered a couple blue cheese and purple punch plants with just a half gallon as they were light and looked drooping. I'm wonderingvif I'm overwatering. Some plants still seem heavy while others are light? I think the plants may have been overwatered due to the torrential rain and my taking less time hand watering. Hopefully I won't come home from this doctors appointment to wilted plants but I really doubt it. 10th planet requires far less water than the two other strains. Even specific phenos require more water and its difficult with the different size containers but im working with what ive got. I need more ph down and I've gotta get these plants supported. These are some massive plants. Store was closed. Dispensary was opened. Showed my buddy the video then it started raining. By the time I got there the plants looked horrible. Everything was droopy but a couple were really bad. A few weren't bad at all. Actually the one in the ten needed it. I think I just need to give more water at a time and document how I water each plant individually. I also need to take into consideration the weather. Hard to do when it's so unpredictable. I'll wait for them to dry out and then I plan to start low doses of big bloom and grow big but I need to wait for them to dry out first. Then next watering they'll get some nutes. It's sunny now so I may go check my plants. I may also put a fan out for a while on the bags. That might help them out.