


Likes
14
Share


@StewartBloom
Follow
Day 40 of flower and I'm pretty impressed. Once again I wish I had trimmed the undergrowth more. I can see light through the canopy so it's far better than last run, but there's going to be a good amount of LARF down there. When I'm done working in the tent the trichromes are visible on my gloves like sand so I'm getting really hopeful it'll be a good washer.
Enjoy the video this week and ignore my attempt at taking LIT style blueish Grey pictures haha

Likes
42
Share


@rhodes68
Follow
Typical Green Crack harvest, lot of leaves but easy otherwise
Lack of tent space really hurt her yield, guessing 25% less due to it
Dry weight for Plenty 322 grams nice easy final trim rock hard nugs
Two clones follow
The clones nearly identical both weigh in at 710 grams wet in dry yield later
Clones yielded 287 grams dry


Likes
10
Share


@HomegrowerDK
Follow
My gorilla glue auto foxtailed...
But buds are huge and the smell of them are really intense.... I can smell it 2 houses from me... Lol... The guy I rent the house from have been here the last 3 days fixing water damage.. him and his workers believe it's my neighbor who is growing.. haha...
Will harvest soon (1-2 weeks)

Likes
17
Share


@FatalFarmer
Follow
December 2nd: Week 6 has started, hopefully last week of veg, defoliating, started feeding Sweet Candy, reducing humidity... more to come
Tuesday night and it's end of week 6 or day 42, they are doing well, about 16 inches tall and bushy but I feel like another week of veg wouldn't hurt, hoping to get them all around 18 inches tall before I flip
Comments and likes appreciated, stay high

Likes
9
Share


@Headies
Follow
So I had a little less nutrient last week then i needed. Def a calcium deficiency. I think it's clearing up but this plant has spot all over it. I changed the water, gave it the right amount of nutrients and a little exra hydrated lime for calcium. Hydro is hard. I hoping It's not sick. I hope It doesn't get the other plants sick. Just a few weeks left.
Likes
32
Share


@Belverde
Follow
Welcome everyone
The first seven days of flowering have just ended for this beauty AYAHUASCA PURPLE 😈
Wow , she's already purple and smel like it 🔥🔥
Shecwas pretty fast in producing flowers 🌻
The appearance is not extremely healthy because of me, I was away for a few days and my self-irrigation system did not work properly, leaving the plants in shortage of water 💦
Maintaining the correct proportions between dry and wet soil is essential
But she will recover 💪
In this week I have slightly defoliated to allow the light to penetrate more and also better ventilation ✂️🍃
About the lights cycle 💡
We are now in a 12/12 on / off..
Always under two SP3000, from Mars-Hydro, at 75% of the power..
About nutrients 👇
I still giving their always organic/veganic nutrients..
A little bit of silicium (Bionova) / Activator (Biomagno) / Crescita (Biomagno) / Activera (Biobizz) / Grow vegan (Bionova) / The Missing Link (Bionova) / X-Cell (Bionova) / Bioheaven (Biobizz) , a little bit of P-K 3-5 (Bionova) {in spray solution } and for the firsth time a little bit of Fioritura (Biomagno) and Bloom vegan (Bionova)
Like i usually do, a little bit of everything at any watering 💧
And that's pretty much everything i've done..
See you in week n°7 📆
Thanks guys for stopping by 😎👍👍
FC ✌️
🇮🇹

Likes
37
Share

@TrickzCutz
Follow
Servus Moin!
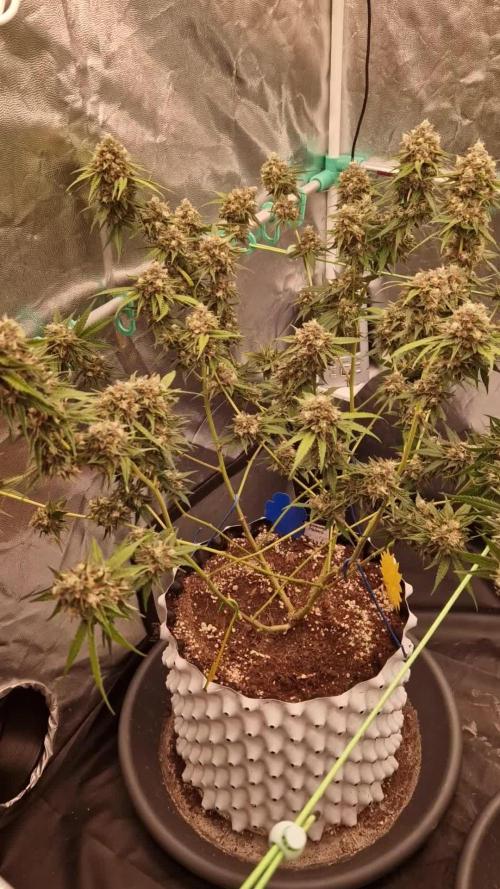
Die Permanent Melons zeigt sich nochmal von Ihrer besten Seite! Die Buds schwellen richtig dick an und die Narben werden langsam dunkel.
Likes
8
Share


@420Somewhere
Follow
Lovely grow from start to finish. Hit is harder than the 10% THC suggests. The high is extremely mellow and the taste is sweet like mangoes. Looking forward to the hash from the trim. May even run this one again along with the higher THC non-CBD Blue Dream next run. Love it.
Likes
76
Share


@DogDoctorOfficial
Follow
🌸 Week 8 Flower – The Trichome Symphony Begins 🌸
Eternity Grow Cup
This week… it’s all about the frost. ❄️
We are diving deep into the universe of trichomes, those magical crystal-like structures that define potency, aroma, and visual beauty. Each pheno this week is presented with its own dedicated video — so everyone can witness the uniqueness and evolution of these genetics firsthand. The photos? Focused close and true on the trichomes and their stalks, the very essence of the plant’s protective and expressive language.
💎 What Are Trichomes?
Trichomes are tiny resin glands that cover the surface of cannabis flowers and sugar leaves. They’re responsible for producing and storing cannabinoids (like THC and CBD), terpenes, and flavonoids — the compounds that create the plant’s effects, scents, and flavors.
They act as the plant’s natural defense — from UV rays, pests, and environmental stress — and in return, they gift us with beauty, medicine, and art.
Why So Many Trichomes Here?
This room has turned into a crystal forest thanks to a harmonious mix of tech, care, and nature:
🔹 Spectrum Tunings:
Using the TrolMaster system, we’ve dialed in a spectrum rich in reds, far-reds, and UV at precise times to stimulate trichome production. The plants are responding in full.
🔹 Lighting:
The under-canopy power of the ICL 300s, combined with the canopy-level intensity of the Model 1s, is creating full-spectrum saturation from top to bottom. Buds are stacked, frosty, and glowing from every angle.
🔹 Nutrition Synergy:
The tag-team of Aptus Holland and Plagron has been flawless. The clean base, balanced micro and macro elements, and biostimulants have driven these girls into full expression mode. You can see the nutrition working in every crystal.
🌿 Where Are We Now?
We’re likely one week to ten days from harvest, but of course we’ll follow the plants’ signals. They’re still swelling and building — it’s the final stretch, and they’re sprinting.
Nerdy Note:
Trichomes can be bulbous, capitate-sessile, or capitate-stalked — and in this run, the capitate-stalked ones are standing tall and loaded. Expect a full cannabinoid and terpene profile when it’s time for analysis.( bro talk not lab hihihihi)
🌟 Let’s take a moment to recognize that we’re witnessing the peak of this cycle. This is living art, frozen in time by a camera lens but alive in scent and energy.
This Week’s Feeding Program
To support this explosive trichome production in Week 8 Flower, we’re feeding with precision and purpose. Every drop counts now, and here’s the clean, efficient mix we’re running:
• Aptus Holland – Regulator: 0.15 ml/L
• Aptus Holland – System Clean: 0.25 ml/L
• Aptus Holland – RO Water Condition: 0.8 ml/L
• Aptus Holland – All-In-One Liquid: 1.25 ml/L
• Plagron – Green Sensation: 1 ml/L
• pH set at 6.2
💧 We’re keeping it clean, clear, and consistent. No extra PK boosters or unnecessary additives. Just smart nutrition, tuned spectrum, and stable conditions to let the plants express themselves naturally. The synergy between Aptus Holland’s Clean Program and Plagron’s Green Sensation is clearly showing in every frosty bud.
This week, we’ve fine-tuned the spectrum to push the plants into full resin-production mode. I’ve reduced the white light intensity to 40% while keeping the reds and UVs running at 100%. This shift focuses energy on the wavelengths that directly stimulate secondary metabolite production—especially trichomes. Red light enhances flower development and density, while UV exposure encourages plants to produce protective compounds, like cannabinoids and terpenes, as a natural defense. This balance between lower photosynthetic pressure and high-spectrum stimulation is helping the girls finish strong, frosty, and full of character.
🙏 Massive thanks to all sponsors, followers, friends, and growers in the community. To the ones competing, to the ones just watching — THANK YOU. This is almost the end of the road, and every diary, every plant, every effort deserves respect.
💬 Don’t forget to follow the full 4K experience on YouTube, and for behind-the-scenes action and updates, join us on Instagram.
With Grower’s Love,
DD 🌱
Genetics - Runtz https://www.zamnesia.com/6000-zamnesia-seeds-runtz-feminized.html
Nutrients - Plagron https://plagron.com/en/hobby
- Aptus Holland https://aptus-holland.com/
Controls - Trol Master https://www.trolmaster.eu/
LED - https://www.futureofgrow.com/en
LED - https://www.thinkgrowled.com
Soil - https://www.promixgardening.com/en
Germination - Cannakan https://cannakan.com/?srsltid=AfmBOopXr-inLXajXu3QFgKXCXXos4F1oEvScjMKIB5MR5dk8-GJ-F49
DOGDOCTOR 15% off
Smoking Papers - https://ziggioriginal.com/
Terpene saver - https://grovebags.com/
As always thank you all for stopping by, for the love and for it all , this journey of mine wold just not be the same without you guys, the love and support is very much appreciloved and i fell honored with you all in my life
With true love comes happiness Always believe in your self and always do things expecting nothing and with an open heart , be a giver and the universe will give back to you in ways you could not even imagine so
As always, this is shared for educational purposes, aiming to spread understanding and appreciation for this plant. The journey with nature is one of discovery, creativity, and respect. Let’s celebrate it responsibly and continue to learn and grow together!
Growers Love To you All 💚
#EternityGrowCup #RuntzHunt #GrowersLove #CannabisCommunity #AptusHolland #ProMixSoil #TrolMaster #Zamnesia #Plagron #ZiggiPapers #Grovebags

Likes
15
Share


@Mr_Prawn
Follow
Las Ak parece que tienen un problema creo que tiene que ver con CalMag pero no estoy seguro, la otra no está afectada. Bajé la EC pero no se si tengo alguna carencia exceso u otra cosa. El dia 21 subo altura de luces al máximo el día 22 bajo la potencia de los quantum boards de 440w a 350w


Likes
10
Share


@HegauHillsFarmers_M11
Follow
Tag 7 - Ende der 1. Woche.
Die Pflanze wurde bisher nur mit Wasser besprüht.


Likes
10
Share


@420DeepGrow
Follow
📆 Semana 7
La planta continúa avanzando de forma constante, mostrando una evolución positiva a medida que la floración se hace cada vez más evidente. La estructura se mantiene fuerte y equilibrada, mientras las flores comienzan a ganar volumen y a desarrollarse progresivamente.
La respuesta durante esta fase sigue siendo buena y la planta mantiene un aspecto saludable, por lo que continuamos con una alimentación controlada, ajustando progresivamente según sus necesidades.
⚡ EC de entrada: 0.8
💧 pH: 6.2–6.3
🌡️ Agua: 18–22°C
☀️ Luz: Sol directo
🔥 Nota de cultivo: Se aumenta ligeramente la EC de entrada hasta 0.8 para acompañar el avance de la floración, manteniendo siempre una progresión moderada y observando la respuesta de la planta antes de realizar nuevos ajustes.
¡Seguimos creciendo fuerte! 💪

Likes
95
Share

@DogDoctorOfficial
Follow
Week 4 day 26F and they are starting to look the way i like , the canopy is full enough and the girls are pumping nice airs to what looks like is gona bi great bud, but I don’t like to speak before things happen hehehe for now the Tropicanas still looking way better than the chocolates ones, but in the end the final product will have the final saying 😁 they are drinking 4,5 L water every day, divided in 3 times, 1st after 2H ligth, 2nd is 2H after and the last after 2H were they reach run out and dry from there until next day. I do the ocasional one day in between to dry out the roots and induce some low stress to help tricomes production, in the end thats going to b the most important factor in my final decision.
I lower my lights to level up my ppfd levels, i will bring them up to 1000ppfd along next week or so since they are enjoying the amounts so far 😁💚👌
PPFD - 750 Umol/m2
DLI - 32.2 mol/m2d
VPD - 1.30 kPa
Little battle between Topicanna Poisen from @sweetseeds vs Chocolate Skunk from @00Seeds (just for fun)
TP = Tropicana Poison
CS = Chocolate Skunk
Light Lumatek Zeus 465W compact pro at 100%
All i grow is medecine for myself, nothing to sell, dont even ask !!!
Stay safe and do it with love for the love ❤️ 🙏
💚Growers Love to you all 💚

Processing
Likes
9
Share


@Cogollo_eu
Follow
**Encontrarás la traducción a español al final de la descripción**
From/Desde: 01/09/19 || To/Hasta: 08/09/19
From day/Desde día: 00 || To day/Hasta día: 07
Ocean Grown Cookies Diary / Diario de las Ocean Grown Cookies:
https://growdiaries.com/diaries/38831-oceangrown-cookies-blues-sisters
-----WEEK SUMMARY-----
If you like this week, please hit a like, it costs you nothing! 👊. Thanks in advance 😉!
Hi buddies, i'm very happy to welcome you to my new Dinafem's Cookies grow. In this grow I'm going to run 4 Dinafem seeds, 2x BlueBerry Cookies (this diary) and 2x OceanGrown Cookies. The seeds were provided by Dinafem itself, a thing that i want to thank a lot to Dinafem Team, specially to you Mark! 👊 ;). I will try to do my best 🙏.
The first week was as expected, buried the seed on Sunday night in a small pot (i'm not sure if it's 0.3 l, but +/-), it be came to seedling on Wednesday afternoon and grown till Sunday as it should be... (AK Déjà vu).
Equipment used
-----------------
Platinum Grow Lights P300 (93W grow, 180w Flora, full spectrum)
DR90 growing tent (90x90 cm)
10 l AeroPot
Mid-size Oscillating vent 20w
Soil from Bio-Bizz (Light-mix) i will use a small layer of Hard-mix in the bottom of the AirPot and mix the rest with Superguano & Top Vulcan (Both from Top Crop) on transplant.
-----WATERING CALENDAR-----
Using all week nutrients @ PH 5.8 & EC 0.7
01/09/19: 130 ml
04/09/19: 60 ml
08/09/19: 120 ml
*****ESPAÑOL*****
-----SUMARIO SEMANAL-----
Por favor, si te gusta esta semana dale un like, no te cuesta nada 👊. ¡Gracias por adelantado 😉!
Hola compañeros, estoy feliz de presentaros mi nuevo diario de Cookies Dinafem. En este cultivo voy a plantar 4 semillas, 2 BlueBerry Cookies (este diario) y 2 OceanGrown Cookies. Estas semillas me las ha mandado el propio Dinafem, cosa que quiero agradecer al equipo de Dinafem, especialmente a Mark! 👊. Intentaré hacerlo lo mejor posible.
La primera semana fué como se esperaba, planté las semillas el Domingo por la noche en un tiesto pequeño (no se si es exactamente de 0,3 l pero +ó-), se hizo plántula el Miércoles por la tarde y creció hasta el Domingo como debía... (DejaVú de la AK)
Equipo usado
-----------------
Platinum Grow Lights P300 (93W crecimiento, 180w floración, espectro completo)
Tienda de cultivo DR90 (90x90 cm)
10 l AeroPot
Ventilador oscilante mediano de 20w
Sustrato BioBizz (Light-mix) usaré una pequeña capa de top-mix en el fondo del AirPot y mezclare el resto con Superguano & Top Vulcan (ambas de top crop) cuando transplante.
-----CALENDARIO DE RIEGO-----
Usando todos los nutrientes de la semana @ PH 5,8 & EC 0,7
01/09/19: 130 ml
04/09/19: 60 ml
08/09/19: 120 ml

Likes
4
Share

@Ensign420
Follow
|»» LOG DISCLAIMER: Not intended as a grow guide. Grow log entries are usually posted 3 weeks later and are for my learning reference. ««|
Introduction - Week 26 Summary -
Ensign's log, stardate 17608.3,
Wow what a week!
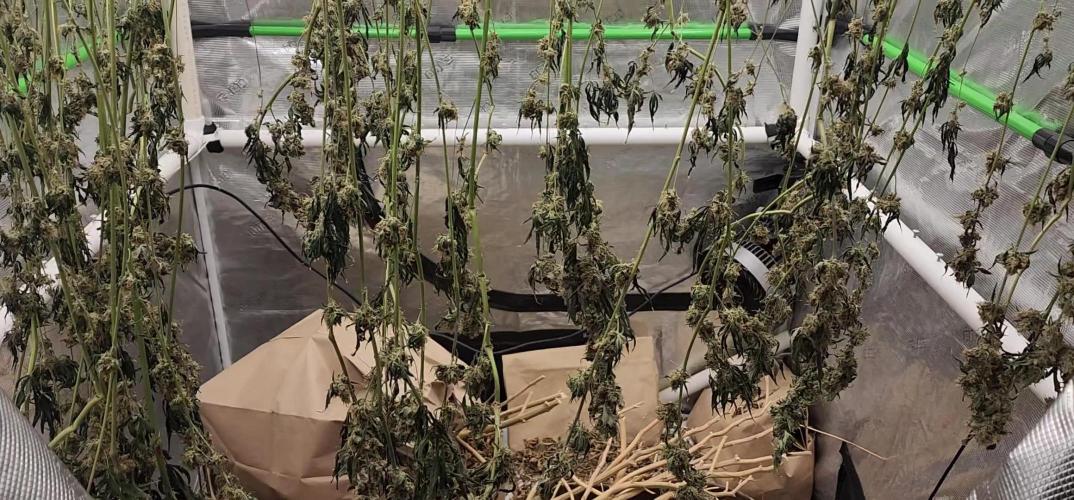
Drying is always pretty simple and been checking daily. Buds are drying nicely and terps are smelling pretty dank!!
Most of the week has been in the veg tent with tissue culture! Mixed another batch of establishment media and took proper explant cuttings. Also super-cropped the mothers to even out the canopy.
Ahh yea! Getting hyped for trim day next week!
Next week will also be the last week for this grow log, but am already planning out the next cycle.
Anyways! Onwards to next week!
[START OF WEEK 26]
==========================================================
---------- [ 4x4 MAIN TENT ] ----------
Heady OG BX1 #1 [Round4 ~Wk19] - WEEK 26 - Dry Wk1
----------- [ 3x3 VEG TENT ] ------------
TKO - WEEK 09 - Full Veg
Gorilla Goat #1 - WEEK 05 - Full Veg
Heady OG BX1 - WEEK 09 - Full Veg
Garlic Budder OG#1 - WEEK 05 - Full Veg
10/13/25 → 10/19/25
This Week's Estimated Goals
----------------------------------------------------------------------------------------------
DLI: ~0 mol/m²/d
PPFD: ~0 μmol/m²/s
VPD: ~1.5 kPa
This Week's Meter Readings & Averages
----------------------------------------------------------------------------------------------
Light On/Off: 00:00 - 00:00 | Wattage: ~000.0W [LV00]
Distance From Canopy: ~00”
DLI: ~0.00 mol/m²/d
PPFD: ~0 μmol/m²/s
VPD: ~1.17 kPa
Soil %: [47.4, 34.1, 35.0, 55.7, 43.7, 43.6, 44.0, 43.3]
==========================================================
Day 01 - Monday - 10/13/25 - Total Days: 183
-----------------------------------
Daily Averages ~[+01:00]
- Temps: 78.8°F [26.0°C]
- Humidity: 64.4%
- VPD: 1.19 kPa
- Soil %: [49, 34, 35, 57, 44, 44, 44, 42]
-----------------------------------
- [22:05]: Night check on the 4x4 tent.
--- Ca-Caw!! Looking great!
--- Heady OG BX1 #1 is drying along and no signs of mold. Also airflow and RH is stable and within the 60-70% range.
--- Getting stoked! Trim day is 9 days away!
- [22:09]: Checked the Ecowitt soil moisture sensor data:
------------------ [ 4x4 MAIN TENT ] ---------------
------ 48% - [CH01 FT » G30 - Heady OG BX1 #1]
------ 35% - [CH02 FB » G30 - Heady OG BX1 #1]
------ 35% - [CH03 BT » G20 - TKO]
------ 56% - [CH04 BB » G20 - TKO]
------------------ [ 3x3 VEG TENT ] ----------------
------ 46% - [CH05 BL » GR7 - TKO]
------ 40% - [CH06 BR » GR7 - Gorilla Goat #1]
------ 40% - [CH07 FL » GR7 - Heady OG BX1 #1]
------ 40% - [CH08 FR » GR7 - Garlic Budder OG#1]
--------- Veg: 38% - 45% | Flower: 45% - 55%
--------- General: 30% [Dry] «| 45 - 60% [Moist] |» 70% [Wet]
- [22:18]: Checked the 3x3 veg tent.
--- Looking healthy in the veg garden!
--- All of the vegging mothers are looking great and the canopy is starting to even out.
--- Also clones look healthy and no need to water yet.
--- The stems, err, I mean, explants, don’t show any signs of contamination.
--- Staying positive, glad the growth media is sterile and the overall procedure was successful.
--- Anyways! Plan to create more establishment media and cut proper explants soon!
- [22:21]: Checked the humidifiers.
--- Tanks are still full and no leaks found.
Day 02 - Tuesday - 10/14/25 - Total Days: 184
-----------------------------------
Daily Averages ~[+01:00]
- Temps: 76.9°F [24.9°C]
- Humidity: 64.8%
- VPD: 1.11 kPa
- Soil %: [46, 34, 35, 56, 43, 43, 44, 43]
-----------------------------------
- [21:44]: Night check on the 4x4 tent.
--- Looking good in the dry tent!
--- Heady OG is drying along and humidity levels look great!
--- Nothing to do but maintain and wait to trim in 8 days!
- [21:55]: Checked the Ecowitt soil moisture sensor data:
------------------ [ 4x4 MAIN TENT ] ---------------
------ 45% - [CH01 FT » G30 - Heady OG BX1 #1]
------ 34% - [CH02 FB » G30 - Heady OG BX1 #1]
------ 35% - [CH03 BT » G20 - TKO]
------ 56% - [CH04 BB » G20 - TKO]
------------------ [ 3x3 VEG TENT ] ----------------
------ 41% - [CH05 BL » GR7 - TKO]
------ 40% - [CH06 BR » GR7 - Gorilla Goat #1]
------ 47% - [CH07 FL » GR7 - Heady OG BX1 #1]
------ 46% - [CH08 FR » GR7 - Garlic Budder OG#1]
--------- Veg: 38% - 45% | Flower: 45% - 55%
--------- General: 30% [Dry] «| 45 - 60% [Moist] |» 70% [Wet]
- [21:59]: Checked the 3x3 veg tent.
--- Looking healthy and growth is raging!
--- All mothers are looking beautiful!
--- Clones are getting taller and looking healthy!
--- Gorilla Goat #2 needs watering. Let’s go Ensign!
- [22:03]: Here is the starting initial watering range:
------ Gorilla Goat #2 » 255.4g → 300.3g and was last watered 4 days ago.
--------- General Solo Range: [Dry] «| [Initial Cup Weight] + ~55-100g |» [Wet]
--- Took the starting weight before watering,
------ Gorilla Goat #2 » 230.8g
--- While on a scale,
--- Gently misted her straw mulch with RO water.
--- Tried to keep the top growth dry.
--- Misted 5-10 sprays. Waited a few seconds, then misted again.
--- Made sure to reference the watering weights.
--- Repeated this process until the cup weighted at least 300g.
--- There was no runoff.
- [22:23]: Took the saturated weight after watering,
------ Gorilla Goat #2 » 345.7g
--- Marked the watering date on the side of the cup. Also marked the saturated weight on the back.
--- Placed her back into the tent.
--- Decided to train and super-crop both clones.
--- Bent the taller branches to lower the canopy.
- [22:38]: Checked the humidifiers.
--- Tanks are still full and no leaks found.
--- Onwards Ensign!
Day 03 - Wednesday - 10/15/25 - Total Days: 185
-----------------------------------
Daily Averages ~[+01:00]
- Temps: 75.6°F [24.2°C]
- Humidity: 63.8%
- VPD: 1.09 kPa
- Soil %: [48, 34, 35, 56, 44, 43, 44, 42]
-----------------------------------
- [+01:33]: Quick night check on the 4x4 tent.
--- Looking great in the dry tent!
--- Also starting to smell dank!
--- 7 more days until the big trim!
- [+01:37]: Checked the 3x3 veg tent.
--- Veg garden is healthy and growth is green!
--- Both the Heady OG BX1 #1 and TKO mothers will need another topping soon.
--- Clones in the propagation tray also look great and no need to water.
--- The explant media is still looking sterile with no signs of contamination.
--- Easy night in the garden. Nice!
- [+01:40]: Checked the humidifiers.
--- Tanks are still full and no leaks found.
--- Okay! Tomorrow plan to dive back into tissue culture and prep more growth media.
--- Onwards Ensign!
Day 04 - Thursday - 10/16/25 - Total Days: 186
-----------------------------------
Daily Averages ~[+01:00]
- Temps: 74.6°F [23.7°C]
- Humidity: 62.2%
- VPD: 1.11 kPa
- Soil %: [46, 34, 35, 56, 43, 44, 44, 45]
-----------------------------------
- [11:41]: Alright! Back to tissue culture and time to start another batch of establishment media!
--- Took the plant growth regulators out of cold-storage (my fridge).
------ [ » SMOKES A BOWL « ]
--- While the products warmed up, gathered the necessary supplies and setup my workstations.
--- Currently, focusing on:
------ PHASE 01 » ESTABLISHMENT
--------- » DAY 01 » MEDIA - PART 01 - Mixing the growth media
--------- » DAY 01 » MEDIA - PART 02 - Sterilization of media and tools [via autoclaving]
--- Going to use the same establishment formula, but doubling the yield.
--- Also using RO water instead of distilled water.
--- Here's the establishment media formula:
--- [» VER.0001 |» INITIAL TROPICAL PLANTS FORMULA |» 0.5L (500mL) RO WATER «]
------ MS [Muashige & Skoog]
--------- » 2.22g
------ Sucrose [Cane Sugar]
--------- » 15g
------ BAP [6-Benzlaminopurine | Cytokinin]
--------- » 0.5mg » 0.5mL » 500μL
------ IBA [Indole-3-Butyric Acid | Auxin]
--------- » 0.05mg » 0.05mL » 50μL
------ AGAR [Jelling Agent]
--------- » 3.5g
------ PH [Potential Hydrogen]
--------- » 5.7
--- [» 1mg/mL CONCENTRATION ratio | 1mg = 1mL | 1mL = 1000μL «]
- [12:59]: Time to prep the growth media!
--- Made sure to turn OFF the lung-room's oscillating fan.
--- Filled a measuring cup with 400mL of RO water.
--- Dropped a clean magnetic mixing bar into the measuring cup.
- [13:05]: Placed the measuring cup on the magnetic stirrer.
--- Turned the unit ON and have the unit on LOW.
- [13:11]: Using a precision scale (sensitive to 0.01g) along with a micro-pipette (1000μL capacity along with tips) and disposable (100mL) weigh boats,
------ Added 2.22g of MS [Muashige & Skoog]
------ Added 15g of Sucrose [Cane Sugar]
------ Added 500μL of BAP [6-Benzlaminopurine | Cytokinin]
------ Added 50μL of IBA [Indole-3-Butyric Acid | Auxin]
------ Added 3.5g of AGAR [Jelling Agent]
------ Then filled the measuring cup to the 500mL line before covering the top with plastic wrap.
--- Alright!
- [13:46]: Let the media mix on the magnetic stirrer for a bit.
--- Have the unit set to LOW with a steady vortex.
------ [ » ~20 MINUTES LATER « ]
- [14:09]: Okay! Time to pH the establishment media!
--- Gently removed the bottom cap of the AC Infinity PH Meter PRO [AC-PHM7]. Placed the cap in the storage case for later. Covered the top with plastic wrap (KCL solution still inside the cap).
--- Swirled the probe in a cup of RO water to rinse off the storage solution.
--- Shook the excess water out and wiped the unit with a clean paper towel making sure all mineral buildup was removed (kept away from the very tip of the probe).
--- Temporarily placed the meter back into the cup of RO water.
--- Removed the plastic wrap of the establishment media.
- [14:13]: Using the AC Infinity PH Meter PRO [AC-PHM7],
--- Took the establishment media's initial pH reading.
--- The pH was at 5.14
--- Using the micro pipette,
------ Added pH Up solution.
--- Made sure to let the media solution mix for a bit before checking for pH readings.
- [14:21]: Adjusted the media's pH until it stabilized to 5.58
--- For this batch, tried to go for a range of 5.4 to 5.8 pH.
--- Also glad that I did not need to add PH down.
- [14:43]: Poured the pH'd establishment media into separate polypropylene containers.
--- Made sure to re-mix the media solution between container fillings.
--- Ended up splitting the media solution into 12 containers.
------ 8x » 125mL Polypropylene Bottles [with screw cap lids]
------ 4x » 236mL (0.5pt) Glass Mason Jars [with polypropylene jamming lids]
--- Have the lids of all vessels loosely on and set each aside for later autoclaving.
--- Also filled 12 empty polypropylene bottles with RO water and placed the lids on loosely (4 bottles are re-used).
- [14:58]: Prepped the tools for sterilization.
--- Took a new 5.25in x 10in sterilization pouch and added the following tools:
------ 3x stainless steel forceps
------ 3x stainless steel scissors
--- Before placing into the pouch, wiped each tool with a paper towel sprayed with 70% isopropyl alcohol.
--- Sealed the bag and marked the date.
--- Time to autoclave everything in the pressure cooker!
--- Filled a Presto 23qt-Pressure Cooker with 12 cups of RO water.
- [15:06]: Added a few aluminum foil balls to the bottom of the pressure cooker.
--- Placed the first rack on top of the foil.
--- Made sure the rack was level and stable resting above the water.
--- Gently placed the containers of media into the pressure cooker and onto the first rack. Lids are still loose.
--- Made sure to give space for each container and kept them away from the sides of the pressure cooker.
--- Placed a second pressure cooker rack on top of the containers of media.
--- Placed the containers of RO water onto the second rack. Lids are still loose.
--- Placed the third rack on top of the containers of water.
- [15:16]: Lastly, placed the sterilization bag of tools on top of the third rack.
--- Took the pressure cooker lid and made sure the release vent was clear of debris before placing it on.
--- Sealed and secured the lid.
--- Pressure vessel has been sealed!
--- Alright! Time to sterilize!
--- While keeping the vessel level and straight up, moved the sealed pressure cooker to the kitchen for heating.
- [15:23]: Placed the pressure cooker onto a butane-gas stove.
--- Turned the stove ON and set it to HIGH.
------ [ » ~20 MINUTES LATER « ]
--- Once steam was venting out of the release vent,
--- Placed the metal rocker onto the vent.
--- Shortly afterwards, the pressure top-lock sprung up to indicate the vessel was under pressure.
--- Then the pressure gauge started to rise.
------ [ » ~10 MINUTES LATER « ]
--- At 15psi, the metal rocker started to rock!
- [15:56]: Turned down the stove down to LOW.
--- Set a timer for 15 minutes and began monitoring the pressure gauge.
--- Maintained the 15psi by making minor adjustments to the stove.
------ [ » ~15 MINUTES LATER « ]
- [16:12]: Turned the stove completely OFF and waited until the pressure cooker's top-lock dropped down which indicated that pressure levels were safe to open.
------ [ » ~40 MINUTES LATER « ]
--- Once the pressure cooker was at safe levels (0psi) and the top-lock was down,
- [16:48]: Moved the pressure cooker into the lung room.
--- The pressure cooker was still quite hot so was careful to keep the vessel straight up and level during transport.
--- Used towels for insulation.
--- Rested the hot pressure cooker onto a stack of 5-gallon buckets covered with layers of towels and folded paper bags.
--- Gently opened the pressure cooker and set the lid aside.
- [16:57]: While wearing nylon gloves, sprayed my hands with 70% isopropyl alcohol.
--- Gently removed the bag of sterile tools placed it onto a Pyrex dish.
--- Removed the top rack and set it aside.
--- Then one container at a time,
--- Gently tightened and secured the lids of each bottle of sterile water before placing onto the Pyrex dish.
--- Removed the middle rack and set it aside.
--- Then one container at a time,
--- Gently tightened and secured the lids of each bottle and jar of sterile media before placing onto the Pyrex dish.
--- Throughout the entire process, kept the gloves on and sprayed my hands regularly with 70% isopropyl alcohol.
--- Decided to store all the bottles in the Pyrex dish.
- [17:16]: Have the dish resting on a shelf in the lung room. The jars of media are set right next to the Pyrex dish on a towel.
--- To prevent dust, covered everything with towels.
--- Done for now and will check on the growth media tomorrow.
--- If all goes well, should be taking new explant cuttings in a couple days!
- [17:39]: Night check on the 3x3 veg tent.
--- Looking beautiful and healthy in the veg garden!
--- All moms are getting bushy and getting pretty close to the grow light.
--- Since I plan to take explant cuttings soon, not going to top or train quite yet.
--- Clones also looking healthy and seem unaffected by the super-cropping. Nice!
- [17:57]: Checked the Ecowitt soil moisture sensor data:
------------------ [ 4x4 MAIN TENT ] ---------------
------ 45% - [CH01 FT » G30 - Heady OG BX1 #1]
------ 34% - [CH02 FB » G30 - Heady OG BX1 #1]
------ 35% - [CH03 BT » G20 - TKO]
------ 55% - [CH04 BB » G20 - TKO]
------------------ [ 3x3 VEG TENT ] ----------------
------ 43% - [CH05 BL » GR7 - TKO]
------ 45% - [CH06 BR » GR7 - Gorilla Goat #1]
------ 42% - [CH07 FL » GR7 - Heady OG BX1 #1]
------ 44% - [CH08 FR » GR7 - Garlic Budder OG#1]
--------- Veg: 38% - 45% | Flower: 45% - 55%
--------- General: 30% [Dry] «| 45 - 60% [Moist] |» 70% [Wet]
- [17:59]: Checked the 4x4 main tent.
--- Ca-Caw!! I got Headies!
--- Wow! Heady OG BX1 #1 is drying along beautifully and she is smelling dank!
--- Also no signs of mold and RH levels look stable!
--- 6 more days until the big trim!
- [18:11]: Checked the humidifiers.
--- Tanks are still full and no leaks found.
--- Wow what a day!
--- Still gots more to do!
--- Let’s go! Let’s grow!
--- Onwards Ensign!
Day 05 - Friday - 10/17/25 - Total Days: 187
-----------------------------------
Daily Averages ~[+01:00]
- Temps: 76.0°F [24.4°C]
- Humidity: 62.0%
- VPD: 1.16 kPa
- Soil %: [48, 34, 35, 55, 44, 44, 44, 42]
-----------------------------------
- [22:57]: Night check on the 4x4 tent.
--- Ca-Caw! Headies is smelling dank!
--- RH levels are getting a bit dry, but are okay.
--- Wow buds are frosty with trichomes!
--- With 5 days until trim day, getting stoked!
- [23:04]: Checked the Ecowitt soil moisture sensor data:
------------------ [ 4x4 MAIN TENT ] ---------------
------ 47% - [CH01 FT » G30 - Heady OG BX1 #1]
------ 34% - [CH02 FB » G30 - Heady OG BX1 #1]
------ 35% - [CH03 BT » G20 - TKO]
------ 55% - [CH04 BB » G20 - TKO]
------------------ [ 3x3 VEG TENT ] ----------------
------ 46% - [CH05 BL » GR7 - TKO]
------ 40% - [CH06 BR » GR7 - Gorilla Goat #1]
------ 45% - [CH07 FL » GR7 - Heady OG BX1 #1]
------ 50% - [CH08 FR » GR7 - Garlic Budder OG#1]
--------- Veg: 38% - 45% | Flower: 45% - 55%
--------- General: 30% [Dry] «| 45 - 60% [Moist] |» 70% [Wet]
- [23:11]: Checked the 3x3 veg tent.
--- Looking healthy in the veg garden!
--- Mothers are getting bushy and tall!
--- Super-cropped and trained the taller branches down to lower the canopy.
--- Plan to take tissue culture cuttings tomorrow so glad there are plenty of tops to choose. Still deciding on which mother to preserve next.
--- Clones in the propagation tray look healthy!
--- The original Garlic Budder #2 clone needs watering.
- [23:26]: Here is the starting initial watering range:
------ Garlic Budder OG#2 » 256.4g → 300.2g
--------- General Solo Range: [Dry] «| [Initial Cup Weight] + ~55-100g |» [Wet]
--- Took the starting weight before watering,
------ Garlic Budder OG#2 » 258.9g
--- While on a scale,
--- Gently misted her straw mulch with RO water.
--- Tried to keep the top growth dry.
--- Misted 5-10 sprays. Waited a few seconds, then misted again.
--- Made sure to reference the watering weights.
--- Repeated this process until the cup weighted at least 300g.
--- There was no runoff.
- [23:40]: Took the saturated weight after watering,
------ Garlic Budder OG#2 » [000.0]g
--- Marked the watering date on the side of the cup. Also marked the saturated weight on the back.
--- Placed her back into the tent.
- [23:45]: Checked the humidifiers.
--- Tanks are still full and no leaks found.
Day 06 - Saturday - 10/18/25 - Total Days: 188
-----------------------------------
Daily Averages ~[+01:00]
- Temps: 76.8°F [24.9°C]
- Humidity: 60.3%
- VPD: 1.25 kPa
- Soil %: [47, 34, 35, 55, 44, 44, 44, 47]
-----------------------------------
- [15:19]: Decided to decrease the VPD level a bit.
--- Within the AC Infinity App,
--- Changed the schedule name from 'Flower [12/12]' to 'Drying [0/24].' Oops.
--- For the Main Tent [4x4] controller,
--- Adjusted the 'Drying [0/24]' Schedule for the exhaust fan.
------ Decreased the VPD LOW trigger value from 1.5kPa to 1.4kPa
--- Adjusted the 'Drying [0/24]' Schedule for the humidifier.
------ Decreased the VPD target value from 1.5kPa to 1.4kPa
--- This should increase the relative humidity a bit and will maintain a 60-65% range
- [16:59]: Evening check on the 3x3 veg tent.
--- Wow the veg garden is raging with healthy growth!
--- Even with the lower veg temps, growth has been perky and bushy!
--- The TKO mother has been looking a bit on the purple-side, but I plan to increase the temps back after trim day.
- [17:23]: Okay! Time to continue the tissue culture journey!
--- Checked on the sterilized media, water, and tools.
--- Ooo yea! The growth media in the glass jars have solidified nicely!
--- The media in the bottles also look great! Found only one that did not gel properly.
--- Hmm. The sterile water bottles are not looking sterile. Unlike the first batch (using distilled water), each RO bottle had tiny white particles floating in the water.
--- I think this was due to the water source. The RO water used was from the plant reservoir. For the next sterilization, will try using water straight from the tap. Will discard the entire batch and try again later.
- [17:34]: Anyways! Time to cut and sterilize another batch of explant cuttings.
--- Using the similar protocols as last time, but with a few changes.
--- Instead of distilled, using reverse-osmosis (RO) water.
--- Also simplifying the workflow and will not be using the sterile water.
--- Only taking cuttings from one cultivar.
--- Today, attempting to preserve Heady OG BX1 #1
--- Unlike the last attempt, going to be cutting apical nodes and will leave all leaf growth on.
--- Last attempt was more for monsteras and not cannabis.
- [17:35]: Made sure the lung room's oscillating fan was OFF during the entire process.
--- Put on a fresh pair of nitrile gloves.
--- Okay! Let's grow Ensign!
- [17:47]: Filled a glass beaker with 180mL of RO water.
--- Using a micro-pipette,
------ Added 20mL of Clorox bleach
--- Mixed the solution.
- [17:52]: Poured the bleach solution into a glass mason jar.
------ Added 1 drop of Dawn dish soap.
--- Dropped a magnetic mixing rod into the jar before setting it onto the magnetic stirrer.
--- Turned the unit ON and set it to a low setting.
--- Placed a polypropylene lid loosely on.
- [18:02]: Rinsed and filled the glass beaker with 70% isopropyl alcohol.
--- Filled another glass beaker with RO water before adding a drop of Dawn dish soap. Mixed the solution.
--- Okay! Time to take the cuttings!
--- Using a clean pair of trimmers,
- [18:09]: Gently cut two clone cuttings from the Heady OG BX1 #1 mother.
--- Stripped each cutting down to 2-inch apical nodes making sure to leave about 0.5 inch of stem growth for planting.
------ Prepared a total of 2 nodal cuttings.
--- Dropped the nodal cuttings into the cup of soapy water.
--- Swirled the cuttings in the soapy water for a bit.
--- Opened the jar containing the 10% bleach solution.
--- Using clean tweezers,
--- Took each cutting out of the RO water and carefully submerged it into the beaker of 70% isopropyl alcohol for about 30 seconds.
--- Then transferred the cutting from the isopropyl alcohol straight into the jar of bleach solution.
--- Once both cuttings were in the jar, sealed the top with the polypropylene lid.
- [18:23]: Flipped and set the entire bleach jar upside down onto the magnetic stirrer.
--- Started using the magnetic stirrer.
--- But the cuttings were getting hit by the bar so ended up turning the unit OFF.
--- Instead, made sure to swirled the bottle every few minutes to agitate the cuttings.
--- For a proper sterilization, the cuttings should be agitated in the hypochlorite (bleach) solution for at least 20 minutes.
--- While waiting for the explants to sterilize, prepped the still air box.
- [18:39]: Unfolded and placed a Safloga still-air box onto my desk.
--- Thoroughly misted the inside of the air box with 70% isopropyl alcohol making sure to coat the entire chamber.
--- Then isopropyl misted and placed the following items inside of the still air box,
------ x1 » Jar of Establishment Media
------ x1 » Bottle of Establishment Media
------ x1 » Glass-Bead Sterilizer
------ x1 » Roll of Plastic Wrap [pre-cut]
------ x1 » Sterilization Bag Containing:
--------- x3 » Stainless Steel Forceps
--------- x3 » Stainless Steel Scissors
--- Made sure to fully coat the outside of the tool bag and each of the containers with 70% alcohol.
--- The bag had a torn corner (Oops), so made sure to spray the inside with a few mists of isopropyl alcohol.
--- For the glass-bead sterilizer,
------ Wiped the entire unit with isopropyl alcohol.
------ Before filling the unit with the included beads, misted the heating chamber with a spray of isopropyl alcohol.
------ Misted the glass beads again with a spray of isopropyl alcohol.
--- Set the cleaned glass-bead sterilizer into the still air box.
- [19:02]: Still air box fully prepped for explants!
--- Okay! Explant nodal sterilization complete!
--- While still wearing gloves,
--- Misted the outside of the explant jar with 70% isopropyl alcohol before placing it into the still-air box.
--- Turned the glass-bead sterilizer ON.
--- Made sure to re-seal the chamber.
- [19:05]: Okay! Finally time to start the tissue culture transplant!
--- Let's go Ensign!
--- Sprayed my gloved hands with 70% isopropyl alcohol (also put on a pair of cloth arm sleeves),
--- Placed my hands through the arm holes and into the still air box to begin the process.
--- Started by laying out my initial workspace:
------ » Far Left Quadrant » Jar of Sterile Establishment Media
------ » Far Center » Bottle of Sterile Establishment Media
------ » Far Right Quadrant » Glass-Bead Sterilizer
------ » Mid Center » Bleach Jar with Explant Cuttings [Main Workspace]
------ » Near Left Quadrant » Empty [Trash Area]
------ » Near Right Quadrant » Bag of Sterile Tools & Roll of Plastic Wrap
--- Opened the bag of tools and placed the forceps and scissors into the pre-heated glass-bead sterilizer.
--- Set the bag in the trash area (near left quadrant).
--- Loosened the lids of both containers of sterile media but did not remove the lids. The lids were resting on top and could easily be lifted.
--- Also took lid off of the bleach jar and gently set it on the table.
--- Took the jar of sterile media and set it in the center of my workspace (to the right of the bleach jar).
--- Using my left hand, took a set of scissors from the glass-bead sterilizer and gently cut the bottom of the first cutting.
--- Once the bottom cut was made, placed the scissors back into the glass-bead sterilizer.
--- Using my left hand, lifted the lid off of the jar of sterile media and inserted the trimmed end of the cutting straight into the growth media (using my right hand).
--- Covered the jar with the lid and placed the forceps back into the glass-bead sterilizer.
--- Tighten the lid of the jar and set it aside.
------ [ » REPEATED THE ABOVE PROCESS FOR THE BOTTLE OF GROWTH MEDIA « ]
--- Once the last cutting was transferred from the bleach jar into the sterile media,
--- Turned the glass-bead sterilizer OFF.
--- Cleaned up my workplace and placed the scrap stem tips and bleach jar out of the way (near left quadrant).
- [19:28]: Wrapped the lid of each explant container with plastic wrap before setting it in the center of the workspace.
--- Explant transplant completed!
- [19:59]: Using a label printer (Brother DT410), made a set of labels for each container:
------ Heady OG BX1 #1 | 04.24.25 | Photo | Reg
------ Formula: v0001 | ExBatch: 0002 | Lot: 01 | Pod: 01
------ Establishment Media | Sealed On: 10/18/25
--- Opened the still air box.
--- Then one container at a time, took an explant out and wrapped the lid with a label.
--- Set the labeled containers onto the propagation tray (in the 3x3 veg tent).
- [20:07]: Done!
------ The explants are around 37 μmol/m²/s which gives a DLI of 2.40 mol/m²/d under an 18/6 light cycle.
--- Will check daily for contamination.
--- Ca-Caw!! Ahh yea!
--- Heady OG BX1 is now officially my first true attempt at cannabis tissue culture!
--- Using this new workflow, I may try reusing the TKO media. Do plan to take new cuttings soon. May even try using the liquid media.
--- Shout out to microclone and Bill Graham! His 'Tissueponics' video contains tips and tricks of the trade that have straight up changed the way I think of DIY cannabis tissue culture.
--- Plan to further refine my process and will continue to refine the workflow with each attempt.
- [20:15]: Checked the Ecowitt soil moisture sensor data:
------------------ [ 4x4 MAIN TENT ] ---------------
------ 54% - [CH01 FT » G30 - Heady OG BX1 #1]
------ 34% - [CH02 FB » G30 - Heady OG BX1 #1]
------ 35% - [CH03 BT » G20 - TKO]
------ 55% - [CH04 BB » G20 - TKO]
------------------ [ 3x3 VEG TENT ] ----------------
------ 43% - [CH05 BL » GR7 - TKO]
------ 48% - [CH06 BR » GR7 - Gorilla Goat #1]
------ 42% - [CH07 FL » GR7 - Heady OG BX1 #1]
------ 45% - [CH08 FR » GR7 - Garlic Budder OG#1]
--------- Veg: 38% - 45% | Flower: 45% - 55%
--------- General: 30% [Dry] «| 45 - 60% [Moist] |» 70% [Wet]
- [20:56]: Checked the 4x4 tent.
--- Ca-Caw! Looking great my ladies!
--- Humidity levels are still a bit on the dry side, but still okay.
- [21:08]: Checked the humidifiers.
--- Tanks are still full and no leaks found.
--- Wow what a day!
--- Oh yea, 4-more days until trim day!! Ca-Caw! Let’s go!
Day 07 - Sunday - 10/19/25 - Total Days: 189
-----------------------------------
Daily Averages ~[+01:00]
- Temps: 76.7°F [24.8°C]
- Humidity: 59.4%
- VPD: 1.27 kPa
- Soil %: [48, 35, 35, 55, 44, 43, 44, 42]
-----------------------------------
- [07:08]: Quick morning checked on the 3x3 veg tent.
--- The veg garden is healthy and perky!
--- All moms and clones are healthy and raging with growth!
--- Both Heady OG BX1 #1 explants also look alive and green!
- [19:26]: Night check on the 4x4 tent.
--- Ca-Caw! We got MENDO DOPE in the trunk!
--- Wow terps are getting loud and buds are drying along nicely!
--- Looking frosty and coated in trichomes!
--- Three more days until trim day!!
- [19:33]: Checked the Ecowitt soil moisture sensor data:
------------------ [ 4x4 MAIN TENT ] ---------------
------ 46% - [CH01 FT » G30 - Heady OG BX1 #1]
------ 35% - [CH02 FB » G30 - Heady OG BX1 #1]
------ 35% - [CH03 BT » G20 - TKO]
------ 54% - [CH04 BB » G20 - TKO]
------------------ [ 3x3 VEG TENT ] ----------------
------ 40% - [CH05 BL » GR7 - TKO]
------ 43% - [CH06 BR » GR7 - Gorilla Goat #1]
------ 47% - [CH07 FL » GR7 - Heady OG BX1 #1]
------ 41% - [CH08 FR » GR7 - Garlic Budder OG#1]
--------- Veg: 38% - 45% | Flower: 45% - 55%
--------- General: 30% [Dry] «| 45 - 60% [Moist] |» 70% [Wet]
- [19:35]: Checked the 3x3 veg tent.
--- Vegging along beautifully in the garden!
--- Mothers are getting taller and probably could train, but will wait until tomorrow.
--- Clones and explants also look healthy and green!
--- Gorilla Goat #2 needs watering!
- [19:44]: Here is the starting initial watering range:
------ Gorilla Goat #2 » 255.4g → 300.3g and was last watered 5 days ago.
--------- General Solo Range: [Dry] «| [Initial Cup Weight] + ~55-100g |» [Wet]
--- Took the starting weight before watering,
------ Gorilla Goat #2 » 244.9g
--- While on a scale,
--- Gently misted her straw mulch with RO water.
--- Tried to keep the top growth dry.
--- Misted 5-10 sprays. Waited a few seconds, then misted again.
--- Made sure to reference the watering weights.
--- Repeated this process until the cup weighted at least 300g.
--- There was no runoff.
- [20:04]: Took the saturated weight after watering,
------ Gorilla Goat #2 » 345.6g
--- Marked the watering date on the side of the cup. Also marked the saturated weight on the back.
--- Placed her back into the tent.
- [21:41]: With a few days before the big trim, decided to sample a few buds!
--- Cut and trimmed branch for sampling and wow she’s got terps!
--- Buds are dense and have a gassy diesel funk! Ca-Caw!! Wow!
--- Without even curing, pretty sure she’s the one!
--- Plan to grow out another cycle (in clone of the same pheno), but I think I found my female for my first breeding project!
- [22:01]: Checked the humidifiers.
--- Tanks are still full and no leaks found.
--- Ahh yea! Three more days until the big trim!
--- Also next week will be the last for this log.
--- But already stoked for the next!
--- Planning on popping more seeds and continuing the pheno hunt for another female!
--- Since I lost TKO this harvest cycle, plan to grow a clone cutting of the same pheno (#2).
--- As for seeds, popping more regulars and going to attempt to grow some of Mr. Grow-It’s Chillout OG!
--- Got a pack of F3s and am stoked to give them a try!
--- Also going to sprout some beans of Dead Ops OG from Zaza Genetics!
--- Chillout OG, Dead Ops OG, and another round of TKO! Let’s go! Let’s grow!
--- Hunters of the dank! Ca-Caw!
--- Anyways!
--- Onwards to next week!
[END OF WEEK 26]


Likes
39
Share


@Randyb4
Follow
Day 56. Plants look good today almost ready to flip into flower, but I have a vacation this weekend so they will have to wait.
Day 59 Back from vacation and the plants look great! Today is their first day at 12/12 light schedule. Tured the Growers Choice ROI-720 led up to 50% and I raised it to maintain 24" from canopy. I did some light defoliation around the base of the plants. I watered Plants B and D today.
Day 60 Couldn't get humidity to drop below 75% so I got a dehumidifier and dropped it to 65%.
Day 61 Plants look good. I'll try to water plants A and C tomorrow morning
Day 62 Watered Plants A and C this morning. Did some more defoliation and bent some more tops down under the net. Plants look good besides plant D had 1 leaf that was completely wilted and dead. The rest of the plant appears fine.

Likes
23
Share


@CannaArchive
Follow
Week 7 was a fairly uneventful but stable week.
The plant continues to look healthy and maintains a compact structure with tight internodal spacing. 🌿
Light intensity remained at around ~1000 PPFD, with stable environmental conditions at ~25°C and ~55% RH.
Watering was done every 2–3 days depending on pot weight, using approx. 3L per watering with RO water + CalMag. During this week, the plant received BioTabs Bio PK and one application of Green House Bio Enhancer. 💧
Bud development progressed slightly, with the flowers beginning to swell a bit more, but overall changes compared to the previous week were still moderate. Stacking is slowly starting but not very pronounced yet.
The plant remains fully green and shows no signs of deficiencies or stress. Trichome production is visible but still relatively light compared to other plants in the tent.
Overall, this week marks a steady continuation into mid flower. Development is slower compared to the Apricots, but the plant remains healthy and stable, with potential for denser bud formation in the coming weeks. 🌱💪
Likes
2
Share


@Barzenegger
Follow
The CBD and SAD seem to be finishing a bit quicker than the other 2, they might be ready in a week or two. I will probably drop the EC next time I fill the tank. Some of the branches with heavier top buds were starting to hang and get too close to other buds, so I used some garden wire to fasten them to the tent poles, which can be seen in the video between the 13th and 14th. Pretty uneventful week otherwise.