
Likes
Comments
Share


@SkunkyDog420
Follow
Hallo zusammen 🤙
Sie wächst sehr schön und macht keine Probleme.

Likes
7
Share


@Batista
Follow
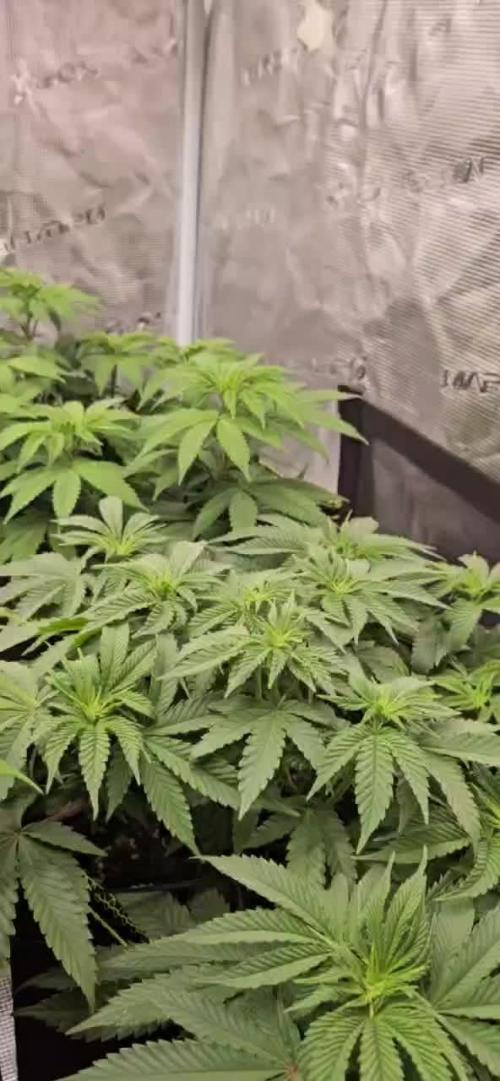
New week, she is developing very fast now, we are tying the branches down almost every day.
We bought an EC meter, and we finally know if we are within acceptable parameters. Tap water is approximately 70 ppm and after adding fertilizers the ppm was close to 850.
We are also planning to make our own colloidal silver for use in clones.
If all goes well, we will start flowering in the ninth week.

Likes
7
Share


@logangrowgan2020
Follow
plant grew awesome seems healthy! environment settling in, watering settling in. performed some defoliation.

Likes
8
Share

@tuzeus
Follow
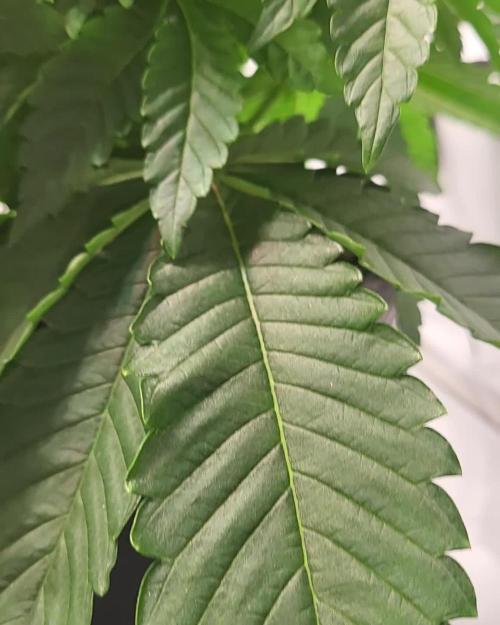
I think I ran into a slight nitrogen toxicity as the leaves are dark green and have a slight tip burn. I think I will change my calmag to use one that has lower nitrogen. Still looking good

Likes
53
Share


@BudBoutique
Follow
! this is my current status, gonna upload my last veg weeks within the next week - got a bit busy around Spannabis - thank you for your understanding! 💚
Welcome to Bud Boutique Grow Diary - really appreciate all your love and support :)
Dont forget to check out my other current grows!
🗓️ This Week:
after 48 hours of complete darkness (important for seedlings to make sure all plants switch into flower same time), I finally switched my lights to the 12/12 schedule and sent my ladies into the flower.
- both Phenos super strong and praying up,
- more than healthy and going well, just one of them needs a little more water and attention than the other ;)
- Day 3: Foliar spray with APTUS Regulator and APTUS Nutrispray to give them extra micronutrients and give them a little shell for protection.
! always use APTUS Regulator first and mix well with your water before adding any other nutrients for Feeding or Foliar!
Thank you for still staying with me 💚
___________________________________________
--- 🌱 Strain (Sponsor) ---
🏷️ P.C.R. by Art Genetix
https://www.artgenetix.world/product-page/p-c-r
--- 🥗 Nutrients and Feeding (sponsored by APTUS: APTUS Ambassador) ---
🍸 APTUS: full nutrient schedule extreme
-- Regulator, N-Boost, P-Boost, CaMg-Boost, K-Boost, Allin1 Liquid, Startbooster, Topbooster, Enzym+ every feeding
-- Fulvic-Blast, NutriSpray as Foliar each once a week
🔗 https://aptus-holland.com/
--- ♻️ Grow Control (Sponsor) ---
TROLMASTER: TENT-X + LM14 Light Adapter to dim/sunrise/sunset lights + Temp & rH Sensor all remote on App
🔗 https://www.trolmaster.eu/
--- 🏭 Grow Setup ---
💡LUMATEK Zeus Pro 600
* 🏠🌿 Indoor: Homebox 120x120x200cm (4x4)
* 📐🌀 PrimaKlima exhausting Fan 1180m3/h (running on 60-80%)
* 🌀 Can Light Filter 800m3/h & 1x Fanbox 1x Dyson fan for Air circulation
🔗 https://lumatek-lighting.com/zeus-600w-pro-29/
🔗 https://primaklima.com/de/shop/ventilatoren-de/ec-ventilatoren/pk160ec-tc/
🔗 https://canfilters.com/products/filters/
All Likes and comments are highly appreciated!!!
👨🌾 don't forget to check out my Instagram for daily educational content: budboutiquee
- Bud Boutique

Likes
4
Share

@Sators
Follow
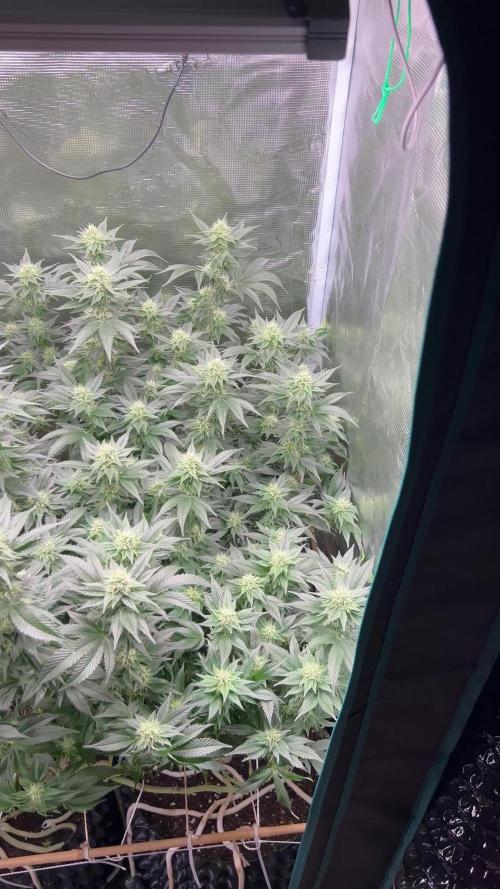
Day 50 – Officially Entering Bloom 🌸
We’ve crossed a beautiful milestone—flowering has officially begun! The pre-flowers are stacking up with intent, and the entire structure is shifting focus to its reproductive mission. It’s a joy to witness the transition as the energy starts moving into the upper canopy. This FastBuds CBD strain is showing phenomenal resilience and grace despite the unpredictable UK weather.
Over the past few days, the plant faced intense rain and strong wind gusts, which even knocked it off its perch. But just like a warrior, she got back up—no broken limbs, no complaints, just a stronger stem and a deeper green. I’ve now placed the pot inside a larger container to stabilise it and protect against slug patrols during cold, damp nights. A simple hack, but one that offers big peace of mind!
This grow is intentionally minimalistic. No tents, no synthetic boosters, no artificial support—just super soil, pH-balanced tap water, natural sun, and trust in the process. Every drop of rain and every beam of sunlight becomes part of the story. It’s an outdoor symphony powered by patience and the pure intent to create top-quality CBD oil—without the psychoactive effects, but with all the healing potential.
She’s now standing tall at approximately 70 cm, stretching with elegant confidence and building a promising framework of bud sites. There’s something incredibly humbling about letting nature lead. And with a strain like this from FastBuds.com, it’s a rewarding partnership between growers and genetics.
More to come, but for now—we bloom.

Processing
Likes
11
Share


@RuX1337
Follow
Damaged a cotyledon. FFS! All values on final day of week (day 7, 14, etc)


Likes
2
Share


Likes
6
Share


@MisterTree
Follow
Tag 58 der Lady‘s, Sie wurden heute nochmal leicht nackig gemacht (entblättert) und leicht gegossen.
Denke die nächste Woche wird geerntet ich halt euch auf dem laufenden.
Danke an alle die mein Diary betrachten und mit verfolgen wünsche euch allen eine gute Zeit🙏🏽
Stay Strong & Healthy Growmies
Likes
13
Share


@SgtDoofy
Follow
April 11
Just got done with some serious defoliation. Removing all kinds of nodes that would have wound up as less than popcorn bud while taking up valuable space in the light. Some of the tips of the leaves up top got sacrificed as I waited to feed for a bit too long while I wanted for a calmag solution to be delivered. Little ugly, but no worse for the wear.
Likes
153
Share


@Ju_Bps
Follow
Hello my friends 👨🌾👨🌾,
All was fine this week,
#2 and #3, got just one time water, this start week, they looking stop drinking, so I've harvest the plants today,
Except the #1, not yet ready.
I'll harvest #1 next week,
#1 got 3x 2.5l water + flash cleaner PH@6
I'll publish all the harvest next week,
I can just say you buds have beautiful colors.
Thanks to Mars Hydro for the TS1000 and Royal Queen Seeds for seeds ❤️❤️
https://www.mars-hydro.com/ts-1000-led-grow-light
https://www.royalqueenseeds.com/autoflowering-cannabis-seeds/537-mimosa-automatic.html
Have a good week end,
See you next week 💨

Likes
15
Share

@IberianRootcraft
Follow
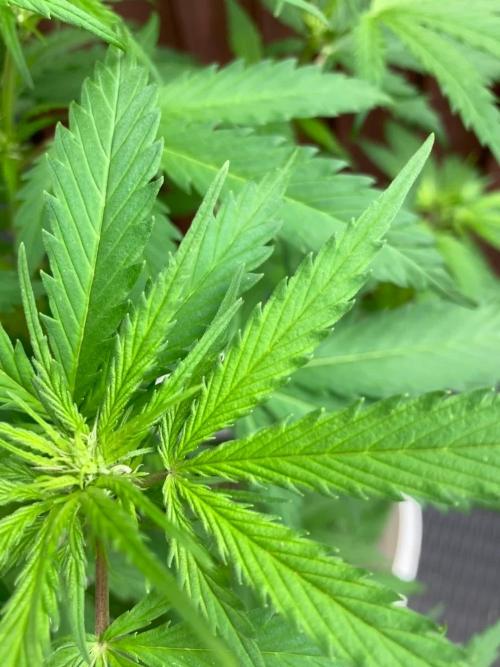
Continuing the journey with the HiHolyHigh selection in this 8th cycle Living Soil bed. The canopy is looking mostly uniform, though a few cultivars (RS11, Colorado Nightshifter, and Runtz HHH) are taking a bit longer to fully acclimatize to the environment.
Key Technical Details:
• IPM: Fully up to date and strictly maintained.
• Soil Moisture: Keeping levels constant within the optimal range to ensure the soil microbiology remains active.
• Biological Activity: Applied avocado tech today to congregate and stimulate the worm population on the top layer, prepping them for the upcoming pre-flower re-amendment.
Nutritional Notes:
The space is almost completely filled, but I’m noticing a slight Magnesium deficiency in the Animal Tsunami and the RS11 is currently recovering from a minor Nitrogen lockout. I’ll be spending this week dialing in these corrections to ensure they are 100% healthy before flipping to the flowering cycle.


Processing
Likes
15
Share


@vibealive
Follow
Not too too much to report... Kind of on Auto Pilot really until the end... The broken top is FINE, and it's looking GREAT man!!
I'm sure we're going to get a solid yield... :)


Processing
Likes
10
Share


@yaron
Follow
So this week we have a heatwave witht 30 degrees celcius,looking good so far except the smallest one.
she is a week or so younger but stays fairly small,but looks healthy.
cheers!


Likes
4
Share


@ZzTooRightOGzZ
Follow
She smells and tastes great 🔥🔥🔥🔥she also looks good with her purple buds.
Processing
Likes
5
Share


@Georgius
Follow
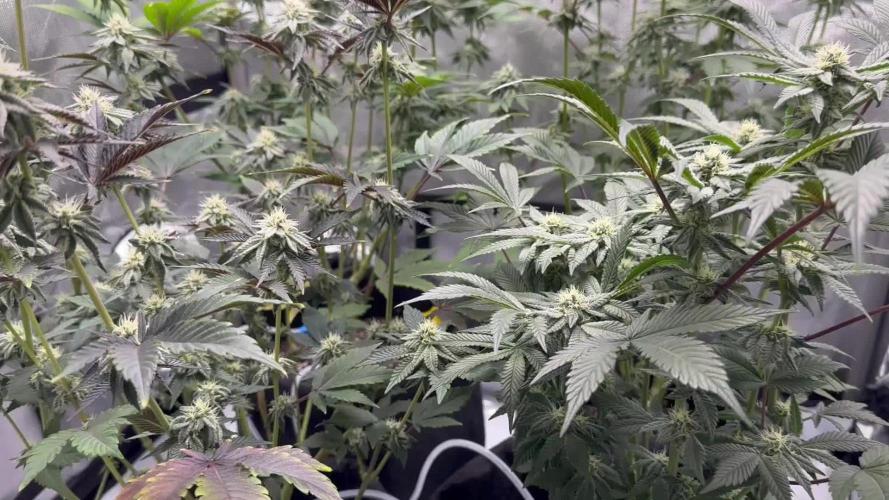
End of 5th week of flowering.
GSC and Tangie by Fairseeds
Cheesus by Tomáš Filcka

Likes
2
Share

@Kevs_Best
Follow
Jo die sind echt krass gewachsen, der eine vorne sehr buschig, die oberen Fächerblätter des Hauptstamms mussten entfernt werden. Der hiintere wächst anders, und beide wurden einmal getoppt, noch 3 Tage veggie, sodass die eine 4 Wochen und 3 Tage Veggie hatte, währenddessen die hintere #2 3 Wochen und 5 Tage, dann gehts ab morgen in die Blüte.
EN
Yeah, they have really grown a lot, the one in front is very bushy, the upper fan leaves of the main stem had to be removed. The one in the back grows differently, and both were topped once, still 3 days of veggie, so the one had 4 weeks and 3 days of veggie while the back one #2 had 3 weeks and 5 days, then starting tomorrow it goes into bloom.