
Likes
Comments
Share


@sevengreenfingers
Follow
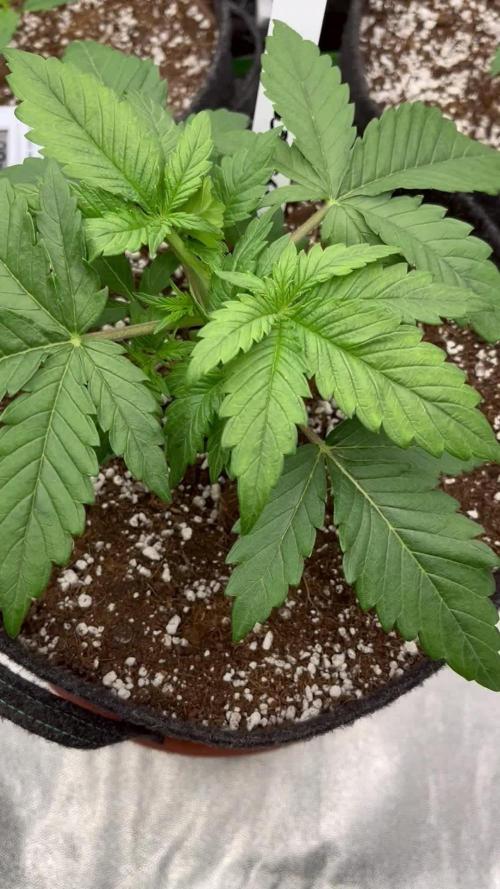
Hello everyone! I promised to track this grow very closely this time and ufortunately life got in the way. Here is a quick sumup of the grow.
First of all- One of the sour stomper plants unfortunately didn't make it. It died at about week 4. The main stem somehow had rubbed/broken down. That's why it was falling down. It was almost like a mini beaver had chewed it off at the point where the stem touches the riot rooter. At first I thought nothing much of it, maybe it hasn't been rooted in quite well yet or something. And I was constantly touiching it when watering, that made it worse. Soo the leaves were dropping and the plant looked very weak. Then I decided cut thr rapid rooters top layer and found out the severity of the problem. Tried to tape it up and other things, but it was too late. At the end it appeared all good as the remaing plants got so big the I had some space issue so I wouldn't have been able to fit another plant in anyway.
At that time I finally made my self-draining saucers. I took me a while and a lot of effort, but finally they were ready and working well. I also installed the self watering system and flowering was starting. Pretty soon I started noticing weird leaf symtoms. Brown spots, different kind. Some plants had it more, some less. Sour Stomper looked pretty good throughout the grow. Mango smiles seemed sensitive and Strawberry Nuggs were pretty strong until the end.
The grow was basically me experimenting with the setup- changing watering schedules , changing ppm, ph and all that stuff to keep the leaves looking healthy and it was very hard I have to admit. Probably my hardest grow in that regard. But somehow, the bud leaves remained healthy and the buds really fattened up good. I got away with an amzing 700G dry bud harvest which was def a new record from one grow. And the bud quality is very good too!
Next time definetly no more than 4 plants as they got pretty big and I thought it was a little overcrowded. I was doing some good defoliation too. I should have defolited strawberry nugs more tho. Sour Stomper got some amazing bud development from top to bottom because it was was growing next to strawberry nuggets which were really small most of the grow. They actually took the most time to harvest even longer than Mango smile. Mango smiles were ready quite early. Sour Stomper was just in time!
I topped sour stomper and both Mangoi smiles, left SNs both normal. Looking back at it, the way I grow them, Should have topped SNs too. Would probably have more space in the middle and longer side branches. Probably wouldn't have been as bushy!
I followed the full Terra aquatica feed chart until the end. I was supplementing with CalMag a lot as I thought the symptoms could have been from a CalMag deficiency as this was my first grow with RO water.
Overall a very challenging but good grow at the end. First time no mold problems. A record breaking yield for me. Basically surpassed the upper limit for all plant probable harvest sizes. Got good smelling quality bud. Very happy overall and will continue experimenting with Mephisto beans in the future for sure! I guess what I like the most about Mephisto is how close to description the plant is, very stable genes in that regard.
Next time I will also have to start feeding plants higher PPM feed faster at the very start. and during flowering. But still not 100% sure what caused the leaf symptoms.

Likes
13
Share


@Youngbuds1
Follow
So as you can see I now have four flowering which I guess were the autos and I have one gelato that is still vegging and is doing damn good. There are two that have lighter color leaves, I’m trying to focus on on these and see if I can get better production. As for the tall GG in the back, leaves are waxy and have resin production starting. A lot better, overall I’m learning more and more every week!
Hope everyone is enjoying my grow and stick around, ask questions. Happy New Year!

Likes
8
Share


@Huganji_37
Follow
In my opinion, the harvest was quite good for a first grow. The buds are now in jars with humidity control packs and hygrometers, curing in the dark. Several weeks have passed, and I've already had the chance to try them. I have to say that I quite like the taste, and when smoking, I don't experience any harshness or other negative effects; instead, it feels rather mild and pleasant. The effect is good—not what I'm used to, but very pleasant and calming. I'm already looking forward to the next grow.


Likes
26
Share


@SmokeableHobby
Follow
1/5 - Day 51 / Day 23 flower - Feeding Day
Pots were mostly dry on this day, last time they were fed was a little over a week ago on day 43 (12/28). I've done two small waterings since last feed, about a half gallon of water for each of my 5 gallons and about 8oz of water for my bonsais. My plants are drying out within about 48 hours of each small watering.
For today's feeding I went to full strength on my nutes. My solution consisted of:
- 1 gallon distilled water
- 3ml CalMag
- 3 tsp of FF Big Bloom (full dose))
- 2 tsp of FF Tiger Bloom (full dose)
- pH: 6.9
- TDS: 342ppm
- EC: .7
I gave each of my 5 gallons about a half gallon of the fertigated water each which wasn't enough to produce runoff. I gave them each about another 1/4 gallon distilled water to generate enough runoff to test. I tested the runoff of my Z52 which gave me readings of:
- pH: 6.3
-TDS: 1600ppm
-EC: 3.2
I gave about 12oz of fertigated water to each of my bonsais. My ZB2 runoff posted readings of:
- pH: 7.2
- TDS: 594ppm
- EC: 1.2
My TDS readings are definitely low compared to the FF Soil Feeding Schedule. The suggested readings for week 7 are an EC of 2.8 - 3.0 and 1960-2100ppm. Not stressing too much over the reading as the girls are looking healthy and happy. Will add another feeding in between waterings if I start to see any nutrient deficiencies but I don't see any cause to do so at the moment.
As you can see from the picture on 1/3, the super cropping I did on 1/2 didn't hurt my girls one bit. By the following day, the tops were already bending back toward the lights. This was a big relief.
****************************************************
1/7 - Day 53 / Day 25 Flower
Light watering in the morning today using pH'd dechlorinated tap water w/ 4ml of cal mag. Gave about about a 1/4 gallon to each for my 5 gallons and another 8oz each for my bonsais.
****************************************************
1/8 - Day 54 / Day 26 Flower
Noticing signs of nutrient issue on the Z51. Surprisingly, no signs of nutrient issues on the Z52 despite using the same solution and roughly the same amount of water during the feeding day on 1/5. Decided to do a heavier watering tonight, using about 3/4 gallon of pH'd dechlorinated tap water. Hoping that dilutes the soil a little bit and pushes the salts toward the bottom.
****************************************************
1/9 - Day 55 / Day 27 Flower
Nutrient issues did not appear to get any worse overnight so that is encouraging. Did some minor defoliation on my 5 gallons this morning to remove any of the smaller branches on the lower 3rd of the plant. Haven't completely removed any branches that are below the trellis. Will start pruning more regularly every other day so I don't shock the plants too much.
Likes
15
Share


@BicRed
Follow
6th week of flowering.
The flowers are almost fully formed, they just need to fatten up and share.
It's noticeable that they're drinking a lot of water and also that it's hotter than the previous months, so it evaporates faster.

Processing
Likes
4
Share


Likes
Comments
Share


@Dirizhor
Follow
Hi, exciting times, flowering, see some stratching, but not too much.
Plant now drinks 2 liters a time, each 2 days. Befor I was giving 1 liter every 3 days. So water cosumption encreased more then 3 times.
Smell is not strong yet, as expected.
Not much really I need to do escept mixing fertilizer and water the plant.
Likes
12
Share


@DeepRootsGrowTrees
Follow
MIMOSA by ROYAL QUEEN SEEDS
Week#11 Overall
Week #10 Veg
This week she's doing good dealing with the heat and the other elements being outside. Stay Growing!!
Likes
14
Share


@RedbeardGrow
Follow
Per essere la prima volta, sono davvero soddisfatto e felice di fumare l'erba da me prodotta. Tenterò di crescere di nuovo questa varietà, sia per la soddisfazione della crescita, sia per il suo gusto e il suo effetto divano


Likes
2
Share

@Lvnsource
Follow
Really happy with the foundation she’s building ! Exactly what I need for a 5-6 week veg :) don’t know when I’ll flip, will have to decide once she’s bigger


Likes
6
Share


@masterofsmeagol
Follow
5/18 It's not raining now but it's supposed to later. The plants are protected though. I have brought them out to continue hardening. It's only 57 degrees but they'll be alright. I used what little water was left in the bottom of the gallon to lightly water what looked like it needed it most. I mixed up another gallon and I'll check them again before they go in for the night. These plants are getting hardened off properly. I've had some pretty serious problems when I try to transition to quickly. I don't see ANY problems (knock on wood) thus far. Pink kush reminds me of purple punch. It grows similarly and starts off slow. I hope it turns the corner like the purple punch did and make up for it with the quality of flower. I topped/fimmed a special kush #1. I'll update when I bring them in for the night. This week I'll clean/sanitize the cage and the grow bags.
EDIT: PLANTS SPENT A LITTLE OVER 3 HOURS IN THE LEAN-TO WITH INDIRECT SUNLIGHT AND EXPOSIRE TO OUTDSIDE AIR, TEMPS AND RH. I DIDNT WATER WHEN I BROUGHT THEM BACK IN. I'LL CHECK TOMM MORNING AND SEE HOW THEY LOOK. IT HAD JUST STARTED TO RAIN LIGHTLY WHEN I BROUGHT THEM IN. THEY ARE PRETTY SHELTERED FROM WIND AND RAIN IN THE LEAN-TO.
5/19 It's thunderstorms out with high winds so the girls will probably stay in today. They look like they are acclimating well. I can see where some of the FIMS took. I redid one I think. I'll update later if do anything.
5/20 Everything looked AMAZING this morning. Boy that MK ULTRA has get some thick branches already forming.
Another shitty rainy day. I consulted chatgtp and it was on the same page as me. No real benefit to expose my girls to 47° Temps, cold rain qnd wind. It will be shitty a couple more days. I'll evaluate things later. WATERED EVERYTHING TODAY. TOPSOIL WAS DRY. I USED APPROX 2/3 OF A GALLON ON EACH PLANT.
5/21 I've got a super busy day. I left early and it was to cold to put the girls out. It's 55° at 9:30a.m. It may rain off and on but I think the girls would do okay in the lean-to. I need to get them ready and hardened for their forever homes. Time seems like it's flying. We are getting close to being able to put them out without risk of reveg. Plus I'm not subjecting my girls to un needed stress for no reason. I'll update what I do.
5/22 Plants were dry this morning. I used what was left in the gallon jug to water all the plants. I don't wantcto overwater and I'd like to keep the nutes in the soil where the plant can absorb them. Not just leak out the bottom. They are all growing at an incredible pace. It's currently 49°F at 9:45. It's overcast with a chance of rain. We are at what was suppised to be the high for the day. If we get above 55 I'll bring the girls out and continuing hardening. I guess it's not going to he an early season. Won't be long though and these girls will be in their final homes. I'm impressed with what I've seen so far.
EDIT: ITS 4PM AND THE SUN JUST PEEKED OUT FOR A FEW MINUTES AND IS GONE AGAIN. PLANTS LOOK FANTASTIC. IM SO GLAD I KEPT THEM IN DURING THESE 40 LOW 50 DEGREE WET DAYS. IT'LL ONLY STRESS THEM IMO SINCE THEY LOOK SO GOOD. AS SOON AS THIS RAINSTORM AND COLD WEATHER PASSES WE SHOULD HAVE DECENT WEATHER. JUST A FEW MORE DAYS WHERE HIGHS ARE IN THE 40'S. I FEEL BAD FOR THOSE PEOPLE THAT SAW THOSE HIGH 70-80 DEGREE DAYS AND PUT THEIR PLANTS OUT. THEY ARENT DOING GOOD. JUST LOOKING AT THE FOLIAGE AROUND AND I CAN SEE TREES THAT ARE JUST LIMP. THE BLOSSOMS ON THIS SPECIES LOOK LIKE A CANNABIS PLANT IN VEG WHEN IT GOT COLD SHOCKED. ANYWAY MY BODY IS KILLING ME. I GOT A LOT DONE. AND I SOAKED MY BAGS FOR 40 MINS IN A MICTURE OF DAWN, H202 AND WATER. PRIOR I USED A WIRE BRUSH TO GET ALL DIRY AND STUFF OFF I COULD. THEN I SOAKED THEM AND AFTER I RINSED THEM. I COULD SEE THE H2O2 DOING ITS WORK. REALISTICALLY I SHOULD GET NEW BAGS. ITS JUST NOT IN THE FINANCES RIGHT NOW. OH WELL. THEYVE BEEN SANITIZED AND WASHED AND ILL GO OVER THE ONES THAT ARE STAINED AGAIN JUST TO MAKE SURE I DONT SPREAD SOMETHING.
5/23 What a miserable day. It's 44° and pouring out. I put a screenshot of tbe weather and you can see that after the next few shitty days we are getting sunny weather in the 70's. Light is long enough for them now. I need to dial back the timer morecto get them acclimated. I just have to clean up the cage and they are ready to go. Bags are sanitized. I'm going to spend some more time getting some algae off a couple. These plants are flourishing. I am happy I picked 1gal over 3gal before the transplant. It's turned out perfect thus far. Really looking forward to this. Oh and I watered everything a LITTLE bit as it was dry. Enough to get it through until they get a full watering before going outside. I also attempted a FIM on the other 10th planet. The FIM on the mk ultra worked and I've got at least three tops.
5/23 WATERED ALL PLANTS WITH APPROXIMATELY A HALF GALLON. Plants were all super light and dry. I keedcto water more volume at a time. This is easier than fixing overwatering. Things are getting tight in here. Plants are getting huge! The FIMs and Toping that ive done took. That big mk ultra has 4 or 5 tops on it! Plants look super healthy. Good weather is coming. They'll be in their forever homes shortly. It's working out perfect. Some of these plants look like they'll need a transplant soon. Still need to clean up the grow cage but that will only take a minute. Also need to fix a tear I made in a grow bag but again thats just normal small shit. If you look at the snap shot of weather I took you can see the weather is going to improve greatly. This is when I'll do the majority of work. I'll update anything else I do.
EDIT: ITS 51° AND RAINING OFF AND ON. I MADE A "TEMPIRARY FIX" FOR THE GROW BAG THAT I HAD RIPPED. IT RIPPED FROM THE HANDLE DOWN AND A LITTLE DIAGONALLY. I THOUGHT ABOUT SOWING IT BUT OPTED FOR THIS EASIER METHOD. I POKED HOLES BIG ENOUGH TO SLID SMALL ZIPTIES THROUGH THE TORN PART OF THE BAG. I USED THEM TO "SUTURE THE BAG BACK TOGETHER. I THOUGHT IT TURNED OUT GREAT. I THEN USED GORILLA TAPE AND PUT A PIECE DIAGONAL OVER THE SMALL ANGLE. I DID THE SAME ON THE OPPOSOTE SIDE BEFORE RUNNING THE GORILLA TAPE FROM THE BOTTOM OF THE TEAR OVER THE BAG AND INTO THE INSIDE (COVERING THE VERTICLE STRIPS AND ZIPTIES). THE TAPE IS JUST SO I DONT LOSR SOIL AS THE ZIPTIES PRETTY MICH DID THE JOB. I ALSO USED A BUNCH OF H2O2, WHICH I POURED OVER THE ALGAE ON THE BAGS IT WAS PRESENT ON. IT FIZZED UP AND I WAS ABLE TO REMOVE ALL STAINS FROM SOME BAGS. I WORKED THEM ALL OVER AGAIN AND DOSLOSGED EPOTS AND SANITIZED ANYTHING THAT LOOKED LIKE IT NEEDED IT. ALL I HAVE LEFT IS TO CLEAN THE CAGE. AFTER WATERING THE PLANTS THIS MORNING THE JUNPED VISIBLY IN SIZE WITH LEAVES PRAYING TO THE HEAVENS. IM GLAD I HAVE TWO LARGE SOUTH FACING WINDOWS WHICH I HAVE OPENED THE BLINDS. I THIBK ITS ONE MORE DAY OF THIS AND A FEW MORE HARDENING THE GIRLS AND ILL BE ROCKING AND ROLLING. WHICH IS GOOD CONSIDERING THESE PLANTS ARE GETTING BIG. DONT WANT THEM TO GET ROOTBOUND. FORGOT CAMERA SO DIDNT TAKE PICTURES.


Processing
Likes
35
Share


@Paulolo03
Follow
Thanks to your advices guys, the plants survived the heat wave !
I had to reduce the light time due the hot temperatures outside, now that it's done and the temperatures back to normal, the light schedule is back to 18h/6h. I misted them frequently and I can tell how well it works, the leaves are way less curled up, the plants are still growing fast. I now mist them a little bit when the light turns off.
I started LST on day 17 and re-adjusted it on day 20, I think I'm doing it well but I could be wrong, comment and tell what I can do better ! I only water them once a week, I wait for the soil to be very dry, like 1cm deep or even more.
I noticed some pistils on the biggest plants, I guess they're already pre-flowering
Couldn't take much photos of this week, I had a lot of work and the light is on when I'm back home, I made a short video with lights on, I also heard music stimulate plants, so I tried lol
Likes
3
Share


@richsanfarmorganic
Follow
Hello brother 👋🤠
I'm grower jahrich from thailand
Nice to miss u🙏🙏🇹🇭💚💛❤️🇹🇭🙏🙏
My farm organic100%
Livingsoil: naturalfarmsoil
Organic Fertilizer: Handmade & naturalfarmsoil
How to water plants: Water every plant by hand.
Every pot has earthworms.
By growerjahrich420 #thailand #organicthailand #10Y 🙏🙏🙏


Likes
40
Share


@MrJones
Follow
47th Parallel Crowly's Comet
🔹⊱╮🔹╰⊰🔹 GROW Started 03.10.24 INFORMATION 🔹╰⊰´🔹⊱╮🔹
🌞Environment - Maintaining 80F and 65%Humidity
🌾Training - Nothing this week just letting the seedlings veg out.
⚱️2-Gallon 📊6.2 PH
💧 Feeding - Using Horti Grow 8-11-21, Bloom 5-15-26, Late Bloom 0-24-26, Cal 12-0-0
🌞Medic Grow Smart 8 760 Watts
🕷️ IPM - CannControl from Mammoth and Mosquito Bits as needed
🔹⊱╮🔹╰⊰🔹 PLANT UPDATES 🔹╰⊰´🔹⊱╮🔹
📝 Notes - These little ladies were transplanted very quickly after sprouting, the stretch was way too fast, are a week above ground, placed into 2-gallon pots, and are starting to recover and grow.
🗓️03.22.24 Maintaining Environmental Environment, Plants Are Doing Great!
🗓️03.23.24 Today fed with Hort-Grow @ 3.3 GRMS Per Gal, and Horti-Cal @ 2.5 GRMS Per Gal.
🗓️03.24.24 Maintaining Temps and Humidity - Plants are Looking Great!
🗓️03.25.24 Watered Today with 6 ounces of H20 w/ Hort-Grow @ 3.3 GRMS Per Gal, and Horti-Cal @ 2.5 GRMS Per Gal, adjusted lights.
🗓️03.26.24 Maintaining Temps and Humidity - Plants are Looking Great!
🗓️03.27.24 Watered Today with 6 ounces of H20 w/ Hort-Grow @ 3.3 GRMS Per Gal, and Horti-Cal @ 2.5 GRMS Per Gal.
🗓️03.28.24 This week has been very productive and the ladies have grown about 3 inches, Maintaining Temps and Humidity.
╰⊰🔹╰⊰´🔹⊱╮🔹╰⊰🔹╰⊰🔹STRAIN INFORMATION🔹⊱╮🔹╰⊰🔹╰⊰🔹╰⊰🔹⊱╮
Crowley's Comet / https://www.47thgenetics.com/product-page/crowley-s-comet-10-fem-birdseeds
It's everyone's favorite piece of space rock, Crowley's Comet! The culmination of reversing our Matterhorn cut off Mr. Crowley to Intergalactic Runtz, and the results were out of this world (I had to do it). These ladies were slow to start, but once they hit their stride they put any worries we had to rest. Compact, short-framed, and robust. They pack beautifully boulder-like flowers that reek of garlic and sickly sweet cotton candy. Dark green to a mosaic of purples, yellows, and silvers. Frost production is off the charts, the internode spacing is tight, and they certainly will impress in their last few weeks of flower. This is one of our favorite crosses in the new fem lineup. If you're looking for your hype fix, here you go.
Yield: Heavy to XL
Flower Time: 63 days
Feeding Schedule: Heavy
Likes
10
Share


Likes
3
Share


@Prophet12
Follow
Been missing weeks on this one as well but uploading until now will be harvesting next week so will be uploading harvest pics hope you enjoy
Likes
17
Share


@WeedTheNorth
Follow
Original Sensible Seeds
Auto Ghost OG
LED 180 watt
Coco 2 gallon fabric pot
Advanced Nutrients
House and Garden
Botanicare
Week 16
Starting to fade this week. Buds are swelling. Starting flushy flushy These are not the biggest buds but they are extremely dense and the citrus smell is intoxicating. This was kind of a unique grow experience the way that I trained this plant. The canopy is even for the most part and good airflow between branches and was very easy to maintain but I believe the yield will be affected due to insufficient lighting, nute burn a little neglect on my part. The quality is on point. Small compact nugs. Heavy trichomes present and the smell is fire. So not a heavy yielder but this lady will impress the senses either way. I tested a nug and was extremely impressed how much the citrusy smell was present with exhale was so refreshing. Anyways this gal is nearing the end of her life and is a fine plant that I intend to grow again. Thx for browsing my diary.
Keep em popping
🇨🇦😉🌱👊🙏

Likes
2
Share


@Jxkptx
Follow
An Tag 23 habe ich das LST neu angepasst um die kleine niedrig und buschig zu halten.
An Tag 24 habe ich fast alle großen Fächerblätter entfernt und das LST erneut angepasst.
An Tag 25 erneut LST angepasst.
An Tag 27 wurden zu viele der unteren Triebe mit Schatten bedeckt, so dass ich einiger der Blätter wegnehmen musste.