
Likes
Comments
Share


@Anxious_Passenger
Follow
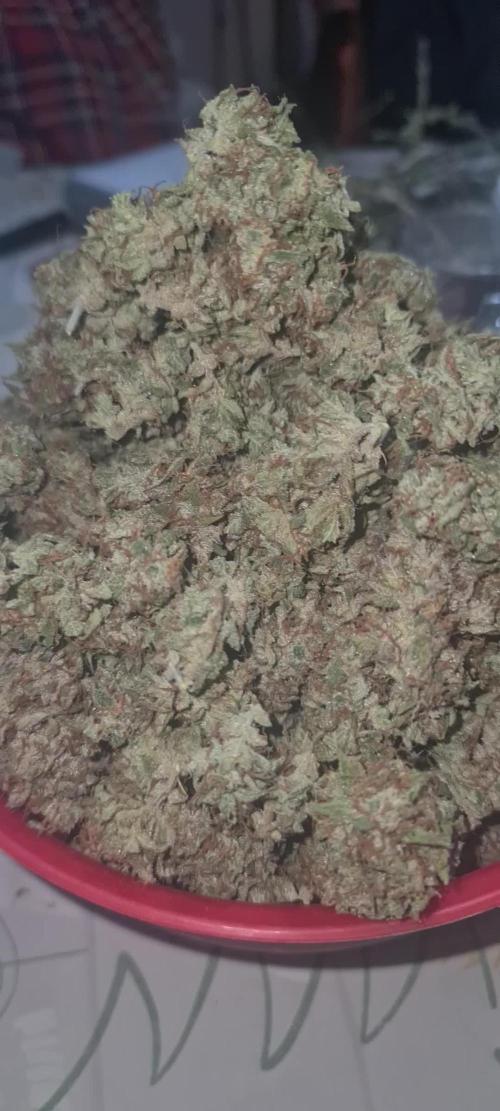
Nice smoke, still currently curing but will become better with age of course. A strong indica as described and exactly what I was looking for after smoking a bit of Sativa for a while, perfect for a quiet night in chilling on a Friday or long day of work. Would recommend for sure.

Likes
Comments
Share


@MoneyMorris
Follow
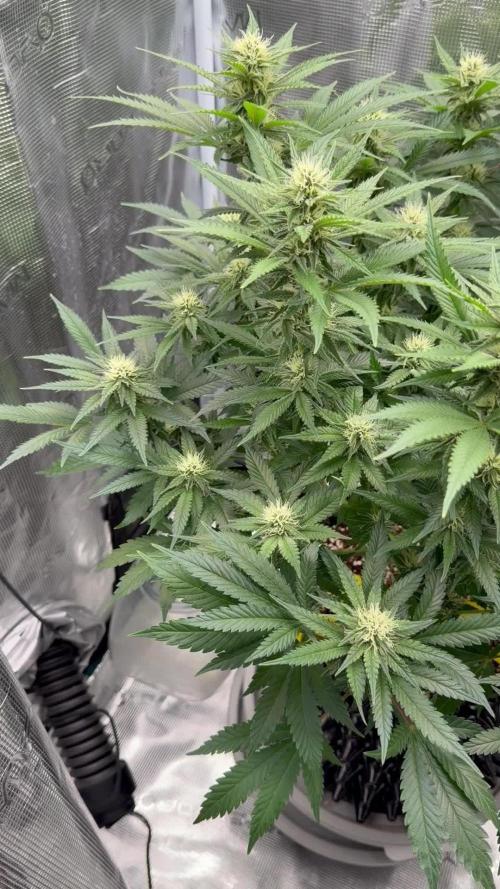
The plants are looking really healthy, I've been defoliating here and there to get the light to penetrate to the lower leaves and branches. They have started to bush out from topping them last week. I started using Mammoth P Microbes halfway through last week. They seem to have grown a little quicker since adding them. The plants are still being fed 4 times a day at 1 minute each feeding. No signs yet of which is female and male, I am planning on pulling all the males once they show signs.
Likes
3
Share


@WeedStockBR
Follow
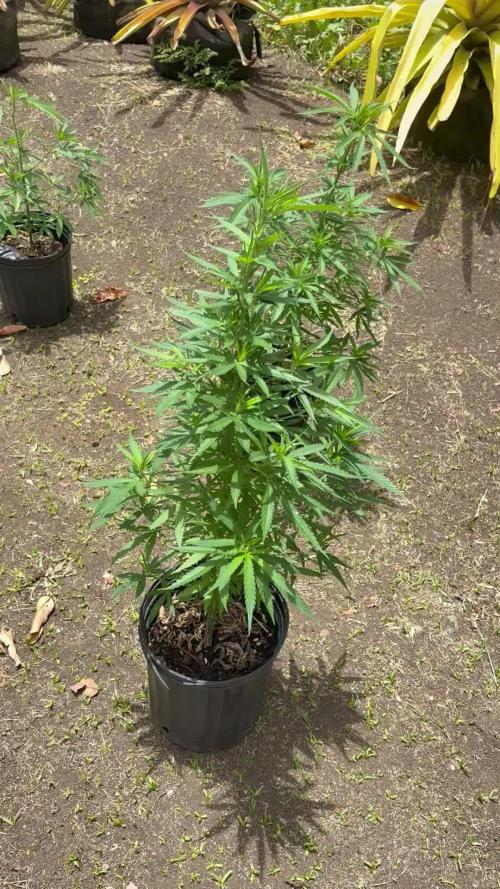
I was too busy in last weeks and forgot to take some photos to growDiaries but this is the last video before start the flowering time.
This girl have been growing health and beautiful.

Likes
20
Share


@Insaniac_0
Follow
8set Mainline & 6/4set Manifold in Auto Pot - Selfie Seeds Sweet Slurry x Sugar Cane (6X4) - Week 14
Flower Week 5 Day 35 to 41 - 4/22 to 4/28
They both look extremely healthy this week. The calyx are swelling with maturing hairs, the pistols are orange, the trichomes are mostly white, and the leaves are fading/changing colors - still not ripe enough for me, but flushing with half nute feeds now.
Feed this week was an auto pot reservoir flush feed at 400ppm total before add-ins. I used 400ppm of Bloom concentrate mix (recipe week 5). However, I also added 1ml/gal of CaliMagic (General Hydroponics 1-0-0) and ph balance this week was for 5.8 where Io plan to maintain it until harvest.
Next week will continue the same half nute feed. I will continue to monitor the signs of trichomes, pistols, and calyx for a better harvest and allow the buds to mature more.
Likes
50
Share


@DogDoctorOfficial
Follow
Week 8 Vegetation Report – Eternity Grow Cup
Welcome back, everyone! We’re diving into another exciting update for our Eternity Grow Cup journey. This week marks week 8 of vegetation, and our girls are thriving! Let’s break it down:
Growth & Structure
All five phenos continue to impress, with strong, bushy growth and uniform structure across the board. They’re praying to the ThinGrowLED Model Ones, which have been running on channel one only, and they’re absolutely loving it. The leaf development is lush and vibrant, a sign that they’re thriving under the current conditions.
Environmental Conditions
We’re keeping things dialed in with stable environmental parameters:
Temperature: 20.7°C
Humidity: 57.2%
CO2 Levels: 1569 PPM (a bit high but manageable)
VPD: 1.05 kPa
PPFD: 355 µmol/m²/s
Each of these factors plays a crucial role in maximizing plant efficiency, and we’ll go deeper into why these values are set as they are.
Featured Grow Gear – WCS2 Substrate Sensor
This week, we’re also highlighting part of the grow gear in use—specifically, the WCS2 substrate sensor. This sensor measures:
Soil temperature
EC levels
Water moisture
It's currently placed in the Autopots, which are not yet connected. For now, we’re still top-feeding to encourage root expansion. By allowing the roots to reach the bottom of the pots before activating the Autopot system, we ensure they establish a strong foundation for optimal nutrient uptake. We’ll go deeper into this method and why it’s an essential step in the process.
The Bigger Picture
As always, this journey wouldn’t be possible without the support of some incredible people and brands. Big shoutout to:
Zamnesia, Plagron, and GrowDiaries for making this competition a reality.
Aptus Holland, TrolMaster, CannaKan, Grove Bags, and Ziggi Papers for their continued support.
The entire community—supporters, followers, lovers, and haters alike—because everyone plays a role in making this grow series truly special!
Stay Tuned & Get Involved!
Don’t forget to follow along on YouTube and Instagram for exclusive content, behind-the-scenes insights, and in-depth discussions. Like, comment, and subscribe so you don’t miss the next updates—it’s only getting better from here!
Let’s keep pushing forward, and best of luck to all the competitors—we’re all growing something incredible together. Until next time!
Genetics - Runtz https://www.zamnesia.com/6000-zamnesia-seeds-runtz-feminized.html
Nutrients - Plagron https://plagron.com/en/hobby
- Aptus Holland https://aptus-holland.com/
Controls - Trol MAster https://www.trolmaster.eu/
LED - https://www.futureofgrow.com/en
LED - https://www.thinkgrowled.com
Soil - https://www.promixgardening.com/en
Germination - Cannakan https://cannakan.com/?srsltid=AfmBOopXr-inLXajXu3QFgKXCXXos4F1oEvScjMKIB5MR5dk8-GJ-F49
DOGDOCTOR 15% off
Smoking Papers - https://ziggioriginal.com/
Terpene saver - https://grovebags.com/
As always thank you all for stopping by, for the love and for it all , this journey of mine wold just not be the same without you guys, the love and support is very much appreciloved and i fell honored with you all in my life
With true love comes happiness Always believe in your self and always do things expecting nothing and with an open heart , be a giver and the universe will give back to you in ways you could not even imagine so
As always, this is shared for educational purposes, aiming to spread understanding and appreciation for this plant. The journey with nature is one of discovery, creativity, and respect. Let’s celebrate it responsibly and continue to learn and grow together!
Growers Love To you All 💚
#EternityGrowCup #RuntzHunt #GrowersLove #CannabisCommunity #AptusHolland #ProMixSoil #TrolMaster #Zamnesia #Plagron #ZiggiPapers #Grovebags
Episode 10 week 8 veg UPDATED

Likes
35
Share


@ccthefarmer
Follow
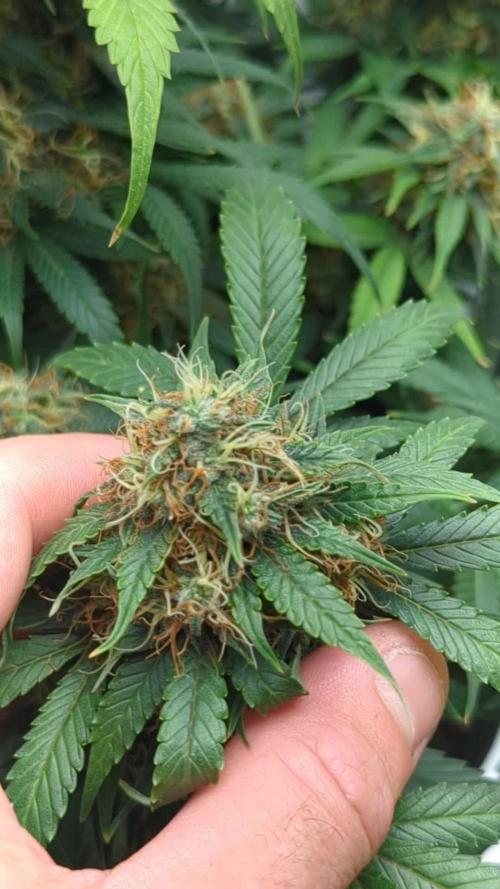
The cal mag deficiency that hit hard early on during the stretch is showing, fuckin hate bad batches of soil. This stuff had little to none in it I couldn’t get enough added in to keep her happy. All in all just goes to show how fire these genetics are because the flowers she’s put out however lacking in size they may be look like an amazing head stash
Happy growing y’all thanks for watching 📺

Likes
10
Share


@pHilosophy420
Follow
She’s almost ready for harvest, just one more week of watching the weather, a big flush, and then it’s time. She’s looking incredibly frosty for a CBD plant; the buds are more like what you’d expect from a high-THC strain. Can’t wait to see how she tastes and what the effects are like in the next few weeks.
Likes
11
Share


@Young_agronomist
Follow
27.07.23-отлично реагирует на тренировки и ростки очень пушистым кустом !
Увеличиваю ппм до 850 и пш 6.0
Растение очень счастливо .
Провожу флаш каждые три дня во избежание засола .
Плохо переносит большие обьемы еды
Эта девочка продолжает почти и очень кустится ! Получает 900 ппм и 6 пш.
30.07.23 -срезал пару больших листьев и освободил пространство для новых побегов и лучшей аэрации . Стресса девочка не испытала
31.07.23-росте очень быстро , акукуратно снимаю большое листья 🍁
Выгладит здорово (только очень кустистый )

Likes
8
Share

@Crop_Top
Follow
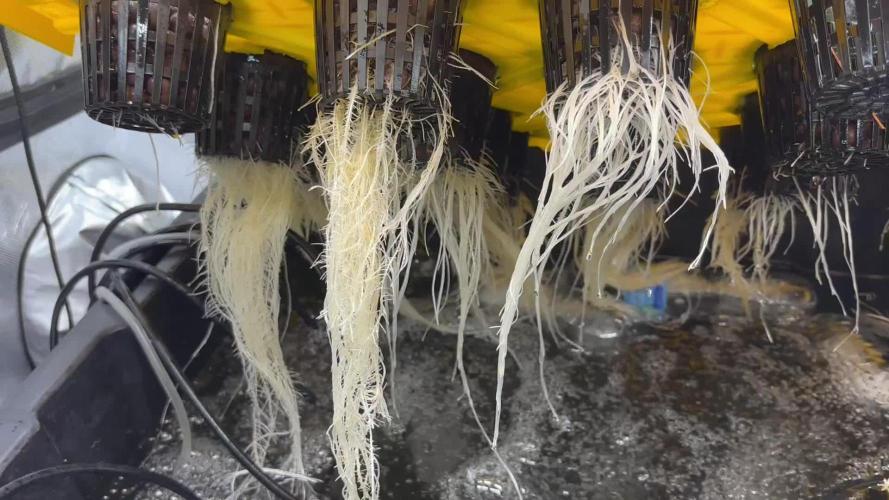
These plants have been thriving this week. Roots are exploding and already filling up the bin sooner than expected. Plants have been “praying” daily. Will likely be moving these into their forever homes (current culture buckets) before end of next week or at least split into 2 bins to give some space before topping.
Have just been mooting levels and water temps throughout the week. Didn’t have to add or adjust anything as of yet.
ph - 6.0
PPM - 375
EC - 750
Water Temp - 68*F
Air Temp - 74 (Lights On) 68 Lights Off
Humidity - 60% on average
Notice a slight cal/mag deficiency (rust coloring on a few on the leaves) so added another 15mL to the bin just to be safe. I’ll also be painting the lid white and insulating the bin to try and keep the water temps around 68, the ice bottles are annoying to continuously change out.


Processing
Likes
10
Share


Likes
4
Share

@ThatDudesDad
Follow
Great week. Plants are exploding. Smell is coming in on the Glitter Gas nicely. Both plants have many bud sites. Increased light to 60%. Around 750ppfd. Still going lighter on nutrients and plants are thriving. Having to feed every 2 days on the Glitter Gas. And every 3 for the Peyote Zkittlez… which ended up stretching perfectly.

Likes
55
Share


@pifflestikkz
Follow
Day 106
16/08/24 Friday
Big feed today using de-chlorinated tap water pH 6.
Finally flipped her!!
Excuse my mess of a Scrog it's first time. I'm cutting away squares to allow the new growth this week to pass through, the net will only be used them as support to allow her to fully express her flowers 💚
Day 107
17/08/24 Saturday
Another watering today using de-chlorinated tap water pH 6 only.
Picture and video update ✌️ 💚
Day 109
19/08/24 MONDAY
Another feed today, she is recovering well from the move, Scrog, LST.
This week I'll be keeping her within the net as she stretches.
Picture update
Day 111
21/08/24 Wednesday
De-chlorinated tap water today pH 6.
Again 5L little run off.
She's stretching 😁 time to fill the floor.

Likes
12
Share


@CampaCavallo
Follow
2ª Settimana di Fioritura 💐:
La bella e vigorosa Critical Lemon⚡🍋, Continua nella sua crescita e mette in mostra tutti i suoi nuovi fiori!😍
Sotto il vigile controllo di TENT-X 🤖, la piccola sta dando il suo massimo nel vaso da 6,5 litri...... Abbiamo settato anche alba e tramonto con una durata di 10 minuti (figata) ☺️👏🏻👍🏻


Likes
8
Share

@20SYL
Follow
Suite du rinçage et récolte de la première plante, la deuxième à besoin d'encore 2/3 semaines je pense !
Placée dans sa box de séchage, 20°C et 55% d'humidité.
Likes
97
Share


@420DeepGrow
Follow
Gracias al equipo de Sweet Seeds y MarsHydro, sin ellos no sería posible esta hazaña.
💐 🍁 Versión fotodependiente de rápida floración de una de las más sabrosas variedades de nuestro catálogo, la Crystal Candy®️ (SWS58), premiada con el 1º Premio a la Mejor Indica en la Spannabis Champions Cup 2017.
Crystal Candy F1 Fast Version®️ (SWS73) es el híbrido resultante del cruce entre nuestra Crystal Candy®️ y una cepa seleccionada de Sweet Special Auto®️ (SWS35).
Esta versión posee el curioso y exquisito aroma dulce que recuerda a chicle de fresa o tiendas de caramelos que tan apreciada ha hecho a la Crystal Candy®️ original.
Esta variedad es una gran productora de grandes cristales de aromática resina que recubren las flores, y las hojas cercanas a estas, con una alta densidad de tricomas largos y de gran cabeza. De sus cogollos se pueden obtener extracciones de exquisita calidad y aroma extremadamente agradable.
🌻 🚀 Consigue aquí tus semillas:
https://sweetseeds.es/es/f1-fast-version/2487-crystal-candy-f1-fast-version.html
💡 Mars Hydro TS 3000, como la lámpara de cultivo LED más grande de la serie TS, ofrece suficiente cobertura para un área de 4 × 4 pies con un precio asequible y rendimientos de calidad; a cambio, se puede aplicar tanto al cultivo doméstico como al cultivo comercial.
Potencia - 450w
Cobertura Vegetal – 5×5 pies
Cobertura de flores - 4 × 4 pies
La opción abrumadora para la mayoría de los productores que la aplican en tiendas de campaña.
Consigue aqui tu lámpara:
https://marshydro.eu/products/mars-hydro-ts-3000-led-grow-light/
📆 Semana 7:
Seguimos en la etapa de engorde, esto va que vuela 😍, la resina esta cada vez mas presente ❄️ , los cogollos comienzan a engordar
Esta semana seguira el TS-3000 de MarshHydro al 100% y 30cm de distancia.
Se estan desarrollando mejor que nunca, con una floracion mucho mas rapida, noto una gran mejoria gracias al Marshydro TS-3000.
Reclaman nutrientes como locas con la nueva luz, solventadas las carencias, se que va bien de nutrientes.
Continuo con defoliaciones
Aplico una solución con nutrientes EC 1600 y otra con agua del grifo reposada y PH 6.6


Likes
45
Share


@Bud_Spencer
Follow
Hi Grower!
Day 107Complete
Day 48 Flower
This strain just keeps getting better and better. It's amazing how it smells. Like cherry gelato !! Next week I'll get my Purple Pro, which means I can measure the THC / CBD ratio at the end of the grow and I'm more than excited about that !! A very educational and super grow, maybe even the reason that I will switch to photoperiodic plants.
follow me on Instagram for the best Shoots of all my Strains: bud_spencer_of_herbs
Grown under Spiderfarmer SF-1000
When you want to grow with the same professional Equipment then Checkout this Link
https://www.spider-farmer.com/?ref=budspencer
Discount Code: Budspencer420

Likes
16
Share


@osmrducks
Follow
Day 64: Started flushing the girls today. Got All milky and starting to go amber.
Day 65: Still flushing. The girls smell amazing. I have one in the bunch that is SUPER airy and I am just not sure what is going on with her. It's the girl that I accidently broke off the main cola a while back. Not sure if that has anything to do with it or not.
Day 66: No new updates. Cut one of the colas off for a taste test and trial run on drying as this is my first go. Figure if I can dry this super dense beauty with no issue, I will be able to dry the rest. Have it hung up in the spare bathroom. Stays roughly 71° in our house and I'd say roughly 40%ish humidity.
Day 67: Girls are smelling really nice! I keep looking at trich's and looks like no change. They are all cloudy and only a few amber from what I see. Still new to it so no tellin!
Day 68: No updates.
Day 69: Girls still looking good. My bud is still drying and looking super hideous. I feel it is drying slow enough but sure doesn't look or feel dense as it did when cut. Will know in several days to come when fully dry.
Day 70: Girls smell dank and look the same! No new updates at this time.
Likes
3
Share

@Dottgreenthumb
Follow
Peso secco totale 102.
Lo strains è molto sativa con sapire di terra e limone