
Likes
Comments
Share


@Pjm70
Follow
7/7 17 days old. Calling this her first week of veg. She did not appear to be growing much for a few days after being transplanted. However in the last couple of days she has been putting on height.
Now that she is growing again it seemed like a good time to top her.
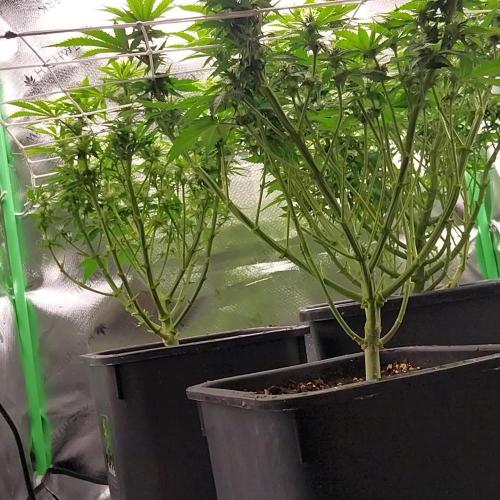
Topped her at the fifth node. A few of my previous grows I topped at the single leaves. This gave me two main branches that I just tied down. Then let all the branches grow up. Gave me a very uniform plant.
7/9 She has a very healthy dark green color. Her branches almost immediately started growing after being topped. I can see the difference in 2 days. Her nodes are very close together.
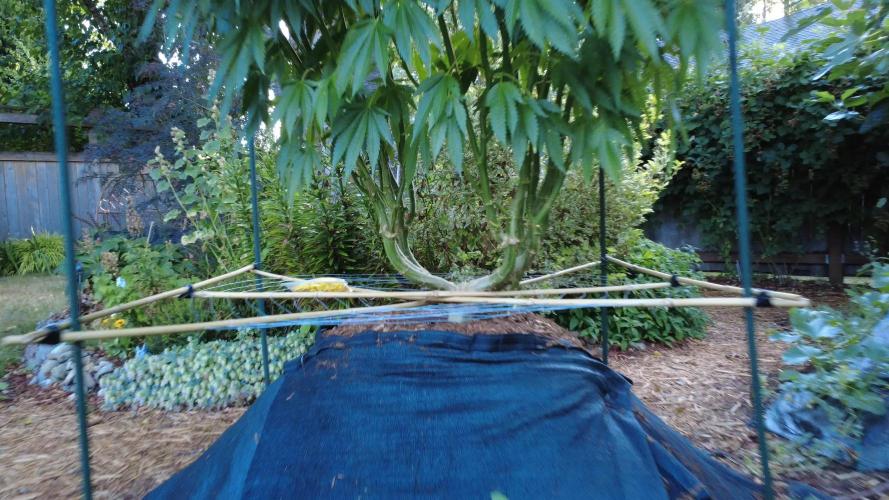
7/10. This lady has huge tits/leaves. Her leaves are so big they’re blocking out the light for the branches. I used some coat hanger to pull the leaves out of the way.
Really her leaves are huge for her age. They’re almost the size of my hands and I’m 6,3. I pulled 1 leaf off to help open her up some. I will do some reading on this strain. I believe as she gets older she will look more sativa. Right now she looks heavy indica.
7/11 She broke ground 21 days ago. She graduated into veg 4 days ago. This plant is growing very nicely.
7/14 25 days old. Gave her water with liquid kelp. Her branches are quickly growing to the top. Would love to do some defoliation but I’m not. Other than a few 3 blade leaves in the center. Absolutely love her dark green color.
So far the living soil is doing a great job. The company says just water. We will see.
Ethos Genetics is top shelf. My friend grows mostly Ethos and these plants are just amazing. I was hunting for old school so I didn’t grow any Ethos until now. Old school is gone. I have never saw buds like these Ethos. This plant needs to come out close to or better than my friends.
She is growing in organic living soil and her color is great. The only thing I added was myco supreme on her roots. The next time I water her she will get some liquid kelp and humic acid.
The plant is relying on the living soil to eat. So I want to make sure her root system is very healthy and able to process nutrients.

Likes
14
Share

@Erik99
Follow
En esta semana se puede apreciar que ya se sale de la pre flora y entramos de lleno en semanas de engorde de cogollos, he aumentado un poco más los nutrientes y se ha notado el aumento de masa de las flores.
Al abrir el armario ya se nota un poco más el golpe de olor, muchas ganas de probar estás Tropicana poison 😋

Likes
22
Share


@GreenHouseLab
Follow
Getting the Veg game on, these are already flipped for about 3 days beautiful structure on all the unicorns.

Likes
4
Share


@Osavv_OTGUK
Follow
Seeing these buds produce is amazing big up to barneys farm for these amazing genetics. Also big up Zamnesia for the seeds


Likes
46
Share


@The_Bearded_Grower
Follow
Welcome to 📅 Day 25 7/29/2021 sorry for the late update
I would like to say a few words about Mars Hydro. the TS 1000 is a great light and I love the fact that the power supply is capable of being separated from the light and located outside of the tent to keep the heat down. I also like the fact that you can control the light intensity and daisy chain with another light witch is what I plan on doing.
Likes
15
Share


@ssjmatix
Follow
Nuevos brotes siguen apareciendo y el lst empieza a dar resultado, largó los primeros pelos, no sé si es pq se estresó y quiere florecer o si solamente sexó

Likes
19
Share


@MrJones
Follow
Cinderella Auto 04.20.23
~~~~~~~~~~~~~~~~~~
Day 13 - Above Ground
🔸05.06.23 -So these girls continue to be amazing, scuffed up the soil today, and added airstones to my reservoir, even though it is just water maybe the plants will enjoy the extra oxygen!, the Medic Grow Smart 8 LED is doing very well, at 40% the plants are getting plenty of light and not showing any signs of over-stretching!
🔸05.03.23 - Just over the last 4 days these plants are just growing vigorously and healthy, first real watering today and the plants are starting to eat that Gaia Green amended soil and loving it, the Medic Grow Smart 8 LED is doing very well, at 40% the plants are getting plenty of light and not showing any signs of over-stretching!
~~~~~~~~~~~
📝@fastbuds_official
📝Soil - ProMix HP
📝Medic Grow Smart 8 LED / Light Settings: 40% - V1
📝@medicgrow420
📝@gaiagreenorganics
~~~~~~~~~~~~~
📝Cinderella Auto - grows dark-green thick buds with elongated large-sized calyxes and lots and lots of long amber hairs all over them.

Processing
Likes
11
Share


@ganjaman24
Follow
It’s bern roughly two months these guys have been growing! Lst’d Both but untied the gg because I wasn’t sure she was benefiting from it so I’m going to do it over. These ladies (I hope) will start their flower journey next week when I revive my new flower tent 😎..stay tuned for some epic buds..I hope!!

Likes
Comments
Share


@LokalGrenz
Follow
Week 4 of flower
Things going okay the cap mag is helping I think not having much de coloration on leafs still bottom watering and top watering in between bottom watering fill ups
Likes
2
Share


@acidraccon
Follow
Hoy cvumplen su primer mes de floracion, e notado que en una al aplicar scrog y vario estres a las ramas se ve como genera mejores cogollos que las semas que casi no moleste, la mas alta se ve un poco flaca con cogollos llenos de tricomas pero no tan gordos, esperare a floracion final


Likes
56
Share


@autoseedsman
Follow
Well week 7 has seen a real amount of growth all which looks really healthy...
white hairs are popping out from everywhere and I maybe wrong but I can see around 8 or 9 healthy looking bud sites.
They seem to be loving the conditions and absolutely zero problems with soil and nutrients etc...
Heres to hoping week 8 goes aswell as this one...
Stay safe guys and girls and happy growing...

Likes
11
Share


@BlackXwidow
Follow
Currently sitting at day 38 of flower.
Forbidden Soda- Looks incredible, buds are a pinkish purple. Smell is a fruity tangerine
Forbidden Dream pheno #1 - this pheno is the beat smelling and looking, started turning purple from the onset of flower, the smell is like grape soda mixed with sour patch kids.
Forbidden Dream kush pheno: this was the pheno that I though hermied, it’s not possible that they were just calyxs building on the top buds. They never got bigger, didn’t release pollen, and some now have pistils thru them, but will see once harvest time.
Very impressed with the forbidden Dream strain, as for the forbidden soda while it does look incredible , this was selected from 3 different 12/12 seeds where the other two were not good. The forbidden dream seems to have better phenotypes overall and buds are a lot denser..


Likes
23
Share

@Arcadium
Follow
Warmed up again, 34c highs, but cool nights down to 14c. Flowering has really sped up, this F1's flowering response is very fast, just tons and tons of pistils and the start of trichomes already.
Did another compost tea this week, few hours of drip irrigation and a weekly spray of LCPT, easy going this week.
Rains coming next week, but fingers crossed for some good weather over September to finish. Would like to push another 6 weeks if possible, but anything after the first week of October is really hard due to the constant 95% humidity.


Likes
6
Share


@greenkeepers
Follow
Unsere privaten Growprojekte die wir mit freundlicher Unterstützung von unseren Partnern @growcontrol.de @original_homebox @mars.hydro @biotanicpro & @purolyt realisieren starten! 🌿

Likes
7
Share


@Mr_nugs_lover_David
Follow
I've enjoyed a lot growing this plant, I had to deal at tje end of thr cycle with fungus gntas but she resisted without problems, each day the flowers stink more and more, amazing genetic, I would definitely like to keep on working with this genetic, it's a pleasure to smoke, I recomend you to grow her organically like I did snd you'll see!
Likes
25
Share


@FabioFobia
Follow
Ho trovato una cima con un principio di muffa, sono abbastanza sicuro di aver pulito bene...avevo intenzione di chiudere con 10 settimane sperimentando un flushing leggero ma più lungo, ma visto il rischio muffa non mi spingerò oltre 9 settimane e 3 giorni.
Per il resto le 2 gorilla girl hanno aumentato il volume dei loro fiori ed ottenuto copiose concentrazioni di tricomi....
Ci vediamo al raccolto!!!!

Likes
48
Share


@MadeInGermany
Follow
Info:
Unfortunately, I had to find out that my account is used for fake pages in social media.
I am only active here on growdiaries.
I am not on facebook instagram twitter etc All accounts except this one are fake.
Have fun with the update.
Hey everyone 😁.
Not much has happened this week :-).
Last week's pump failure delayed the whole thing for a few days 😅.
As the lower leaves are now starting to turn yellow, they should show their first roots in the next few days 😊.
The water was completely exchanged again because the EC value has risen again.
The small cups were sprayed every day so that the air humidity remained in the upper area.
Otherwise everything was cleaned and the pumps, heating rod, etc. checked for their function.
I hope you have a lot of fun with the update.
Stay healthy and let it grow 🍀🙏🏻
You can buy this Strain at
https://www.amsterdamgenetics.com/product/kosher-tangie-kush/
Type:
Kosher Tangie Kush
☝️🏼
Genetics:
Kosher Kush
X
Tangie
👍
Vega lamp: 2 x Todogrow LED CXB3590 COB 55 W
1 x Sanlight S2W 62 W
💡
Flower lamp : 2 x Todogrow LED CXB3590 COB 55 W
1 x Sanlight S2W 62 W
💡 ☝️
Grow Aero System : Growtool 0.8
☝️
Fertilizer:
Canna Aqua Vega A + B , Canna Aqua Flores A + B , Rizotonic, Cannazym, CANNA Boost, Pk 13/14, Canna Cal / Mag, Canna Ph - Grow, Canna Ph-Bloom
☝️🌱
Water:
Osmosis water mixed with normal water (24 hours stale that the chlorine evaporates) to 0.2 EG. Add Cal / Mag to 0.4 Ec Ph with ph- to 5.2 - 5.8
💦 💧
