
Likes
Comments
Share


Likes
4
Share


@Fatbudz
Follow
Week5
the temperatures dropped a bit and I did what I could...❄️❄️
Earlier this week I had to flush this little one because I thought she had nitrogen toxicity. Maybe not...
But From the water that ran out I realized that the soil was full of nuts and after the flush I didn't give it any more water. as I use a 12 liter vase, you can imagine how much water was retained in the root system. for that reason and because the water is good quality and has an amount of micronutrients, I didn't have to worry about giving water this week. let's see next week, wish me luck 🤞☺️🌞

Likes
15
Share


@38PLAN
Follow
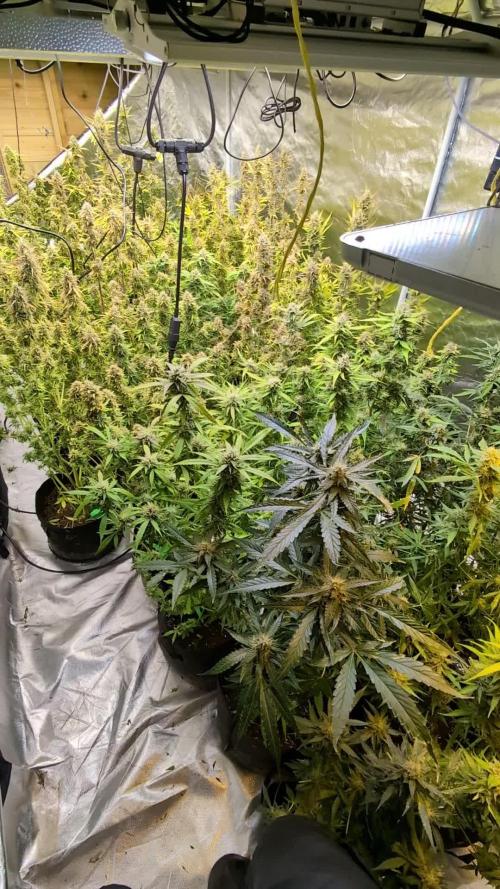
Stiamo ancora raccogliendo,ancora nessuna pianta é morta,sto rimuovendo piano piano le cime più mature,così facendo evitiamo le cime popcorn e diamo il tempo alla pianta di riempire anche le cime inferiori,per adesso levando quella fumata e venduta siamo all'incirca sui 780g,però aspettiamo anche il nuovo stendino,alla fine del raccolto dovremmo arrivare a quasi 2 Kili con 7 piante e 6 vasi,con una media di 333g a pianta,ho pubblicato tutto quello che potevo,ogni procedimento,spero vi piaccia e mi seguiate

Likes
12
Share


@Bread_n_Buds
Follow
Our Purple Urkle by Zamnesia has reached 16 buds. I'm growing it a little more to make sure it doesn't go into flowering with small brunches but now we're there, a few days and it will go into flowering and it will be very exciting you can bet on it.
The Topping worked very very well the plant at the moment of topping went into overfertilization due to the obvious slowdown in growth, so I slowed down the fertilizer for growth but it was about to go into crisis, so we are starting to give fertilizer again. When topping is a delicate moment it is probably better to do what I explain below.
The ideal when topping is probably to start with a gradual release fertilized soil or start preparing the soil for a period that is at least enough for the vegetative phase at most by adding a bit of alga grow which by itself I must admit gives me some problems at least in this case if the plant grows straight much less or rather nothing.
We are always using soil, feeding and all the recommended additives from Plagron 100% organic, we have only lowered the amount of grow in this topping phase for the reasons mentioned above.
---- Decide on the right soil and calculate your fertilizer sheet based on the soil on the official website.
-- www.plagron.com
Try a seed of this strain that drives us crazy..
---- https://www.zamnesia.io/en/11168-zamnesia-seeds-purple-urkle.html
Zamnesia Description // A direct descendant of a Mendocino Purps phenotype, Purple Urkle is a high-performance cultivar from Zamnesia Seeds. This feminized, indica-dominant strain is sure to win over any cannabis grower. With a THC content of 20%, Purple Urkle has a lot to offer from seed to harvest and beyond. A grape-flavored adventure, Suitable for indoors, outdoors or in the greenhouse, Purple Urkle is a very resilient strain. Growers will be impressed by how easy this cultivar can be managed. Purple Urkle can reach 120cm indoors and 160cm outdoors, but if you want more control over the height you can use the LST technique.
Purple Urkle has fantastic flavors and aromas that intensify during the flowering phase. Regardless of the method of consumption, Purple Urkle offers tangy, fruity flavors that lean towards notes of grapes, berries and plums. The effects of this strain are soothing and relaxing, with uplifting sensations that make the experience suitable for any occasion, whether in a social setting or alone.
All the best that mother nature can offer is on ---- www.zamnesia.com


Likes
8
Share


@MG2009
Follow
02/08/2022
And this one is going to flowering room
Need to up pot one more then they will all be flowering soon

Likes
4
Share


@GLOrganics
Follow
At this point i was a bit worries because despite trying to match indoor hours to outdoors gradually, and not going below 14, plants started to show signs of flowering. After some conversations i dicided to wait for it to reverse. First time this happened to me. If somebody has a protocol please let me know.


Likes
19
Share


Likes
37
Share


@masterofsmeagol
Follow
8/26 FED TODAY. 2 GALLONS TO THE GARDEN. THE WATERING CAN I USE IS ABOUT A HALF GALLON SO THAT'S WHAT A NORMAL PLANT HAS BEEN GETTING. Wow. What a week I had last week. I'm hoping things are going up from here. It's overcast but we have a 90% chance of rain. Thunderstorms. I'm wondering if I should put my back tarp up. The wind doesnt seem too bad so I'll play it by ear. The remaining plants seem to be doing good to me. I wanted to let the soil dry out but I NEEDED to feed. Buds are popping up everywhere and increasing in size. Earwigs still seemed to lollipop the interior branches (mostly larfy stuff but still). I attached a picture so people can see what I mean. I'm getting hit on all fronts but I'm still kicking! I'll update as I go. Some pictures won't upload. I'll have to do it later. Oh and my ph is on point for once. I tested all plants a bunch of different places and readings were 6.6 to 7.3 at the highest.
8/27 Rained last night but not as bad as I thought it would. We are supposed to have some good weather coming up so I'm hoping my medium will get a chance to dry put. Still liking the liquid kool bloom. I'll up the dose next feed. I'm going to need to do another application of plant doctor this week too. It's about time for a BT application as well. I see moths flying off when I check early in the morning and I've observed some pillar damage. I'm slightly worried about soul going anaerobic. The color of the gdps are too lime green for my liking but our weather has been horrid. I never remember having to deal with shit like this. The branch that was all drooped with fusarium wilt has one (the closest to the stalk) shoot that has repaired itself. That gives me hope but I really should just amputate that branch. I guess I'm just nervous because of the reaction I had last time. Granted I've cut tons and tons of branches off in the past and prune things they didn't have whatever pathogen these do. Septoria is still there on one of the GDPs but it seems to be doing okay. I'm SLIGHTLY worried about the change in color on my big NYCSA. It's lost some of its vibrancy. I think it's kinda normal. I'm sure it has some PM (which I'm hoping plant doctor and the silica will help repress) but I think it will be a heavy yielding plant. Sun's poking out. The little clones I took are exploding in growth. They might not yield much but I'm glad I didn't just chuck them like I was going too.
8/28 Things are still looking good! We got some sunshine yesterday and the sunshine out today. Buds are really starting to form and colas are taking their shape. I'm slightly concerned with the coloring of my NYCSA but it started flowering later than the others so senescence may be behind. I may have lost half this year but looking at other diaries and attitudes of soms others I'm pretty fucking lucky. I didn't have much time this morning so I'll update later. I need to keep up with my IPM and do BT treatment and follow up with a second dose of plant doctor.
8/29 Super rushed morning. Only had time to shake the dew off the plants and snap a couple quick pictures. I lowered the growbig this week. I think that was a mistake. Plants are flowering like crazy. My NYCSA doesn't seem as vibrant green as it was. I may up feeding to twice a week or at least give them a little growbig if I need to water. I want tge medium to stay dry for a while. I also needcto cut that dead branch. I'm just afraid of a situation line before where the whole plant died. My anxiety disorder really hampers my growing ability. I qorry far too much. I should just cut it off right now. I've also seen pillar damage so I'm going to need to do a BT spray. I have the other organocide that's the 3 in 1 but I can't use it in flower. I'll just have to stagger applications. Either that or do another root drench or "sprench" and a foliar with the BT on another day. I have WPM on the garden and I'm pretty sure septoria. This plant was perfect though. I'm afraid it might be getting sick. Either way it'd an extremely resilient strain. The little 9lb kush I have in a 3 gallon is flowering the fastest. It really fuckihgcsucks I lost those massive plants. Judging by this "clone" I took off the other clone (I know) this strain wouldve been the first to finish. EDIT: Went back over to check the medium and do some slight defoliation. I inspected the stalks and the dead branch. The dead branch has a small indent (from breakage, insects or rot) where the branch connects to the stalk. I've seen this before but had no problems. However THIS branch seems to he coming out of the stalk RIGHT where the rot is. I cut the other one off that ENORMOUS 9lb Kush and it was dead a few hours later. I talked to my father who has degrees in biology and forestry (among other things) and he said he couldn't really see the harm in leaving it. I am worried that a cutworm mightve gotten in bit I don't see any evidence of any borer insect. Under that stem there is more "bark" and other stuff but nothing like a borer makes. I'm going back over tonight to treat with either BT or Plant Doctor. Haven't decided which. Probably the plant doctor.
8/30 Didn't have time for pictures. Large NYCSA NOW has fusarium wilt. Either I'm the most unlucky grower in our area or my plants got dosed with fusarium. After the research I've done I've cone to the conclusion that this season will be a complete loss. Maybe the two small separate cuttings will make it through flower. The rest is just a waiting game to see if fusarium kills it before they finish flowering. Even if it doesn't then I don't know if I would want to smoke the flowers. I'm shopping online for grow equipment. I'm going to do some indoor this winter. Wow this feels like a kick in the nuts. I'm a good dude. Like I said I'm just either the unluckily grower around or my plants had a little help. Who knows. EDIT: I treated everything with Pkant Doctor again. I'll feed tomorrow and see if some miracle happens and I actually get something
8/31 I added a few pictures so folks can see what fusarium looks like and how it progresses. As you can see it killed a branch and is progressing to the next and so on until the plant is typically dead. No need to get too scientific on the mechanism of action. I FED 2 gallons today. Still kept growbig low dosing.


Likes
111
Share


@Dahoola
Follow
______________
An interim update:
______________
The pre-bloom has started. The plant is preparing for its last growth spurt. The growth in the last days is therefore substantial. For the time being no real problems. Apart from the additives that I provide, no additional nutrients have been added. A little too much N, because of this there is a little bit of burned leaftips. But hopefully a bit of a push can not hurt too much;) a new update at the end of the week.
_________________
End of week 4 update:
_________________
The bloom has begun. The growth was very exuberant this week. 25 centimeters larger than at the beginning of the week. There are a lot of shoots with budsites. Have given some flowering nutrients for the first time, albeit a low dose. The problem with the burned leaf tips has also been solved. A little too much of N did not hurt the plant. The grow mix of plagron is perhaps a bit too 'powerful' for young plants. But no real negative consequences, so no problem. I gave the plant also a nice 'shower' today with iron spray. She seems to like it. On to the real first week of flowering
Processing
Likes
12
Share


@Italianganya88
Follow
Alles läuft super buds fangen langsam an anzuschwellen hab eine 2 Lampe mit reingebracht um mehr lichteinwirkung in der Blüte zu haben. Die einzige Frage die bleibt sollte ich langsam anfangen zu entlauben. Bin mir bei autoflower unsicher.


Likes
3
Share

@smoking_hills9
Follow
Last final defoliation done, now buds are fully exposed to the lights and the best part, harvest trim will be easier. Still it took me around 8 h altogether to defoliate all of them. Tones of buds and frost , amazing smells. Won't rush will give it a bit more to swell.

Likes
17
Share


@Rangaku
Follow
FB is getting phat and healthy , just keeping up the defol and trying to get my bud sites organised , the next week should see her stretch out some . Same same next week

Likes
11
Share


@Novagrow
Follow
This stuff has taken an age to dry! I think it was a little too cool in the tent. ah well.
Its currently in jars curing, so havent had chance to try it out and i think im prepared to give it a full 6 weeks of cure.
Results wise, little disappointed by the yield, only 4oz but it was a micro grow - I think perhaps although i didnt notice it at the time, the heatwave fortnight i had during flower may have had something to do with the lack of growth - but still the quality of the buds is high, plenty of trichomes and buds are really dense.
As its still in cure its still a bit hay-smell as the chlorophyll continues to work its way out but there are lovely undertones of gas and fruit - (cherry?)
Will check back in with a smoke report in a few weeks but wanted to get a couple of vids of the buds (yes i dont trim them like the pros, i dont care :p )


Likes
61
Share


@PEAKYPLANTERS
Follow
I had a burn on my central plant, close to the apical top ... I'm really angry.
I admit it, I was an idiot to tinker too much with the lights, and this served me as a lesson .... aaaahh how bad it is when you are inexperienced ... but how do you say: "wrong you learn" .... do not worry ... we are on the wave of the harvest !!
Likes
60
Share

@Natrona
Follow
FBA2502
Week 4 April 20-26 Veg 4
Highlights of this week:
I defoliated the large fan leaves from the main stems. After defoliating, I saw that plant #3 has a short, tight node structure like plant #1, so I pinned her down before she goes into flowering. Plants 2, 4, 5, and 6 are taller than plants 1 and 3. The larger plants 2, 4, 5, 6 show pre flowers with thinner new growth and hairs at the nodes. The leaves are wide and thick. Some have a slight blue tinge. This makes me think I’m over feeding. Apparently, the blended soil has enough nutrients for the autos, so I don’t need to feed right now. At the end of the week, I watered with ph 6.5 water with cal mag and recharge. Lights are 20” from tops of tall plants and 30 from 1& 3.
My general thought for the future grows is to wait until the plant is bigger and see its structure before starting training. #1 has many branches coming into the middle. By beginning with pinning and keeping it at the ground, she will not achieve the stretch around the pot.
I pinned #3 to push out the bud sites from being up against the main stem. It is easier to LST when there is more space between the nodes, so a bit of growth or stretch is required. Training to open the top is needed when the plant is short and tight.
If you want to follow what's happening with my other two FBA2502s see my friend's @Susquihanna diary.
4/20 Hairs on 2, 4, 5, 6 and feeding
Micro ½ tsp/gal
Gro ½ tsp/gal
Bloom ½ tsp/gal
CalMag 1 tsp/gal at full strength
4/21 pics & video
4/22 water only ph6.5. I watered with plain water, it looks like over feeding and they are in are transitioning to flower.
4/24 Water with recharge ½ tsp/g & CalMag 1 tsp/g ph 6.5
pics & vid see blue tinges in leaves.
Plants shot up, doubling in height again this week.
#1 6”, # 2 10”, #3 7”, 1 14 “ 5 14” 6 13”
Your likes and comments are appreciated. Thanks for stopping by.
Growers love 💚🌿
💫Natrona💫
Processing
Likes
17
Share


@CANATURTLE
Follow
broke my old phone, couple days late to post for this week, next week will com,e earlier but as you can see its much much different after the 14 day gap.
buds are stretching towards hps but fattening more under LED so food for thought; id go LED grows personally, although the coverage is a bit harder to maintain; hps breaks down more frequent ive already been through 2 bulbs; quite the hassle.

Likes
15
Share


@Dr81n
Follow
Sprouted tails and put in dirt. Let’s watch most genetics are cali connection some are dank seeds

Likes
13
Share


@Dunk_Junk
Follow
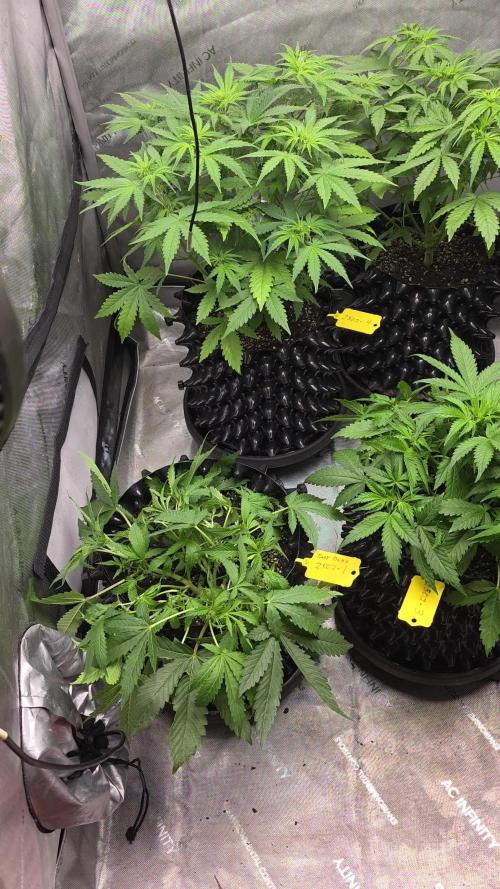
Day 18 - FIM cut made.
Day 20 - Transplant to 38L airpot. I planted her deep to aid stability.