The Grow Awards 2026 🏆 


Likes
Comments
Share
@GanjaReaper
Follow
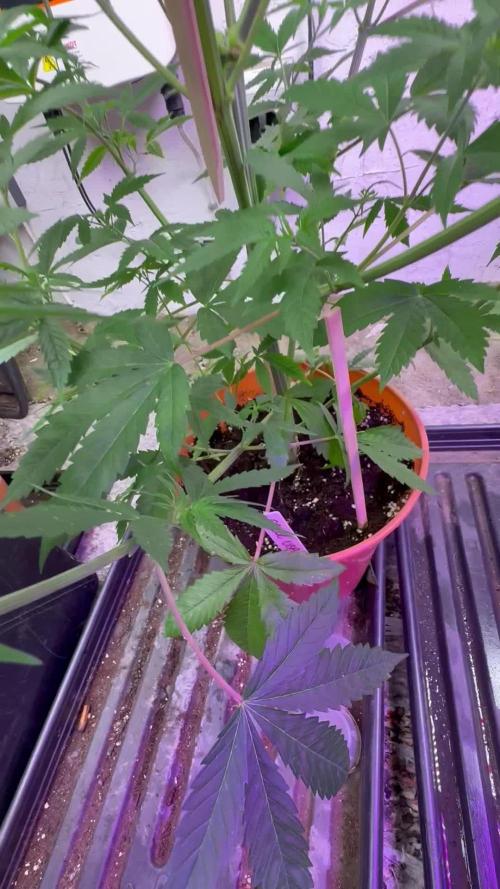
Day 56:
Like I said in the 2 weeks before this one, I was on vacation and a friend took care of my plants.
This is the last week he helped out, I will be taking care of them again in the upcomming week.
Well what can I say about this week;
- Weather/climate was still bad. Lots of rain and cold temps.
- They kind of failed with Low stress training, they went up and stretched without proper bending.
- One plant has already mature looking buds but still on the small size. Two/three of them are going well and one is falling behind flowering wise.
- They look nicely green tought.
Until next week.


Likes
32
Share
@CapybaraProbioticTeam
Follow
Hola!
Antes que nada, quería pedir disculpas por no poder continuar las semanas de vegetación como correspondía, pero por cuestiones personales se me hizo imposible.
Las fotos corresponden al ultimo dia de la semana 13 de la planta, el día 6/02/2021. En todo este periodo de crecimiento vegetativo realice mainlining, como muestro en la semana 5 subida, y luego deje que las dos ramas se desarrollen hasta tener 5 nudos cada una y realice en ambos extremos una poda apical, o topping. Luego, con tecnicas de LST fui torciendo las ramas para que vayan creciendo mas o menos parejas, pero al ser un cultivo outdoor obviamente esto no sucede tan prolijamente como en un indoor. Mas alla de eso, estoy contenta con el resultado: 10 ramas principales y muchas pequeñas en la vegetación. Fui haciendo defoliaciones suaves, y ahora le tocará la ultima antes de que empiece a florecer. Con respecto a esto, la planta sexó finales de enero, pero recién ahora esta comenzando a mostrar signos de que esta por empezar a florar, así que la semana que viene será la primera de flora. Esto por mas que parezca raro suele ser común por lo menos en esta region, muchas veces las plantas sexan antes y no muestran signos de comenzar a florecer hasta unas cuantas semanas después, nada que ver a como ocurre cuando uno controla el fotoperiodo.
Por suerte la temporada viene siendo mas seca de lo normal, y poco lluviosa, por lo que tuve problemas con trips pocos días. En general cuando tocan veranos lluviosos se vuelve muy complicado tratar las plagas. En particular en mi patio suelo tener problemas con trips, pero no de otras plagas ya que las plantas de acompañamiento son suficiente para espantarlas.
En las fotos notaran que el tronco principal esta partido en dos, esto sucedió cuando se le cayo un peso importante encima hace 4 semanas, pero con unas rápidas ataduras y la correcta nutrición la planta sano al 100%.
Esto ha sido todo. Cualquier sugerencia es bienvenida. 💪
Saludos!! 😘

Likes
25
Share
@Kikiwindsurf
Follow
I cutted off the main cola of GG accidentally, so we have GG LST, GG LST + topping and LH growing naturally.
Rain days/no sunny days they stay indoors as u can see. (20hours indoors 400HPS and 12 hours outdoors direct sunlight)
Gonna decrease nutrients because of the apparence of the leaves, "plastic leaves effect" let me know what u will do in comments ! DAY 39 AND 40 GORILLAS AND DAY 30 LH
18/04/2020 day 35 of LH and day 44 and 45 of the gorillas. They starting the full bloom and swating crystals. Smell increased considerably. I water more nowadays because she drinks a lot ! enjoy todays vid in the terrace :D


Likes
11
Share
@UrbanBoer
Follow
Monday’s Blue, it looks like she’s flowering but I am not sure but I will find out very soon with this coming week, the days are getting hotter and now an hour longer. I almost lost hope, the leaves were drying out, but with time knowledge is acquired and look at her now, she does show signs of going through trauma but now she healed ad growing like the rest.
Likes
12
Share
@thonhash
Follow
Sobre esta cepa no hay que comentar mucho,bastante contento con esta regular.

Likes
13
Share
@Erratico
Follow
Día 11 de flora: Se realizan podas de hojas y brazos pequeños constantemente, también se realizaron varios dobleces a ramas largas, haciendo super topping en algunas, hoy se riega por primera vez con bud candy, lo que es biobizz, agrego 3-4 productos por riego. Se están formando pequeños cogollos, no se ven hojas con carencias ni excesos.


Likes
4
Share
@BB-COLLECTIVE
Follow
Same again both Oreos USA beans we popped running side by side both topped and now tied down to even up the canopy and get them ready to be flipped to 12/12

Likes
Comments
Share
@Papapeyote
Follow
Traspaso a nueva carpa, por el momento misma luz, para floracion de usara un sodio en cambio de la LED

Likes
36
Share
@TaterheadJohnson
Follow
7/19: Started new nutrients today. Filled gallon jug with new nutes. Poured half of new nute mix in half gallon jug. Poured the entire half gallon jug into reservoir.
7/20: Bumped light intensity to 50%
7/21: Filled reservoir to the 2nd line today. Added a total of 1 gallon to res to get it to that line. Poured the rest of the mixed nutes for this week (half gallon) and then another half gallon of just plain water.
7/24: Bumped light intensity to 55%
7/25: Sadness today 😞.. While in the process of doing more LST today I accidentally snapped the main stem. I Panicked! Moved plant back in opposite direction to counteract the split. Will be monitoring very closely! 🙏🏾
***** For this Grow******
“Day Air Temperature” will be the max temp of tent for the week.
“Substrate Temperature” will be the average temp of tent for the week.
“Night Air Temperature” will be the lowest temp of the tent for the week.


Likes
7
Share
@Danger90946
Follow
Day 43 12/06/2021- Beginning of week five of flower. She should be done soon, she will also get her final feeding soon.
Day 45 12/08/2021- She got her final top dress today from here on out she is on her own all I will do is water with pain water PH to 6.2-6.8 when dry.
Day 47 12/10/2021- She is coming along nicely. Very frosty wish she wasn't a auto so I could of clone her for sure. Today she got a nice treat as it rain in my hometown and that's the water she got. Hoping she is ready by the end of the year. I know she looks funny but she was never topped either.
Day 49 12/12/2021- End of the week, nothing new.
Likes
35
Share
@XperencdGmanXG
Follow
I can finally get this guy going now that I have space again. Time to use me new found PGR knowledge and see just how fast I can make this girl grow. First off is to get her roots stimulated for fast growth. Watered her in with a new formula banana peel microbe bomb recipe that I brewed out. Looking for some explosive growth in the coming weeks.
Likes
3
Share
@Dash58
Follow
1.4. Buds fatening up, looking good. 34DLI
8.4. Had some problems around, not with plants. I have to discard them, it’s tearing my hearth but it’s what it is.


Likes
Comments
Share
@ORION1_1
Follow
Still happy and doing well. Maybe a little slow since I was getting the living soil watering differences figured out. Water only living soil for now ph at 6.3-6.6


