


Likes
Comments
Share


@Luke_Lee
Follow
-25.07.2024
The blooming season starts today
the light intensity has been increased, the lamp is running at 80% (240 Watt)
the measured values with the Photone App: Ppfd = 1000 DLi = 75
Starting this week, each plant will be watered with 1 liter of water.
4 ml BioGrow, 2 ml TopMax, 2 ml BioBloom will be added to the liter of water.
Soil still felt moist, so no watering today.
-26.07.2024
Just a visual Check
-27.07.2024
Everything looks pretty good so far.
the soil felt dry,
both plants were watered with 1 liter of water with 4 ml BioGrow, 2 ml BioBloom and 2 ml TopMax.
-28.07.2024
Just a Visual Check
-29.07.2024
Visual Check
The Soil felt really dry, Both plants got 1 Liter Water per plant.
-30.07.2024
Visual Check
The soil is little bit moist, but no watering.
I raised the Skywalker, now both tips of the plants are at the same height.
LST has been readjusted slightly and removed some of the lower leaves.
-31.07.2024
Visual control,
the plants were watered with 750 ml of water per plant.
2ml BioGrow, 2ml TopMax and 2ml BioBloom were added to the water.
And another week passed.

Likes
15
Share


@AllieO
Follow
2/15 NL: I seem to be in the final stretch of things! Lots of white pistils still, but they're starting to curl in. Going to keep her in the tent and recheck this weekend! Harvest window is approaching! Very excited for the extra tent space.
2/19 NL: Not quite ready for harvest. Soon...


Likes
Comments
Share

@theChimp
Follow
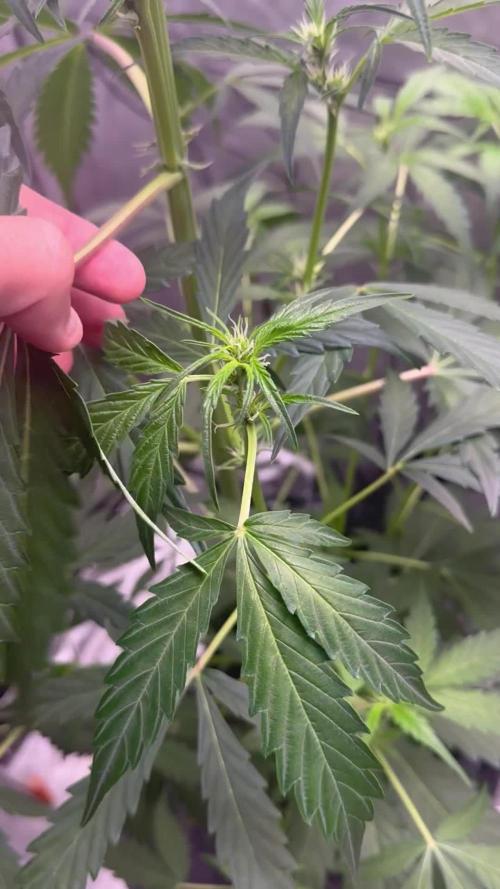
It appears the stretch phase for this plant is indeed about two weeks long. We have seen another foot of growth compared to last weeks entry. With basically no growth seen in the past two or three days, it does appear that the stretch phase has ended. Although I will certainly update on height as we keep going.
The entire reservoir of the VIVOSUN automatic watering base has been emptying about every two days recently. The plant is thirsty and is taking up all the nutrients we’ve given it. Each time I replaced the reservoir, I’m increasing an additional 3 mL per gallon of Athena Grow A and Grow B. We started at six, then nine, and the watering yesterday was a full 12 mL per gallon. I am still seeing yellowing at the tips of our leaves, about 1 to 2 mm long, which is ideal and indicates that our plant is right on the edge of maximizing its nutrient uptake.
Higher nutrients would be recommended if this plant were not potted in live soil. However, the FFOF soil continues to provide sufficient nutrition w/ our augmentation with the Athena nutrients.
In an effort to get an idea of the full shape and lifecycle of this plant, we have continued without any stressing techniques on the plant. I have only used some of the lower branches to hold down some of the larger fan leaves to allow for more light to some of the Bud sites, as you can see in the video posted.
Overall, we are really excited to be on schedule and to see this explosive plant. I also included a comparison shot of this plant with the Chem diesel X banana daddy auto, which was planted only a couple of days after the plantet of the grapes. It really shows just how fast this plant has grown, and shows why FastBuds is so loved.

Likes
21
Share


@TechDCo
Follow
23/04/2025
Lights On! Sprayed walls 6%HP/L sprayed Domes 0.05% HP/L
Pulled backwards MS with tape to try and shape her.
23/04/2025
Lights Off!
25/03/2025
Lights On!
Placed seedlings in the 5L starting cans.
Lights Off!
Check the VT me like the old me!
26/03/2025
Midday!
27/03/2025
Lights On!
28/03/2025
Lights Off!
30/03/2025
Lights On! Defolled!
Switch to flower in 4days. I need to setup the sativa tent in loft!
Midday! Increased light: 460watts they perked up and are praying!
- "If the truth perished, it'll still stand true that the truth perished"

Likes
34
Share


@JonnyKush
Follow
Day 65
past nutrition problems I believe have slowed growth. unfortunately on a plant I think I have problems with the compaction of the soil which has caused too much irrigation. the plant does not eat and a little slower than the others. now after 4 days to dry i will give only datpo water which seems to burn for nutrients, i believe brought about by the fact that they are deposited in the soil. all in all they continue to grow and hope for the best! 💚🌱


Likes
12
Share

@farah4weed
Follow
Hello guys 😍👽
This week is the most exciting time of my cultivation.
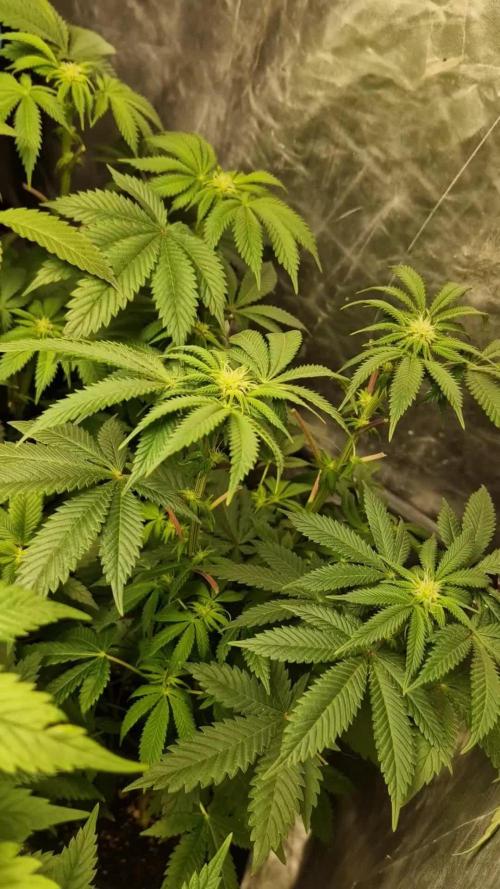
After we grew 10 og creams, today in the third week of flowering, all the seeds showed that they are feminized😍😍
My project has given the right result
But more important than this is the final product, which we compare with the father (og kush) and the mother (cake n cream) and the traits it inherited😍😍
Thanks for your comment🙏😍👽
"farah4weed"
Likes
8
Share

@CannaArchive
Follow
Growth Stage:
Transition / Pre-Flower
Environment:
Temperature: ~25–26 °C
Humidity: ~60–62 % RH
Light intensity: increased to ~500 PPFD
Watering / Feeding:
Plants were watered with plain water + CalMag during this week.
No base nutrients were added, as the focus was on keeping stress low during the transition into flowering.
Observations:
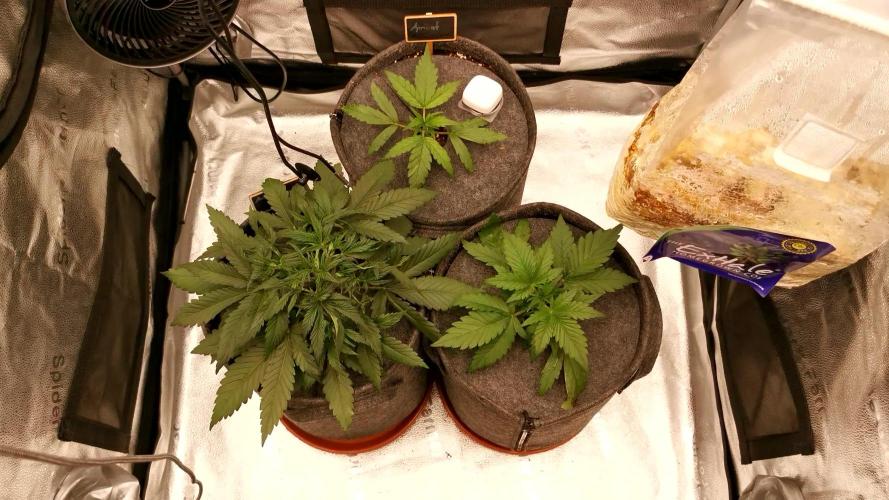
Week 3 marked the start of pre-flowering for both Apricot Autos.
Apricot Auto #1 showed the first white pistils about one day after the Amnesia, clearly indicating the transition into flower. Growth looks stable, and the plant continues to improve compared to the earlier weeks.
Apricot Auto #2 entered pre-flower about one day after #1. While still noticeably smaller and less developed, it also showed clear signs of flowering and continued growing steadily.
The transition into flower felt slightly early for the Apricots, but the decision was made to let them run naturally without any intervention.
Training / Work Done:
No training or manipulation was done this week. The plants were left untouched to avoid unnecessary stress during the transition phase.
Notes:
Week 3 was mainly about observation and stability. Both Apricot Autos successfully entered pre-flower and are now preparing for the upcoming stretch and early flowering phase.


Likes
49
Share


@Ganjafarmer420flowers
Follow
😁😁😁😁 all I can say on this one is wow I'm blown away with that purple I really can't wait to taste that beauty 😍 I'm still a novice so this as really excited me. I would like to give @fastbuds a shout out I have already done the chemdawg and now this your strains are brilliant 👏 this is why I'm going to do all 75 strains you have 😁😁
Likes
26
Share


@pifflestikkz
Follow
Day 17
17/07/24 Wednesday
De-chlorinated tap water pH 6 with calmag 5ml -5L.
Very humid week, noticed a green turning colour on top of soils where the humidity has been far to high.
I have installed door netting and recently left open all day and night now so they can condition over night in colder temps.
All are doing well, one overdose slightly behind and looking ABIT swifted. But she'll come around 💪💚
Day 19
19/07/24 Friday
Lite Feed today, 250ml each pot small run off.
Seeing excellent start to these babies. Let's get it 👌💚
Day 21
21/07/24 Sunday
De-chlorinated tap water pH 6 with calmag 5ml to 5L.
Watering in 1L each day from now.
Updated video


Likes
16
Share


@biggreens420
Follow
this girl has come on well since the change to 12/12 shes stretching out and grown into a decent Bush so decided to do some defoliation and lst shes responded well to it will be dropping silicon this week was going to drop it last week but didn't will be adding buddy next week thanks for reading happy growing guys


Likes
15
Share


@MrJones
Follow
Mr. Jones Fast Buds Moby Dick
╰⊰´🌿 ╰⊰´🌿 ╰⊰´🌿 ╰⊰´🌿 ╰⊰´🌿 ╰⊰´🌿 ╰⊰´🌿
🏡Indoor - 3"x4"x8" Custom Built Grow Closet
🌾This strain likes to stretch, so a heavy training regiment will be needed.
🗓️Germenation - Soaking in Water Strait into Amended Soil.
⚱️3-Gallon Pots 📊6.4 / 6.8 PH
💧 Feeding - Gaia Green Grow / Bloom
🕷️ IPM - We will be using Green Cleaner" 1 OZ per Gallon, and CannControl from Mammoth alternating between products each month for Integrated Pest Management.
🌿╰⊰´🌿╰⊰´🌿 PLANT UPDATES 🌿╰⊰´🌿╰⊰´🌿
🗓️SUNDAY 10.29.23 - Going to leave the light cycle alone for another week, these ladies are blowing up pretty well, don't want to mess with the MoJo :)
╰⊰´🌿 ╰⊰´🌿 ╰⊰´🌿 ╰⊰´🌿 ╰⊰´🌿 ╰⊰´🌿 ╰⊰´🌿
📝 Notes - Original Moby Dick Auto is a world-renowned Sativa-dominant giant created from two of the most popular strains ever, the White Widow and Haze cannabis strains which are known for the huge delicious aroma, huge size and yields; It’s an extremely easy-to-grow variety highly recommended for growers of all levels seeking for maximum yields with minimum effort as this strain grows up to 150cm and yields up to 650 g/m2 in 10 weeks without extra maintenance. Thanks to its 23% THC, this marvelous hybrid is all about happiness as it will melt your worries away while boosting your mood, leaving you with a big fat smile on your face and ready to get things done as soon as you take the first hit, making it an excellent choice for social scenarios and busy workdays. The Sativa effect comes hand-in-hand with a mix of lemony, piney, and woody terpenes that translate into that classic aroma every stoner loves.
╰⊰´🌿 ╰⊰´🌿 ╰⊰´🌿 ╰⊰´🌿 ╰⊰´🌿 ╰⊰´🌿 ╰⊰´🌿
Likes
30
Share


@gottagrowsometime
Follow
Welcome to my Runtz X Layer Cake Female Diary from Barneysfarm.
Wk 9 Days 58-63 (device was lost, and all picture,video days 57-69 were lost, so here's my account) just had finished pre flower and started to stack heavily on building top bud sites. Laded with thich compact trichomes. She has bright orange hairs. That give of a lovely musk of armoas that take over your senses. 2/3rds down the main bud sites, very healthy huge sugar leafs surround her, but, if hasn't taken away from below, as the sites are smaller, but have so much frost. And she had at least 14-20 more days.
Wk 10 days 64-70 As you can see. She has a beautiful shape. Some of the nicest looking bud I've yet grown. She took to LST really well. Had I lollipopped the heck out of her, and make for some pretty good solid top colas with some small dense bud sites that have 1/3 the trichomes to calyxs. The calyex to sugar leaf ratio is super low, but 2/3s down she has many large sugar leafs that have shaded out her canopy. But, by moving her around and adjusting LST and leaf tucking. I've literally done hardly any defoliation. Am going to squeeze some in this week. Not, that its needed. But, there is some still more growing to do down below. And if I leave her to mature without allowing light to hit her harder down further into the canopy I risk the chance of overcooking the hard earned Rock Hard half fist sized buds. Have a feeling this gonna be some of my best smoke to date. The plant is in tip top shape. No defiencies no toxicity. 1st time for me. Am just going to let her ride out the next 2 weeks on water. Should be enough in pot to finish her off.
Lots of pics to come over the next few weeks.
Thanks to my sponsors from MarsHydro+barneysfarm, (reps) for supplying me with great lights+strains.
COUPON FOR MARSHYDRO
Use code ggs at any marshydro site for a discount.
Be sure to drop a like or comment so I can visit your diaries. Either way, thanks for dropping by folks.
Likes
Comments
Share


@shreddeew
Follow
Неделя промывки
По 5л раз в два дня
Запах очень фруктовый, сильно пахнет, но запах восхитительный, мое почтение бридеру🤤

Processing
Likes
11
Share


@ganjaman24
Follow
She’s been looking great just moving very slow been flowering for a while but I forgot I transplanted her a while back so she’s gaining speed! Smell is interesting only present when ruffled..exciting to see her Finish

Likes
15
Share


@Shizzlemanizzle
Follow
Now tent is here ! plants are exploding:) little one starts to catch up ! Trust in the process👍🏽


