


@ApothecAries
Follow
1 Week since planting the seeds into soil! very healthy little seedlings! I think for this run. Will be running two 3 gallon pots next week or two. We do have the spider farmer SE3000 coming sometime which will give us all the power we need for flowering a full tent 8).Girls have a radio playing country of all eras all day long and when I’m around they get a dose of classic metal hope they are jamming out 🤘
Next week most likely homing into their 3 gal homes. Will be giving a shot of Microbes and Molasses. Coating root system with Dynomyco mycorrhiza!


@EXZELENS
Follow
1st of November, HARVEST, D91
So, after the 24 hours of darkness, she is now beautiful and ready. After chopping her, I hung her for some hours – I had some stuff to do – and after that I did wet trimming since I find it more convenient and I don´t like to trim dry buds. I guess the best way for me would be to leave it drying for some days, do the trimming, then leave it drying some more, but, I sincerely don´t have patience lol.
When I was in the last stock to trim (which was the main btw) the top bud looked strange to me so I opened it and it was starting to rot.. I got really sad but what can I do except for trying to save it, right? So I took all the rotten parts out of the top bud and tore it to pieces to watch it closely and keep it from getting any more mold.
D94
Today I weighed the half part of the top bud that was already dry and it remained without any mold: 3.6 grams.
D97
Everything is dry and now curing, the total weight is 68.6, 65 of the whole plant and 3.6 of what I saved from the rotten bud. I´m really happy with the results, the buds aren´t much dense but they look beautiful.
D111
Today is the 14th day of curing.
D120
Today I´ll be doing the smoke report, it´s been curing for 3 weeks and the smells is quite good already, I know it can be better but the taste is good already so I´ll be doing it today.
More info on growing in the previous weeks and a summary of growing and also the smoke report are on the top at the strain review. Thank you very much for reading my diary!


@AsNoriu
Follow
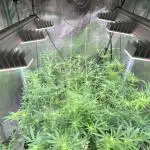
Day 57. They are running amazingly good, will leave for 7-8 days more, trim heavy, defoliate and will put them into main tent. I need this space for drying ...
Today only pure water, next time I will give them feed .
Happy Growing !!!





@BAM_BAM
Follow
The tent is filling very nicely. In my neut section it says Tsp or ml….. I am using powder so I am using Sensi pro A&B 6 grams ea. Also with the Big Bud it is powder so I use 4 grams in the solution I am calculating for 2 Gallons (American product converted to eu) but adding more water the plants are doing really well.
Started Overdrive this week this stuff really works the entire series grows awesome bud but Overdrive Pops those buds it really fills them out, it gives the buds weight makes them SOLID.


@masterofsmeagol
Follow
6/22 Some pictures didn't upload but that's probably a good thing. As long as the video went up its good. I need to take less pictures. I'm glad I watered the plants in the back with a premixed gallon last night as we didnt get nearly the rain I thought we would. It's small showers throughout the day. The plants are getting enormous. A couple have revegged. Mostly the 10th planet. The others aren't anywhere near as impacted. Boy are some of these stalks thick. I chose to keep a couple plants that could be grown naturally without topping or fimming. I like to see the structure of the tree bit with humidity like this 98%rh it's easy to get botrytis. That's why it's good sometimes to have multiple bid sites so your proverbial eggs aren't all in one basket. But you do end up with a massive cola. I think that mk ultra with the big fan leavescis just going to be one giant bud. That's what it's looking like. Oh and today is the summer solstice. Longest day of the year.
6/23 WATERED EVERYTHING. USED FIVE AND A HALF GALLONS. EVERYTHING GOT AT LEAST A HALF GALLON. Despite the rain we got and the bags still having some heft I decided to water. It's 80 at 9am. It's supposed to he in the upper 90's today and coukd break 100° tomorrow. I hate that the grow bags are black. That's way to hot for the plants. I should find some empty soil bags and wrap the black fabric for a couple days. A sunscreen might help but I doubt much. We'll see how it goes.
6/24 It's 90° at 9am. It's supposed to break 100° amd stay there a while. Up to 106°. Plants looked awesome this morning. I wasn't sure what I'd find. Today is the worst of the days. If it didn't break 100 yesterday it was damn close all day and the girls look GREAT. I WATERED AGAIN TODAY. I USED 6.5 GALLONS TO WATER THE GARDEN. It was nice cool well water too so they should like that. Branches are getting longer and I'm training as the get bigger. I need to put up the trellis but I'm not doing it in this heat.
EDIT: 90° @ 6PM WENT OVER AND AS PREDICTED THE TWO TENS WERE DROOPING. IM WONDERING IF THEY WILL BE ABLE TO FINISH IM THOSE TENS. LAST YEAR I HAD ONE THAT WAS HUGE IN A TEN BUT IT JUST DEVELOPED INDIVIDUAL CALYXS WITHPUT CONNECTING. CHECK IT OUT ON LAST YEARS DIARY. IF THATS THE CASE I SHOULD KIGHT DEP THEM BECAUSE THEYRE GETTING BIG. I WATERED THE TWO TENS WITH ABOUT A HALF GALLON AND I USED WHAT WAS LEFT OF THAT COLD WELL WATER ON THE 10TH PLANET IN THE 30. SHITS LIGHTER THAN USUAL BUT LOOKING PRETTY GOOD. THE REST CAN WAIT UNTIL THE MORNING FOR THEIR WATERING. TOMORROW TOPS OUT AT 85° WHICH WILL BE MUCH BETTER. IM LOVING MY STRAIN CHOICES RIGHT NOW.
6/25 It's super humid out but much cooler. I think it's like 80 at noon time. I had to water the two tens this morning. I didn't really HAVE to but I did. I filled up my watering can that says it holds 1.5 gallons (but it seems like more) and watered the two tens at least a half gallon and focused the rest on the 10th planet in the 30 and the other one up front that gets lighter than the rest. I was fully planning on watering EVERYTHING this morning but I could feel moisture in the soil and they had weight. I'm pretty sure I made the right decision. Especially with humidity so high. Either way I'll check tonight.
EDIT: WENT TO THE GROW AT APPROX 2:30PM. I HAD BO IDEA HOW HOT IT WAD OUTSIDE. IT WAS 87° BUT THE HUMIDITY IS DAMN NEAR 100%! I HAD WATERED SHIT A KOT LATELY AMD WANTED TO WAIT UNTIL THE MORNING. THE TWO 10'S (WITH GIANT PLANTS THAT IM NOT SURE CAN FINISH IN TENS) WERE DRY AND LIGHT. A COUPLE SPECIFIC PLANTS WETE A "LITTLE" LIGHTER THAN THE REST. I MIXED UP THE WATERING CAN WHICHVIS 2.5 AND ANOTHER GALLON. I USED THE WATERING CAN ON THE PLANTS IN THE FRONT. THE CHEMDOG #4 WAS SIGNIFICANTLY LIGHTER THAN THE REST SO I GAVE IT MOST OF A GALLON. THE PLANTS THAT ARE STILL HEAVY ARE GOING TO HAVE TO WAIT LONGER BEFORE I WATER THEM.
6/26 This morning I came over to substantially lighter bags. I watered everything but the 50 with 5.5 gallons of water. Plants amd roots are getting heavier. My intuition told me to water that 10th planet but it was still wasn't TOTALLY dry. This happens a few times a year during hot stretches. It will be fine by the time I'm back. I've also noticed that the pink kush in the 50 (the only one that didn't use ALL new soil) is a substantially lighter green than every other plant in the garden. Boy I'm glad that heat wave is over. It's 67° at 9:30 that's much better. I'll update as I go. I'm still thinking about light depping the 10s.
EDIT: HASN'T BROKE 70 YET AS OF NOONTIME. I THINK I MAY HAVE GONE A LITTLE OVERBOARD WITH THE WATER. TH8NGS LOOK ALRIGHT AMD THERE'S A GOOD BREEZE SO EVEN IF I DID THEY'LL DRY OUT QUICK. SO MUCH GROWTH SO FAST! THE MK ULTRA WITH THE BIG FAN LEAVES LOOKS A LITTLE SAGGY BIT IT WILL COME OUT OF IT. THE 10TH PLANET THAT WAS DROOPING LOOKS A LITTLE BETTER. IT DID REVEG AND IS STEAIGHTENING OUT TROM THAT. I DEFOLIATED SOME SPOTS TJAT LOOKED LIKE SEPTORIA. BUT THERE WERE BURNS AND DISTORTED LEAVES FROM BEFORE SO ITS HARD TO TELL. JUST A COUPLE LEAVES WITH THAT DOT. TIME WILL TELL. ITS PAST TIME TO GET MY IPM GOING ANYWAY. DURING ONE OF THESE COOLER DAYS IM GOING TO HAVE TO PREEMPTIVELY TREAT MY PLANTS. EITHER BT, CAPTAIN JACK OR PLANT DOCTOR IS WHAT I HAVE ON HAND AT LEAST. I HAVE CITRIC ACID AND K BICARB BUT HOPFULLY NONE OF THAT WILL BE NECESSARY. THE WIND IS FAR TO STRONG FOR A MITE POPULATION TO GET OUT OF CONTROL WHICH IS AWESOME. IM MAINLY WORRIED ABOUT THE PATHOGENS.


@Ensign420
Follow
Introduction - Week 14|07 Summary -
Ensign's log, stardate 9437.65,
Great week of growing! Wow what a good week!
Growth in the main tent has all around been incredible!
Submitted my first submission to the Global Grow Cup! Filmed a video of the solo cup container (marked with the ticket/order number) that will be used for the competition. Also had to fill and prove the solo cup holds 2 cups of soil. Now I need to root a clone (for the first time), transplant her into this cup, and submit my 2nd entry before the 30th of this month.
As far as my first attempt at cloning, have already begun the rooting process! Managed to take cuttings from 3 out of the 6 phenos in the main tent (the first cutting was also my first time topping). Soaked the cuttings for two days before planting them into Coco Coins. So far everything has gone surprisingly well! The clones are now rooting under the propagation dome with the vents fully closed. Will check for roots soon!
At the end of the week, growth was just raging! Was planning on flipping to flower in a week, but decided to begin the first week of flower next week! Thus this is the last week of veg. Plan to flip to 12/12 next Monday!
Onwards to next week!
[START OF WEEK 14|07]
==========================================================
Garlic Budder #1 - WEEK 14|07 - Full Veg Wk5
Garlic Budder #2 - WEEK 14|07 - Full Veg Wk2
Garlic Budder #3 - WEEK 07 - Full Veg Wk5
Garlic Budder #4 - WEEK 06 - Full Veg Wk4
06/03/24 → 06/09/24
This Week's Estimated Goals
----------------------------------------------------------------------------------------------
DLI: ~26 mol/m²/d
PPFD: ~400 μmol/m²/s
VPD: ~1.0 kPa
This Week's Meter Readings & Averages [Lights On: 16:00 - 10:00]
----------------------------------------------------------------------------------------------
DLI: 24.56 mol/m²/d
PPFD: 379 μmol/m²/s
VPD: 0.91 kPa
Soil %: [32.7, 37.6, 37.9, 34.1]
==========================================================
Day 01 - Monday - 06/03/24 - Total Days: 098
-----------------------------------
Daily Averages [~23:00]
- Temps: 80.7°F [27.1°C]
- Humidity: 74.4%
- VPD: 0.90 kPa
- Soil %: [31, 34, 39, 35]
-----------------------------------
- [09:57]: Quick morning check!
--- #1 is looking a bit droopy, but almost lights off (at 10:00) so not concerned.
--- Nice! Mainly wanted to check on #4 and she is looking great! She’s perked back up and looking good!
- [23:08]: Evening check.
--- Wow! It’s a jungle in here!
--- #1 has gotten too big? Nah!? Keep on growing girl!
--- #2 is growing and definitely getting bigger! Growth just looking really weird.
--- #3 has continued to get larger and is looking quite uniform in growth!
--- #4 is growing and looking perky again!
--- Even the original #1 and #2 phenos (in the back) are looking good!
--- Wow! #4 is really getting close to the light.
- [23:14]: Checked down both fill tubes.
--- Both reservoirs were completely dry!
- [23:27]: Checked the Ecowitt soil moisture sensor data:
--- 30% - [CH01 EB1 - Garlic Budder #1]
--- 34% - [CH02 EB2 - Garlic Budder #2]
--- 39% - [CH03 GFP - Garlic Budder #3]
--- 32% - [CH04 FPT - Garlic Budder #4]
- [23:32]: Poured 4 cups of distilled water down EB1’s fill tube.
--- Poured 2 cups of distilled water down EB2’s fill tube.
- [23:38]: Checked the humidifiers.
--- Refilled the 4X4’s humidifier with distilled water.
--- Tomorrow, plan to defoliate and start cloning for the first time!
--- Going to take multiple cuttings from both #1 and #4 for sure, but still deciding on the rest.
--- Getting hyped!
Day 02 - Tuesday - 06/04/24 - Total Days: 099
-----------------------------------
Daily Averages [~23:00]
- Temps: 81.4°F [27.4°C]
- Humidity: 74.3%
- VPD: 0.93 kPa
- Soil %: [29, 35, 38, 32]
-----------------------------------
- [11:59]: Time to film the first entry for the Global Grow Cup!
--- Going to be using BuildASoil 3.0 potting soil.
--- Filming the video using a stand and my phone.
--- This video is mainly to establish the container that the plant will be grown in. Also to prove that the container is a 16oz container and that it can hold 2 cups of soil.
--- The ticket (order) number also had to be written on the cup.
- [12:36]: Done!
--- The video had to be done in one continuous shot with no edits (my original submission does not have the logo).
--- There was also a photo that needed to be shot which shows the cup filled with 2 cups of soil (just like the video, the original image submission did not have the logo).
--- I think I did everything correctly, but also sent an email for verification of submission and validation.
--- Getting hyped!
--- [*smokes a bowl]
--- Going to defoliate today along with for the first-time, going to take cuttings for clones!
--- After a bit of online research, decided to split the cloning process into two days.
--- Today going to take cuttings and will soak them in a solution of aloe for 24hrs. Afterwards will change the water out and use straight distilled water.
--- Then in a couple days, plan to transplant into coco plugs (Coco Coins) for rooting.
--- For optimal results, also be using a rooting hormone (Clonex).
--- Well.. Here goes nothing!
- [17:01]: Evening check.
--- Wow! #1 is looking huge! Her main top is stretching above the lower canopy which is continuing to bush out.
--- #2 is growing along. Growth is gnarly and a bit droopy, but she’s getting taller!
--- #3 is looking great! Still a bit small, but she is continuing to get larger.
--- #4 looks like she needs a watering.
--- Both plants in the back are also looking surprisingly great as well!
- [17:05]: Checked down both fill tubes.
--- Both reservoirs were completely dry!
--- As far as today's defoliation, going to leave #2 and #3 alone and will focus my defoliation and cloning on the rest of the plants.
--- This will be my first attempt at cloning, also going to try topping for the first time today.
--- No pressure Ensign. What can possibly go wrong right?
- [17:27]: Time to start the cloning and defoliation process!
--- Filled a measuring cup with 3 cups of distilled water.
------ Added 3/4tsp of Horticultural Aloe
------ Added 1 more cup of distilled water
--- Mixed the solution and poured an even amount into three separate solo cups.
--- Made sure to mark two of the cups (#1 and #4). The unmarked one will be for any other clones from amongst the 6 phenos (if any at all).
- [17:43]: Time to top and defoliate #1!
--- Using a pair of brand new trimmers (AC Infinity),
--- Gently cut the main stalk to even out the canopy.
--- Then trimmed and cleaned most of the nodes leaving the top node or two.
--- Also trimmed the leaf fingers a bit before placing the top cutting into the cup of aloe solution.
--- Now for the rest of the cuttings!
--- [~45 minutes later]
- [18:32]: Managed to finish defoliating and cutting the rest of the clones.
--- Took two more lower cuttings from #1 (3 clones total).
--- Took 3 lower cuttings from #4
--- While defoliating, decided to try and clone the original #2 pheno as well. Took 4 small cuttings.
--- Similar to the top cutting, trimmed and cleaned each lower node for each cutting before placing them into the cups.
--- Before finishing up the 2nd cutting, I noticed the first cutting (the top cut that was also trimmed) was drooping.
--- So I did not trim and the leaf fingers for the other cuttings.
--- In total there were 10 cuttings taken for potential clones.
--- My main focus was to take cuttings and to clean up all the lower growth from both #1 and #4.
--- Defoliated and cleaned up the back original phenos as well (also trimmed back the cover crop).
- [18:35]: Temporarily placed the cuttings onto the floor of the 4x4 tent.
--- Took the trimmings (about 3 cups) and spread them onto the top mulch of #1 and #2.
--- Time to set the environmental controls for the 3x3 veg tent.
- [18:43]: Within the AC Infinity App,
--- For the Veg Tent [3x3] controller,
--- Adjusted the 'Vegetative [18/6]' Schedule for the grow light.
------ Set the Mode to ‘On Mode’
------ Set the START/END times to 04:00PM/10:00AM
------ Set the MAX to 1
--- The IonBoard S33 is now utilizing around 60.8W (at intensity 1 out of 10).
--- Adjusted the 'Vegetative [18/6]' Schedule for the exhaust fan.
------ Increased the Humidity’s HIGH trigger value from 81% to 87%
--- Adjusted the 'Vegetative [18/6]' Schedule for the humidifier.
------ Decreased the VPD target value from 1.5kPa to 0.8kPa
- [18:52]: Moved the cuttings into the 3x3 veg tent.
--- It begins! I think.
--- Going to let these cutting drink some aloe for a day before switching to straight distilled water.
--- Hmm. Could be the white floor of the 3x3 veg tent, but have noticed the S33 has a whiter spectrum whereas the FC-6500 seems to be warmer in color.
--- Anyways,
- [18:58]: Poured 4 cups of distilled water down EB1’s fill tube.
--- Poured 2 cups of distilled water down EB2’s fill tube.
- [19:06]: Filled a pump sprayer with 5 cups of distilled water.
--- Focused mainly on the straw mulch of #4.
--- But also misted the straw mulch for the rest of the plants a bit.
- [19:12]: Checked the humidifiers.
--- Refilled the humidifiers with distilled water.
- [19:44]: Going to be using Clonex rooting gel before planting the cuttings into Coco Coins (pre-soaked with microbes and aloe). But before that begins, going to transfer the Clonex gel into a squeeze bottle.
--- Gently peeled back the seal on the original Clonex bottle. Just enough make a tiny opening,
--- Then slowly and carefully poured the gel into an empty squeeze bottle.
--- Also removed the sticker from the original bottle and placed it onto the new one.
- [19:54]: Perfect!
--- Instead of applying the gel to the cutting, going to be applying the gel to the Coco Coin.
--- This squeeze bottle will make applying the gel a lot easier.
--- Will take PPFD readings tomorrow.
--- Also will change out the aloe solution to distilled water.
--- I really hope I didn’t screw things up before they could even begin.
--- Don’t die on me ladies!
--- Please.
Day 03 - Wednesday - 06/05/24 - Total Days: 100
-----------------------------------
Daily Averages [~23:00]
- Temps: 81.9°F [27.7°C]
- Humidity: 75.5%
- VPD: 0.90 kPa
- Soil %: [29, 36, 38, 36]
-----------------------------------
- [09:40]: Quick morning check!
--- #1 is looking a bit droopy, but looking okay. Topping is a high stress technique so going to take some time to recover. Don’t plan on flipping the main 4x4 tent to flower for a good week or so which should be enough time.
--- #4 looks great! The defoliation seems to have no effect on growth. Nice!
- [09:41]: Also quickly checked on the 3x3 veg tent,
--- Nice! The cuttings are looking great!
--- No yellowing and they all seemed to have turned up towards the light.
--- So far so good!
- [22:53]: Evening check.
--- #1 is continuing to dominate this grow! She has spread wide and looking incredible!
--- #2 is looking gnarly, but getting there.
--- #3 is getting larger! But still a runt. By far, her leaves are the darkest of the bunch, but she is still growing!
--- #4 looks happy and growing along beautifully! Wow!
- [22:55]: Checked down both fill tubes.
--- Both reservoirs were completely dry!
- [22:59]: Poured 5 cups of distilled water down EB1’s fill tube.
--- Poured 2 cups of distilled water down EB2’s fill tube.
- [23:05]: Checked on the 3x3 veg tent.
--- Ooo yea! The cuttings are still green! Nice!
- [23:07]: Took PPFD readings.
--- The cuttings were around 121 μmol/m²/s which gives a DLI of 7.84 mol/m²/d
--- Nice! These levels are on the lower range for seedlings (~100-300), perfect! I think.
- [23:14]: Swapped the aloe water out to straight distilled water.
--- Going to let these cuttings soak for one more day before planting.
--- Please don’t die girls!
- [23:15]: Checked the humidifiers.
--- Refilled the humidifiers with distilled water.
--- Ooo yea!
--- Tomorrow is the big rooting day!
Day 04 - Thursday - 06/06/24 - Total Days: 101
-----------------------------------
Daily Averages [~23:00]
- Temps: 81.9°F [27.7°C]
- Humidity: 75.2%
- VPD: 0.91 kPa
- Soil %: [32, 38, 38, 34]
-----------------------------------
- [16:20]: Evening check.
--- #1 is a bit droopy, but growth is looking green and healthy.
--- #2 is looking bigger! She’s also looking sort of droopy.
--- #3 is growing along nicely! Looking good girl!
--- #4 is looking great! A bit droopy but plan to water today.
- [16:23]: Checked down both fill tubes.
--- EB1's reservoir still has some water.
--- EB2's reservoir was completely dry!
- [16:23]: Checked the Ecowitt soil moisture sensor data:
--- 28% - [CH01 EB1 - Garlic Budder #1]
--- 36% - [CH02 EB2 - Garlic Budder #2]
--- 37% - [CH03 GFP - Garlic Budder #3]
--- 30% - [CH04 FPT - Garlic Budder #4]
- [16:30]: Using a pump sprayer,
--- Misted the straw mulch of #4 with 6 cups of distilled water.
--- Focused mainly on the straw mulch.
--- Also misted the straw mulch of #3 (in the grassroots fabric pot) a bit.
- [16:43]: Poured 5 cups of distilled water down EB1’s fill tube.
--- Poured 3 cups of distilled water down EB2’s fill tube.
- [16:52]: Checked the Ecowitt soil moisture sensor data:
--- 56% - [CH01 EB1 - Garlic Budder #1]
--- 44% - [CH02 EB2 - Garlic Budder #2]
--- 40% - [CH03 GFP - Garlic Budder #3]
--- 45% - [CH04 FPT - Garlic Budder #4]
- [17:01]: Took general PPFD readings.
--- #1 was around 379 μmol/m²/s which gives a DLI of 24.56 mol/m²/d
--- #2 was around 333 μmol/m²/s which gives a DLI of 21.58 mol/m²/d
--- #3 was around 293 μmol/m²/s which gives a DLI of 18.99 mol/m²/d
--- #4 was around 378 μmol/m²/s which gives a DLI of 24.49 mol/m²/d
- [17:09]: Took the weekly height and light distance measurements.
--- #1 was about 21" tall.
--- #2 was about 13.5" tall.
--- #3 was about 9.5" tall.
--- #4 was about 19.25" tall.
--- Hmm..
- [17:19]: Adjusted the right oscillating fan a bit.
--- Re-angled the CloudRay S6 oscillating fan upwards. Been noticing that the air has been hitting the tops of the plants so easing off a bit (#1 is still getting hit, but she’s huge so not too worried).
- [17:23]: Back to the measurements!
--- #1 was about 9.5" away from the grow light.
--- #2 was about 17" away from the grow light.
--- #3 was about 17.5" away from the grow light.
--- #4 was about 11.5" away from the grow light.
- [17:46]: Checked on the 3x3 veg tent.
--- Cuttings are still green! They do look a bit droopy but no signs of yellowing.
--- Okay!
- [17:55]: Time to begin the rooting process!
--- For my first attempt at rooting, going to be using Coco Coins pre-soaked in saponins, microbes and aloe.
--- To further help with rooting, going to also be using Clonex rooting gel.
--- Filled a measuring cup with 4 cups of distilled water.
------ Added half of 1/64tsp of Quillaja Saponaria Extract [60]
------ Added 1/16tsp of Horticultural Aloe
------ Added 1/8tsp of Mycrobe Complete
--- Mixed the solution thoroughly.
--- Time for the Coco Coins!
--- 10 cuttings means 10 Coco Coins.
- [18:09]: Dropped 10 Coco Coins into the measuring cup.
--- The coins immediately started to expand.
--- A bit too much.. Oops!
--- Poured the solution and Coco Coins into a pitcher.
--- Added 2 cups of distilled water to the solution (now at 6 cups).
--- Great! The coins are pretty much fully expanded, but going to wait a bit longer to fully saturate each coin.
--- [~20-30 minutes later]
- [18:42]: Great!
--- Took the seedling and flood tray from the AC Infinity propagation dome and placed all 10 Coco Coins into the slots.
--- Gave each Coco Coin a quick shake to remove excess solution. The coins were not dripping with solution but still pretty saturated.
--- Arranged them into 3 groups with the cuttings in mind.
--- Also tried to keep the pre-made holes intact.
--- Time to inoculate the Coco Coins!
- [18:54]: Using a squeeze bottle,
--- While keeping the nozzle from making contact with the coco, gently filled each pre-made hole with Clonex rooting gel. Just enough gel to fully cover the hole of each coco coin.
- [19:00]: Time to plant the cuttings!
--- Gave each cup a misting of distilled water. Focused on wetting the top growth with water.
--- Okay!
--- To avoid mixing cuttings up.
- [19:01]: Starting with the original #2 pheno cup,
--- For each cutting,
--- Using a pair of clean trimmers, made a final 45° cut about 1/2" from a bottom node.
--- Then stripped away and scared the protective membrane below the node before planting.
--- Made sure the node was about 1/2" below the surface of the coco.
--- To help with planting, while inserting each cutting, gave the Coco Coin a gentle squeeze to loosen the coco. This also helped to ensure the coco and gel was in good contact with the cutting.
--- Once the cutting was planted into the Coco Coin, made sure to place back in the same spot (made sure to keep the cuttings in their groupings).
--- Once a cup was complete, made sure to keep the label with the group.
--- Re-misted the top growth as needed to keep it wet.
--- Also wiped the trimmers with isopropyl alcohol in between cuttings (plan to use 10% bleach solution for next time).
--- Repeated this process until all 10 cuttings were cut, planted, and in the tray.
--- The coco coins fit perfectly into the tray and don’t reach the bottom. Nice!
--- The bottom air gap is important.
--- Poured a bit of distilled water through one of the empty slots into the bottom of the tray. Just enough to fill the bottom of the tray, but not enough to reach any of the Coco Coins (~1/4cup).
- [19:35]: Placed the propagation tray with cuttings into the 3x3 veg tent.
--- Placed the first layer of the propagation dome on before giving the sides a misting of distilled water.
--- Also sprayed the top of the propagation dome before covering the cuttings.
--- Vents are all fully closed.
- [19:40]: Placed the bar lights onto the top of the dome before configuring the controller.
------ Set the START/END times to 04:00PM/10:00AM
------ Set the bar light’s intensity to 2 (out of 10).
--- Also made sure the propagation light controller’s time was in sync with the Controller 69 Pro.
- [19:47]: Took PPFD readings.
--- The cuttings were around 136 μmol/m²/s which gives a DLI of 8.81 mol/m²/d
--- The PPFD levels are similar to the floor.
--- Perfect!
--- Going leave the IonBoard S33 on during this rooting process.
--- Will check back tomorrow to cycle the air under the dome.
- [19:56]: Checked the humidifiers.
--- Refilled the humidifiers with distilled water.
- [20:17]: Quick night check!
--- Ooo yea! Growth is raging and looking perky!
--- Mainly checked on #1 and #4 which were looking incredible!
--- Keep on growing ladies!
Day 05 - Friday - 06/07/24 - Total Days: 102
-----------------------------------
Daily Averages [~23:00]
- Temps: 82.7°F [28.2°C]
- Humidity: 76.2%
- VPD: 0.89 kPa
- Soil %: [37, 40, 38, 35]
-----------------------------------
- [10:03]: Decided to increase the ambient temp in the 3x3 veg tent.
--- Within the AC Infinity App,
--- For the Veg Tent [3x3] controller,
--- Adjusted the 'Vegetative [18/6]' Schedule for the heater.
------ Increased the Temp target value from 78°F to 82°F
--- Hopefully this will help to keep the veg tent at a more consistent temp.
- [22:26]: Evening check.
--- Ooo yea! The garden is looking incredible!
--- #1 is looking perky and just bushing out! Wow!
--- #2 is getting big! Growth is weird and leaf fingers are huge! Just going to let her grow.
--- #4 is looking happy and growing along like a champ! Nodes are starting branch out and she is turning into a bush!
- [10:28]: Checked down both fill tubes.
--- Both reservoirs were completely dry!
- [22:33]: Poured 5 cups of distilled water down EB1’s fill tube.
--- Poured 3 cups of distilled water down EB2’s fill tube.
- [22:40]: Checked on the propagation dome (inside the 3x3).
--- Ah yea! Looking great ladies!
--- Lifted the top of the dome to let some fresh air in for a bit.
--- Wow!
--- Leaves still look nice and green!
--- So far everything looks great!
--- Just going to continue on!
- [22:53]: Checked the humidifiers.
--- Refilled the humidifiers with distilled water.
- [11:01]: Decided to adjust the humidifier for the 3x3.
--- Within the AC Infinity App,
--- For the Veg Tent [3x3] controller,
--- Adjusted the 'Vegetative [18/6]' Schedule for the humidifier.
------ Increased the VPD target value from 0.8kPa to 1.5kPa
--- The higher VPD level will essentially turn the humidifier off.
--- I won’t be needing the humidifier for a good week so might as well save the water.
Day 06 - Saturday - 06/08/24 - Total Days: 103
-----------------------------------
Daily Averages [~23:00]
- Temps: 81.6°F [27.6°C]
- Humidity: 74.9%
- VPD: 0.91 kPa
- Soil %: [35, 40, 37, 31]
-----------------------------------
- [07:40]: Quick morning check!
--- #1 and #4 are looking perky and happy!
--- Also checked on the propagation dome,
--- All cutting still look green! Hyped!
- [20:02]: Evening check.
--- Wow the garden is raging with growth!
--- #1 has blown up! She has clearly recovered and growth is ramping up again!
--- #2 is stretching upwards!
--- #3 is now the smallest of the 4, but still getting larger!
--- #4 is looking incredible! Wow! Growth looks perky and happy!
- [20:05]: Checked down both fill tubes.
--- Both reservoirs were completely dry!
- [20:10]: Poured 6 cups of distilled water down EB1’s fill tube.
--- Poured 2 cups of distilled water down EB2’s fill tube.
- [20:16]: Checked the Ecowitt soil moisture sensor data:
--- 35% - [CH01 EB1 - Garlic Budder #1]
--- 40% - [CH02 EB2 - Garlic Budder #2]
--- 36% - [CH03 GFP - Garlic Budder #3]
--- 27% - [CH04 FPT - Garlic Budder #4]
- [20:19]: Using a pump sprayer,
--- Misted the straw mulch of #4 with 5 cups of distilled water.
--- Focused mainly on the straw mulch.
--- Also misted the mulch of #3 a bit (in the fabric pot).
- [20:27]: Checked propagation dome (in the 3x3),
--- To cycle the air under the dome, lifted the top off for a bit.
--- Ooo yea! Everything is still green and looking great!
--- Keep on rooting ladies!
--- Oops!
- [21:45]: Checked the humidifiers.
--- Refilled the humidifiers with distilled water.
Day 07 - Sunday - 06/09/24 - Total Days: 104
-----------------------------------
Daily Averages [~23:00]
- Temps: 81.5°F [27.5°C]
- Humidity: 74.8%
- VPD: 0.91 kPa
- Soil %: [36, 40, 37, 36]
-----------------------------------
- [08:18]: Quick morning check!
--- Nice! The main tent is looking great! #1 and #4 are both raging with growth!
--- Checked on the propagation dome (inside the 3x3) and the clones are still looking green!
--- Wow! Everything is going almost too well! Just keep on growing!
- [19:08]: Evening check.
--- Garden is just exploding with growth! Seems everyone has fully recovered from the defoliation and topping!
--- Wow #1 is bushed out and looking incredible!
--- #2 is growing really starting to get large! Growth still is funky, but stoked none-the-less.
--- #3 is starting to fill in the pot! Getting larger!
--- Wow! #4 is getting taller and looks healthy and green!
- [19:12]: Checked down both fill tubes.
--- Both reservoirs were completely dry!
--- Wow the canopy is really starting to get taller and closer to the light. May need to raise it up soon.
--- Absolutely surprised how low the light levels have been throughout this entire cycle. Barely moved the light and have not increased the intensity past 2 (out of 10). Less is really more.
--- Anyways!
- [19:18]: Checked the Ecowitt soil moisture sensor data:
--- 36% - [CH01 EB1 - Garlic Budder #1]
--- 41% - [CH02 EB2 - Garlic Budder #2]
--- 37% - [CH03 GFP - Garlic Budder #3]
--- 34% - [CH04 FPT - Garlic Budder #4]
- [19:19]: Poured 6 cups of distilled water down EB1’s fill tube.
--- Poured 3 cups of distilled water down EB2’s fill tube.
- [19:24]: Checked propagation dome (in the 3x3),
--- To refresh the air, lifted the top off for a bit.
--- Sweet! Still green! Wow!
--- Using a spray bottle, misted the top growth with distilled water.
- [20:35]: Checked the humidifiers.
--- Refilled the humidifiers with distilled water.
--- Wow what a week!
--- Growth has been just insane in the 4x4 tent! All plants have fully recovered and have just exploded with growth.
--- I think it’s time to flip to flower!
--- Also, I’m absolutely baffled about how well the cloning process has been going.
--- So far no issues!
--- Not complaining, but just surprised. Keep on growing ladies!
--- If all goes well, should have fully rooted clones soon ready for transplanting (into solo cups of course).
--- Absolutely hyped for next week!
--- Maximum warp Ensign, Engage!
[END OF WEEK 14|07]

shorts_status_processing


@Sider79
Follow
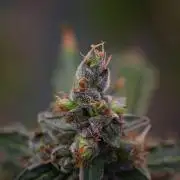
Some Faded bottom leaves . Temps are lower . Not sure if my questions are seen but moving forward with my first Auto Blow Dream grow.



@DogDoctorOfficial
Follow
💎 8×8 Adventure – Week 14
Black Diamond Auto by Zamnesia – Pheno A
👑 Part 1: The Queen Has Spoken… Harvest Me, DogDoctor! 💎✂️🌸📸
Hello everyone, and welcome back to another chapter of the 8×8 Adventure! 🌱💚
Well, my friends…
Our not-so-humble plant.
Our not-so-humble cultivar.
Our beautiful Black Diamond.
💎👑✨
After weeks of watching her grow, build, stack, frost up, and make herself noticed in the room, she finally gave me the message I'd been expecting.
"DogDoctor…
PLEASE HARVEST ME."
😂😂😂💎
And you know what?
That's exactly what we did.
But not before giving this girl one last opportunity to shine in front of the camera.
Because if there's one thing Black Diamond Pheno A has earned throughout this adventure, it's a proper goodbye to the tent.
And when I say goodbye, I don't mean we're finished documenting her.
Not even close!
This is simply the end of her flowering chapter inside the tent.
There's still trimming, drying, weighing, curing, and eventually a proper smoke review to come.
So consider this Part 1 of her harvest story: the last day in the tent, the photography, the breakdown, and the beginning of her drying journey.
💎🌿📸
And before we get started, a small explanation for everyone following the diary.
────────────────────────
📢 WHY ARE WE STILL POSTING THIS UNDER A FLOWERING WEEK?
First things first!
Yes, this update is still being published as a flowering-week report, even though Black Diamond has now been harvested.
And there's a very simple reason for that.
GrowDiaries has a limit of 30 photos per update, and between the harvest, studio photography, photo stacking, trimming, drying, and eventual smoke report, we have far more material to share than we can comfortably fit into one harvest entry.
😂📸💎
I don't want to throw everything into one report, squeeze the story until it barely makes sense, or leave out photographs and details that deserve to be seen.
So we're splitting the journey into separate chapters.
This first part covers her final day in the tent, the last photographs of the living plant, the photo-stacking session, the breakdown, and the start of drying.
The next chapters will continue with the rest of her harvest journey, including the trimming and drying updates, the final results, and the smoke review when we get there.
That way, we can give this girl the attention she deserves without trying to squeeze an entire harvest into a single update.
And honestly?
After following her for so many weeks, I think she deserves more than one final goodbye.
💚🌿
So, for anyone wondering why a harvested plant is appearing in a flowering-week update…
That's the reason!
We're keeping the diary moving while giving her harvest story the space it needs.
────────────────────────
💎 THE LAST DAY IN THE TENT
Let's take a moment to appreciate how we got here.
Black Diamond Auto Pheno A was part of our 8×8 Adventure, where twelve plants shared the same general environment, lighting schedule, and overall growing conditions.
One room.
One shared stage.
Twelve different stories.
And this girl?
She decided to make hers unforgettable.
😂👑💎
From the early stages, she developed into a magnificent plant with a beautiful structure and an impressive collection of flowering sites.
As the weeks progressed, we watched her build.
We watched the flowers develop.
We watched the frost become more apparent.
We watched those colas become increasingly impressive.
And, of course, we watched that main cola claim its place in the spotlight while the rest of the plant seemed determined to remind us that it wasn't the only one worth photographing.
😂🌸
Remember the song?
"Shining bright like a diamond…"
Well, I think we can officially retire that joke now.
Actually, no.
Let's not get carried away.
😂😂😂💎
She's still Black Diamond, and I'm probably going to keep humming that song every time I look at her photographs.
But the important thing is that this beautiful phenotype has now reached the end of her time in the tent.
The flowering chapter is complete.
And today, we get to appreciate the result of that journey before moving into the next stage.
────────────────────────
🌸 ONE LAST LOOK BEFORE SAYING GOODBYE
Before taking her out of the tent, I wanted to capture her beauty one last time.
The colours.
The flowers.
The overall structure.
The individual colas.
The details that make this particular phenotype so special.
And I'm really happy we did.
Because once the plant is taken down and broken apart, we can still photograph individual flowers, but we can never recreate that exact moment when the whole living plant is standing there in her environment.
That's why I wanted those final photographs.
I wanted to remember her as she was.
Standing in the tent.
Surrounded by the equipment and lights that had been part of her journey.
Looking absolutely beautiful.
💎🌿📸
And then came the next part.
Taking her out of the tent and into the studio.
Because apparently, even after growing a beautiful plant for weeks, I'm still not finished taking photographs of her.
😂😂😂
────────────────────────
📸 THE PHOTO-STACKING SESSION — PATIENCE, LIGHTS AND A LOT OF PHOTOGRAPHS
Now, this is where things get particularly interesting for me.
Because some of you might look at a final macro photograph and think:
"Beautiful picture!"
And that's exactly the reaction I hope to get.
But there's a whole process behind that final image.
Photo stacking is not simply pointing the camera at a flower, pressing the shutter once, and calling it a day.
It's a process that takes time, patience, attention, and a little bit of stubbornness.
😂📸🔬
For this session, I took Black Diamond into the studio and worked with my lighting setup to get the look I wanted.
I'm using three or four LED lights from SmallRig, positioning and adjusting the light to bring out the details while keeping the final image as close as possible to the visual result I'm looking for.
Light makes an enormous difference in macro photography.
The angle.
The intensity.
The shadows.
The highlights.
The way the surface details catch the light.
All of it changes how the final photograph looks.
And because I want to show the flowers in as much detail as possible, I spend time getting the lighting right before and during the process.
It's not just about making the image bright.
It's about making the details visible.
💡📸💎
Then comes the stacking itself.
Instead of relying on a single photograph to show the entire subject in focus, I take a sequence of images with different focus positions.
Those images are then merged into one final photograph, combining the sharp areas from across the sequence.
The result can show far more of the subject in focus than a single frame would normally capture at this magnification.
But the process takes time.
A lot of time.
And sometimes…
A LOT of photographs.
😂😂😂
────────────────────────
🔬 321 PHOTOS… 347… 365… 399… 596… 599!
Let's talk numbers, because the photographs we're sharing tell their own story.
The smallest stack in this selection contains 321 photographs merged into one image.
And the largest?
599 photographs merged into one final stack.
Five hundred and ninety-nine.
😂😂😂💎
At that point, I think we can safely call it a 600-photo stack.
One photograph short, but I'm not going to lose sleep over it.
😂📸
The other stacks include sequences of 347, 365, 399, and 596 photographs, among others.
Every stack represents a series of individual frames that have to be captured and processed to create the final result.
And when you see the finished image, it's easy to forget how much work went into it.
That's why I also shared a video of me actually doing the photo stacking.
I wanted to give everyone a better idea of what happens behind the scenes.
You can see the process.
You can see how the work progresses.
And you can get a sense of how much patience goes into creating these images.
It's not necessarily as slow as it might sound, and we managed to photograph a lot of material during the session.
But it certainly isn't instant.
😂🔬📸
And honestly?
I love it.
I love the process.
I love the challenge.
I love watching all those individual frames come together.
And I love seeing the final result when the details become visible in a way that a single photograph simply couldn't reproduce.
────────────────────────
💎 WHY I LOVE PHOTO STACKING
For me, photo stacking is another way of appreciating the plant.
We spend weeks watching the whole plant develop.
We look at the canopy.
We follow the branches.
We compare the colas.
We watch the flowers change.
But when you move into macro photography, you enter another world entirely.
Suddenly, the details become the subject.
You can explore the textures, the shapes, the colours, and the intricate surface of an individual flower.
You can take something you've been looking at for weeks and appreciate it from a completely different perspective.
And that's what makes this process so enjoyable for me.
It's not just about taking a pretty photograph.
It's about looking closer.
It's about curiosity.
It's about patience.
And it's about the satisfaction of creating an image that represents the subject the way I want to show it.
💚📸🔬
Some people enjoy growing.
Some people enjoy photography.
Some people enjoy both.
And apparently, I enjoy growing a plant for weeks and then spending even more time photographing the hell out of it.
😂😂😂💎
But that's part of the fun.
And if the final photographs make somebody stop scrolling for a moment and appreciate the details, then all that time was worth it.
────────────────────────
🎥 A LITTLE BEHIND-THE-SCENES VIDEO
Alongside the photographs, I also shared a video of me working through the photo-stacking process.
I wanted to show the reality behind the finished images.
Because a finished macro photograph can look simple when you see it on a screen.
But behind that final result are the individual frames, the focus changes, the lighting decisions, and the time spent bringing everything together.
The video gives you a glimpse of that process.
It's a little reminder that the photograph isn't always just one photograph.
Sometimes it's hundreds of them.
😂📸
And when you're looking at a 599-image stack, you can appreciate why patience is such a big part of the process.
I hope you enjoy seeing a little of the work that happens outside the tent, because documenting this adventure isn't just about the plants.
It's also about the photography, the equipment, the experiments, and the things I enjoy learning along the way.
────────────────────────
✂️ FROM THE TENT TO THE BREAKDOWN
Once the photography was done, it was time to move on.
Black Diamond was taken out of the tent, and we began breaking the plant down for drying.
This is where the story changes.
We move away from the living plant and into the post-harvest stage.
I removed the fan leaves and the larger leaves that I didn't want to keep with the flowers during drying.
Then I broke the plant down into smaller sections rather than leaving the whole plant intact.
It's not what I'd call a full wet trim.
It's closer to a light, partial trim before drying.
The aim here was to remove the larger unwanted foliage and prepare the flowers for the next stage, while leaving the detailed trimming work for later.
And yes…
those beautiful big buds we spent weeks admiring?
They were broken down into smaller sections for the drying process.
😂✂️🌸
I know.
I know.
We spent all those weeks talking about her beautiful colas, her impressive flowers, and how she was shining like a diamond.
And then I came along with the scissors.
😂😂😂
But that's part of the process.
The plant has reached the end of her time in the tent, and now we're preparing her for the next stage of the journey.
The flowering chapter is over.
The drying chapter begins.
────────────────────────
🧤 THE GLOVE TELLS A STORY — LOOK AT THAT RESIN!
Now, this is one of those little details I really wanted to include.
While bucking the plant down and handling the flowers, resin started accumulating on my glove.
And when I looked at it…
well…
I had to take a photograph.
😂💎🧤
Look at that!
This girl has been building resin throughout her flowering journey, and the glove gives us a very visual reminder of just how sticky things became during the breakdown.
The plant was still fresh at this point, so the resin on the glove was collected from handling the living, freshly harvested material.
That's why I jokingly call it a little bit of charas in the context of the harvest.
Strictly speaking, resin collected on a glove isn't automatically the same thing as finished charas, but you get the idea.
😂🌿💎
It's a lovely little behind-the-scenes detail, and I think the photograph makes the point beautifully.
We can talk about frost.
We can talk about resin.
We can take hundreds of macro photographs.
But sometimes all it takes is one glove covered in sticky resin to make you stop and say:
"Okay, Black Diamond… I see you!"
😂😂😂💎
She certainly left her mark.
────────────────────────
🌬️ THE DRYING CHAPTER BEGINS
After the breakdown and initial preparation, we placed the flowers on the drying rack and moved her into a separate drying tent.
The rest of the 8×8 Adventure is continuing in the original room, with the other plants still growing and following their own timelines.
Black Diamond has moved into a different space for this next stage.
And, of course, that space is kept completely dark for drying.
Her time under the flowering lights is over.
Now it's time for a different environment and a different kind of patience.
🌑🌸
For the initial drying period, our intended environmental starting point is approximately:
🌡️ Temperature: 20–21°C
💧 Relative humidity: around 45% initially, with the intention of moving toward approximately 60% as the drying environment is adjusted.
These are the intended starting conditions for this stage, rather than a claim that the environment has already remained at those values continuously.
The initial lower humidity is part of the plan to help manage the moisture still present in the freshly harvested flowers. We'll be watching how the drying environment behaves and adjusting our approach as the process progresses.
The longer-term aim is to maintain a stable, suitable drying environment rather than chase numbers without considering the actual conditions.
And this is important:
The drying process is not finished just because the plant has been harvested and placed on a rack.
This is the beginning of another stage that deserves its own attention.
The flowers still contain substantial moisture, and the way they dry will influence the quality of the final result.
So now we wait, observe, and document.
🌬️🌸💚
────────────────────────
⏳ HOW LONG WILL SHE DRY?
Normally, the drying period in my experience can fall somewhere around one to two weeks, but that is a general expectation, not a deadline.
It can vary depending on the temperature, relative humidity, airflow, the size and density of the material, and how the conditions behave over time.
Two harvests don't necessarily dry at the same speed.
Even within the same harvest, different sections can behave differently.
So we're not going to decide in advance that Black Diamond must be ready on a particular day.
We'll monitor the process and see how she progresses.
The next report will give us an opportunity to discuss how long she's been drying, how stable the conditions have been, and what we're observing as the process continues.
For now, she's resting.
The lights are off.
The flowers are on the rack.
And the camera work continues.
😂📸🌸
We'll let time tell us when the next chapter is ready.
────────────────────────
💡 FROM FLOWERING LIGHTS TO THE DARKROOM
One of the interesting things about this transition is how quickly the environment around the plant changes.
For weeks, we've been talking about the flowering room.
The Future of Grow Black Series 600W fixtures.
The additional lighting capability.
The approximate 1,500 PPFD reference across the upper canopy.
The shared 12/12 schedule.
The Lumiflora lighting deeper in the canopy.
The TrolMaster equipment helping us monitor and manage the environment.
And now?
Black Diamond has left all of that behind.
😂💎
She's no longer part of the active flowering canopy.
She's in a separate drying space, in darkness, beginning a completely different stage.
The rest of the room is still going.
The other plants haven't suddenly decided to follow her.
They're continuing their own journeys, and we'll keep documenting them individually.
That's another important part of the 8×8 Adventure.
Not every plant reaches the same point at the same time.
Each one has her own timeline.
Black Diamond has told us she's ready to leave the tent.
And now we're giving her the next chapter.
────────────────────────
🌿 A QUICK LOOK BACK — FROM SEED TO HARVEST
Before we close this first part, I want to look back at the journey.
Black Diamond Auto Pheno A was grown from seed under a 12/12 light schedule from the beginning.
That was part of the wider 8×8 Adventure, where we followed different plants and phenotypes sharing the same general environment.
From the early stages, she behaved beautifully.
She developed into a magnificent plant.
She built an impressive structure.
She produced a beautiful collection of flowers.
She gave us those colas that kept making me stop and take another look.
And as the weeks progressed, she became one of the plants in the room that was impossible to ignore.
💎👑🌸
Her main cola was beautiful, but the rest of the plant wasn't interested in taking a supporting role.
The other flowering sites kept developing, and the whole plant became a beautiful example of her own individual expression.
That's what made her so much fun to follow.
We weren't trying to make her behave like the other plants.
We were observing what she did under the same general conditions.
And she gave us her own answer.
A beautiful Black Diamond Auto phenotype, grown from seed under 12/12, now ready to leave the tent and begin the post-harvest journey.
From seed to a magnificent plant.
From flowering to harvest.
And now, from harvest into drying.
One chapter closes.
Another begins.
💚🌱💎
────────────────────────
🔬 THE 8×8 ADVENTURE — SAME ROOM, DIFFERENT STORIES
Black Diamond's harvest also reminds us of the original idea behind this entire project.
Twelve plants sharing one room.
The same general environmental framework.
The same lighting schedule.
The same overall approach to nutrition and care.
And then we observe what each plant does.
Some grow taller.
Some remain more compact.
Some develop particular flower structures.
Some move faster.
Some take longer.
And eventually, they reach their own milestones.
Black Diamond has now reached hers.
But the 8×8 Adventure continues.
The other plants are still in the room, still developing, and still writing their own stories.
We'll continue giving each phenotype her own report, because every plant deserves to be documented as an individual rather than simply becoming one photograph in a group.
And Black Diamond?
She's earned her own harvest series.
😂💎👑
────────────────────────
💎 PART 1 COMPLETE — BUT HER STORY IS FAR FROM OVER
So, my friends, this is the end of the first part of Black Diamond Auto Pheno A's harvest journey.
We said goodbye to her in the tent.
We took her into the studio.
We photographed her.
We created photo stacks containing hundreds of individual frames.
We shared a glimpse of the process in a behind-the-scenes video.
We broke her down.
We removed the larger unwanted leaves.
We prepared the flowers for drying.
And we discovered that she was more than happy to leave a little resin behind on the glove.
😂🧤💎
She's now resting in the drying tent, in darkness, while the rest of the 8×8 Adventure continues in the flowering room.
But don't worry.
This isn't the final report.
We still have more to share.
The drying process deserves its own update.
The trimming deserves its own attention.
The final results deserve their moment.
And, when the time comes, we'll sit down for the smoke review and talk about the experience of the finished product.
We're not going to rush those chapters just to close the diary.
We'll document them as they happen.
For now, we're simply marking the end of her time in the tent and the beginning of everything that follows.
💎🌸🌬️
────────────────────────
💭 FINAL THOUGHTS — THE QUEEN HAS LEFT THE TENT
Black Diamond Auto Pheno A.
Our not-so-humble girl.
Our beautiful diamond.
Our queen of the 8×8.
👑💎🌿
After weeks of growing, stacking, developing, and shining, she finally gave me the message:
"Please harvest me."
And that's what we did.
Not before giving her one last photographic session.
Not before taking her into the studio.
Not before creating stacks containing 321, 347, 365, 399, 596, and 599 photographs.
😂📸💎
Not before breaking her down and seeing the resin collecting on the glove.
And not before making sure that her next chapter was ready to begin.
She's now in the drying tent, in darkness, resting on the rack.
The next stage will take the time it takes.
We'll observe.
We'll document.
We'll see how the conditions behave.
And we'll share the results in the next chapters.
I'm incredibly happy with how this journey has unfolded.
Not just because of the beautiful plant we've harvested, but because of everything we've been able to document along the way.
The growth.
The differences between phenotypes.
The photography.
The experiments.
The unexpected lessons.
And now, the harvest.
That's what this adventure is about.
It's about growing, learning, observing, and sharing the journey honestly.
And Black Diamond has given us a beautiful story from beginning to end of flowering.
So, my precious diamond…
Thank you for the show.
Thank you for the photographs.
Thank you for the resin-covered glove.
😂💎🧤
And thank you for making me hum that damn song every time I walked into the room.
"Shining bright like a diamond…"
Of course you were.
💎✨👑
Your time in the tent is over.
But your story isn't finished.
Rest well, beautiful girl.
We'll see you in the next chapter.
────────────────────────
🙏 THANK YOU — TO EVERYONE WHO HELPED MAKE THIS JOURNEY POSSIBLE
A massive thank you to GrowDiaries for giving us the platform to document this adventure, share our observations, and keep the individual stories of these plants alive from seed to harvest.
Thank you to Zamnesia for the Black Diamond Auto genetics and for giving us the opportunity to follow this beautiful phenotype throughout her journey.
Thank you to Plagron for supporting the garden with the growing media and nutrition used throughout the run.
A huge thank you to Future of Grow for supplying the additional Black Series 600W fixtures and allowing us to explore the expanded lighting setup in the 8×8.
Thank you to Lumiflora for helping illuminate the deeper areas of the canopy.
Thank you to TrolMaster for helping monitor and manage the room behind the scenes.
And a special shoutout to SmallRig for the LED lighting equipment helping me create the studio setup I use for my photography. Getting the light where I want it is a big part of the process, and those lights are part of how I work toward the images I want to produce.
💡📸💚
Finally, thank you to everyone following along.
Every comment.
Every question.
Every photograph you stop to look at.
Every bit of support.
It genuinely means a lot.
And thank you to Black Diamond herself for giving us such a beautiful plant to document.
💎🌿👑
24 cultivars.
One room.
Different genetics.
Different stories.
And one beautiful Black Diamond who has now moved from the flowering tent into the drying tent.
The next chapter is already underway.
We'll keep documenting.
We'll keep learning.
We'll keep sharing the process.
And we'll give her the time she needs.
Growers Love, my friends. 💚🌱
Happy growing, take care everyone…
And remember:
This is Part 1 of the harvest story. The Queen has left the tent, but the final chapters are still to come.
💎👑🌸🌬️
See you in the next update! 📸💚



@TeesTrees
Follow
Day 57 - The plant looks great, healthy! The buds are looks great also.
Day 58 - The plant is looking great i just watered her today looks like she might have a bit of water shock. I gave the plant some PH controlled water but i didn't take into account the soil so the whole thing didn't make a difference.
Day 59 - The plant looks amazing. Defoliated her a little more today.I'm noticing the smell more prominently now as well; Also we done some seriouse decore change today so the whole place looks like a bud box we got the other plants from my diaries featuring in a the video.
Day 60 - She is well and growing.
Day 61 - Was to busy running around didnt take a pic its a shame but its okay.
Day 62 - The buds are forming nicely plant is stretching out for the last time. The plant is also dry and will need watering tomorrow. I raised the light today as she is very tall now and was nearly touching the light.
Day 63 - The plant got fed PH 5 water, so she looks a bit droopy from water shock but; she will spring back to life like she normally does. Looks like the plant is doing well though.





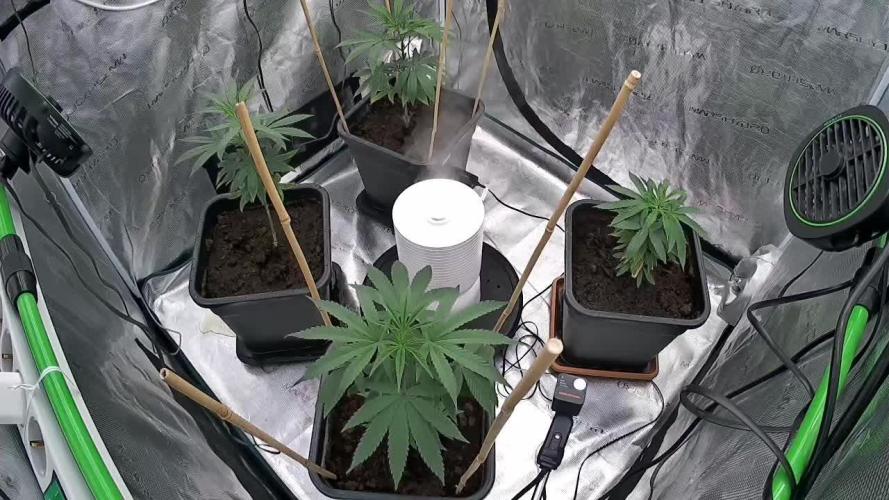
@HowtoBubatz
Follow
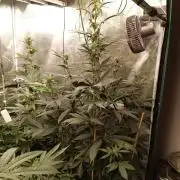
The cannabis plant is in excellent health, showing vibrant green leaves and a robust structure.
The overall appearance suggests that the plant is thriving in its current environment.
No signs of nutrient deficiencies, or diseases have been observed. A light defoliation was performed during this week.
This practice will help the plant focus its energy on the upper buds, leading to better yield and quality in the upcoming weeks.
The plant has been fed according to the BioBizz nutrient schedule, specifically following the guidelines for week 2 of the flowering stage. The nutrients provided include BioBizz Bio-Bloom, Bio-Grow, and Top-Max, which have been carefully measured and administered to support the plant’s transition into full flowering.
I'm curious to see what will become of the plant. Stay tuned! 🌱🌱




@terpproducer
Follow
👇 This week:
---
Watered again as usual with the standard Plagron scheme + Calmag (last feeding with Alga Grow) (PLEASE CHECK YOUR WATER BEFORE USING CALMAG)
Phosphorus foliar spray - red stems pretty much gone now
PPFD at canopy height approximately 350-400, VPD ~1
Performed a major defoliation again
Ordered more Autopots 😂
---
Happy growing and thanks for checking out my report! I really appreciate you! 😁💪🙏


@Salokin
Follow
Hi Growmies,
She did not take well to the ec of 2.0 that I intended to feed her, so I changed the reservoir again midweek and went down to 1.6, after feeding her canna flush with RO water for 24 hours. She seems very forgiving, as she didn’t even get stunted by the lockout. 4 of the 8 shoots went through scrog and were super cropped underneath the screen. The others should catch up any day now and will be trained in a similar fashion. Rootball looks also amazing. I will experiment with continuously feeding her orca every 3 days, as it feels like the mycorrhizal inoculants seem to go down after 3 days and root growth slows down. Let’s see if it’ll work.
Here is the code that’ll give you 20% in Zamnesia‘s online store, just input ZAMMIGD2023 at checkout.
Thanks for stepping by and until next week!


@KushKingOrganics
Follow
Easy to grow. Only issue I ran into was the other strain being a male. If I grew this strain alone I would’ve filled out the tent with just this strain the yield would’ve reflected that. Keep in mind if the other plant didn’t get the chop this yield would be almost double. I will grow this cut again.


@Eddjack
Follow
Procede molto bene . È sana e forte, non so se allenarla in qualche modo o lasciarla crescere così. Per ora la ho travasata in un vaso rotondo da 5 litri. Aspettiamo e vediamo se tagliare .