


Likes
Comments
Share


@GanjaFarmer101
Follow
Smooth trim and harvest, very time-consuming. I think we spent over 8 days working on the autos.
Now I can rest until early September.

Likes
14
Share


@biggreens420
Follow
gg4s all flushed out she smells fruity not like the gg4 i know more like a gorilla zkittles shes a huge plant and stacked well with some fat colas will be back with the harvest shortly thanks for reading happy growing guys

Likes
8
Share


@dank604
Follow
So far so good. Lowering the light was a bit of a mistake as the main cola started to show light stress. The main cola is 7" higher than the rest which is a bit of a PITA. I'll be much more aggressive with the LST next time around - comments on how to prevent such a taller main cola are welcome :)
I've trimmed about a dozen or so leaves to get more airflow and I moved the LED strips up to support the middle section of the plant, seems to have helped (I think).

Likes
13
Share


@Youngbuds1
Follow
So as you can see I now have four flowering which I guess were the autos and I have one gelato that is still vegging and is doing damn good. There are two that have lighter color leaves, I’m trying to focus on on these and see if I can get better production. As for the tall GG in the back, leaves are waxy and have resin production starting. A lot better, overall I’m learning more and more every week!
Hope everyone is enjoying my grow and stick around, ask questions. Happy New Year!

Likes
41
Share


@BOMbolenath
Follow
This week the weather is better. The buds are getting fat and it is developing well.
Smells like baked sweet.


Likes
10
Share


@KcKoolaidMan
Follow
Getting close to that time! Prob just a week or so out letting the trichromes darken up a bit more and going to chop em down! They look amd smell beautiful and I can’t wait to try them!

Likes
57
Share


@Kmikaz420
Follow
Je passerai demain pour remplir les commentaires j ai actuellement pas mal de travail à couper/trimer 😀 et le tous sur une jambe ..merci de votre compréhension..
Et voilà une de moins la 1ere dos-i-dos de batney à été couper et cette plante a fais les tête les plus compacte et dur que j ai jamais vue je pense être pas loin de la vérité en disant qu il doit y avoir 120g.. 150g sec sur cette seul plante ;) affaire à suivre ..je rajouterai des photos demain )les photos avec flasch ne rendent pas service aux plantes;)
Enfin on t est la recolte !!!! La strawberry x gorrila seche avec les dos i dos et la gorrilla x purple punch
Les 2 cherry cola ont été trimer et mis en bocale pour curring
Cherry cola 1= 88g
Cherry cola 2= 83g
Gorrila x purple punch = 40g
J ai pas mal de travail je mettrais le journal à jour au fur et à mesure ;)

Likes
6
Share
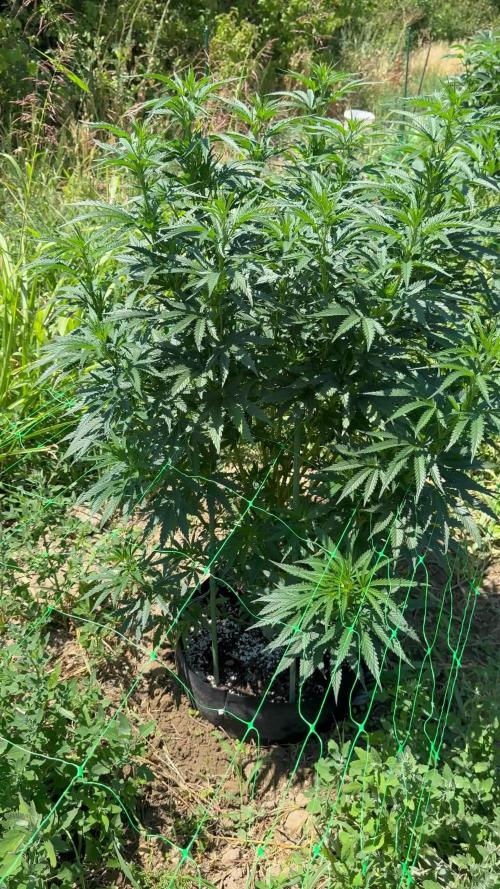

@Radagast_
Follow
19.07.
OG KUSH
Day 85#
I have nothing special to write, the plant is progressing well, although it could do better, but it is constantly under some stress, or there are strong storms or great heat, and so on in a circle.
Yesterday was the end of her twelfth week.
Stay High and Keep Growing!!!

Likes
9
Share


@Doctor_Gonzo
Follow
-3/26/23 Start of Week
--Week 1
-3/28/23 (day 10)
--Observations: spade leaves looking healthy and first set of shade leaver are coming in. has stopped growing vertically and has started focusing on leaf growth, leaves growing at a good speed.
--changes: sprayed with Miracle-Gro performance organics all purpose plant nutrients at a concentration of 1/4 Tsp to 10 oz of water.
--Diary Entry: still growing at a good rate, doesn't seem like much transplant shock if any at all. sprayed with nutrient water twice, the second time was just for the photograph. will wait two days before spraying again, will be looking for signs of nutrient burn.
-3/30/23 (day 12)
--Observations: has slowed down on vertical growth.
--Diary Entry: took the picture for today with a different lens than the last photo. watered without the nutrients, sprayed with the nutrient water.
-4/1/23 (Day 14)
--Observations: seems to have slowed down on growth rate, could have just been explosive early growth. firsty set of shade leaves are looking good, still seems to not be having problems with the nutrient spray given once to twice a day.
--Diary Entry: several close up photos this week and im glad that fast Buds made a comment on the fast flower contest about needing a video every week. would have been upset if I would have been disqualified at the end because of something as silly as not having any videos of the plant.
-4/1/23 End of Week
Likes
229
Share


@Crashoverite
Follow
Hi everyone 😁
I would like to thank you all fellow growers and breeders for such a great support on this journey. Thank you Grow Diaries and Green House Seeds. Without you all this wouldn't be possible. Love you all
First ever recorded diary so don't know where to even start 😅
I am returning to growing after many many years of break. This is my first ever experience with autoflowers, scrog, lst, led and such tiny grow space.
Choice of strain - Big Bang Auto from Green House Seeds. I have run so many strains from this seed bank in the past and I was always happy with the final outcome. Was looking for indica dominant strain, fast flowering cycle and very important heavy yields on small spaces. Again thank you GHSC in very happy of choosing this strain.
Little bit about my cabinet.
External dimensions:
64 x 50 x 114 cm (W x D x H)
Growing area:
55 x 47 cm cm (0.26 m2)
Panel based on SAMSUNG LM301B diodes
Spectrum:
Samsung LM301B – 5000 x72
Samsung LM301B – 3000k x136
Samsung LM301B – 660nm x9
Samsung LM301B – IR 760nm x1
Regulation in the range of 20W - 110W - Meanwell XLG 100-H-AB
PPF 300 umol/s
PPFD 890 mol/m2/s @30c
Total of 6 adjustable fans, 4 exhaust fans 4 modes - silent/drying, vegetation, flowering, full power
Active carbon mass in the filter 2kg
Absolutely love my grow cabinet. Thinking of next build already.
My grow
3 beautiful ladies - Nuna, Luna and Sweet Mary Jane.
This was a pleasure experience growing autos for the first time. All 3 ladies on the end developed perfectly.
Nuna, left corner lady- tall and beautiful. She had some problems to switch to flowering and was even considering removing her but very happy that I was patient enough and turned great.
Luna, right corner lady - have to say she is the queen. She has the most heavy buds from all, the most. colorful. Her wet weight was 420g, can't say how much of dry but guessing approx. 100g
Sweet Mary Jane, front seat lady. I think she was the most pleasant to grow of her location but due to no other spare space for drying I belive that I have harvested her at least a week to early. If keep longer I belive she could be the most yielder from all 3.
Thank you all for all the support, help, comments, likes, messeges.
Love you all 💚💚💚
Will update this diary in some time and when puff perfectly cured 😎
Peace and love ✌️💚


Likes
7
Share


@B4nkz
Follow
I took off some leaves that were blocking some bud sites to increase light penetration.
I’m still giving them only water with calmag due to the nitrogen toxicity from veg…
I think they are 4-5 weeks away from harvest but we’ll see🙏🏻


Likes
146
Share


@EZgrower
Follow
day 50 - everything going OK. im using only water right now.
day 52 - today I was in the local Grover's store where I was given a trial package of supplements 10 grams of powder feeding PK Booster. so today will be the first day of irrigation using PK Booster. dosage is 0.25 g per 1 liter - total ppm 140. (pure water ppm is 70)
day 54 - another defoliation

Likes
111
Share


@Salokin
Follow
Hello Growmies,
I'm back with some more updates from the heart of my garden as we journey through the second week of flowering!
Our star plant is right on track, stretching beautifully as she enters deeper into the flowering stage. It's a delight to see her grow and evolve so perfectly. I've noticed some signs of tip burn, so I'm planning to reduce the nutrient levels even further in the upcoming week. It's all about finding that sweet spot where she's happiest and healthiest.This week saw her go through defoliation twice. Depending on her stretch in the coming days, I might go in for one more round of defoliation. Keeping a close eye on her growth to make sure every leaf and bud gets the light and air it needs. The first little bud-sites are beginning to show, a promising sign of the beautiful blooms to come. It's these small milestones that make the whole process so rewarding.
And here's something for my fellow plant enthusiasts: use the code ZAMMIGD2023 at Zamnesia's online store for a 20% discount. It's a great way to spread some joy and appreciation in our growing community!
Thanks for joining me on this growing adventure. Your support and interest mean a lot, and I can't wait to share more updates with you next week. Here's to more growth and flourishing buds!
Likes
35
Share


@ThatoneAKguy
Follow
What a difference a week makes! #1 is just adding on the weight this week while #2 continued to stretch to what might be a record for this auto at 40” and is now exploding with pistils. #3 is yet another type of pheno and a short bush that I have continually taken leaves from trying to figure out what is what. I expect #3 to start her stretch this week given the fact that she’s almost two weeks behind the others while I was trying to find a bean that would pop. Staggering on the trim doesn’t really bother me because they are all getting the same 19 hours of light indefinitely. We are getting into some heat up north and I imagine the room will climb into the high 80’s but there’s not very much I can do about that except giving them air circulation. Stardawg really is the star of the show and might end up being my consistent go to if they keep going like this.
Likes
2
Share


@Mr_Prawn
Follow
Las flores aparecen y las plantas se estiran, algunas son mas altas que los tutores, se puede ver en una foto, también dejo video de los luxes que tiene cada planta, solo agua y todo bien, el sistema de bandeja funciona correctamente. Una foto a principios de la semana y el resto a finales.
Likes
38
Share


@MadeInGermany
Follow
Info:
Unfortunately, I had to find out that my account is used for fake pages in social media.
I am only active here on growdiaries.
I am not on facebook instagram twitter etc All accounts except this one are fake.
Harvest day 74
since time change
to 12/12 hrs.
Hey everyone Finally it was time for the lady to be harvested :-).
The buds smell very tasty and look very good so I'm really excited.
The trichomes are 70% milky and 30% amber.
As always, it came to the darkroom 48 hours before harvest :-).
There it will now remain after harvesting at 62% humidity for 8-12 days before it is put into the jars for fermentation with 62% boveda packs :-).
As usual, the last update will come after the fermentation.
Until then, I wish you all the best and stay healthy 🙏🏻
You can buy this Strain at :
https://www.zamnesia.com/de/4532-zamnesia-seeds-gorilla-glue-feminisiert.html
Type:
Gorilla Glue
☝️🏼
Genetics:
Chem's Sister x Chocolate Diesel
50% Sativa/50% Indica
👍
Vega lamp:
2 x Todogrow Led
Quantum Board 100 W
💡
Bloom Lamp :
2 x Todogrow Led
Cxb 3590 COB 3500 K 205W
💡💡☝️🏼
Soil :
Canna Coco Professional +
☝️🏼
Fertilizer:
Green House Powder Feeding
☝️🏼🌱
Water:
Osmosis water mixed with normal water (24 hours stale that the chlorine evaporates) to 0.2 EC. Add Cal / Mag to 0.4 Ec Ph with Organic Ph - to 5.5 - 5.8 .
Likes
11
Share


@Ninjabuds
Follow
"My Blackberry Moon Rocks plants are looking awesome, especially that one I decided to leave alone. It's got so much branching, I think it might take over the whole room! And that other plant with the stacked-up branches? It's gonna have some serious nugs. Can't wait to see how huge they get."

Likes
2
Share


@Madman2020
Follow
Day 8 flower
Plants look like they will end up small. This was a short veg. This is a great time to train plants.
_____________
Day 9Flower
Plants need to be tied down to have wide arms by day 7
Day 11 flo
18.5inches tall
12inches from light
1300ppm
_____________
Day 13
Aggressive defoliation and Lollipop
___________
Day 14
Secret sauce microbe blend .7/gal

