Likes
Comments
Share


@NewbieLearner
Follow
This was a beautiful strain to grow. With her flowers getting big towards the end of harvest as well as the purple colours! I would definitely recommend that you try grow this strain. The buds are super dense and very well formed. An absolute treat to smoke and look at.


Likes
7
Share


@NOLOGIK
Follow
24/03/23
beautiful and full of swollen buds and very thick branches, the smell they give off gives the idea of what is being grown we are almost at the end of the flowering cycle. I water them regularly with bio bloom, bio grow, I removed a few leaves as they grew, and I didn't do anything anymore, nature did it all by itself! enjoy
___________
28/03
we have almost reached the end of the flowering cycle, at most 15/20 days the buds are complete. the smell has invaded the whole room and is very strong!, the branches are very thick and full, I look forward to it! the fruits

Likes
18
Share


@BudMunchies
Follow
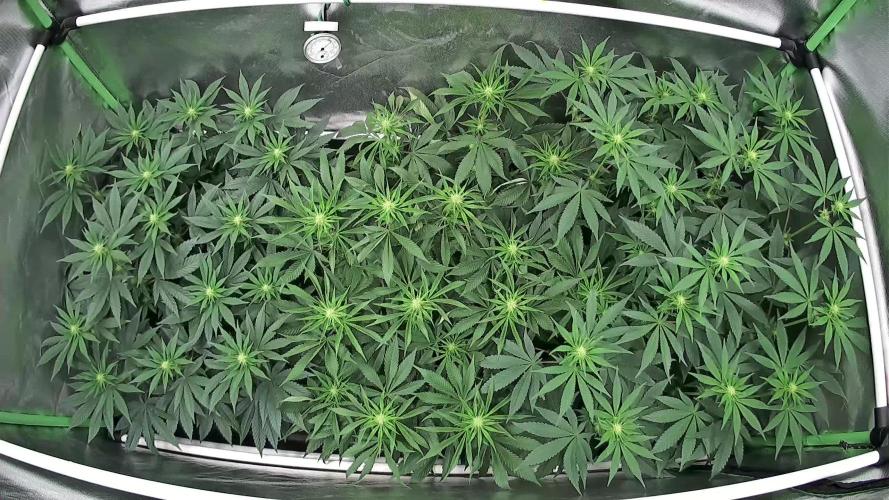
11/12: day 35 of flower. final defoliation - just on autopilot now.
These ladies should now be moving on to that last stretch of maturity. And so I did a final defoliation.
The dramatic differences between all 4 of these is interesting to say the least. #4 is probably my favorite pf the group. It is so frosty compared to the other 3 and its not even close. #1 is the monster of the bunch with #3 close behind it. Both of those plants have grown monster buds considering I'm only in week 5-6. #2 is just a disappointment all together. It is small, has produced only small popcorn nugs.
They all now smell very strongly of sweet lemon chemicals/fuel. The smells dramatically changed this week and im hoping it gets even more smelly.
I am still very frustrated with the lack of purple. So much so that i am considering tossing all of the clones i have for these cause i dont yet see a reason to keep a mother. I was after the purple and lemon. I have lots of green lemon smelling seeds that i already know love the bud from.
I am looking forward to the next week as these start to finish up.
Likes
9
Share


@guitarrasrockeras
Follow
9 SEMANAS Y YA VAN APARECIENDO SUS FLORES CON MAS GANAS SALUDOS CHICOS

Likes
2
Share


@LIPANJA
Follow
KKKK omg
986 g wet with branches, and trimmed only the parts that were very dry. The smell is moderately strong, very sweet and pleasant. I believe that once dried, trimmed, and cured it will yield around 160-200 g.
For the flush I did the following:
I used 15 L of water with Flawless Finish and left it for 12 hours. After that, I rinsed with 5-liter increments until the runoff PPM was below 250, which took 100 L of water. I let it dry for 72 hours and harvested today.
________________________________________________________
15 days later....
170g weight dry
sweet+coffee smells
8/10 low high

Likes
14
Share


@SUMAN
Follow
I'm in the fade waiting for 30% amber it's taking forever tho, no amber as of yet on any plant also the barneys farm runtz muffin strain hermed on me...😮💨also put the runtz muffin in 3days of darkness Friday chopped today Tuesday Sept 5


Likes
Comments
Share


Likes
2
Share


@Itslegalnow
Follow
No joke, the small plant last week blew up. It grew almost 10 inches in a single week! I had to put the Vulcan pinch on this skinny beast! I know it’s taboo to let train a plant in flower but she was forcing my light up.

Processing
Likes
4
Share


@Englandshigh
Follow
This one my favourite plants to ever grow , she is producing loads of pistols everyday and producing colours change in the them, very stinky smell recommended this strain to every one

Likes
62
Share


@MeaCulpa
Follow
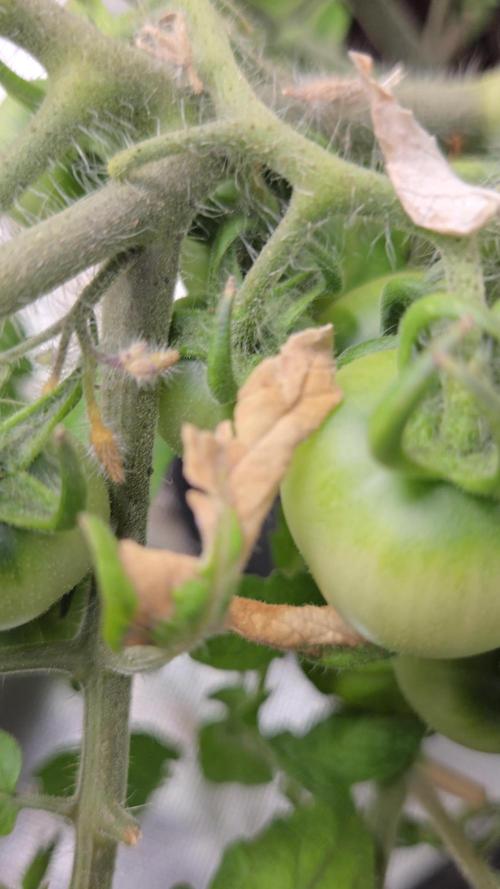
OK, Ich habe den Kampf gegen meine Trauermücken aufgenommen..... und direkt sieht es aus, wie im Militär-Lazaret.
Ich habe 3.000.000 Nematoden (Steinernema feltiae) auf ca. 2.5L Wasser (ph 6.2) der Erde zugeführt.
Die Blätter mit einer Neem- und Rapsölmischung besprüht. Damit die Erde das nicht aufnimmt gibt es weisse Laken für die Patienten.😂
Ich habe keine Ahnung, ob es funktioniert. Mal sehen.
Ansonsten gefallen mir meine Babies echt gut.

Likes
14
Share


@GoldenWeedGrower
Follow
D29/V25 - 29/04/23 - Benting
D30/V26 - 30/04/23 - EC 0.9 pH 6.5
D31/V27 - 01/05/23 - LST and Benting
D32/V28 - 02/05/23 - Some other LST
D33/V29 - 03/05/23 - Added water and nutes - EC=0,9 pH=6,5
D34/V30 - 04/05/23 - LST
D35/V31 - 05/05/23 - Nothing


Processing
Likes
15
Share


@TheHighNews
Follow
I just dropped it in water and rootjuice for 2hrs and then direct in peat pellet and after about 50hrs she was saying hello ✋
I'm very exited to start this experience whit exotic seed can't wait to grow this strains 😵

Likes
38
Share


@Chucky324
Follow
Hello This is the end of week 5 and the beginning of week 6 of flowering.
Went to post on Tues. but found no pictures in any of my diaries. WTF...
1/2 way there. Still got 5 weeks to go, I'm planning to harvest around Aug 15 unless I get some pests or mold.
The inside plants seem to have gotten a little yellow. I'll give some extra nitrogen next watering.
Ok. Short Comment. Have Fun.
Chuck.
Some how the nutrients got messed up. I look at it later.???
Likes
10
Share


@Minuteman_Organics
Follow
One of the easiest plants I've grown.
Smells of marshmallows and blue candy for one pheno and the other is pure lemon cleaner.
Almost no stretch in flower. Very little side branching.

Likes
26
Share


@valiotoro
Follow
If you’ve got a bit of time and some ice, it’s really a fun thing to do. It’s also a great way to make use of every part of the plant


Likes
13
Share


@DeepRootsGrowTrees
Follow
SHERBERT QUEEN AUTO / RQS
Week #8 OVERALL
WEEK #3 FLOWER
This week she's doing well no issues to report this week she got a nice color to her buds are are starting to get some weight and she's getting good trichome coverage. Stay Growing!!
Thank you for stopping by and taking a look much appreciated!!
Thank you ROYAL QUEEN SEEDS!!
SHERBERT QUEEN AUTO / RQS