




Likes
Comments
Share

@Northern_Ent
Follow
Godfather OG by MSNL is an exciting choice for one of my legal domestic four plants.
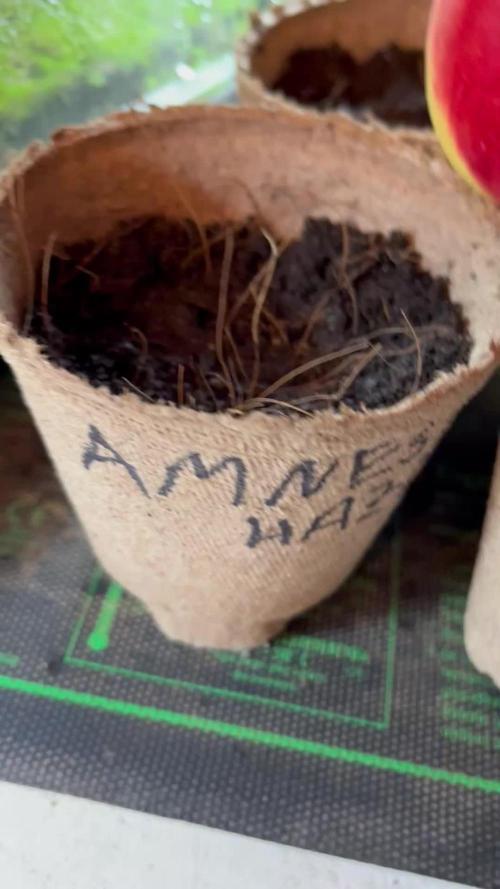
on a heating mat at 24 C and covered with foil to keep in dark until sprouting.
Apr 27: transferred sprouted seeds into soil to doil in a peat pot at 24 C.
second video is about seed priming using ethylene gas given off by an apple (or other ripe fruit). I’ve done seed priming the last two years, and yes it works. Also works on other plants like tomatoes or peppers.

Likes
5
Share


@GrowFunMD
Follow
I am now putting my weekly comments in the videos. Watch the videos for updates.

Likes
91
Share


@Salokin
Follow
Hello Growmies,
Just a quick update from my plant's world. I took her out of her usual spot today to give her a bit more space and a thorough inspection, particularly checking for any signs of mold. Happy to report, she's looking great – continuing to ripen and swell nicely.
An exciting development: the first of her trichomes have started turning amber. This is a clear sign of her maturing beautifully.
For her feeding regimen, I've switched to using only Canna Flush this week. Planning ahead, I will transition to RO water exclusively after this period. Her root ball is looking healthy and vigorous, which is always a good sign of her overall well-being.
And here's something for you: use the code ZAMMIGD2023 for a 20% discount at Zamnesia's online store.
Thanks for tuning in, and I’ll be back with more updates next week!


Likes
8
Share


@GrowingABushWithButch
Follow
Top The 02 Kombucha Cream on 12/04)2022 And I LST the 02 on 12/05/2022
It's Day 26 For My 02 Kombucha Cream by atlasseed . And it's Day 25 For My Snow White and SpliffStrawberry by Spliff Seeds Amsterdam . Yesterday I Top the 02 Kombucha Cream and Today I Started the beginning stage of LST(Low Stress Training) . The 02 where Top on node 05. I will Top the Snow White and SpliffStrawberry when the hit Node 07 Then I will start Training those 02 When I Top


Likes
21
Share


@BLAZED
Follow
Week 14 (2-5 to 8-5)
2-5
Temperature: 27.3 degrees (lights on) 19.5 degrees (lights off)
Humidity: 69% (highest) 52% (lowest)
Watering: 2000 ml.
3-5
Temperature: 24.2 degrees (lights on) 19.3 degrees (lights off)
Humidity: 68% (highest) 50% (lowest)
Watering: None.
No pictures.
Increased the light's power output to 90%
LUX: 22.500
4-5
Temperature: 24.1 degrees (lights on) 20.3 degrees (lights off)
Humidity: 63% (highest) 43% (lowest)
Watering: 1000 ml.
5-5
Temperature: 24.8 degrees (lights on) 20.3 degrees (lights off)
Humidity: 66% (highest) 43% (lowest)
Watering: 1000 ml.
No pictures.
6-5
Temperature: 24.4 degrees (lights on) 19.4 degrees (lights off)
Humidity: 66% (highest) 44% (lowest)
Watering: None.
7-5
Temperature: 24.4 degrees (lights on) 19.2 degrees (lights off)
Humidity: 66% (highest) 44% (lowest)
Watering: 1000 ml.
8-5
Temperature: 24.2 degrees (lights on) 19.4 degrees (lights off)
Humidity: 65% (highest) 48% (lowest)
Watering: 1000 ml.

Likes
12
Share

@DogDoctorOfficial
Follow
🌱 GMO Cookies Auto — Week 10 From Seed (Week 5 Flower)
🔁 Quick Recap — How We Got Here
This run started under a 12/12 from seed approach, pushing these autos into a slightly different rhythm compared to traditional schedules. From early on, the focus was on building a strong, healthy structure without over-intervention — letting the plant express itself while guiding it gently.
Through the vegetative phase, they developed into compact but well-branched plants, with a natural bushy structure. No aggressive training, just light leaf management to maintain airflow and light penetration.
As we transitioned into flower, everything started stacking quickly — and now here we are, mid-flower, with the plants fully committed to production.
⸻
🌿 Week 5 Flower — Current State
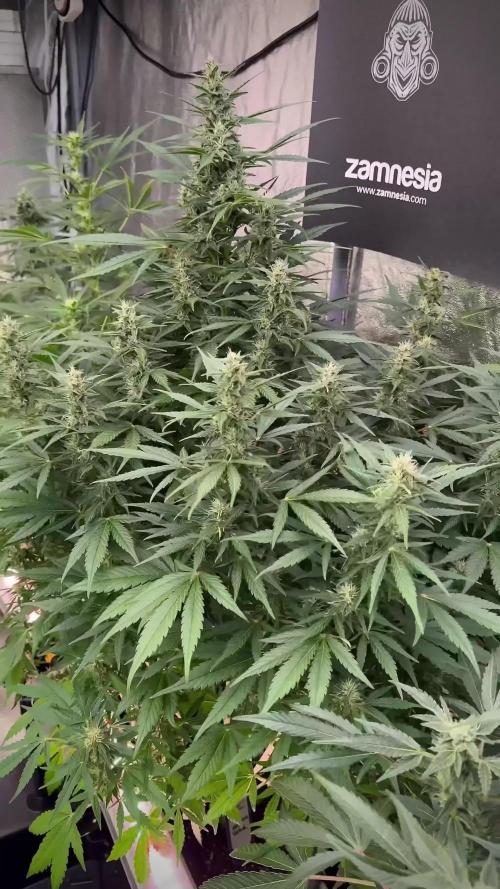
This week, they’re looking beautiful, full, and alive.
• Structure: Bushy, dense, well-filled canopy
• Bud development: Stacking nicely across all sites
• Resin: Starting to frost up properly now — visible increase day by day
• Overall health: Strong, stable, and responsive
There are a few minor light stress signs — slight leaf tip burn from the LEDs — but nothing concerning. It’s the kind of stress that comes with pushing intensity, and the plants are clearly handling it well.
And the standout feature right now:
👉 That main cola.
It’s already separating itself from the rest — bigger, more dominant, and showing real potential. Definitely one to watch over the coming weeks.
⸻
🌡️ Environment & Feeding
Dialed and stable — exactly where we want to be:
• 🌡️ Temperature: 26°C
• 💧 Humidity: 60%
• ⚡ EC: 2.0
• pH: 6.5
Instead of chasing generic room VPD charts, the focus remains on leaf VPD and plant response — and honestly, the plants are confirming everything.
The rule stays the same:
Plants speak louder than numbers.
Right now, they’re not just speaking — they’re thriving.
⸻
💡 Light Intensity (PPFD)
Light levels are being pushed into a productive range:
• Average canopy: ~1000 PPFD
• Top colas: up to ~1200 PPFD
• Full room range: ~800–1500 depending on plant height
The variation comes from canopy differences — taller tops naturally receiving more intensity.
And the key point:
👉 They’re handling it comfortably.
No major stress, no slowdown — just steady development and increasing resin production.
⸻
🔮 What to Expect Next
Things are moving fast now — this is where the magic really begins.
Over the next week, we’re expecting:
• 📈 Increased bud swelling and density
• ❄️ Noticeable jump in resin production
• 🌸 Stronger aroma development
• 🏆 That main cola to really define itself
This is the phase where small daily changes start becoming visible differences.
⸻
🤝 Shoutouts & Gratitude
Big love to everyone walking this journey:
• 🌍 The GrowDiaries platform
• 💬 The entire community — here and across all platforms
• The genetics behind this run
• 🤝 The supporters and partners
• 🌱 The new followers joining the ride
• 🐺 And the OGs that have been here since day one
Energy matters — and this one is built on shared passion.
⸻
🧠 Final Thoughts
Everything is flowing naturally right now.
No forcing, no chasing — just reading the plants and moving with them.
There’s something special building here… and we’re right in the middle of it.
Let’s see where it goes 🌿🔥
📡 DELETED @ 1K Please stay tuned.we never quit https://www.youtube.com/@TheDogDoctorOfficial NEW 🙏 Thank you for your patience and continued support.FOR DISCOUNT CODES AND MORE JUST FOLLOW THE LINK https://website.beacons.ai/dogdoctorofficial
📲 Don’t forget to Subscribe and follow me on Instagram and YouTube @DogDoctorOfficial for exclusive content, real-time updates, and behind-the-scenes magic. We’ve got so much more coming, including transplanting and all the amazing techniques that go along with it. You won’t want to miss it.
GrowDiaries Journal: https://growdiaries.com/grower/dogdoctorofficial
Instagram: https://www.instagram.com/dogdoctorofficial/
YouTube: https://www.youtube.com/@dogdoctorofficial Deleted by Youtube - https://www.youtube.com/@TheDogDoctorOfficial NEW
Vimeo : https://vimeo.com/dogdoctorofficial Under construction stay tuned ⸻
Explore the Gear that Powers My Grow
If you’re curious about the tech I’m using, check out these links:
🔆 Lighting & Environmental Control
• Future of Grow — Advanced LED lighting technology
https://www.futureofgrow.com/
DISCOUNT CODE: DOG20
• Lumiflora — Under-canopy LED lighting
https://lumiflorade.com/
• TrollMaster — Environmental controllers and automation gear (past collaboration)
⸻
Genetics
• Zamnesia Seeds — Genetics used in this project
https://www.zamnesia.com/
⸻
🌱 Soil, Substrates, Boosters & Root Support
• Plagron — Substrates, bio mixes, and supportive products
https://plagron.com/en/
⸻
🎒 Storage, Curing & Preservation
• Grove Bags — Curing and storage solutions
https://grovebags.com/
⸻
📸 Photography Equipment & Tools
(Not sponsors, but part of my creative toolkit)
• Sony A6700
• Sony full-frame macro lens + few more
• Stacking photography workflow - learning
• iPhone (for behind-the-scenes shots)
We’ve got much more coming as we move through the grow cycles. Trust me, you won’t want to miss the next steps, let’s push the boundaries of indoor horticulture together!
As always, this is shared for educational purposes, aiming to spread understanding and appreciation for this plant. Let’s celebrate it responsibly and continue to learn and grow together.
With true love comes happiness. Always believe in yourself, and always do things expecting nothing and with an open heart. Be a giver, and the universe will give back in ways you could never imagine.
💚 Growers love to all 💚
📸 P.S. – The Eye Behind the Lens
All photos in this diary (for now — except for the ones showing the camera, which I took with an iPhone) are taken with a Sony A6700 paired with a Sony full-frame macro lens and a few more.
Photography is part of the story — it’s how we share the fine textures, the glow, and the quiet details that words can’t always capture.
I’ve also started experimenting with photo stacking — a technique where multiple images, each taken at a slightly different focus point, are layered together to create one perfectly sharp image from front to back.
It’s not digital enhancement or AI; it’s pure photography — a way to reveal the plant’s beauty in microscopic depth, from trichome to petal.
You’ll even see a few shots of "ghost me" capturing the shots — camera, lens, setup — because every grow deserves not just to be cultivated, but documented like art.
FOR DISCOUNT CODES AND MORE JUST FOLLOW THE LINK https://website.beacons.ai/dogdoctorofficial
NEW DISCORD - Official Server Invite Link : https://discord.gg/ksjAkA5T74
Likes
21
Share


@NorthernMonkeyzInc
Follow
Im finding these great fun to grow, training is very easy to do considering it the first time ive trained any plants

Likes
7
Share


@CouchlockAussie
Follow
Day 69 late report this week, starting to turn milky so about another 2 weeks i think


Likes
13
Share


@SzkolaZiola
Follow
I gave up on her. She it one big fixtail.
No trichomes, no resinbg, no smell, no stickiness, leaves almost all gone - no point in waiting.
Into the trashcan she goes. Farewell. But she did yileld beautifully. It's just shit product.



Likes
25
Share


@Lou_Grows
Follow
She recovered very well from last week training and lollipop. I hope this technique gives me good results, is looking promising so far, I decided to lower the nutrient amounts to half the recommended from advanced nutrients since I burnt my pineapple chunk a little.
Likes
10
Share


@Zelfiris
Follow
Getting beautiful and stinky down here! Buds are thickening up nicely and getting frosty! The aroma is like a dank basement and brushing a stem smells like bubblegum.
UV-B still running for 30min just before the SE7000 turns on, providing 950 ppfd to the top bud sites.
Feeding “week 8 Ripen” at light strength according to General Hydroponics 10 part table and with the addition of General Hydroponics Dry Kool Bloom at 2tsp/gal (x2 the strength of last week). I think that dry koolbloom dose may have been a little too aggressive though - I’ve had an explosion of new growth on the buds as well as some canoeing.
I wish I had a meter to monitor co2, but that will be the next upgrade.

Likes
52
Share


Likes
25
Share


@NONSENSE
Follow
Hello world!
It was the last week before the harvest for my strong and hardy bush dark phoenix.
I continue to clean the substpat with water with the right level of ph
Today is the last day of the purge. At the end, the water off plant was close to 200 ppm, which corresponds to the level of my drinking water.
I'm watering the last time today and turning off the lights for 2-3 days, making the flowers extra stressful, and directing the remnants of fertilizer and salts to the root system.
Please watch photos and video of the last week. The flowers turned out to be very dense and medium-sized with about a tangerine.
Smell with northern notes, menthol, citron, earthy smell. 🍀😇🤗👌
Likes
59
Share


@Neo09
Follow
Hi buddies 😉🙌 ..at least im happy, that i have found my growmie! ..METROP works pretty well, plants movin just str8 ON, nice stretch. Tables done and next week we gonna work on support for plants.. bamboo and bandage..
Likes
37
Share


@Chunkmasta1
Follow
Some explosive growth This week. She has calmed down on the drinking a little. The ph has stayed pretty level between 5.6 to 5.8 all week. Pistols are really starting to make an appearance. This will be the last week she gets the transition set of nutrients. I added another 450w viparspectra for flower. Sorry about some of the darker pics I got home right as the lights went out tonight. The smell is still light not heavy at all. She filled the scrog well. I am so surprised at how well this plant is doing now it’s like nothing ever happened. Plant got about 17 hours of dark yesterday do to my power going out cause someone hit a telephone pole in the neighborhood..... back on schedule today and we are at day 13 of flip. According to breeder we have about 8 more weeks to go. I’m no expert but I think she is done stretching (i think)..... I can say as a beginner grower this is an excellent strain so far for my level of experience. Been a little cold at night here but so far no issues

Likes
27
Share


@adam_pawloski87
Follow
This week went really great! Plants are looking super healthy today at day 22 from seed!! Today they got a dose of just pure water phd at 6.5 ! Temperature an humidity has been staying pretty stable everyday, staying around 70-75 degrees and 58-61 % humidity!! Can’t wait to see what these girls do this week ! Hope you all enjoy , an had a great safe weekend! Peace love an positive vibes to y’all Cheers 😶🌫️💨💨💨If there’s any questions, please ask me 🙏🏻
Likes
17
Share


@HowtoBubatz
Follow
After deciding to start this new growing journey, I chose to germinate a Banana Purple Punch seed from Fast Buds.
This particular strain caught my attention with its unique characteristics, and I couldn't resist giving it a try.
I began by using a hydrogen peroxide water solution to germinate the seed, which helps oxygenate the water and prevent harmful pathogens.
After about 36 hours, the seed cracked open, revealing the first signs of life.
With a taproot emerging, I carefully transplanted the sprouted seed into a 20L airpot, ensuring enough room for the roots to breathe and grow freely.
This marks the beginning of an exciting new adventure, nurturing this intriguing strain to its full potential.🌱💚
_________________________________________________________________________________________________________________________________________________________________________________________________________________________________
One of my cannabis seedlings unfortunately didn’t survive in the pot....😭
Now, I’m trying again with two more seeds of the same strain, but I’ve changed my approach. Once they've successfully sprouted, I transfer them into coco tablets.
There, they’ll remain until they’ve developed healthy roots before being moved to their final growing environment.
I’m hopeful that this method will help me handle the early phase of the cannabis plants more successfully, and I’m excited to see how things turn out.💚💚


Likes
23
Share


@Ferenc
Follow
Day 72: 600W LED, 18 hours on 6 hours off the same with ventilation. No more ferilization. Water intake also remains the same 200ml per day. Humidity approx 35 percent.
Day 74: She is done I just checked the trichomes getting amber Friday is harvest. No more water so 3 days no watering.