


Likes
Comments
Share


@CreoWeed
Follow
Hey guys,
The week went pretty smoothly and flowers are starting building up.
I'll soon introduce Bloombastic for 10 days, increasing from 0.5 to 1.5 ml per liter.
Other than that, this phenotype are bringing out some gorgeous color, and they are starting to smell.
Now she's finally alone in the tent so I hope she will build up a little more.
For now, thats all lads.
Stay tuned, stay high!

Likes
10
Share

@OnlyBuds
Follow
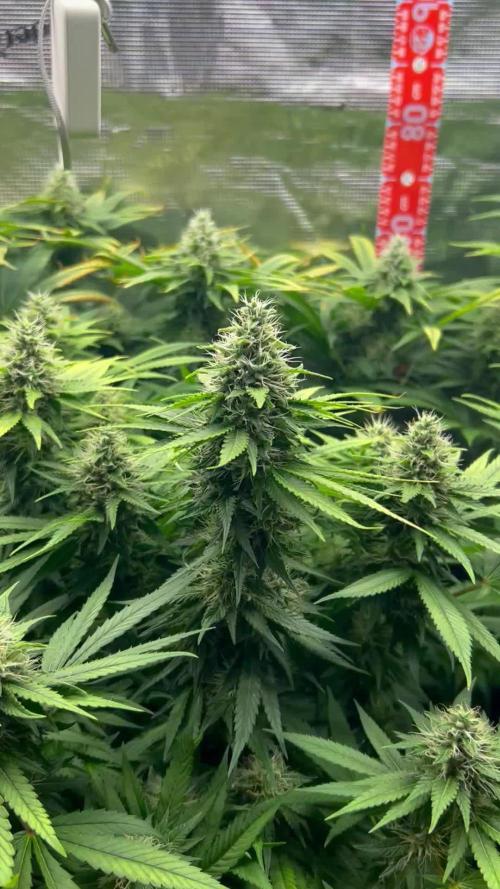
Week 7 – Lemon OG in full swing 🍋🔥
We’ve entered week 7 and things are moving strong!
Buds are stacking up nicely and getting chunkier by the day. Pistils are bright and reaching, trichomes are beginning to pop – this run smells like success already.
There’s one girl in the back-middle acting a bit dramatic – some light potassium-related signs showing up. Could be linked to CalMag interactions, but nothing alarming. Keeping an eye on her, but overall everyone looks green and thriving. I’m seeing a healthy nitrogen fade on some leaves – exactly what I want at this stage.
Lights are cranked to full power (480W total) and the girls are taking it like champs. Not a single sign of stress – just hungry green machines turning photons into fat nuggets. Climate’s locked in nicely too.
Feeding highlights this week:
• 💧 15 L water
• 🌸 70 ml Biobizz Bloom
• 🌼 20 ml Topmax
• 30 ml CalMag
• 2.5 g Epsom salt
• 💩 15 ml GuanoKalong Liquid
• ❌ No molasses this time
Can’t wait to see how they frost up in the next days.
The lemon is loud, the growth is proud, and the buds… oh man, they’re plumping hard. This is going to be a juicy harvest 🍋💪
Stay tuned, fam.
– OnlyBuds 🌿
Keep it green. Keep it growing.

Likes
11
Share


@Ananas_Comosus
Follow
Plant looking OK with signs of pre-flowering. All LST'd stems almost fully over pot edge and nodes on the stems developing well. All plants currently growing seem smaller when I compare the pics to my previous grows at the same age. Only one feed this this past week as I allowed the pots to dry out from the rain in the previous week. Supplemented feed yesterday with my Beneficial Booster. I made a mistake when preparing and put in double the amount of molasses but the plants seem to be tolerating it so far this morning.

Likes
10
Share


@SgtDoofy
Follow
2/20:
Both pots are light and are looking droopy. Time for first day of feeding nutrients. I used 1tbsp unsulphured molasses mixed into a half strength mix of General Organics GO Box nutrients, following the first week of flower instructions.
2/21:
Both plants are looking great this morning. Amnesia seemed to have grown more overnight! I'll need to watch the timelapse to see what happened. My lights are at about 80% at 12 inches above the plants. I'm going to increase it to 12 inches above the tallest cola.
2/22:
May turn both lights to 100% soon, as the timelapse of the night didn't show much growth or movement. Otherwise looking good.
2/24:
Woke up to Amnesia's lower leaves turning yellow, brown, and crunchy. Google research thinks its a PK deficiency, the last two letters if the N-P-K nutrient list. Discord users also believed it was a PK deficiency on their own accord. I may be able to remedy this by upping my main Biothrive Bloom to full strength to increase those nutrient numbers, and feeding her now. She's growing fast, I could see why she'd be hungry again after 4 days. Her pot wasn't quite all the way light before bed though. After today's feeding I'll go down to 3/4 strength on the Bloom for the next feeding.
EDIT: After lifting Amnesias pot, she definitely is ready for feeding/watering. Probably starved a bit overnight in the hot tent. Later at night, Trainwreck began to droop, so I mixed up a half strength of nutrients and fed her a gallon over a half hour.


Likes
8
Share


@banditman1200
Follow
my bad luck cops doing door to door inquiry's about an accident in street,smelled a bong and got busted.crap but looking forward to next


Likes
25
Share


@Justnblaze
Follow
Starts slow then bursts into flowering and really packs on the weight the last week or two. Last run I chopped at their reccomended 9 weeks—I’d say that’s about 2-3 weeks short of what you really need to get the full potential of this particular strain. I notice the buds have developed substantially more with the extra time and without losing trichromatic potency. At just about 12 weeks this time she is mostly 50/50 cloudy amber. Last time was mostly cloudy so I’m hoping this time it’s a bit more couchlocky. I’ll report back with photos and a smoke report after the dry and cure.
Likes
14
Share


@LokalGrenz
Follow
Still just water and some fish shit
Jan. 1 Happy New Year welp to start new year off drop my very cheap PH meter in the bucket water and now the readings are off and I probably watered them today with wrong pH water Sour diesel looks cool didn’t water today soil was still moist but the amnesia haze be

Likes
4
Share


@knnabisgrower
Follow
En la 6ta semana de vegetación hicimos una poda de bajos y desfoliación en general para potenciar el crecimiento de los brotes superiores, mejorando la iluminación y ventilación en el cultivo. También hicimos unos cuantos amarres (lst).

Likes
16
Share


@CookiesAndCake
Follow
Week 15
Day 99 (20/11/2020):
Unfortunately did not have time today to take pictures or check them because have been quite busy.
Day 100 (21/11/2020):
Woow day 100 today, which seems a bit crazy but I think the girls just need another month and they will be ready for harvest. It has been a great grow so far and although 100 days seems like a lot, the girls have definitely come really far. DSD is definitely one of the slower girls and her buds are not as big as the other girls, but maybe that will pay off by being the most hard-hitting.
Day 101 (22/11/2020)💧:
Measured the pH of the girl today before watering and it was at 5.75 which means it needs to be increased slightly. I wonder why it keeps dropping because apparently the BioBizz soil is supposed to maintain the pH pretty well but I guess she is quite big and must be taking in more nutrients. I also decided to stop giving her CalMag since she has not been showing the deficiency on the leaves for a week or two now. So I watered with the usual 1.5ml of BioGrow, 4.5ml of BioBloom, 1.5ml of TopMax. And on top of that I gave 0.75ml of pH+ to increase the pH by 0.5 points. The buds are not fattening up as much as I thought they would but the trichomes are definitely getting more and more dense on the flower which is a great sign.
Day 102 (23/11/2020):
DSD has definitely been the most resistant to stress/nutrients/watering problems. She always looks happy and except for the calcium deficiency at the end of veg, she has definitely been the strongest girl of the 4 in the tent. So happy with how she has been growing, definitely reflects the indica that she is
Day 103 (24/11/2020):
Not that many updates today, just doing as amazing as always.
Day 104 (25/11/2020)💧:
Today I watered the girl with 1.5ml of BioGrow, 4.5ml of BioBloom, and 1.5 of Topmax. She is looking really healthy and beautiful as always
Day 105 (26/11/2020):
Managed to take some lovely pictures and a video of a close up of those beautiful snowy trichomes. This girl will definitely be a hard hitter – all the trichomes are so densely packed. Amazing progress from last week and the flowers are definitely fattening up.

Likes
19
Share


@Wenz004
Follow
So aufgehts mit Fettarschfrau.
Gewählt Samen von Flo. Lasse nur eins von 3 erstmal keimen...also muss 100% Keimrate sitzen🤭...keine Selektion etc...und vor Allem ohne dieses Hopfenzeugs🤭
Kommen aber später sicher nicht in Living soil...obwohl ich Flo sympathisch finde, weiß ich mittlerweile, dass es einfach nur ein riesen Markt ist, mit dem man gut Geld verdienen kann. Mann muss lediglich den Gärtnern gut ins Gewissen reden und mit vielen Fachausdrucken wie "Bodennahrungsnetzwerk" etc. gut umgehen...aber es funktioniert. Wurde übrigens alles bei den Amerikanern abgekuckt...wie fast alles andere auch. Dort natürlich alles viel größer wie es z.B. Jeremy Silva macht (build a soil)...hab übrigens zwei seiner Rezepte ausprobiert...garnicht mal so schlecht aber trotzdem natürlich einfach nur Marketing damit die Kasse gut klingelt und die Gärtner sauberes Gewissen haben...einfach mal selber ausprobieren oder sich ein paar echte Wissenschaftler und Koryphäen anhören...wie den guten alten B.B...z.B. hier
https://youtu.be/qtXa_dAWKXc?si=nXuThrh_BhyvUSHH
Ab 6:14 eben dieses Thema...ansonsten happy growing😃
Kokos getränkt ec 0.7 (davon 60% dest. Wasser 40% Leitungswasser Ausgangs-ec 0.1) und mit Aptus:
All-in-one 1 ml/l
CalMag Boost 4 Tropfen /l
Startbooster 4 Tropfen /l
Regulator 3 Tropfen /l
Gegossen wird mit einer noch leichteren Lösung...geblubbertes Leitungswasser EC 0.4 + 4 Tropfen/l Startbooster
Also gleich der Keimling/Sämling wird beschossen🙆♂️...mal sehen...ist ein Experiment😉
Am Tag 3 die Lampe gewechselt...bin mal gespannt was die neue "CreScience FLUXshield Babo 450C (160W)" so kann☀️
Update!...der Lampenwechsel am Tag3 war schlechte Idee...veg mode von der babo450c ist schließlich auch völlig anderes Spektrum als bei der SF1000
Neustart läuft gut...2ter Samen von Flo ist auch super gekeimt...Bilder folgen bald
Licht ca. 200 mikromol auf den Deckel...drunter weniger
Versuch #2 läuft besser...coco zu scharf getränkt...sieht an der linken Blattspitze letztes Bild...insgesamt löuft die Sämlingsphase zu langsam ab...aber das lag wohl eher an mir
Likes
13
Share


@DaisyNabis
Follow
cada dia mas glotonas mis bellas, estoy aplicando riego casi día por medio, solo una vez a la semana las abono, el resto solo con agua. hice algunos amarres a los tutores ya que están en pleno crecimiento

Processing
Likes
6
Share


@Alejangrow
Follow
Popped these a couple weeks ago and started rooting them before the move to 5 gallon dwc buckets. 🌱
If these are anything like the last freebies I got from seedsman than I cant wait to bring these ladies to fruition. 😎🌺
I'm excited to see what the next few months brings. 🤞😊
Processing
Likes
3
Share


@Papabro2k
Follow
Seems to be growing nice so many budsites she’s drinking a lot 2ltr a day easy I’ve added a bit of budcandy to see how she handles it
Likes
35
Share


@The_Bearded_Grower
Follow
Day 36 I guess the video I'm uploading kind of says it all I think I need to make a comment anyway everything is going great the yellowing in the leaves primarily due to getting close to the end of flower I doubt it has anything to do with pretty much anything else he is going great can't wait for Harvest Time
Likes
6
Share


@Hommero75
Follow
The first 7 days were good the plant is growing nicely. She just got fed for the first time with Goldleaf feterlizer. I had to raise the light higher because she is a little sensitive to the light.
Likes
15
Share


@SuperSmokeBrothers
Follow
I'll add pics of how much Live Rosin we get after wash and after pressing it...October 14 12:00 am est. Washed her in a ice bath 2 separate runs. Nice looking yield I do a bath dumped into a 220 and 190 combo for seperating material, then ran threw 90 and 25 micron collection. Put in a pizza box on a 25 micron pad with a piece of parchment under the pad and surround the pad with decanter packs and into the fridge for 3 to 4 days to dry it all the way threw b4 pressing it at 170 degrees with the nugsmasher xp... Will ad dry pics and final press and cure pics


Likes
1
Share


@Pestitel
Follow
Amazing experience with the Mix Pack, I will try it again next summer for sure. Love the variety.


