


Processing
Likes
2
Share


@Vet4weed
Follow
Week 7 (Feb 15 - Feb 21).
All three plants are doing nicely, and River, our youngest plant, is doing a good job keeping up, but still a couple inches shorter. So, I decided to FIM the older two plants to see if it evens them out, or sends them into a growth spurt. If the later, then I'll give River a FIM next week.

Likes
17
Share


@VegHead_Lou
Follow
One week left on the 2 that are already in flower. The third just started flowering in its 7th week for some reason. This was a decent grow. I learned a lot by messing up a lot. I’m most definitely a newbie. Will be doing another run on these immediately. Have to test my skills to have it grow faster and yield more. Thank you all who has followed our journey.

Likes
121
Share


@Tropicannibis_Todd
Follow
💩Holy Crap Growmies We Are Back💩
Code Name FBT2307
Well growmies we are at 63 days in and everything is going much better , she's bounced back pretty good👍 really good actually 👌
👉 Shes getting frosty now , and i hope she fills out 👌if she does gonna have some buds on a stick 💪
Lights being readjusted and chart updated .........👈 Even with early major issues due to the soil/medium she's come a long way 👈
👉I used NutriNPK for nutrients for my grows and welcome anyone to give them a try .👈
👉 www.nutrinpk.com 👈
NutriNPK Cal MAG 14-0-14
NutriNPK Grow 28-14-14
NutriNPK Bloom 8-20-30
NutriNPK Bloom Booster 0-52-34
I GOT MULTIPLE DIARIES ON THE GO 😱 please check them out 😎
👉THANKS FOR TAKING THE TIME TO GO OVER MY DIARIES 👈

Likes
5
Share


@C4NN4815_030
Follow
All good :) very frosty and smells so good. She‘s so happy. At day 35 end of week 4 approaching week 5, i flush her to remove salt buildups since i didn’t had runoff the entire grow ever. She has crazy 2.6EC run off the ph is on the spot though. So lets see how will she react after heavy flush with runoff 1.6EC by week 5. i am now lowering my nuts half of the manufacturers recommendation.


Likes
44
Share


@TheBudWhisperer
Follow
Week 6 of flower - again, I prefer to call it the end of week 7 because this chick is mere days from done. She's a straight fuck'n enigma to be honest. Earlier in the week I was sure she was gett'n the knife on the weekend. Now I'm almost positive I can push a little more outta her. She's fading out beautifully now but the trichs are sooooo close to our harvest wheelhouse. General uniformity in cloudiness throughout, little amber on the tops and some racy mirrored trichs on the underbelly👌. Swapped the res. and we'll top off on plain water moving forward to the full finish I think. I expect this to be the last update before the chop. We were hoping for a well-rounded basketball and ended up with a warped beachball monster👌. She's squat and the buds start from literally the base of the plant. Gonna go out on a limb and guess min. 4oz. at this point. Dense resinous beast💪. Not long now ya'll.
Tip 'O The Week
This weeks bullshit is about pick'n ur spot when it comes time to harvest. Some folks like their weed racy and heart palpatation inducing, others like it sedative and ..... ahhh fuck it. I’m way too high to be soapboxing right now. Summary: Wait until she’s done and then get the scissors out!👍.
Background
From Exotic Seeds, Herz OG is a 4th gen. Cross of GG4 and black lemon autos, crossed again with a photo Herz OG mother. Supposedly piney, honey and woody tones with a calm relaxing effect. Just what the lady of the house ordered. She’ll be straight DWC like the rest. 2 weeks on the drip line and depending on how they all do, this may be the girl that stays under the Spider Farmers for the duration. My first go with Exotic so no idea what we’re in for. Let’s hope she’s a beast🤞.
I’ve included a weekly tip forum for those new to the game that have an interest in trying out water based hydroponics. It’s vetted, reliable info that will hopefully help you avoid weeks of lost time and failed attempts. Comments, questions and discussion are always welcome👍.

Likes
157
Share


@Qutro
Follow
Hi Growmies,
This was her last week, as she was cut down at the end of the week;) I fed her Final Part another 3 days and then changed the reservoir to PH-ed tap water with Flash Clean for 5 days. Dimmed back the light to 50%.
I took out her from the tent for an inspection and I saw more and more milky trichomes turning to amber. This is a clear sign of her maturing beautifully.
After she went with another girl from for 48 hours of darkness before she was chopped.🌱⚔️
Her root ball was looking healthy and much better after the flushing process so next time, I'm sure I won't be using powder silicate because it only made the roots tangled.
The total number of flowering days was 65 since we changed the light cycle to 12/12.
I moved her to the drying tent with 55% RH. She is sharing it with the Dos-si-dos’33 girls. They will remain there as long as needed.
Will come with a longer report next week as I have a lot of thoughts in my mind about this journey to Japan with her.💚🇯🇵
Have a lovely weekend fellow cultivators!
Peace🏻
Likes
4
Share


@Fatbudz
Follow
I said!! it's huge
ready for flowering!! one week to change the light schedule to 12/12
I've already lost count of the toppings I've made. I will always take some of the bottom leaves out. that no longer catch light and only waste energy. I water every two days. small quantities and One feeding per week. I make adjustments whenever necessary. I also don't spend a lot of nuts as long as she doesn't really need food as in flowering. you will realize soon
Likes
Comments
Share

@DogDoctorOfficial
Follow
🍮 Chem Brûlée – Pheno B
Week 6 | Finding Her Own Pace
Welcome back to another chapter of the 8×8 Adventure!
One of the reasons I love running phenotype hunts is because they constantly remind me that there is no such thing as a "perfect timeline."
Every plant has her own rhythm.
Even sisters sharing the same genetics, the same room, the same lighting, and almost identical nutrition will often choose completely different paths.
Chem Brûlée Pheno B continues to be the perfect example of that.
While her sister has moved slightly further ahead, Pheno B is taking a steadier, more measured approach to flowering. She's still stretching, still building her structure, and quietly preparing for the weeks ahead.
There is absolutely nothing wrong with growing at your own pace.
Sometimes those who start a little slower end up surprising everyone in the end.
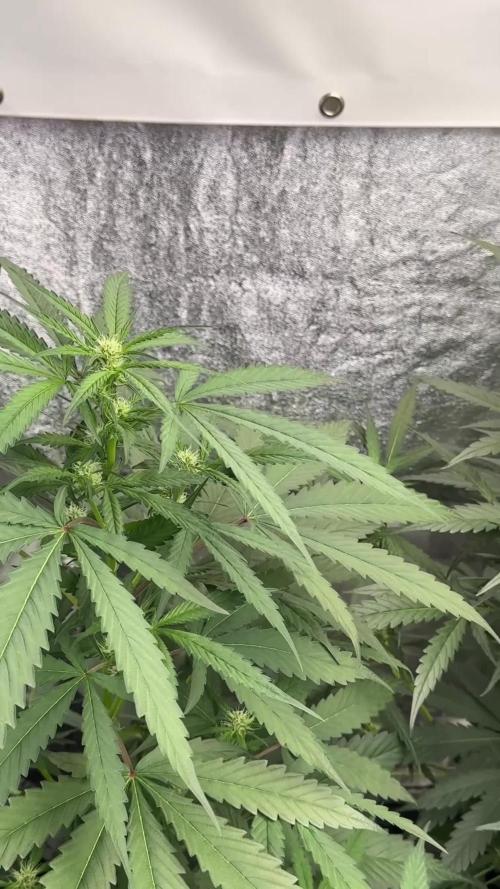
🌼 Flowers Are Taking Shape
This week the flowering transition became even more obvious.
The first pistils that appeared last week are now multiplying across the growing tips, with every branch beginning to establish its own future flower site.
The main top is starting to take form, while the secondary branches are joining the party one by one.
Everything still feels delicate, but that's exactly what makes this stage so exciting.
These tiny clusters may not look impressive today, but in only a few weeks they'll become the dense flowers that make all the patience worthwhile.
Watching that transformation never gets old.
🌿 Elegant Structure
One thing I really enjoy about this phenotype is her overall architecture.
Compared to her sister, Pheno B has developed a slightly more open canopy, allowing plenty of airflow and excellent light penetration throughout the plant.
Every branch seems to have found its own place without much intervention from me.
The internodal spacing is balanced, the stems are strong, and the canopy already has a very natural shape.
Sometimes a plant almost trains herself.
Those are always enjoyable grows.
The foliage remains a rich healthy green, and she's showing plenty of energy as she continues building toward full flower production.
🌱 Gentle Guidance
Training remains intentionally simple.
Low Stress Training continues helping spread the branches while occasional leaf tucking allows light to reach developing flower sites hidden beneath the canopy.
I've resisted the temptation to overwork her.
At this stage the goal isn't to force the plant into a specific shape.
It's simply to help her make the most of the structure she's already chosen.
The less unnecessary stress we create now, the more energy she can dedicate to producing beautiful flowers later.
🍽️ Feeding Strategy
Nutrition remains focused on supporting the transition deeper into flowering while maintaining healthy vegetative growth during the final stretch.
This week's feeding included:
• Terra Bloom – 1.9 ml/L
• Green Sensation – 1 ml/L
• Sugar Royal – 1 ml/L
• Power Buds – 1 ml/L
• Pure Zym – 1 ml/L
• pH adjustments using Lemon Kick and pH Plus when required
Everything continues to be based on observation rather than routine.
Plants don't read feeding charts.
They tell us what they need through their growth, colour, and overall health.
Learning to understand those signals is one of the most valuable skills any grower can develop.
🌡️ Environmental Conditions
The room continues providing stable conditions for healthy flower development.
Average conditions this week included:
• Day temperature: 29°C
• Night temperature: 25°C
• Relative humidity: 60%
• Nutrient solution: 24°C
• Root zone: 21°C
• CO₂: 639 ppm
With flowering progressing, humidity has gradually been reduced to create an ideal environment for the weeks ahead.
Stable environmental conditions allow every phenotype to fully express its genetic potential without unnecessary stress.
It's amazing how much difference consistency makes over an entire grow.
📸 Capturing Another Chapter
This week's photographs show a plant that's confidently settling into early flower.
The close-up shots reveal fresh white pistils appearing from every growing tip, while the wider photos showcase a beautifully balanced structure that promises excellent light distribution as the buds continue developing.
One thing I particularly enjoy is seeing how different the two Chem Brûlée sisters already look despite sharing the same genetics.
That's the beauty of phenotype hunting.
No two stories are ever exactly the same.
🔮 Looking Ahead
During the coming week I expect Chem Brûlée Pheno B to continue producing new pistils across the canopy while gradually slowing her vertical stretch.
The individual flower sites should begin expanding, and the first signs of true bud stacking will become more noticeable.
Training will remain light, allowing her natural shape to continue developing while simply helping every branch receive as much light as possible.
She's growing with quiet confidence.
And sometimes...
Those are the plants that end up leaving the biggest impression.
💚 Thank You
A huge thank you to everyone following this 8×8 Adventure.
Whether you're here to learn, compare phenotypes, improve your own garden, or simply enjoy watching these incredible plants grow, I'm grateful to have you along for every step of this journey.
Special thanks to:
💚 GrowDiaries for providing a platform where growers from around the world can learn from one another and share their passion.
Zamnesia for the outstanding genetics making this phenotype hunt possible.
🌱 Plagron for supplying the nutrition supporting every stage of this grow.
💡 Future of Grow LED for delivering the light that fuels healthy growth day after day.
🌿 TrolMaster for helping maintain a stable environment around the clock.
And finally...
Thank you to every grower, follower, supporter, silent reader, friend, and every person who stops by these diaries. Your encouragement, advice, questions, and conversations are what truly make this project worthwhile.
I'll see you all next week, where Chem Brûlée Pheno B will continue proving that every phenotype has its own pace, its own personality, and its own unique story to tell.
Until then...
Growers Love and happy growing, everyone. 🌱🍮💚

Likes
72
Share


@BodyByVio
Follow
Day 9 I had no choice but to defoliate, the canopy was getting way to dense and humidity was hard to control even with my 30 pin dehumidifier. Hopefully will not affect to much. Probably I will do another defoliation on day 21.
TDS stays at 550PPM this week and CO2 at 1200PPM.

Likes
19
Share


@Mzsnoop2001
Follow
Está semana se siente bastante el aroma de whithe widow y blue moby, mientras que moby Dick sano y viene en viaje entrando en flora. Me quedé sin medidor de ph y sufren un desvalance de ph, más que nada ww pero ya lo voy a solucionar! Muchas Gracias por ver! Acepto críticas y concejos.


Likes
22
Share


@StrontiumGrow420
Follow
Ready for harvest, chopping this week. Flushed with molasses water for 6 days. Lost most of the fan leaves, yellowing off and some heavy reds in the leaf at the end of flower. Nice toke, OG flavour


Likes
9
Share

@Canna96
Follow
I transplanted them on Friday 17 and topped them on day 21. I am planning to build mainlines out of all 5. So far they're looking pretty good. Thanks for stopping by and have a safe holiday.


Likes
4
Share


@Soskar69
Follow
The plant is doin very well, the colas are all getting bigger and the resin production is huge. I'm near the harvest so within few days I'll give her the last nutrients ans the next week I'm gonna flush her. I'm very happy about this plant, she takes nutes very well and give zero problem.
Likes
3
Share


Likes
37
Share


@DogDoctorOfficial
Follow
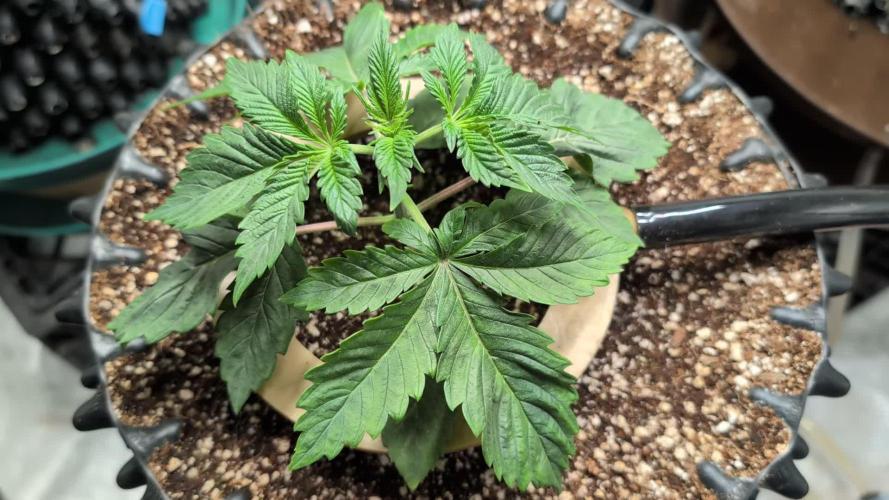
🌿 Week 7 Veg Report: Terpyz Mutant Mentha de Croco 🌿
Hello, Grow Fam! We’re now into Week 7 of this exciting adventure with my Terpyz Mutant Mentha de Croco ladies, and what a week it’s been! The theme for this week? Patience and appreciation. These girls continue to grow at their own pace, each one showcasing their unique traits and incredible beauty.
Week Recap: Slow and Steady Wins the Race
The girls are still on the slower side in terms of growth, but that’s part of their charm. Each leaf is a masterpiece, more intricate and stunning than the last. Their prayer posture remains consistent—a true testament to their health and contentment in their environment. They may be taking their time, but their vitality and uniqueness shine through every step of the way.
Environmental Conditions: Keeping Things Balanced
This week has been about maintaining a steady environment despite the natural slowdown in growth due to cooler temperatures.
• Temps: Daytime 18–20°C, nighttime 14–16°C. It’s a bit chillier than usual, but these resilient ladies are adapting beautifully.
• Humidity: Stable at 65%, ensuring the girls remain hydrated and comfortable.
• Airflow: Gentle but constant to keep the space fresh and prevent any stagnant air pockets.
Feeding Program: Aptus Holland Perfection
Feeding remains consistent, and the girls are loving the organic-mineral lineup from Aptus Holland. Here’s what’s in their mix this week:
• Regulator: 0.15 ml/L – To strengthen cell walls and increase stress resistance.
• CalMag Boost: 0.25 ml/L – For robust development and prevention of deficiencies.
• StartBooster: 0.25 ml/L – Enhances early vegetative growth and root systems.
The switch to All-in-One Pellets last week has eliminated the need for liquid All-in-One, and the girls seem to be thriving with this natural, slow-release food source.
Watering: A Gnat-Free Approach
This week, I continued with bottom watering. Filling the trays and letting the soil absorb the water has been a game-changer—not just for healthy root development but also as a part of the war against gnats. Paired with yellow sticky traps, this strategy has kept pests in check while ensuring the roots get all the hydration they need.
Growth Observations: Slow but Stunning
• Structure: The slow growth might test patience, but the payoff is worth it. The compact, vibrant structure of each plant is breathtaking.
• Leaves: Dark green, uniquely shaped, and full of character. Each girl is like an artist’s brushstroke—no two alike.
• Praying Posture: Their leaves reach for the skies like they’re soaking up every ounce of light.
Still no cloning or flipping to 12/12 yet, as I want them to grow a bit more before making any big moves. Next week, I’ll decide whether to flip them for a brief period to determine sex or wait until cloning is feasible.
Photography Spotlight: Capturing the Details
This week, I took some time to immortalize their beauty with my Sony A6000 and Nikon DSLR cameras. The intricate details of their leaves, captured through different lenses, reveal their individuality.
📸 Photography Tip:
• Cameras like my Sony and Nikon bring out fine details you’d never see with a phone camera. The larger sensors, interchangeable lenses, and manual controls allow for stunning clarity and depth.
• Macro lenses, in particular, are fantastic for close-ups, like capturing water droplets or vein details in leaves. The difference between these and even the best phone cameras (like the latest iPhone) is night and day when it comes to quality and creative control.
Looking Ahead: What’s Next?
As we move into Week 8, I’m hoping for an uptick in growth speed, but I’m perfectly content to let these beauties take their time. The journey is just as rewarding as the destination, and these girls are proof of that.
Shout Outs & Gratitude
A massive thank you to:
• Terpyz Genetics for these exceptional mutant seeds.
• Aptus Holland for their top-tier nutrient lineup.
• Future of Grow (FOG) for lighting that keeps these ladies praying.
• Pro-Mix Soil for providing the perfect growing medium.
• TrolMaster for environmental controls that make my life so much easier.
• Grow Diaries for the platform to share this incredible journey.
• And, of course, all of YOU—followers, supporters, and even the haters—for being part of this adventure. Your feedback, encouragement, and interaction mean the world to me.
🌟 If you’re curious about the journey, feel free to check out my Instagram and YouTube for behind-the-scenes content, photos, and more!
Until next week, stay positive, stay curious, and as always: Growers Love! 💚
Genetics - Mentha De Croco
https://terpyz.eu/products/menta-de-croco-fern-type?_pos=1&_sid=e9237cbcb&_ss=r
DogDoctorOfficial Discount Codes @ terpyz.eu - DOCTOR 15% off
Nutrition - @aptusholland
https://aptus-holland.com/
Led Power @ F.O.G. Future Of Grow
https://www.thefuturofgrow.com/en/online-store/BLACK-SERIES-600-p489093171
Controls @ TrolMaster
https://www.trolmaster.eu/tent-x
As always thank you all for stopping by, for the love and for it all , this journey of mine wold just not be the same without you guys, the love and support is very much appreciloved and i fell honored with you all in my life
With true love comes happiness Always believe in your self and always do things expecting nothing and with an open heart , be a giver and the universe will give back to you in ways you could not even imagine so
As always, this is shared for educational purposes, aiming to spread understanding and appreciation for this plant. The journey with nature is one of discovery, creativity, and respect. Let’s celebrate it responsibly and continue to learn and grow together!
Growers Love To you All 💚

Likes
28
Share


@Kitties_and_Colas
Follow
The Critical Purple are about as tall as me at this point and buds are stacking up very quickly,.. had i known these plants would take so long to flower i definitely would have opted for a larger pot size, but these things happen i guess ....I pulled a GWS, a finished CP and another GG auto this weeks as well :)


