
Likes
Comments
Share


@PigBearMan
Follow
Hey there,
as the clones are almost ready and I will transplant them in the aeroponic system tomorrow, I allowed myself to get the pH and EC ready and stabilize it over a night. 😏
August, 20th:
23 of the 30 clones made it to the system and are now growing fine. Guess those 7 clones that didn‘t make it were old ones from below the mother plant.
SanLights at 40%. ☀️

Likes
12
Share


@NONSENSE
Follow
Good afternoon everyone!
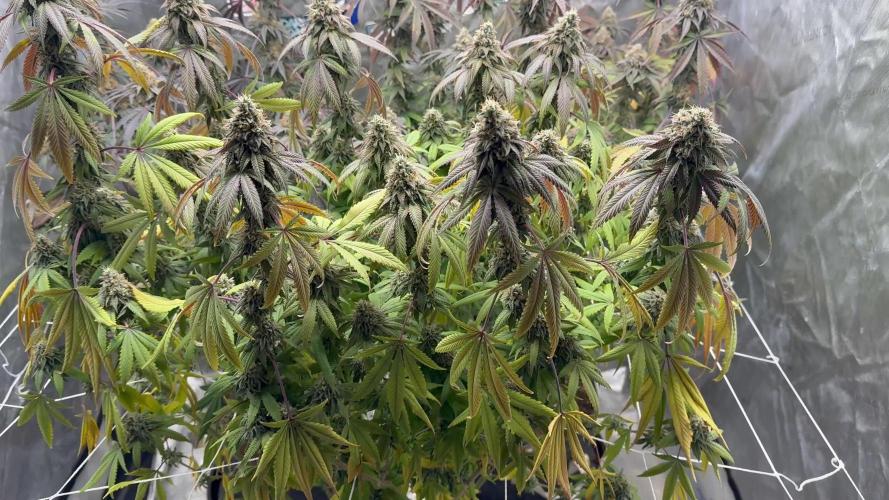
One more week is gone of the flowering.
the plant looks beautiful, the buds become heavier every day.
I still only use Hesi sponsored nutrients with every watering.
I don't overdose on nutrients and follow the weekchart I got from Hesi.
genetics is good old school from Neville's seed bank.
It is also a normal seed, not femenized.
The light schedule is 12/12 ,
feeding every day( I try to handle the cocos always wet)
next week is the last flowering, after that I will clean the plant and will harvest it.
Good luck, everyone

Likes
8
Share


@CanarianGrow92
Follow
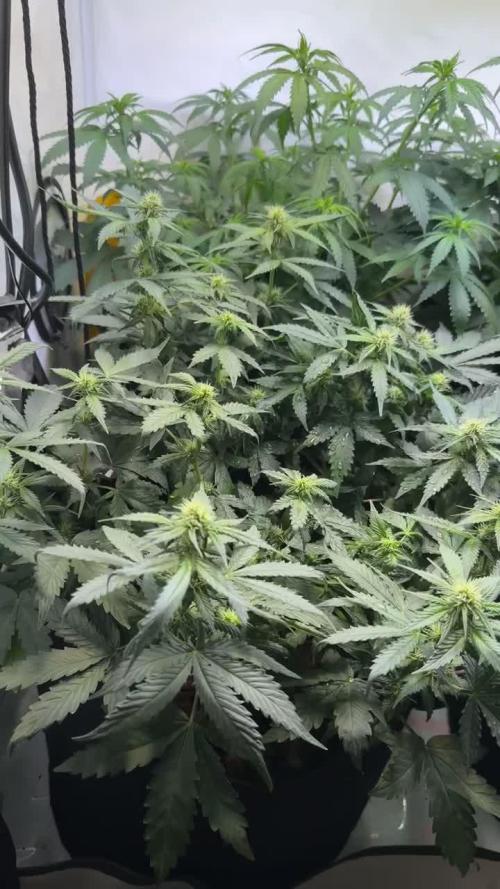
Week 1 flowering for the Green Papaya from super sativa seeds club.
All good so far, we gave organic nutrients and some extra calmag with amino and some silica. We also continue with master root. Looking nice and green. Small little buds are starting to appear 🤗

Likes
6
Share

@Grower_Tom
Follow
Finally chopped and drying! I cut water 5 days before chop and of those days the final 48hrs were darkness! I’m still amazed at the resistance this grow had with heat and low humidity!
Likes
17
Share


@Bobo_Zion
Follow
Just did some pruning of the lower level leaves that were yellowing or about to fall off. Found one of those pesky army worms 🐛 on one of the ladies growing in a 1 gallon pot, wasted no time putting an end to his career as a cannabis connoisseur ☠️ ⚰️. Other than that everything's as normal as can be I guess.
Likes
3
Share


@BR1CK_SANCHEZ
Follow
This week was a little rocky. Two girls on the outer edges are good, but the middle one is drooping and foxtailing already. It's weird because my middle plant was larfy last run as well. I might push her to the corner and let her do her thing with less attention... because I just got a photoperiod runtz clone that's gonna need some space and perhaps its own light. LST seems to be going well for the other two though. Sometimes with autos, it's just a genetic thing. They can be temperamental girls sometimes.

Likes
21
Share

@J4kpvp
Follow
Hey:)
I flipped them to 12/12, added some nutrients as recommended by biotabs and then just let them grow this week. They immediately started stretching a lot.
Very minor defoliation of dead leaves, I also bought a scrog net but I’m asking myself if I should even use it, the top is flat enough and spread nicely. I count at least 10 nice main tops per plant, last grow I had about 4 per plant, I‘m really happy with the results so far:)
Also the bugs are gone now, haven‘t seen any this week, my yellow sticky traps are completely covered though.
Sadly the wasabi is clearly ahead already… I hope I can harvest them together without the wasabi being too much overripe, I would have loved to veg them a bit longer…

Likes
13
Share


@Jocolope
Follow
32 one foot colas . This will be a long trim. Not too many leaves I was happy with the outcome


Likes
25
Share


@The_Lonely_Farmer
Follow
Overall a great strain too grow as grows with ease and seemingly without issues even with minimal care.
With care she can produce hefty buds, as kept mine small my flowers reflect but still produced great smelling powerfully buds 🌱
Cycle finished in time essentially with ease and I'd be happy too recomend this strain from fastbuds.
I will update with more images and videos upon timing complete and give dry weight ect, these girls wont bring much but smell absolute treat.
Atm I have tried 1 small nug but still not ready not long untill can trim up, great oils and taste just need a little cure up once finished.
Tried uploading longer videos but again says error 👎 have now added few extra videos
Likes
346
Share


@Canna96
Follow
Hey now! This week went pretty well, I did notice my EC of my runoff was getting pretty high on day 65, it got up to about 1.9, and my nutrient solution going in was at 1.6. I ended up mixing a bucket of my normal fertilizer, and hand watering all the places my drip ring wasn't really hitting, and i got the EC back down to about 1.7. I also got a tip from MrJones to setup some type of support for the colas. I ended up tying some 550 (parachute) cord across the top of my tent poles, then I ties little loops around the colas with the same soft cord. I then used wire ties to attach the loops to the 550 cord. I also am slowly reducing my EC, as I believe I only have a couple weeks left. I am also going to be switching from Liquid KoolBloom to Dry KoolBloom at some point later in week 10. If anyone has any experience on the correct timing of this switch to ripening formula, please hit me up! I am still struggling a bit with heat and humidity, and am considering buying another dehumidifier for my next grow. As always, Thank you to everyone for all of your encouragement, support and tips!! Blaze on!

Likes
4
Share


@Amazone27
Follow
die Letzte der überlebende Pflanze macht ein Wachstum schub und in Blüte jetzt Scheint ertragreich zu werden für eine Auto

Likes
5
Share


@TJHeadley
Follow
This week was a little late due to the holiday. This is the week RSQ Wedding Cake flipped to flower. I accidentally super cropped her when trying to bend a branch over. After that she started drinking a whole lot more (hence the underwatered pictures)
Likes
14
Share


@EaRtH
Follow
18.5. - Entering new week, probably the last one with feeding. I've ran out of Biobizz juice, so I have already fed them the new mix with Advanced Nutrients and it seems they like it. Buds are ripening, smell is strong. I just think that Apricots and Gorillas will need some more time than Jack and Lemon.
20.5. - Last feeding for Jack and Lemon. Only water, from now on and harvest next week ✂️ Others still have one or two more weeks to go. Watered 💧
22.5. - Jack and Lemon are fully matured based on the looks of trichomes. Very yummy looking and smelling buds. Very dense too. I'm flushing them tomorrow and I'm super excited for the harvest 😎
23.5. - This day marks exactly 10 weeks from the day all seeds sprouted through soil. I have flushed Jack and Lemon. Those plants are looking stunning. Watered 💧
24.5. - Week wrap-up: Very successful week. After I switched to Advanced Nutrients my plants exploded. Next week, when Jack and Lemon are dried out after flushing, I'll harvest them. Others will still go at least one more week with feeding.
18.5. - 24.5.2024
Processing
Likes
94
Share


@Master_weeda
Follow
la semaine c'est bien passé aucune carence apparente . j'augmente progressivement la dose d'engrais je suis surpris de voir l'évolution de certaines plantes durant la phase de stretch au cour de la cinquième semaine
mention spéciale pour la blueberry #1 (palissée) et à la GG de chez fastbuds


Likes
9
Share


@DeepRootsGrowTrees
Follow
KICKASS AUTO by KANNABIA
Week #10
Week #4 Flower
This week no issues to report being outside as she continues to flower. Her buds are getting thicker by the week and the trichome coverage is looking good she's getting frosty!! Stay Growing!!
Kannabia.com KICKASS AUTO

Likes
4
Share


@GreenForMiles
Follow
This strain was a mystery from the beginning. I planted 6 plants and got 4 drastically different phenos. Surprisingly they all have similar aromas but visually they’re much different. She stretched a lot and needed two layers of the sCrog net. One plant had 2 random seeds so I’ll probably be planting her again. Next time I’ll use a low stress method to see her at her full potential!


Likes
33
Share


@nonick123
Follow
Día 71 (24/03) La planta lo ha pasado mal tras 2 días sin riego (casi 3 ciclos completos de 12 horas de luz sin riego...)
A lo que se suma altas temperaturas en mi zona, han tenido 28 ºC durante las horas de luz...
Las hojas inferiores se encuentran caidas y alguna quebradiza...
Le hago un riego con 750 ml H2O EC 0,45 a ver si se recuperan....
Día 72 (25/03) Riego con 250 ml H2O EC 0,45
Elimino las hojas quebradizas que no se van a recuperar después de la "sequia" que han pasado
Se encuentra en buen estado general y formando nuevos pistilos! 😍💥
Día 73 (26/03) Riego con 250 ml H2O EC 0,45
Día 74 (27/03) Riego con 500 ml H2O EC 0,45 con BIO PK 5-8 a 10 ml / L (solo Limon Blanco)
Riego con 100 ml H2O EC 0,45 (el resto)
Reviso los tricomas, y GG4 Sherbet FF y Blueberry Pie F1 solo les faltan unos días! 😍💥
Día 75 (28/03) Riego con 400 ml H2O EC 0,45
Día 76 (29/03) Riego con 500 ml H2O EC 0,45
Día 77 (30/03) Fiesta de la Cosecha!
Reviso los tricomas y están un 10% ambar, 85% nublados y 5% transparentes
🚀 FastBuds 15% DISCOUNT code "NONICK" 2fast4buds.com @fastbuds.official
🚀 Khalifa Genetics - https://khalifagenetics.com/product/lemon-blanco-v3/ @khalifa.genetics
💦 BioTabs 15% DISCOUNT code "GDBT420" biotabs.nl/en/shop/ @biotabs_official
🌱Substrate PRO-MIX HP BACILLUS + MYCORRHIZAE @promixmitch @promixgrowers_unfiltered
💡2 x Mars Hydro FC1500 EVO Led Grow Light (2024 NEW FC 1500-EVO Samsung LM301H 150W LED) - https://marshydro.eu/products/fc1500-evo-led-grow-lights/ - https://www.amazon.de/dp/B0CSSGN5D8?ref=myi_title_dp