
Likes
Comments
Share


@Hazebuster888
Follow
1 woche noch ca. +/- 3-4 tage je nachdem wie es ausschaut.... bin mega gespannt...
habe vor 2 tagen schon ein kleinen trieb abgeschnitten um es vorab testen zu können und die sieht schon mega aus 😋😋😋👌😉
Likes
18
Share


@xtchill
Follow
Week 3 and 2 days since the repot into 15ltr pots
Looking beautiful atm and healthy.
Just wish they would grow quicker.
Starting to lst now.
Any advice will be used.

Likes
13
Share


@madlangs
Follow
All going extremely well. No problems
22.12.24
Height
Purple lemonade 78cm
Small jelly breath 63
Large one 89
Slurricane 59
Lemon haze 91
Tangie 66
Hubbabubba 56
Cosmic queen 56
Ppfd around 800
22.12.24
Gave all 1L each
10ml/L Pk 5-8
2ml/L bio heaven
2ml/L acti Vera
Recharge quarter tsp/L


Likes
78
Share


@Hou_Stone
Follow
En ce 24/09 guidé par les astres, je décide de me diriger vers mon minuteur et par les pouvoirs qui me sont conféré je diminue la durée du jour et déclare l'arrivée de la phase de floraison.
Ensuite, toujours guidé par les astres évidemment, je saisis ma coupe et je pars en quête d'un substrat pour y mélanger ma précieuse poudre de floraison. Après un certain temps me voilà face à une source abondante de terre. Je remue la terre, la frotte entre mes doigts, j'inspire un grand coup dedans afin d'analyser la qualité du substrat et enfin j'y plonge ma coupe. Fier de ma trouvaille, je referme soigneusement ce sachet de terreaux universel.👽
Après avoir mélangés ma poudre à mon terreau, je la dépose en dessous des plantes et je fais un vœux.🙏
--------------------------------------------------------------------------------------------------------------------------
J'ai ajouté environ 25gr de poudre BioBloom par pot de 8L soit environ 3gr/L.
J'arrose chaque pot avec environ 1.5L tout les 5 jours. J'ajoute du biohenhanceur 1 fois sur 2
Intensité de la FC3000: 90%
Ventilation : 2 ventilateur oscillant ( ON 12/24H) + Extracteur pouces mars hydro power : 2/10 (24h/24h)
🌺👨🚀💃👨🚀💃👨🚀💃👨🚀💃👨🚀💃👨🚀💃👨🚀💃👨🚀💃👨🚀💃👨🚀💃👨🚀💃👨🚀💃👨🚀💃👨🚀💃👨🚀💃👨🚀💃👨🚀💃👨🚀💃👨🚀💃👨🚀💃🌺
Venez me voir sur instagram 👌:
https://www.instagram.com/hou_stone420/
Likes
6
Share


@kingmcdaid
Follow
This is week 2 for the "gelato auto" from female seeds. this week it was given it's first dose of worm tea to the soil and I also foliar fed the leaves for disease prevention. I tried to transplant some clover cover to the right side of the pot from a empty container the clover did not transfer well unfortunately and so I now have a bare section in my cover crop I'll likely leave it alone and just proceed without regard to it. the plant it's self looks healthy however it does seem to be behind some of my other varieties in size I won't know until later in the grow if this is a normal trait that is made up later or if something is off. As far as I can see though all is well. In addition a added a diy light mover to the garden to aid them in getting more light and I'm steadily increasing the intensity daily. I'm going to do some LST to this plant but because I'm not convinced of its resilience at this time I may avoid topping. thats all for this week. If your interested in "female seeds" genetics or gelato auto specifically or if you just want to know more about organic/living soil growing please follow me and let's watch her grow!

Likes
4
Share


@CalGonJim
Follow
3/11 🍓🍑 They were a little dry this morning, so I gave them a gallon of water split between the four of them using the light schedule feed🎄
3/12 Z🍓🍓🦍 strawberry and strawberry gorilla are starting to get very tall. They’re becoming huge. I’m gonna keep them at 91 W maximum that might even be a little high. It’s nice to know. They don’t take as much light as I thought along time ago. They really look good. this is the first time I’ve used 2 gallon pots so I have to remember to water more often and spray the bag with neem oil. I can’t tell if it’s runoff salts or if it is some sort of white fungus that’s not good on the outside of the bag, either way, if I spray everything with neem oil before I water including the soil, NO the plants just the soil and the bag makes a huge difference.🎄👍
3/13🍓🦍🍑💦 💦plus silica
after about 12 hours, they are looking really good. They’re actually dry again. I’m gonna do watering tomorrow. The CBD plant is going completely different than any other one. It’s really exciting. It looks great but very different from any of the other ones probably because I dropped it when I did the transplant either way luckily she’s doing great.👍
3/14 🍓🍑👍
3/15 🍑🍓🦍💦💦💦 I ended up doing two full gallons of water. I was surprised how much I had to water them with today did full nutrients and supplements.💧💧💧
3/16🍓🦍🍑 strawberry gorilla and the strawberries are growing exactly like they said they were on their website. They’re looking just great apricot and the CBD are also doing great. I’m not gonna do too much training. I feel better if I leave them alone.👍🍓🦍🍑
3/17 Z🍓 🍓🦍🍑💦💦 1 gallon with 1 mL silica 1 mL Cal mag💦💦
Processing
Likes
8
Share


@eldruida_lamota
Follow
Esa familia, de nuevo e vuelto para actualizar las candy caramelo, también trasplantamos a su maceta definitiva, amarillean las hojas de abajo porque ya pedían un trasplante, y hasta que se amolden al nuevo sustrato.
Ph controlado temperatura 22/26 y humedad algo baja 60% aunque pronto cambiaremos el ciclo lumínico.
Hasta ahora esto es lo que hay y mientras catamos la cosecha anterior, os iré actualizando demás diarios con sus respectivas cosechas fumetillas, un saludo y hasta la próxima semana.

Likes
31
Share


Likes
11
Share


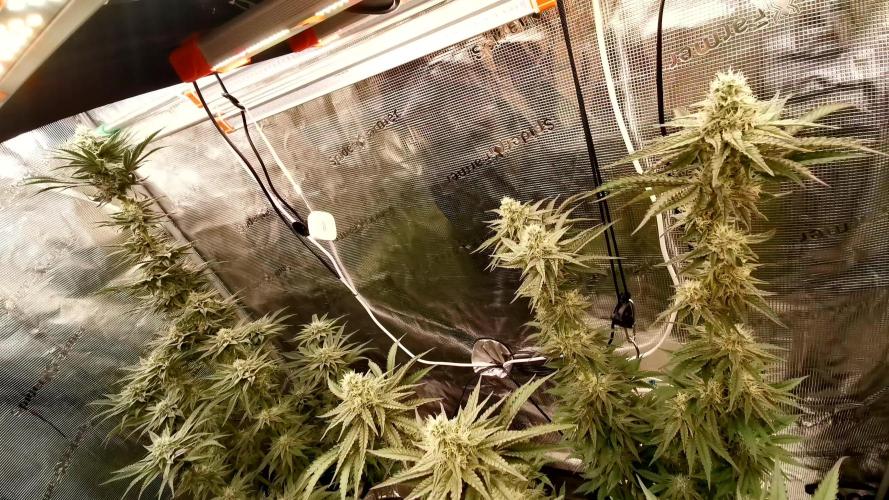
@Growin_it
Follow
BIG stretch this week!
Might scrog these ladies as some space opens up in my tent with a harvest coming up soon.


Likes
11
Share

@CannaArchive
Follow
This week the Chicken n’ Wafflez became noticeably frostier ❄️🔥
Resin production increased heavily across the buds and even the sugar leaves are now getting completely coated in trichomes.
The plant still keeps its slightly airy structure, but flower stacking improved nicely throughout the canopy 🌿
The aroma became much stronger this week 🍯?
The sweet jam-like scent intensified further while keeping the same creamy sugary direction from the previous week.
Opening the tent now releases a much louder and richer terpene profile overall ✨
Water consumption stayed about the same 💧
Feeding this week consisted of:
• Bio PK 🌱
• Calmag
Environment stayed stable again 🌡️
The plant continues handling the strong light intensity very well with no major stress signs visible under the current setup ☀️
Visually the plant looks healthy and heavily resin-covered, especially on the upper flower sites ❄️
The tallest cola still dominates the structure while the side branches continue slowly filling in. Buds are now clearly transitioning from early flower into proper stacking mode 🚀

Likes
34
Share


@Gassedupfromthemaskup
Follow
This week one of the plants has really began looking tropical and the smell is danker by the day. It wreaks of fruity gas in my tent. Everything is basically on cruise control from here. Two of the plants look ready for a flush while the others are a week or two behind. One of the phenos is a good bit behind and was since day one but looks like it will yield a good bit.
🍻🍻
Mid week: I spotted few amber trichomes and started flushing on two of the 5 girls. One is way behind and two are maybe a week behind. 👌💨 Ready for these beauties to finish😍
Likes
52
Share


@Stick
Follow
Last days on earth for this beautiful monster, hopefully she should be ready by the end of the week. Trichomes are more and more milky, I gave the coco a good flush, and she's fading out nicely.
Thanks for stopping-by and stay tuned for the harvest update 👌


Likes
27
Share
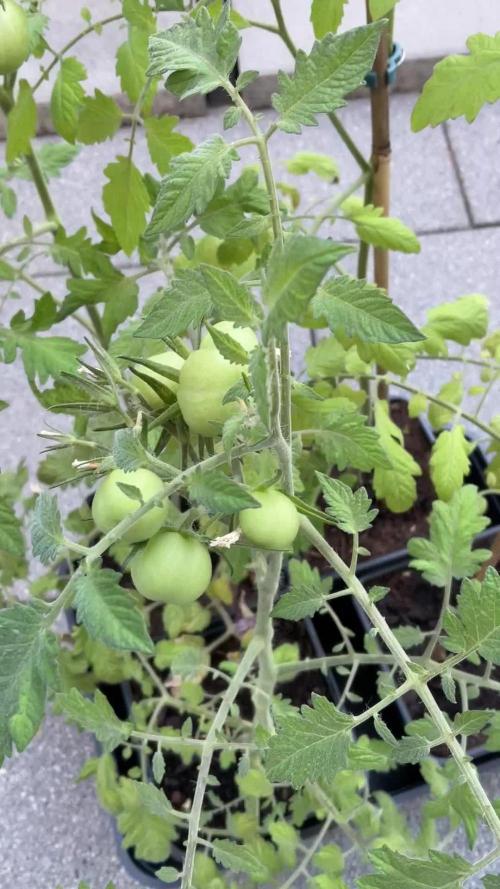

@Tower84
Follow
The tomato plants will finally move outdoors permanently on Tuesday and will be transplanted into their 30-liter pots. Next year, my plan is to start the tomatoes later and use 3-liter pots during the early growth stage.
Likes
59
Share


@Salokin
Follow
These ladies continue to develop very nicely and lucky stopped stretching pretty much in the beginning of this week and the buds are forming super nicely. Since I also don’t observe a stretch in flower anymore, I decided to feed pk13/14 for the next week. It continues to surprise me how hungry these autos are, much hungrier than my glookies fro example. Unfortunately I realized that the plant on the very right of the box produces much smaller buds than the other two. I am pinning that on the fan right above her, so have pointed it slightly higher, but I guess the damage is done:(.
Likes
13
Share


@Luv2Grow
Follow
This strain took really well to LST and didn’t seem fazed by the training at all. She did become a really heavy drinker about two weeks or so into flower and she definitely seemed to want more nutes than usual. I believe I’ve got two more seeds so will be running this one again if the smoke is worth it.
Likes
4
Share
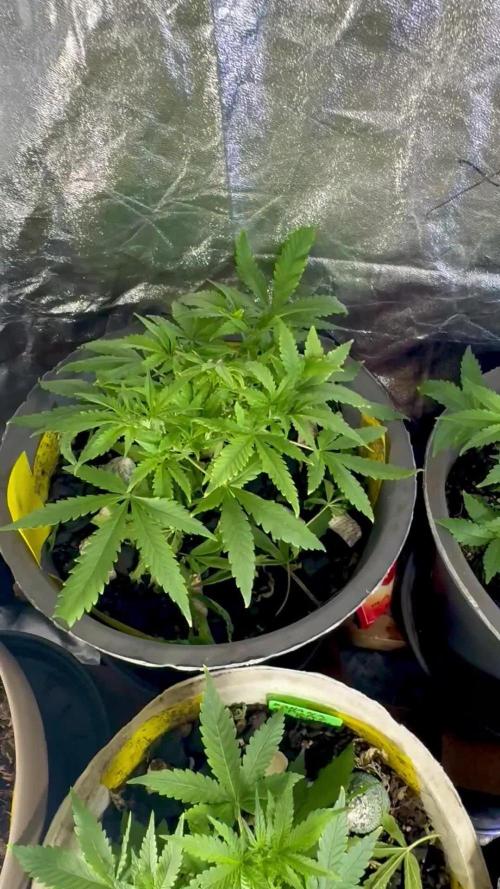

@Simba247
Follow
Week 4 over for wa girl.
Soil PH was off this week and the ppm levels was way too high after I tested my runoff.
So this week was mainly about flushing and trying to get the medium back to ideal conditions.
So far she’s recovered well and been cruising ever since.
There are a lot of new undergrowth so I need to lightly defoliate and tuck in some leaves to allow even light distribution on the canopy.
AC got worked on too so my temperatures have drastically changed. I could see stress on a few of my plants already.
Really interesting plant though, the smell has started coming out and it’s lovely 😍
Let’s see how everything goes.
Take care beautiful people
Likes
14
Share


@StickyFingah420
Follow
Crecimiento fuerte y vigoroso, una planta muy linda y resistente a las bajas temperaturas. Se comportó bastante bien con la dieta de nutes que le dí ya que no sufrió carencia ni bloqueo de nutrientes.
Espere cogollos de alta calidad cubiertos por una gran capa de resina aromática.
Su humo es relajante y sabe muy rico a berries y un fondo diésel terroso.
Muchas gracias a la gente de Fast Buds por la oportunidad de cultivar genéticas de alta calidad.
Ahora solo queda esperar a darles un buen curado y así catar toda la paleta de sabores y aromas en su máximo esplendor, hasta entonces!.
Likes
11
Share


@Harvi
Follow
In general, similar to the autoflowers, we collected at most a quarter of the total volume. We'll take it back and do the trimming on site.
Of course, you're interested in the numbers. In total, there were 14 trips to the plot. Mostly, we focused on weeding and foliar treatment. We harvested approximately 15 plants (10 autoflowers and 5 early bloomers). Altogether, we filled 4 containers each holding 6 liters. Each container fits 350-400 grams, which means there's about 1.5 kg in all the containers, plus a 2.5 kg bag of good trim.
Approximate yield per plant (inflorescences with a small amount of leaves!):
Early bloomers: around 150-200 grams per plant (we didn't collect the fattest buds because, unfortunately, they got moldy, so the numbers are approximate).
Autoflowers: around 70-90 grams per plant.