
Likes
Comments
Share


@cannacat777
Follow
8/26 - sporty looking great, praying hard! Posh is working on it. But look who finally showed up to the party! I’m calling her Baby spice. She sprouted 12 days after going in the soil. Way to be a fighter girl!
This is going to be a tricky thing to manage I feel like my gals are tracking a week apart. I’ll keep this journal’s timeline on sporty spice. -1 week for posh and -2 weeks for baby spice. spice girls let’s grooooow!
8/30 - exactly two weeks from sprout for Sporty and Posh. Pretty wild how big a difference there is between the two. Baby is getting her footing. Now.
Sporty already pushing 4-5 nodes and I saw a tiny root through the drain hole. Wanted to pot her up! About 8 cups pro mix, one cup perlite. About 1.5 tbs of Gaia green 4-4-4, some worm castings and sprinkled mycorrhiza around where the rootball would be. God speed girly!
9/3. Potted up Posh today. About a half gallon pro mix, plus about 1.5 tbsp of the Gaia green 4-4-4. Plus about a cup of worm castings, perlite, and mycorrhiza. Sporty is looking very happy, 5 nodes and counting. Added back my second light, let’s go girls!!!
9/5. Wrapping up week 2 here, so far I’ve been really impressed with the pro mix Gaia green and soil support so far. The girls seem happy and healthy. See you in week 3!


Likes
3
Share


@WeedM8
Follow
Hello m8 welcome to this journey with me in this diary will have very interesting strains hope u find something useful
O.G. Kush Titanium
- [ ] 1st week Veg: germinated in substrate lighting very close so it jets medium high humidity after the 3rd day they started sprouting
- [ ] 2nd week Veg: this week my ventilator broke down and as the temperature stayed very warm nothing developed much
- [ ] 3rd week Veg:fortunately this week i had fixed the ventilation and the temperature has go down a bit allowing the little plants to develop and reinforce
- [ ] 4th week:very good developments in this week I already started feeding a bit two times but i didn’t have to…once was enough
- [ ] 5th week Veg:this week they were very strong green i only had to water them good and keep the ventilators going no stop .They have good hight already ,but as i have to strains together. I want to transplant them when the hight of the other one have stretched… I’m thinking to transplant next week if not the next one
- [ ] 6th week Veg: this week it went great fortunatly i dont have pests that eat my buds i’ve givven a fed once the substrate is very rich already the plants streached very well i will transplant today so be ready m8 i cant wait to show you the progress
- [ ] 1st week Fl:they started stretching and looking very healthy just transplanted
- [ ] 2nd week Fl this week I’ve been away i had a friend taking care of them they stretching very well i hope that she starts putting energy into the flo
- [ ] 3rd week Fl:they are streaching very well ..getting the light very well
- [ ] 4th week Fl:
- [ ] 5th week Fl
- [ ] 6th week Fl
- [ ] 7th week Fl

Likes
19
Share


@Naujas
Follow
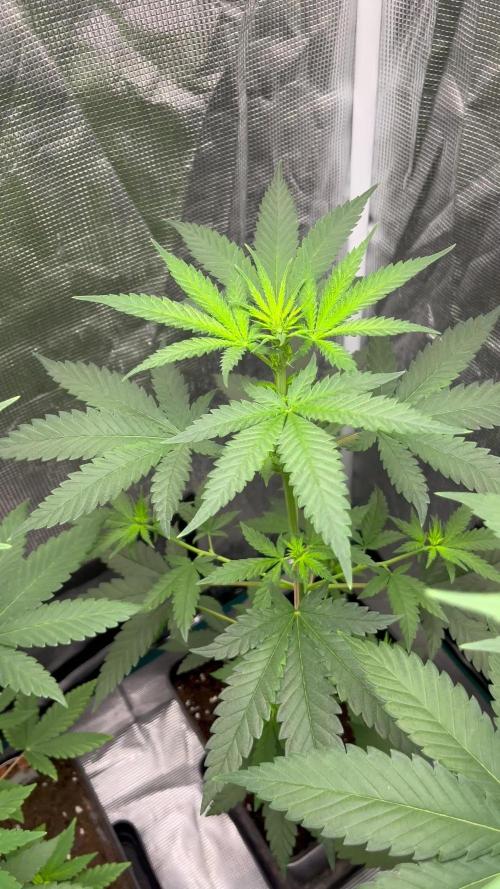
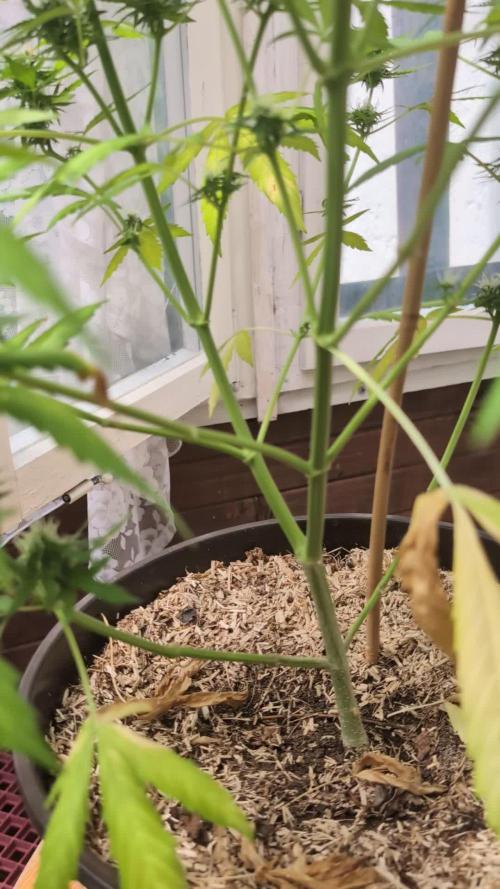
I cleaned up the unnecessary leaves :) so far it looks perfect to me :)!!!! I hope for good weather conditions and a good finish, the update will be in about 2-3 weeks :)

Likes
9
Share


@NanoLeaf
Follow
End of Week 8 (First week of flower)
Increased the CO2 to 1200ppm and the ladies love it, already started stretching within the first 3 days of flower which shows that CO2 definitely boosts the grow cycle of cannabis.
The main top-sites are popping up everywhere and everything looks evenly spread out. I defoliated again because the fan leaves are growing so fast and blocking bud sites. I also did one last lower canopy maintenance and removed small and stalky bud sites and stems below the trellis net to make sure I get maximum energy distribution to the main colas.
I also added some GHF BioEnhancer to make sure the soil-microbes are happy and that the plants reach their maximum potential.
Pest Report: EXTERMINATED!
Thrips VS Ladybugs VS Neem Oil...
I decided to fight fire with fire - I purchased Swirski-Mites from Koppert (They are beneficial insects that feed on the eggs and larvae of thrips and other unwanted pests). As for the adult thrips - I got very lucky and found about 10 Ladybugs in my garden and decided to introduce them into my grow room as they will feed on adult thrips and any other unwanted pests.
Then to be extra sure I know that neem oil hinders the life cycle of pests like thrips causing them to stop colonising in my grow room. So I sprayed the ladies every day during the dark period to make sure there are no pests that I or the Ladybugs have missed.
Mission accomplished. No more wilting and definitely no more thrips.
Likes
22
Share


@donovanliam
Follow
Not much to say. Buds developing nicely. Just the stems tied lightly away from center letting more light and air into the middle. Im really happy with the look so far.


Likes
14
Share


@Phurlax
Follow
Day 36: just tucking leafs
Day 37: cleaned and added new charcoal to my carbon filter lots of better airflow now old one was several years old
Day 38: watered 1 gal of ph water
Day 39: looking good lots of trichomes been reading that uvb light helps thc production so I ordered a bulb will have in the next few days
Day 40: tucking leafs
Day 41: watered 1 gal of ph water with .25 tsp tiger bloom.
Day 42: decided to water 2 more gallons of ph water just to be safe for any nute burn
Likes
37
Share


@weedgrowlover
Follow
Its a soft smoke, But feels good and relaxed
This strain will be done a next time..
Its a smoke you will not forget
--------------------------------------------------------------------
This is the last one thats still going on.. I have cut 11 and I gave 3 away..
But this lady is a hard to get... Hopefully I can smoke her before 2017
Processing
Likes
21
Share


@LittleBigTrees
Follow
I've cut down on grow at this point as the soil seems to have a lot.
I'll feed for another week then think about Flushing.
The kalimist will keep getting fed bloom and grow as its only been flowering for about 3 weeks due to taking longer to force flower.


Likes
6
Share


@DrFabrizio_85
Follow
Still pushing branches under the net. I give sugar royal once a week


Likes
2
Share

@eldruida_lamota
Follow
Vamos familia, actualizamos la primera semana de floración de estas Runtz de MSNL.
La temperatura que estuvo entre los 24-26 grados y humedad dentro de los rangos correctos.
Cambiamos esta semana el ciclo 12 horas luz, 12 oscuridad, estiraron bien y ensancharon bastante también, el color es verde sano.
Se nota que los nutrientes de la marca Agrobeta hacen sus funciones.
También realicé una poda de bajos que yo si las veo necesarias para explotar después la flor.
- os dejo por aquí un CÓDIGO: Eldruida
Descuento para la tienda de MARS HYDRO.
https://www.mars-hydro.com
Hasta aquí todo, Buenos humos 💨💨💨

Processing
Likes
20
Share


@Silverback_Guerilla
Follow
1/21:
I rotated the edge plants and foliar fed with big bloom a few times today.
1/22:
I fed them about 3/4 gallon each after top-dressing their pots with a heaping tablespoon of happy frog cavern culture( bat and seabird guano). That will make some P and K available to them over the next 2 weeks as they begin to flower. Aside from that, I went with full strength veg nutes because I'm still seeing some yellowing and som cal-mag deficiencies. I also added some more liquid molasses. They're gonna need the energy as they start their stretch. I foliar fed a few times throughout the day with big bloom.
1/23:
EXPLOSIVE GROWTH last night...love it...everybody is stretching...pretty sure the 14/10 photoperiod is working!!
I foliar fed with big bloom a few times today.
1/24:
Definitely sativa. Neither one liked the FIM job..
1/25:
I tied down the mains on both of them and watered with a half-gallon each containing bembe, cal-mag, signal, armor si, and humic acid.
1/26:
Re-tied the mains again,,,strong branches!
1/27:
That's it for week #5!

Likes
3
Share

@GoodTimesOrganics
Follow
Die Pandora legt allmählich an Dichte zu und die Buds werden immer kompakter. Im Schnitt performed die Pflanze etwas besser als die Skywalker OG Auto.
Es sieht auch so aus als würde die Pflanze etwas mehr Gewicht entwickeln. Dafür benötigt sie insgesamt länger als ihre Kollegin.


