


Likes
Comments
Share


@Earthsower
Follow
She did well but the main problem was under feeding. She just wasn’t getting enough water from which she suffered tremendously as the growth through the vegetation was almost at a standstill. The plus side is that she is quite resilient.


Likes
11
Share


@GREENPHOENIX6262
Follow
*Week 4 Flowering 09/17*
Blimburn - Apple Fritter (1) - 47 Inches
Seedsman - Crititcal +2.0 (1) - 47 Inches
Thus far no issues or concerns - Both plants are growing accordingly and are growing vigorously, Bud-sites are coming in heavy. Still growing in length.
*Week 4 Flowering End of Week 09/23*
Both Apple Fritter/Critical+2.0 have appeared to stop growing in length but have expanded in width in regards to the bud site development.
Bud sites are blooming accordingly and trichome development seems to be coming along nicely as well.
Nute feeds have remained the same/Plain water feeds have increased.
*BACK TENT VIDEO ADDED - Apple Fritter (L) - Critical+2.0 (R) - 09/23*


Likes
14
Share


@Belivitez
Follow
29.8. Plants look just amazing! I dont add any nutritions... Just bionova powder nutritions in start which i get from zamnesia 💪 maybe i found right nutritions for my plants
31.8. I will leave those beautys for few days more 😍 i cant wait to taste this buds!
2.9. Another week more and they are done 🤟 so far im impressed 🚀

Likes
115
Share


@DogDoctorOfficial
Follow
Cherry Cola's Grand Flourish in the Floral Symphony
Greetings, fellow cultivators! Week 4 has unfurled its petals in the mesmerizing floral journey of our beloved Cherry Cola Auto. The tent is now a stage for a grand botanical opera, and our green queen stands as a testament to the wonders of cultivation. Let's dive into the details of this flourishing spectacle!
As we venture deeper into Week 4, the floral elegance of Cherry Cola Auto takes center stage. What was once a lush bush has evolved into a breathtaking beauty, a true testament to the success of our horticultural endeavors. The topping technique and the release from training supports have paved the way for a regal display of colas and buds.
The decision to set our Cherry Cola free from the constraints of training supports continues to be a triumph. The tent is now a realm of bushy brilliance, and our green queen stands tall, a majestic presence commanding attention. It's a living masterpiece in perpetual motion.
The echoes of our topping tales from previous weeks resonate in the structure of Cherry Cola's colas. Each topped branch has evolved into a flourishing bud-laden entity, contributing to the overall grandeur of our green canvas. The decision to embark on this topping journey has truly paid off.
Our nutrient symphony, now joined by the magical touch of Potassium (K), continues to fuel the botanical brilliance. P-Boost and Topbooster, with their orchestration of phosphorus, organic grace, and now potassium magic, create a harmonious dance of blooming processes. The buds are becoming robust, laden with fibers, resins, and sugars, promising a top-tier end product.
Every day, the visual majesty of Cherry Cola unfolds with new growth, showcasing the resilience and vitality she possesses. It's more than a plant; it's a living testament to the artistry of cultivation.
As we conclude Week 4, Cherry Cola Auto stands as a botanical opera in full swing. The tent is alive with the grand flourish of a floral symphony. Stay tuned, fellow enthusiasts, as we eagerly await the next thrilling act in the Cherry Cola Chronicles!
Genetics Cherry Cola Auto @Fast_Buds @fastbuds_genetics_official @fastbuds_official @fastbuds_espana
Nutrition: @aptusholland @aptus_world @aptus_
Love, Care, and Attention: @dogdoctorofficial
As always, thank you all for joining me on this journey, for your love, and for it all. My horticultural odyssey would never be the same without you. Your love and support are cherished, and I feel both honored and blessed to have you in my life
Friendly reminder all you see here is pure research and for educational purposes only
Growers Love To you All 💚 💚 💚

Likes
6
Share


@rvabudman
Follow
Cant take my eyes off my plant. This is my second round of growing and I am the type of person who learns through failure (not gonna upload the pics of the first round plants lol). The buds are thickening up very nicely. Hoping to get between 3-4oz , the strain is high yielding but I have a smaller tent. My auto yielded 2oz with the same space (2 plants in one tent splitting the space), but the buds definitely didn't develop as well as these buds.


Likes
9
Share


@Hypnogrow
Follow
Quarter Pounder and Skywalker are probably over due for final flushing. Squanch Queen is doing very well and looking to go 9 to 10 weeks. King tut and Alien Technology doing well. However, i did a spray of insecticidal soap due to seeing a couple small holes in a few king tut leaves. Next day plant was shocked and lost tons of leaves to burn. This plant did this once before with the same spray, the others no problem and didnt connect the two til now. Will let her veg back to health and flip to flower once shes healthy again and the autos are done.


Likes
4
Share


@Adrrys
Follow
10 semanas desde germinación día 11 de abril hasta corte viernes 25 de junio (día 69 corte) cultivada en maceta de 11 litros con tierra plagron all mix, inicio de floración en semana 5, día 20 de mayo

Likes
9
Share


@treeofsong
Follow
My first soilless grow, i hope everything is gonna be alright
They got out 03/07/2018
I started watering 0,4 l per plant with 167 ppm on the 4th day from seed, i used 0,210 ml/L Floramicro; 0,420/L FLoraBlomm; 0,05 ml/L CAliMAGic
Likes
6
Share
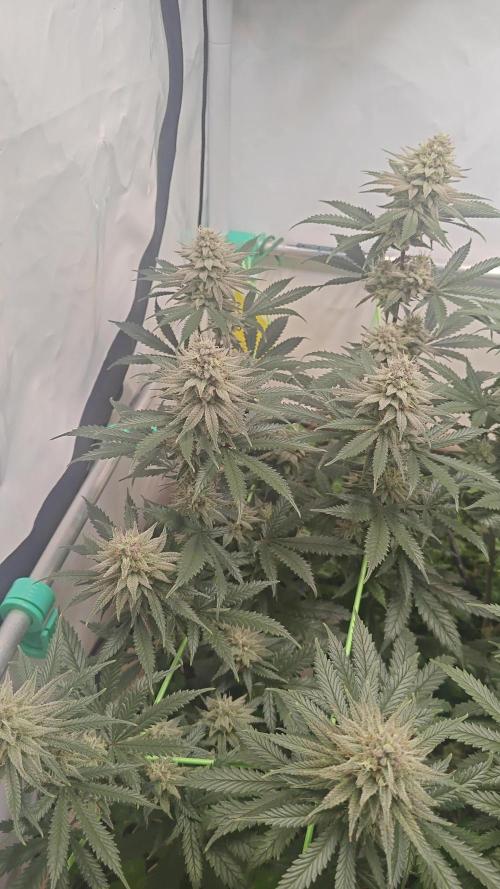



Processing
Likes
8
Share


@Gs_13
Follow
During this week the plant start stretching more and more every day at the end of that week reached 76cm,she had a nutrient lock this week but I flushed her with PHed water to clean the soil from salts and unused nutrients ,seems that that worked, also pre-flowering signs shown ,I am going to change on flower nuts next week.


Likes
40
Share


@BudBoutique
Follow
! this is my current status, gonna upload my last veg weeks within the next week - got a bit busy around Spannabis - thank you for your understanding! 💚
Welcome to Bud Boutique Grow Diary - really appreciate all your love and support :)
Don't forget to check out my other current grows!
🗓️ This Week:
- still lack of nutrients, which got worst
- Day 24: attaching once a week APTUS Foliar with Regulator & Nutrispray with the amazing CannaFogger by Petra Grow
- Day 26: as you can see its the only plant out of 9 in this run and I really can't catch up with her that well. Giving my best over the next week.
- Bud sight development accordingly slow
Thank you for still staying with me 💚
___________________________________________
--- 🌱 Strain (Sponsor) ---
🏷️ Wedding CheeseCake by Fast Buds
https://2fast4buds.com/seeds/wedding-cheesecake-fast-flowering
--- 🥗 Nutrients and Feeding (sponsored by APTUS: APTUS Ambassador) ---
🍸 APTUS: full nutrient schedule extreme
-- Regulator, N-Boost, P-Boost, CaMg-Boost, K-Boost, Allin1 Liquid, Startbooster, Topbooster, Enzym+ every feeding
-- Fulvic-Blast, NutriSpray as Foliar each once a week
🔗 https://aptus-holland.com/
--- ♻️ Grow Control (Sponsor) ---
TROLMASTER: TENT-X + LM14 Light Adapter to dim/sunrise/sunset lights + Temp & rH Sensor all remote on App
🔗 https://www.trolmaster.eu/
--- 🚿 PetraGrow (Sponsor) ---
CannaFogger Foliar Spray
🔗 https://www.petratools.com/product/petragrow-cannafogger-atomizer-new-mini-fogger
--- 🏭 Grow Setup ---
💡LUMATEK Zeus Pro 600
* 🏠🌿 Indoor: Homebox 120x120x200cm (4x4)
* 📐🌀 PrimaKlima exhausting Fan 1180m3/h (running on 60-80%)
* 🌀 Can Light Filter 800m3/h & 1x Fanbox 1x Dyson fan for Air circulation
🔗 https://lumatek-lighting.com/zeus-600w-pro-29/
🔗 https://primaklima.com/de/shop/ventilatoren-de/ec-ventilatoren/pk160ec-tc/
🔗 https://canfilters.com/products/filters/
All Likes and comments are highly appreciated!!!
👨🌾 don't forget to check out my Instagram for daily educational content: budboutiquee
- Bud Boutique
Likes
13
Share


@HeartStrong_Garden
Follow
So far she looks like she's doing well. I'm not getting any leaf curling from either over watering or nutes so I'm happy with that. Just some minor leaf discoloration. I feel like she exhausted her nitrogen early.
Likes
35
Share


@Master_weeda
Follow
Bonjour à tous les padawans et les maîtres jedis
Pour cette semaine je prévoit de pratiquer comme technique spéciale le LST et juste un arrosage.
Pour cela comme à mon habitude j'attend le cinquième noeud ou que je juge la plante robuste.
Je profite que cette semaine qui va être relativement calme pour faire un LST appliqué et vous faire un rappel de ce qui est pour moi la meilleure technique pour arroser une autofloraison et la façon dont je pratique le LST.
En suivant ces quelques simples conseils vous obtiendrez un résultat optimal tout au long de votre culture :
Le cannabis est une plante qui n’aime pas recevoir un léger arrosage en continu. Il est impératif de l’arroser en grosse quantité, puis d’attendre que la terre soit bien sèche avant d’arroser à nouveau!
Pour calculer la quantité d’eau nécessaire à chaque plante, suivez cette règle :
Le volume d’eau à donner lors de chaque arrosage doit représenter au moins environ un quart du volume du pot !!
Exemples :
pour un pot d’1L, donnez 0,25L d’eau à chaque arrosage pour un pot de 4L, donnez 1L d’eau à chaque arrosage pour un pot de 12L, donnez 3L d’eau à chaque arrosage pour un pot de 30L, donnez 7,5L d’eau à chaque arrosage !etc…
Pour donner un tel volume d’eau, il est souvent nécessaire d’arroser en deux (voir trois) fois, lentement et uniformément sur toute la surface. Disposez de bonnes coupelles sous les pots, celles ci se rempliront d’eau qui remontera dans le pot par capillarité en moins d’une journée. Il est également très important d’utiliser un bon terreau de qualité, avec une bonne capacité de rétention d’eau mais qui assure également un bon drainage (celui ci doit contenir de la perlite, et/ou de la coco, etc..)
Il vous faut alors maintenant attendre quelques jours en sous-pesant régulièrement les pot avec vos bras. Quand ils seront redevenus très légers, vous pourrez arroser à nouveau !!
En effet, comme l’eau pèse beaucoup plus lourd que la terre, un pot gorgé d’eau pèse plusieurs fois le poids d’un pot d’une plante prête à être arrosée. Avec un peu d’entraînement, vous apprendrez donc très rapidement à sous-peser vos pots pour savoir quand une plante a soif.
C’est une technique à la fois très facile et très efficace, et qui peut être appliquée à toutes les plantes en pots !
En arrosant de cette façon, en général vous devrez arroser vos plantes tous les 3 à 6 jours.
Pour cette semaine 3 au jour 17 ma plante fais 12 centimètres et son cinquième noeud apparaît je décide donc de pratiquer un LST sur ma plante.
Pour ce j'utilise du fil de fer galvanisé que je plante directement dans le substrat en faisant attention de ne pas endommagé les racines car n'oublions pas que ce qui pousse dessus pousse aussi dessous.
Jour 17 je pulvérise du une solution composé d'une cuillère à café de savon noir mou dilué dans un litre d'eau en prévention d'éventuels nuisibles.
Je corrige mon LST suivant la pousse de ma plante ...
Pour ma par c'est la manière dont je procède. Comme promis petit rapel de:
Quand commencer à appliquer la technique LST
De nombreux cultivateurs commencent la manipulation dés que les plantes possèdent entre 3 et 6 nœuds ou une paire de feuilles. Durant cette première étape de la croissance, le tronc encore flexible est pliable sans risque qu’il ne se casse, même si au fur et à mesure du développement de la plante il sera de plus en plus difficile de le plier. Nous pouvons continuer à guider la croissance des branches durant toute la culture, même durant la floraison, ce qui pour cette étape représente un grand avantage face à la taille, qui n’est pas du tout recommandé une fois que la formation des têtes commence, cela stressera en effet la plante, ce qui aura pour effet de retarder la récolte.
Comment appliquer la technique de guidage LST
Si nous sommes prudents, la flexibilité naturelle des fibres du cannabis permet de plier leur tronc et branches avec une relative facilitée, même durant la floraison des plantes.
En utilisant une corde fine, nous pouvons accrocher la pointe de la plante à la base du pot par exemple ou à un tuteur que nous aurons planté dans le substrat. Nous plierons le tronc avec précaution et nous le fixerons avec la corde, à partir de là, nous pouvons augmenter progressivement la tension de la corde, chaque jour un peu plus, jusqu’à obtenir la position souhaitée. Soyez attentif à la réaction de la plante, essayez de ne pas appliquer trop de pression sur la corde et rappelez-vous que la flexibilité des branches peut varier d’une plante à l’autre.
Pour obtenir de meilleurs résultats, il suffit de suivre quelques règles simples. Pour commencer, nous devons choisir une corde fine mais pas trop pour ne pas blesser les troncs au fur et à mesure qu’ils grandissent et qu’ils deviennent plus gros.
Nous pouvons utiliser des crochets en plastique souple ou de n’importe quelle autre matière flexible pour éviter d’endommager les plantes. Spécialement en intérieur, utiliser des cordons en plastique de couleur (voir les diaries de @Silky) est très pratique pour voir facilement les accroches et faciliter le travail au milieu du réseau formés par les cordes, les tuteurs, les mailles ou les supports que nous aurons dans la culture. Bien entendu, en culture extérieure et surtout en guerilla nous ferons juste le contraire et nous utiliserons des matériaux de couleur qui n’attirent pas l’attention pour que notre jardin reste discret.
Pour stresser les plantes au minimum, la mieux est de réaliser ces manipulations le soir ou juste après que les lampes en intérieur s’éteignent, ce qui leur permettra de se remettre durant la nuit. Normalement, le jour suivant nous pourrons observer comme les pointes des branches que nous avons pliées se dressent de nouveau vers le haut à la recherche d’une source de lumière.
Que la force soit avec vous
Likes
14
Share


@pifflestikkz
Follow
Day 65
Day 30 Flower
Seeing nice stretching and spacing on nodes are still kept tight, strong but small structure.
Nice hues coming through on the tops fans.
Minor lollipopping and defoliating done today.
Not much else to say,
Stay high my growmie ✌️🚀💚
Day 68
Day 33 F - Final lollipopping and defoliating today. She really is starting to develope. Node spacing is nice, bud sites forming, nice hues and glistening.
Applied feed today.
Small compact looking plant, but hoping to see them top shelf grade dense nuggets with this technique and strain 😍- we can hope

Likes
42
Share


@GODSGIFT_2005_JM
Follow
⛺️ MARSHYDRO
💡VIPARSPECTRA
🍼GREENHOUSE FEEDING BIO GROW
🌱 WEEDSEEDEXPRESS

Likes
13
Share


@FUH20
Follow
Alaskan still growing don't see much of a stretch
Speed plus 1 started to pre flower and stretched a good amount. 3 main sites
Speed plus 2 flowering started to show. Had 5 shorted sites that has not flowered or pre flowered
Came to terms with I might harvest total 10-15g for all 3 plants.
Trial and error taking it as a learning experience
Likes
10
Share

@GoodTimesOrganics
Follow
Welcome Back!💚
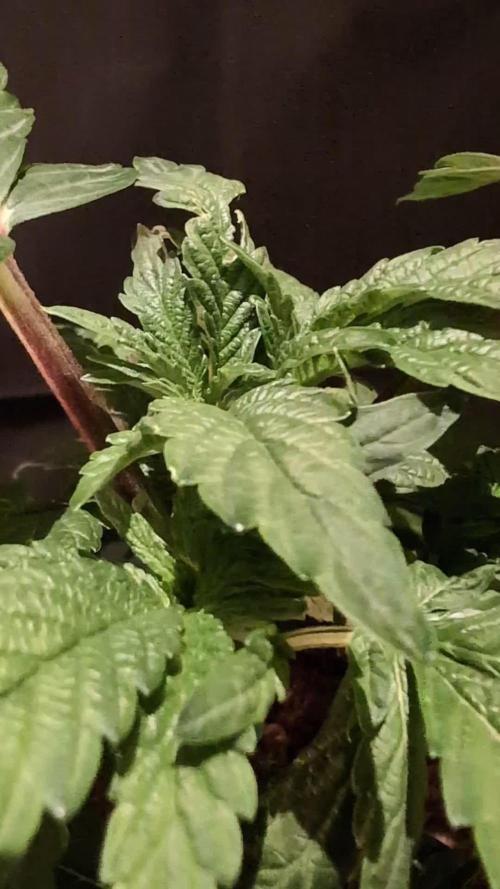
Nach der fünften Woche des Wachstums entwickelt sich die S Apple Apple durch das topping etwas gehämter.
Scheint so, als hätte sie das nicht so gut vertragen / kann aber auch sein, dass ich sie zudem etwas Überwässert habe.
Daher habe ich die Pflanze nun ein paar Tage nicht gegossen und langsam erholt die sich etwas.
Allmählich ist eine reguläre Triebform erkennbar, dennoch bilden sich die Triebe sehr langsam und eng anliegend aus.
Daher habe ich ein paar Beugungselemente an die Seitentriebe angebracht.
Sie fasziniert mich sehr und ich bin so gespannt, ob sie dann auch ordentlich so die Triebe ausbildet.
Ich bin gespannt, wie sich die Pflanze entwickelt.
Diese Woche habe ich die Pflanze zudem noch mit Orgatrex gegossen..
Die Umgebungsgegebenheiten sind OK:
—————
🌞 Temp: 21°C
🌚 Temp: 18°C bis 19°C
💨 RH: 54%
VPD: 0,85 kPa
—————
Viele Grüße 👋
Likes
4
Share


@AustinRon
Follow
OG 4Q24 Flower Week 9
Orangegasm (Fem) [ IRIE Genetics ]
12/12 @ Bolt (Day 21)
Germination: 20 November 2024
#3A Earliest Harvest Date: 9 February 2025
#3B Latest Harvest Date: 19 February 2025
_________________________________________
Start of Week: [Wed Feb 5, 2024 CR2 4Q24 57:F:8:1]
End of Week: [Tue Feb 11, 2024 CR2 4Q24 63:F:8:7]
OrangeGasm Fertigation:
- MAX: EC: [ 2.4, mS] #Ramping Down
- LightIntensity MAX: [ 850, µMol/m2/s]
______________________________________
OBJECTIVES
- Ramp EC from 2.4 - 1.0
- Start rolling off Primer A&B/Silica Skin to Resin Bloom . . .
__
Wed Feb 5, 2025
OG 4Q24 57:F:8:1
EC: 2.3
Notes:
#5 looks like a 60 day plant, if so - consider Saturday Harvest …
Runoff
- [x] Amount: [ 0.125 , gal]
- [x] EC: [ 4.4 , mS/cm]
- [x] EC∆: [ 2.5 , mS/cm] # Fried Yet? ;-}
Harvest Dehu
- [x] Amount: [ 1.5 , g]
__
Thu Feb 6, 2025
OG 4Q24 58:F:8:2
EC: 2.3
Refresh Reservoir
- [x] Amount: [ 2 , g]
- [x] EC: [ 2.3, mS/cm]
- [x] Primer A&B: [ 31, ml]
- [x] Silica Skin: [ 15 , ml]
__
Fri Feb 7, 2025
OG 4Q24 59:F:8:3
EC: 2.3
__
Sat Feb 8, 2025
OG 4Q24 60:F:8:4
- [x] Disassemble, Clean Reservoir and Pumps, Reassemble
Refresh Reservoir
- [ ] Silica Skin: [ 15 , ml]
- Dropping Silica Skin due to (sparse to medium) granular precipitate
- [x] Amount: [ 6 , g]
- [x] EC: [ 2.1, mS/cm]
- [x] Primer A&B: [ 100, ml]
EC: 2.1
@1900 - Clear Manifold Filter. (Mainline should be cleared on 1845 feed
__
Sun Feb 9, 2025
OG 4Q24 61:F:8:5
- [x] Dilute to EC 2.0
- Flooded Tent, 2 Gallons PLUS of Runoff. Happy Plants.
- Shout Out Shop-vac. ;-}
EC: 2.0
__
Mon Feb 10, 2025
OG 4Q24 62:F:8:6
EC: 1.8
HAND APPLICATION
Prepped One Gallon of 12-8-7-5 @ 1.8 mS/cm w/ PhotoSynthesis Plus, SLF-100
Reclaimed Dehu Water, ~2 Gallons
Refreshed Reservoir, 2 Gallons Rooted Leaf Hydro no Silica Skin, EC: 1.8 mS/cm
Reduced watering to 5 min, then 1 - 1 -1 -1 -1 -1 -1 -1
(It’s not like they’ve been under-fertigated)
__
Tue Feb 11, 2025
OG 4Q24 63:F:8:7
EC: 1.7
- [x] EC: [ 1.7, mS/cm2]
- [x] Refresh Reservoir
- [x] amount: [ 2.5, gal]
Runoff
- [x] Amount: [ 0.5, gal]
- [x] EC: [ 3.6, mS/cm2]
- [x] EC∆: [ 0.9, mS/cm2] # Better than 2.5!
PLANT POSITIONS
3 5 1 7
4 2 6 8
