
Likes
Comments
Share


@Esmoki_La_Cabrona
Follow
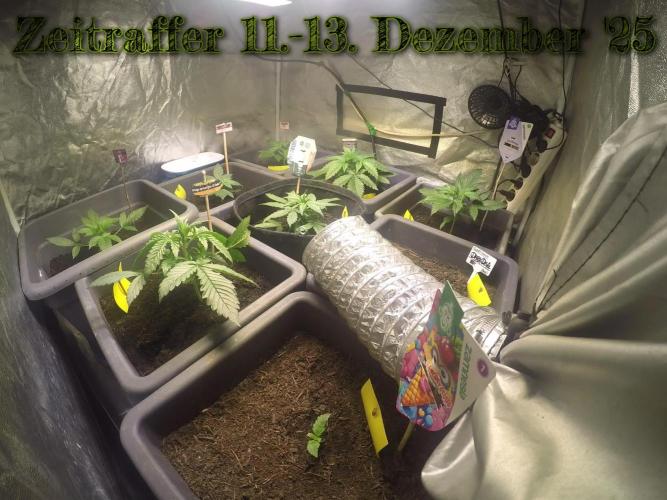
September 2, Day 43. I removed the trellis because it was annoying and I realized the spaces were too large and that's why it felt clumsy... Kabob sticks are doing the trick so far.
As I was clipping some leaves to prepare for flowering, I noticed roots growing through the bottom of the pot. I hate transplanting plants so I sat the current pot in another pot that was filled 30% with additional coco coir that had been prebuffered with seedlings strength nutrients to avoid shock. I am confident the roots will continue their journey through the first pot and into the additional space below. Now to observe for a few days, aiming to switch to flowering next week.
I have removed at least 30 leaves throughout the last week and she is still looking so bushy and healthy... Thanks Recharge. I ordered Big Bud by Advanced Nutrients and I look forward to using it during flowering.
SUPER MEGA HAPPY UPDATE
Day 44, September 3. I clipped a branch and planted it in a prebuffered with seedling strength nutrients rockwool pellet... I baptized her Kaboom Baby.... And. She. Survived!!! Ahhhhh!!! So freaking happy! I am going to start a second grow under this diary called Kaboom Baby, La Reinita Africana.
Update, Day 46, September 5, 11am. Fed and watered with all nutrients except Recharge. Kaboom Mama is growing wild and free. I had so many training plans but I like her this way.
As always, thank you for stopping by. If you have any thoughts about this grow, please leave them below. Happy growing and massive yields to all 💯🙏💚

Likes
52
Share


@TheFoxFarmer
Follow
Week 8 Flower
Last full week of flush (plus a couple days). She was taken down on Day 58 Flower after she'd faded enough. Most of her fans had died off and been plucked. I always cut them down approx half hour before the light is due to turn on. This is so the chlorophyll production is at its minimum, giving you the best flavour and smoke.
She's a stunning girl with fat juicy fruity cola's! 🍇🍓
Thanks for following and happy growing! 🐺

Likes
15
Share


@38PLAN
Follow
Siamo arrivati alla 10 settimana,una pianta ha incominciato il flush,quella al centro di destra.i fiori delle piante più avanzate sono grassissimi e ricchi di resina,questa pianta é davvero ECCEZIONALE,daremo qualche altra settimana di acqua e raccoglieremo la prima!ricordiamolo sono tutte autofiorenti.GORILLA COOKIES AUTO

Likes
20
Share


@SecretTreasures
Follow
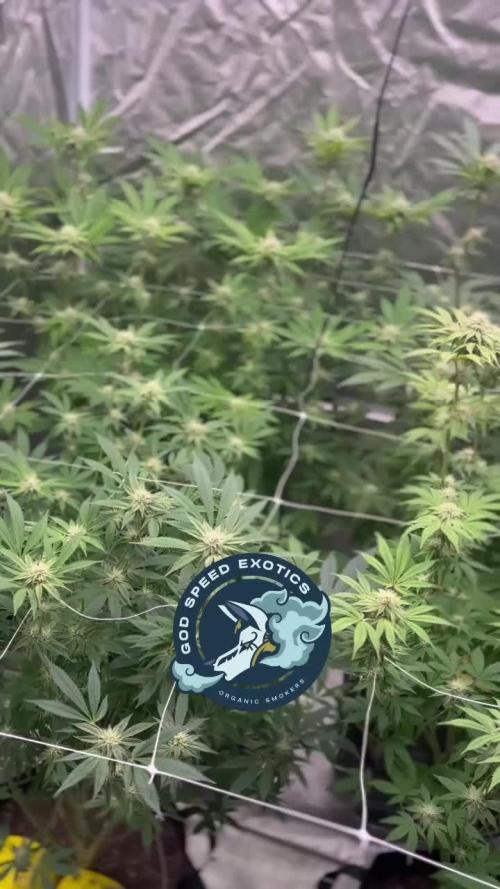
All the plants have been given another good stretch and the flowers are constantly swelling. The odour is also becoming more intense. One plant of the Hardcore zoap is already getting a lot of brown hairs.
The climate is a little 1 degree during the day and warmer at night, but still steady.

Likes
4
Share


@TopNotchBud
Follow
Well pretty good week I would say, the only issue is we dint really see the total amount of our stuff but it was still great.
Likes
6
Share


@Cannabis4Crohns
Follow
Plant fading and changing colour nicely. Day 77 Trichomes are still milky or clear. Waiting for the first signs of amber Trichomes, at which point I plan to harvest. Day 77 might be the plants last watering depending on the Trichomes in the next few days.
Likes
14
Share


Likes
4
Share


Likes
3
Share


@Mr_Freeze
Follow
(Back Left) Panama Red, (Back Right) Amnesia Lemon, (Front Left) Super Purple 2.0 Pheno #1, ( Front Right ) Super Purple 2.0 Pheno #2


Likes
22
Share


@DeepRootsGrowTrees
Follow
Week #18 GSC By Kannabia
Week #18 Mar 8th-15th
Week #7 Flower
This week she's looking beautiful purple through out the plant the orange in the buds. Stay Growing!! Thanks for stopping by!!

Likes
10
Share


@SnoopyShaggy
Follow
Week is going super well, did notice trichomes are starting to develop more in the coming weeks. Still struggling with watering mainly because i have 3 different strains and i dont know the flow yet.
Watering schedule is thrice a week,
I nutrient feed on sundays, water on wednesday and compost tea on fridays 500ml each pot.
Will be monitoring the trichomes hereafter, today is day 90 from germination, super happy with the results no stunted growth or slow growth.
Will set my harvest day between day 120-150. I am targetting longer harvest time for the purple punch because they didnt fight for the light and bullied by 2 monstrous sativas. Since it is indica dominant, i am going to chop them once i see 70% amber
Likes
11
Share


@Yellabeard
Follow
Here we are at the beginning of week 3 and the babies are thriving :).
This Cherry Cola is growing well and things are as i would expect at the end of week 2/start wk3.
I’m going to be starting LST at some point this week .


Likes
50
Share


@AsNoriu
Follow
Day 36. One girl is shooting the sky other still have that unhealthy look, made my mind - its genetics and i can't do anything.
Girls got second feed, looks happy and hopefully will bring some nice flowers.
Took some leaves down, spread a bit, but most of work will be done next week, if i will dare ;)))
Last time used Root Juice, added Acti-Vera, increased Bloom and Heaven.
Day 40. After last feed, girls got small rusty spots on 4-5 leaves total, cut out cal mag for couple weeks.
Heavy training, its always tricky to decide what to do with Autos and i have almost no knowledge, but i have SPA Queen and Midget aka Margaret ;))) both different, but bushy, had to clear Midget really heavily and still loads future airbuds left, but maybe ... ;)))
Girls drink 3 liters every day, highest rate ever, but i relate it to most powerfull exhaust ever.
Some leaves on both plants got strange mutation, like leaf tries to branch out ... Never seen anything like this. But by height i presume it happend on first feed, late Root Juice aftermath ?
Happy Growing !
Likes
23
Share


@JeyGanesha
Follow
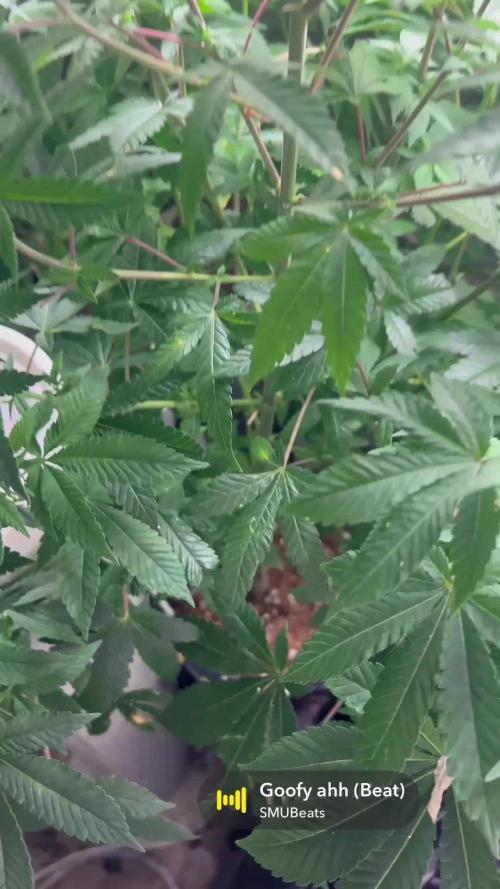
Hanno iniziato la quinta settimana di vegetativa...penso che ancora poco e la passerò in fioritura 😂💪💪💪

Likes
5
Share


@TheBulldozerSicily
Follow
Risultato finale inaspettato! Questa è la prima volta in outdoor, e pensare che le volevo regalare perché non me la sentivo di farle crescere a casa perché troppi vicini di casa, poi mi sono affezionato ed eccole qua, le più grandi piante mai riuscite!! Sono molto contento!!
Likes
16
Share


@Shotiie
Follow
Took some microscopic pictures through the mini microscope and a video. Pretty cool. The microscopic world is so fascinating. Put a plastic ring around the pot today and retied. I literally look at my plants for hours. Love them.

Likes
61
Share


@BillMonroe
Follow
Lights to 11.5 hrs, temps dropped, light raised, let's finish! I think next week it's time to cut them.
More branches are falling over from #2 (back right) and it's yellowing nicely.
#3 (front right) could use 2 or 3 more weeks but I don't think I will take it that long. It's a low yielder but its structure is very sativa. Smells good.
#1 (back left) and #4 (front left) smell roughly the same, #1 makes very heavy branches and dense tops. Its looks are deceiving, hiding its yield under big leaves.
Thanks for the interest. I hope your grow is as lucky as this current one. It has been really fun to experience the different phenotypes of SSH.
Stay tuned for the harvest report. Hopefully I can take some better pictures.

Processing
Likes
9
Share


@Kushizlez
Follow
Day 69 (March 6th)
Just gave everyone their last watering. I’m going to harvest and wash everything tomorrow night on day 70. I‘m not going to do that whole 48 hours of darkness thing because I didn’t see a difference last time I did it. In fact, it made my plant under watered before drying which caused it to dry too fast. Slurricane and cheese will be washed with h2o2 and the rest will just be rinsed off in warm RO water and hung up. Before and after washing I’m going to go over each branch with a flashlight and make sure there is no dog hair or debris in or on the buds. I will be drying in my spare bathroom (that no one uses!) from hangers. Aiming to keep it around 60-62F and 50-60 RH. Hoping for that 10-12 day dry. I wanted to do a full plant hang but the tent got pretty dirty and I would feel more comfortable just cutting and rinsing everything off branch by branch. I’m going to try my best to keep the full plant intact. Got my humidifier hooked up and running RO water because with tap water it deposits calcium and lime all over the buds and walls. For air flow I’m just indirectly running a small usb fan. I’m not worried about air flow in the bathroom honestly. It stays nice and breezy down there anyway.
Got the food grade peroxide and RO water to wash up the slurricane and cheese. Everything except for the cheese and garlic#1 is looking more than done. Trichomes all look pretty well done. Some of them have even burst open. Smells are all super ripe and mature too. Can’t wait to smell each individually in jars.
Next week I will recap what went wrong and what I will do differently next time to keep it from happening again.
(Day 70F) Just got everything chopped, washed and hanging. The vast majority of the PM was washed out but I can still see very small amounts. When they dry out I can shake the branches a bit to get the rest off. At very least it’s sterile now. There is no question I lost some potency while washing but the amount is negligible for a much cleaner product.
I could see lots of dirt and other debris float to the surface of the water after being washed. And no those are not trichomes, those sink to the bottom. I could put that nasty water through a bubble bag and wouldn’t get all that much. Although it probably does remove a lot of the actual trichomes heads. I’ll have to check with the microscope.
Everything is rigged up for a nice slow dry. Temp is sitting at 64 and RH is at a nice 60%.
