


Processing
Likes
Comments
Share


@DILLIGAF
Follow
The Cali connection's PURPLE CRACK
Week 5 of Veg
This Plant is an absolute pleasure to grow , Very lush short internodal spacing with those big ass indica style leaves Simply beautiful 😍
I am trying to keep her as compact as possible because of the 110cm height limit in the tent.
I have a fan blasting her most of the time in an attempt to replicate strong winds which hopefully will help strengthen the stems .
I'll be giving her one more week of veg and then I'll flip the lighting schedule from 16/8 to 12/12
I will also be using Advanced nutes PH perfect from now on as Im out of the Professors nutrients A+B
Thats about it for now 👊

Likes
38
Share


@Cariboo_OG
Follow
Utopia Haze is a rare heavily sativa dominant hybrid (90% sativa/10% indica) strain created through back crossing Brazilian Sativa strains. This tasty little bud took home 1st Place for Best Sativa in the 2008 High Times’ Cannabis Cup and for good reason – with its potent 18-22% average THC level and long lasting cerebral effects, Utopia Haze is one powerhouse smoke. The Utopia Haze high comes on soon after you finish your first toke, hitting you with a strong cerebral lift that infuses you with a sense of hazy relaxation.
Type: Feminised/Photoperiod
Cultivation: Indoor/Outdoor
Flowering Time (days): 70-75
Indoor Yield (g): Up to 650
Feminised Outdoor Harvest Month: October
Feminised Outdoor Harvest Month Week: 3rd-4th week
Aroma: Citrus, Woody, Pungent, Mint
Effect: Cerebral Lift, Hazy Relaxation, Sleepy
Welcome Everyone to the Final Entry of my Utopia Haze Grow !
There is so much to discuss ! I have been extremely busy as of late trying to get this Harvest together, but i am happy to have it here for you now !
I Seriously under estimated the amount of time, help from others, and my own necessary skills to pull this off.. and i still kind of screwed it up lol !
But its worth noting i have never actually done this before and trying to document it during....was extremely hard.
It is next to impossible to work an iPhone with rubber gloves on !
First I want to discuss everything step by step so before you jump straight into the comments on how the end product is so small in "quantity"
Rest assured i am happy with its"quality"...and thats all that matters to me because Life is a journey not a destination! and i have learned so much from this grow that I couldn't be any happy even if i messed some things up :)
But at the very least I hope you read through this entry in its entirety with an open mind and focus more on the process, rather than just the outcome!
I ran out of Ice & i was only able to wash three times..(normally I've heard you should go sometimes 5-6 washes)
Preparation is Key & things will be much better next round :)
Photos 1-22
These are pretty self explanatory but for those of you just tuning in now.. this is what happens to a very happy plant when you don't have the necessary tools to monitor key components of growing cannabis.. Ph, as well as EC levels play a very key role in the outcome of your grow lol that being said I was just able to save this plant by purchasing both tools but that doesn't mean the plant didn't suffer because of the prior events.. This was a Huge reason behind me choosing to turn this harvest into what i would consider
"Solventless Hash Rosin" from "Ice water extracted Bubble hash".
Pictures 23
The idea here is the process of using "fresh Frozen Cannabis" this has been discussed many a time online on such sites as instagram and here on grow diaries as well.. I personally have Never tried the process so i decided to try it out and make a judgement for myself..
Video 24
The Cannabis has now been in the freezer for 72 hours making it very well frozen.. as you can tell i struggled getting it all into the 25u Screen Wash Bag. One thing of note i would do differently is i will de-stem my next batch as i also believe this played a part in the amount of plant matter that escaped through the sieves.
Photo/Video's 25-28
The idea here is "ice water Seiving" & especially with the bags that I am using here that are only have screen material on the bottom portion of the bag it is very important to have spaces in-between the screens to allow the water to pass directly through the screens into the bottom bucket with the least amount of resistance.. because the hash is so extremely temperature dependant if it gets warm on the side of the bag.. it will stick there and not make it to the bottom to become use able product..
29
You do not need to use as much Ice as i used here lol... the idea is to keep everything very cold..i certainly achieved that but at the sacrifice of using so much that i ended up grinding product and producing "contaminants" but in the end they are just plant matter that i would be smoking when i rolled up my joint either way so.. I'm not super disappointed..
But it should be noted that what you want to achieve here is a Layering effect where you have the wash bag between two small layers of ice while the "water current" washes the Trichomes away allowing them to be separated by the screens setup below :)
Before Starting the machine you should allow some time (i.e.;10-12minutes pre soak to allow the product to become saturated) before the first cycle.
By video 32 I have just ran out of ice lol..
Video 33-34
Here I have a tip for you.. to separate the screens that you sieve through.. cut 5 gallon buckets to stretch them across nice and tight.. it'll make scooping your Bubble that much easier ! i learned this from the many "Frenchy" videos I have watched :)
Picture 35
Here in lays the problem for most people.. drying your hash without loosing vast amounts of "Terpenes" whilst also stay ever vigilant against mold !
Thanks to all those videos I've watched on youtube.. id like to think this was one of my most successful parts of this process..
Things to Note; Terpenes start to seriously evaporate at temperatures 68F or 20C
you need to stay as cold as possible whilst bringing the Relative Humidity in the space down into the 40-30% to stay away from that nasty mold !
I used my cold storage room in the basement.. with a dehumidifier running to keep the space at 45% RH & staying at a constant 15c.
All while spreading the hash as thin as possible across parchment paper, on top of the white screens with a fan moving air across both sides of the paper.
Pictures 36-38
These are some macros i took in the middle of my drying session I fell in love with the colour.
Yes i know the black spots are plant material but they will get caught when i bag the hash & squish the oil out.
Thing to Note; at this stage it is important to ensure you 'micro plane" the hash down as fine as you can whilst staying weary of the temperature... any "chunks" will hold pockets of moisture.. that lead to potential problems..ie; mold ...
Picture/Video 39-41
Successfully planed bubble hash ready to be bagged and Squished !
Picture 42
Ive decided to follow Pedro.. from Pedros Grow Room and double bag to be on the safe side so i don't have any blow outs.
So thats One 25u bag inside one 160u bag ! :)
Pictures 43
This is almost 3 grams of the bubble hash from above, already melting in the bag.. this is where i ran into trouble again lol things started getting to warm in the house and i was only able to get one of the three squish's i did on video :( things started getting sticky.
Picture 44
This is basically just a photo of the equipment I'm using; 3x5 LowTemp Cage in the frame I built myself, with a 20Ton bottle jack.
Something to note here is this is an older Lowtemp model with only a single heating zone which is which i have it closed here heating Both sides of the press :)
As well as the importance of having adequate pressure on your plates.. my rig is very overkill for the size of hash bags..lol
Video 45
Here is the lovely press video.. its didn't quite work the way i wanted either lol my directional folding wasn't quite tight enough for a big "drip" :)
&the Press was set to 65°c
Photo's 46-50 are pretty self explanatory :) I had a blow out.. but still managed to pull an 80% return from the hash once squished...& yes it tasted amazing :)
Was it worth it in the end... that could be debated.. for some..i understand..its not your thing, but for those of us that are interested in making our own concentrates.. free from Solvents...
I wouldn't make it any other way :)
If even ONE of you reading this diary finds it helpful to reference for ANYTHING.....even if its "what not to do" ill consider it a success !
Thanks again for tagging along on this garden adventure.. its been one heck of a journey !
Much Love from B.C. Canada,
Until Next time,
Cariboo


Likes
12
Share


@li0nhe4rt
Follow
14/12 just gave her a nutrient feed diluted with water, 500ml nutrient feed with 1 Litre water mixed together then sprayed around pot. Unfortunately the next 4 weeks ill be on holiday so there wont be any update pics, sucks but ill try get some up here and there.
17/12 got some updated pics today while on holiday, looks like shes doing good
18/12 2L normal watering.

Likes
3
Share


@Smithsgrow420
Follow
Looking forward to this girl to really start to grow
Thanks divine seeds

Likes
13
Share


@Lfuego22
Follow
Day 18 veg from clone
Water temp 69.6
Ph 5.9
Ppm 724
Ec 1.6
Room temp 66.8
Light temp 74.4
Humid in room 48
Over light 42
Day 19. Full flush.
PT 1
Start ppm of RO (filtered/nestle) 146
Ph 7+
Final ppm 880
Ph 5.9/6.0
Temp 70°
Room humidity 50%
Light 45%
Light heat 73.0
Room heat 68/70 depending on if heater on or off
Likes
3
Share


@Nat889
Follow
Purchased a new night which is 24 inches from the plant. The bottom two leaves have started to turn slightly yellow. The PH levels have not changed. I may have over watered, but I don’t believe I did. Not quite sure what is going on here. She has taken off in growth this week compared to the last.
She is on a 18hour light schedule and taken out into the sun from 12pm to 6pm and then back under the lights. I am not overly sure of how much water is required.

Likes
3
Share

@Ninjabuds
Follow
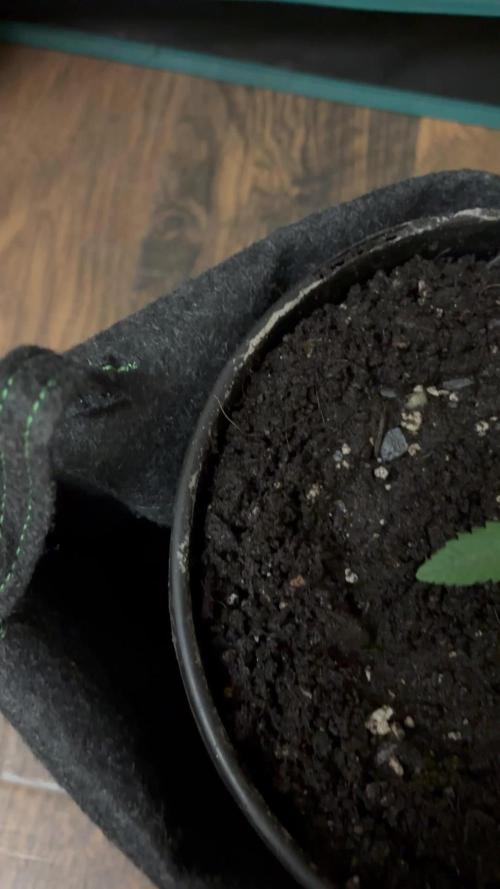
Trasplant day! Nothing special going on. Im excited to see how these turn out. Not to much visul difference between the LCR and the Papa at this point.

Likes
13
Share


@Trailblazers_Farm
Follow
15 seeds germinated. 100% success rate. Seeds have been planted in a mix that has volcano ash and bat guano. The mix gets the seeds off to a great start without the worry of adding nutrients. Over the next few days they'll receive water twice a day.
We water about 100ml at a time 3x a day. We water in circular motion to encourage the roots to grow out.

Likes
8
Share


@Marihumama
Follow
64 days after i planted her seed directly in a pot outside 😱the reaper came, i hung her upside down for 6days then cut her &put her on a net to dry some more
While cutting I found some little catterpillars about 5 guess that were the eggs that I found on some of the plants last week.☺️
After a few days drying on the net i weighed it:53,6gr
The taste is great
I'm very happy with the result catterpillars included☺️

Likes
18
Share


@Wicked_Stix
Follow
Was a pretty smooth week for most the girls. Showing some steady growth. I topped all of the plants around day 12 other than the slurricane 7. Ph got a little high since the nutrient level was too low to buffer it at the beginning of the week. Slurricane 7 and sugar cane are the ones that took some damage. I think they will be ok though. I upped the nutrients to 1/4 tsp per gallon and the ph has held stable since then. Should be able to start some training the middle of next week and looks like we might be going 2 more weeks on veg before flipping them to flower depending on how this upcoming week goes. Guess you will have to show up next week to find out...
Likes
22
Share


@OutdoorRookie
Follow
Week 5 there was a lot of sun I watered it completely every 3-4 days


Likes
17
Share


@DevelGrow
Follow
Hallo Freunde 👋 Frost Banger von fast buds ist 56 Tage Alt und baut mächtige buds! Ein starker süß erdiger Geruch im Zelt bin echt neugierig was sie in zwei Wochen noch zu bieten hat! Keep Green and grow High ✌️🍀💚🍀
Likes
4
Share


@Sowers_Autoflowers
Follow
Even the leaves are black god these purple plants are beautiful
Likes
2
Share


@Bowser45
Follow
This week the strech reached almost 70cm , and the ladies almost grew into the growlight one day so i moved it higher up to stay at a distance if 30cm. i alo defoliated more this time and started strecheing some branches out so everything gets enought light down. they seem to really like the feeding schedule too. The werent any nutrient issues anymore. trhichome production also started and is already about to cover the surrounding keafes. they are going to be pretty frostyy🍀❄️❄️
Likes
6
Share


@Centollo
Follow
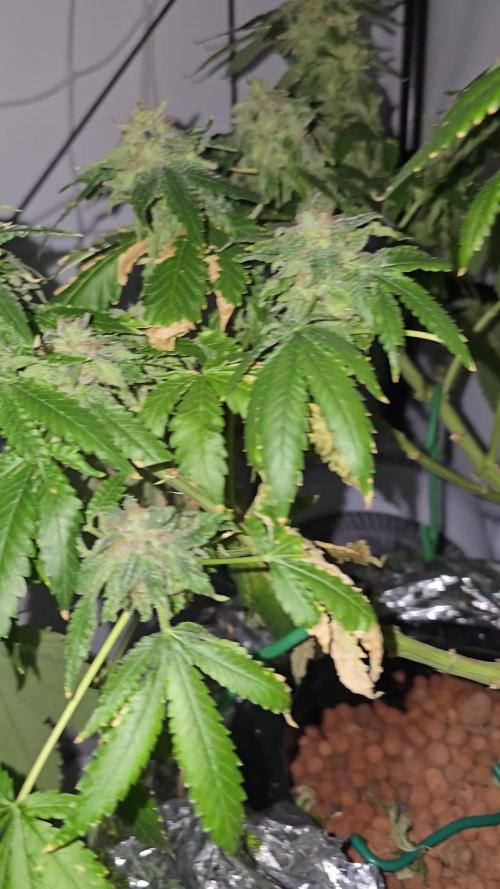
Día 42. Esta semana les voy a dar los últimos abonados. Huelen de maravilla y siguen engordando y resinando. Buenos humos!!!



Likes
3
Share


@Dargaville_Dukes
Follow
Really nice growth this week. I'm going to give it one more week in veg and then change to flower. I think she's going to be a beast 😊
Likes
9
Share

@deFharo
Follow
Bienvenidos cultivadores de marihuana! 🖐️ 👨🌾
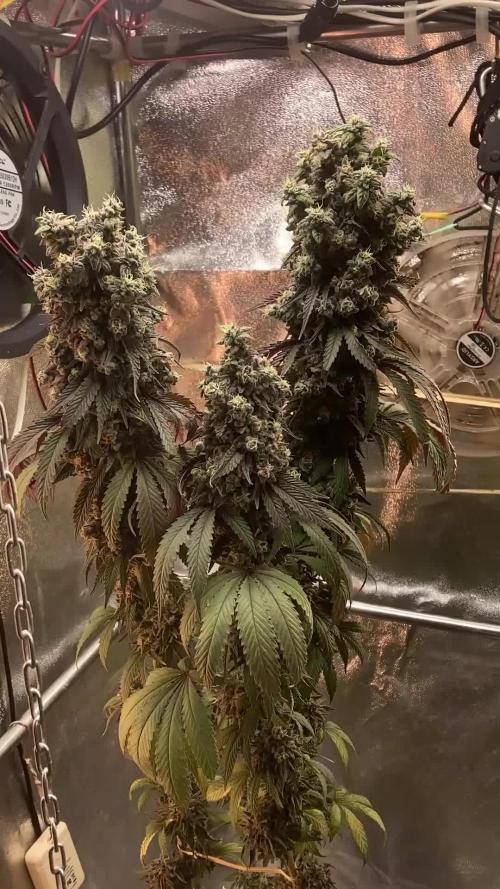
He comenzado a fumar esta planta y es muy, muy fuerte! Los cogollos están completamente escarchados y sueltan polen por doquier. Los aromas son cítricos con toques de pimienta de Jamaica y tierra de bosque.
=========================================- 21 semanas desde que puse la semilla a germinar! 🌱
- 19 semanas desde el trasplante a la maceta final.
- 17 semanas desde el corte apical
- 13 semanas desde el cambio a horario de floración a 12/12H.
- 12 semanas desde que comenzó la floración...
3M 🍨 Green Gelato
RIP
*08/09/25
†29/01/26
"Tus padres orgullosos: Sunset Sherbet x Thin Mint Girl Scout Cookies"
==========================
Hoy, después de las 12 horas en la carpa de cultivo, saqué la planta al frío del exterior durante unas horas, después, al medio día la saqueé sin contemplaciones.
Esta temporada casi todos los cultivos han mostrado crecimiento en modo foxtail. La gran diferencia con otros años ha sido el aumento a 13 horas de luz en las últimas semanas. Probablemente ahí esté el error. Lo pienso ahora, claro, cuando ya es tarde, como hacen los humanos. Lo lógico habría sido justo lo contrario: empezar la floración con 13 horas y terminarla con 12, acompañando de forma más natural el ciclo vital de la planta.
No tengo nada en contra de las colas de zorro, pero verlas repetidas en cultivos tan distintos me dejó claro algo importante: las plantas, incluso a esta edad, todavía tenían ganas de seguir creando flores. Eso es bueno. Retrasa la senescencia, mantiene la energía… aunque también retrasa la maduración de los cogollos. Todo tiene su precio. Incluso la vitalidad.
La próxima temporada volveré a probar. Ajustaré mejor el fotoperiodo. Bajaré un poco la intensidad lumínica en las últimas semanas. Porque aquí nadie lo sabe todo, y el jardín siempre acaba enseñándome algo, normalmente cuando ya no puedes cambiarlo.
😁 HASTA LA PRÓXIMA. SALUD Y SALUDOS PARA TODOS!
==============================
GREEN GELATO (Royal Queen Seeds) "Las semillas de marihuana Green Gelato, ganadoras de la Soft Secrets Cup, fueron creadas en honor al mismísimo Larry Bird."
- Genética: Sunset Sherbet x Thin Mint Girl Scout Cookies
- Sativa 45% Indica 55%
- Tiempo de Floración: 8.10 Semanas
- 500 - 700 G/M2
- THC: 27%
https://www.royalqueenseeds.es/semillas-feminizadas-de-marihuana/416-green-gelato.html
==============================
Likes
32
Share


@Compassionate_Gardener
Follow
Shortly after they were switched to flowering (after week 3) the plants continue to stretch and then start to develop their first flowers. Now in week 7 all plants have very nice flower clusters all over the plant and side branches. They have grown to 45 cm (=Shiva Skunk on left side) and 40 cm (Serious Kush on right side of aisle) in height respectively and all plants have a nice dark green color, which shows they are healthy and also that the Advanced Nutrients schedule works like a treat. The Q6W-Gen.2 LED-Lamps are now dimmed to 100% (=three green LEDs on the dimmer) and work on FULL POWER, which ensures full fledged flower production. Both varieties have now started to exude their typical aroma. The Shiva Skunk starts to smell musky and sweet, while the Serious Kush smells 'gassy' and 'fuely' like its OG-Kush heritage. The flower clusters on the Serious Kush appear to grow denser than the clusters on the Shiva Skunk.

