
Likes
Comments
Share


@Terpyboyz
Follow
So this grow came to a finshed but I had a. Few issues that’s held me up from finishing up the diary, but in due time I will reupload it all in order soon. But over all I will also update with a final weigh in of each strain produced so stay tuned 🤙🏻🔥


Likes
7
Share


@SomeLikeItGrow
Follow
hey! we are one bloom as well, massive bug buds coming, but hairy lol, let’s see where it goes ;)

Likes
2
Share


@KEVS_BEST
Follow
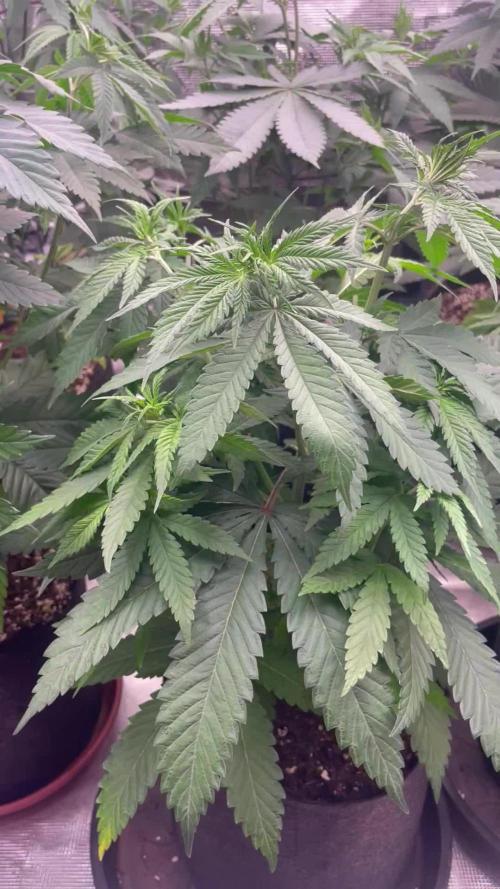
Woche 6 - Übergang zur Blütephase und erste Herausforderungen
Die sechste Woche markierte den Übergang von der Vegetations- in die Blütephase. Bis zum Wochenende wurde weiterhin der Terra Vega Dünger verwendet, mit einem Verhältnis von 30 ml pro 10 Liter Wasser. Am Samstag, dem ersten Tag der Blütephase, wurde jedoch deutlich, dass ein Wechsel auf den Blütedünger nötig war. Leider führte die verspätete Umstellung auf die Canna Terra Bloom Linie zu einem leichten Nährstoffmangel, der sich in den ersten Tagen der Blüte zeigte. Anfang der ersten vollen Blütewoche wurde dies korrigiert, indem vollständig auf Canna Bloom umgestellt wurde.
Die pH- und EC-Werte blieben stabil und optimal eingestellt. Die Temperaturen stiegen minimal an, blieben jedoch bei angenehmen 26 Grad. Mit Beginn der Blütephase startete der sogenannte Stretch, und die Pflanzen legten beeindruckende 2,5 cm pro Tag zu.
Während dieser Woche wurden die ersten unteren Blätter entfernt – ein leichtes Lollipopping, um die Energie auf die oberen Bereiche zu konzentrieren. Die entfernten Blätter wurden getrocknet und sogar laminiert, um den Fortschritt dieses besonderen Grows festzuhalten. Es wurden ebenfalls einige kleinere Zweige und Blätter im unteren Bereich entfernt, um die Belüftung zu verbessern. Das eigentliche, umfassendere Lollipopping wird jedoch erst in zwei bis drei Wochen erfolgen.
Trotz des anfänglichen Mangels aufgrund der zu späten Umstellung des Düngers blieben die Pflanzen insgesamt kräftig, gesund und wuchsen konstant weiter. Der Übergang in die Blütephase verlief somit erfolgreich, und die Pflanzen zeigten weiterhin ihr beeindruckendes Potenzial.
ENGLISH
Week 6 - Transition to Flowering and Initial Challenges
The sixth week marked the transition from the vegetative to the flowering phase. Until the weekend, the Terra Vega fertilizer was still used at a ratio of 30 ml per 10 liters of water. On Saturday, the first day of flowering, it became clear that switching to the flowering fertilizer was necessary. Unfortunately, the late transition to the Canna Terra Bloom line caused a slight nutrient deficiency that appeared in the first few days of flowering. This was corrected at the beginning of the first full flowering week by fully switching to Canna Bloom.
The pH and EC levels remained stable and optimally adjusted. Temperatures increased slightly but stayed at a comfortable 26 degrees. With the start of the flowering phase, the stretch began, with the plants growing an impressive 2.5 cm per day.
During this week, the first lower leaves were removed—a light lollipopping to focus the energy on the upper parts. The removed leaves were dried and even laminated to document the progress of this unique grow. Some smaller branches and leaves were also removed from the lower areas to improve ventilation. However, the main lollipopping will take place in about two to three weeks.
Despite the initial deficiency due to the late fertilizer switch, the plants remained overall strong, healthy, and continued to grow beautifully. The transition to the flowering phase was successful, and the plants continued to showcase their impressive potential.

Likes
8
Share


@Pirangueiro
Follow
started to resin! I think more 4 weeks they will be done. Peace bros 🙌🏻✌️🏻✌️🏻
Likes
4
Share

@Canda
Follow
Holkám se daří dobře, vypadají zdravé a vitální, co se týče stretch,. tak vystrelili ze do 300% moc nechybi
Guano odvádí spolecne s vodou dobrou práci a v jidelnicku mame kdyztak biobizz bloom ,jestli bude potřeba tak uvidíme. .jedna z holek ukázala lehce bile spicky listu ale nesiri se to, nemění to barvu tak mam zato ze jde o projev toho ze substrat je nabitéj a chce jenom vodu ..uvidime jak to pujde dal ...
At vám to roste Hombres..Dasvidáňa :D
Likes
9
Share


@BLAZED
Follow
Week 10 (19-8 to 25-8)
19-8
Temps: 21.5 to 26.9 degrees
Humidity: 44% to 52%
20-8
Temps: 22.4 to 28.1 degrees
Humidity: 47% to 56%
21-8
Temps: 20.4 to 26 degrees
Humidity: 39% to 60%
Watering: Both 1500 ml.
Dry Weight #1: Both 2.5 kg.
22-8
Temps: 20.4 to 26.6 degrees
Humidity: 45% to 50%
23-8
Temps: 22.6 to 27.3 degrees
Humidity: 47% to 59%
24-8
Temps: 22.3 to 28.9 degrees
Humidity: 48% to 64%
Watering: Both 1500 ml.
Dry Weight #1: Both 2.5 kg.
25-8
Temps: 21.4 to 25.5 degrees
Humidity: 46% to 64%
The 2 plants are showing some nutrient deficiencies/toxicities, anyone knows whats going on?
I already installed a humidifier so the humidity wont get so low.

Likes
3
Share


@Jorgeeee
Follow
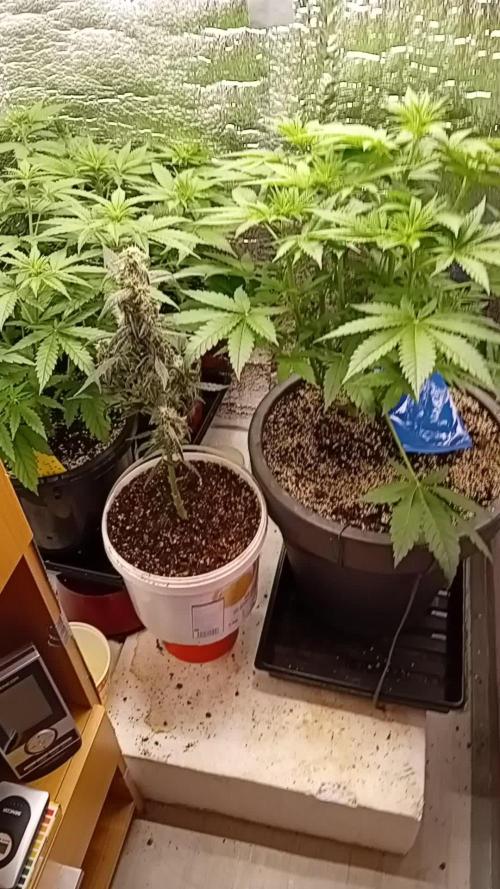
After stuggling to make my first diary, here i got it. 1 monte is the biggest im watering them every 3/4 days with 1,5/ lit of water idk if its enough. I had a nutrient defincy caused by ph i think.
Processing
Likes
15
Share


@Cultivators_Dream
Follow
Day 9: installed this Pro Co2 bucket in my grow tent 2 days ago. Really looking forward to see what this addition brings and if Co2 can really improve a run. Only time will tell
Day 12: Everything is going good.. Added Foxfarm Acid Lovers dry fertilizer, scratched it into the top inch of soil about a tbsp and a half and watered good. I checked ph the other day and somehow soil ph was all the way up to 7.0 hopefully this FFAL will drop that a little. Also got some trifold poster boards and stapled sheets of mylar to them to reflect more light.
12/2 Ending week 2 gotta say everything is going as good as I could hope this lady is in full affect first time ever growing this strain and I can tell its a good one. Great genetics can't wait to see end result


Likes
4
Share

@sunshinegroww
Follow
The time to switch to 12/12 finally has arrived so far so good a bit underwater but we fixing this as we go super happy 😃 lets goooooo

Likes
Comments
Share

@Dubl_Jointed
Follow
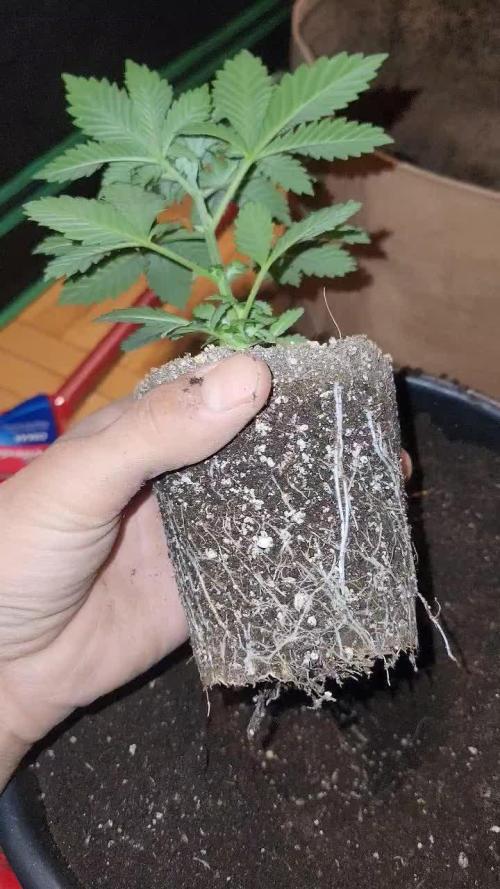
transplanted and ready to go, since shes fully recovered i threw her in a bigger pot now playing more of the waiting game.

Likes
3
Share


@TheGanjaGrower
Follow
Started with LST and did extreme defoliation. Plants were pretty healthy so they will recover soon.

Processing
Likes
25
Share


@BudHaks
Follow
I am now flushing her with plain Brita filtered water PH'd with lime juice to lower her PH.
I initially first flushed her with 42L of water and now I am flushing her once a day for 8 days and then I will put her in for darkness for 3 days and then I will harvest her and dry her for 9 days and then cure her for 28-48 days.


Likes
88
Share


@CBD_Sweden
Follow
The growing cycle it self worked out as expected, except that the pH-level was way off from where it should be, and I found out a bit too late. Because of this the outcome of the harvest didn't say much about the potential of this strain, but as soon as I got enough time and space, she will get a new chance to shine.
2018-03-01.
This is my review / smoke report of this lovely cbd flower.
There are rock hard buds and almost no give at all, even in those smaller buds.
When you grind it the scent will appear more than just smelling on the buds.
It smells a little weak of grass, wood, bark, sweet, lemon, honey, skunk and some kind of spice.
The taste is orange, mandarin, honey, bark, popcorn and pepper.
The effect is directly, the thc feeling above the eyes and in the forehead, it fells like its a higher thc levels in this strain compered to the cbd strains i tried before.
A little light ringing in the ears and a slight dry mouth.
After 10 minutes, the cbd kicks in and and balance the thc high.
The neck and shoulders begin to relax and the feeling continues down over the back and chest down to the stomach.
A calming, relaxing, and slightly energetic feeling.
After 15-20 minutes it is down in the legs and feet, and you can feel a vibrating feeling in your muscles, joints in a pleasant way.
It reduces my tense muscles and some of the nervpain i got.
Its a good strain for releasing stress and get you in a relaxed and satisfied mood.
It is a very well-balanced strain and it fits in all sorts of contexts.
If you take this in the morning or mid day it will give you a small energy boost and get you in the mood for doing something.
I think this is a lovely strain and I highly recommend it to everyone but especially for more inexperienced people that dont like the high thc strains and want to have a good relaxant, pain controlling, anti depressant medication that also can give energy or help with getting to sleep.
This is a must try strain.
Likes
8
Share


@Grimreefer420
Follow
5/11 Topping these girls! Let's get growing.......
5/15 Topped and new growth is loving life!


Likes
112
Share


@Dunk_Junk
Follow
Day 18 - FIM cut made.
Day 20 - Transplant to 38 litre airpot.
Day 21 - She is growing the most by far. I'm expecting a big jump in growth in the next few weeks.

Likes
21
Share

@therealgrowmie
Follow
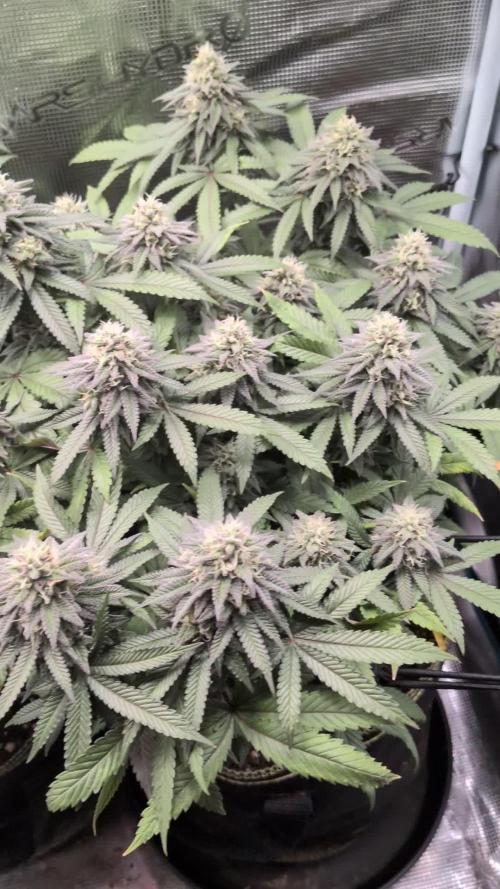
The buds are really starting to stack and bulk up, and man… the frost is coming in nicely. Some of those tops are getting properly coated, and the smell hits you the second you open the tent.
You can clearly see the contrast between the plants — the NLs are staying nice and dark green with heavy frost, while the Critical Mass fades out into those limey/yellow tones. Not perfect, but at this stage I’m letting them ride. The flowers themselves are developing well, and that’s what counts.
Structure-wise, I’m pretty happy. The canopy is fairly even, multiple solid tops across the board, and everything is getting good light exposure.
Stats so far:
💧 Watering: Every third day
🌡️ Temp: 26–28°C
💦 Humidity: 60% RH
📈 VPD: ~1.18 kPa
💡 Light: ~700 PPFD