


Likes
Comments
Share




Likes
48
Share


@StarfishSmallBatch
Follow
This week I am still working on my slow defoliation, to get some light intake to some of the node sites, while putting the plant under as little stress as possible. I've still been using the molasses, Mykos WP and Fish Sh!t mix every other watering. I also top dressed another 1/4 teaspoon of BioAg TM-7, which once again seemed to help both plants keep their leaves held up longer between waterings. I assume the TM-7 is improving the water retention of the Build A Soil Lite I'm using. I still have the Viparspectra 100w boards, set to about 30% power kept about 14 inches away, this seems to be a good spot for the plants. I'll probably be taking the bottom branches off and cloning them this week, so I can back up these genetics.
Update: I went ahead and cloned these ladies to back them up, they are my first plants from seed, so I wanna keep the genetics if I like the flower! I used clone-x, root riot cubes, my AC infinity Germination Kit with 80w led bar on setting 2. I sprayed the clones and inside of the kit with distilled water. Hoping I get some clones rooted soon!


Likes
245
Share


@Roberts
Follow
My harvest was trimmed bud at 217.3 grams, then smaller buds, and some leaf material was 59.3 grams. Easily a half pounder auto under a 100 watt Spiderfarmer SF-1000 light. Was more loose due to the plant outgrew the light. 33x28 in diameter roughly. Thanks again Bomb seeds and Spider farmer.
Thank you grow diaries community for the likes,follows, and subscriptions on my YouTube channel.
https://youtube.com/channel/UCAhN7yRzWLpcaRHhMIQ7X4g
To purchase a Spiderfarmer SF-1000 please follow link below
US:https://amzn.to/396hXXb
CA:https://amzn.to/3ol4oK4
DE:https://amzn.to/3q15SJT
UK:https://amzn.to/2L7NVKN
AU:https://amzn.to/3pZD6ZQ
FR:https://amzn.to/2Xkomsi
IT:https://amzn.to/3nk7A7h
ES:https://amzn.to/2XhtGwB
Coupon code saveurcash

Likes
9
Share


@Budking420
Follow
Shes actually already pre flowering the bud sites are already purple so I'm super excited to see how dark this one gets. I've seen this variety almost turn black it's so dark purple. I went heavy with LST and lightly defoliated. I hope you enjoy the diaries as much as I do! Check back next week to see just how fast she buds & remember its 4:20 somewhere!!!!!!

Processing
Likes
7
Share


@CanadianFillmore
Follow
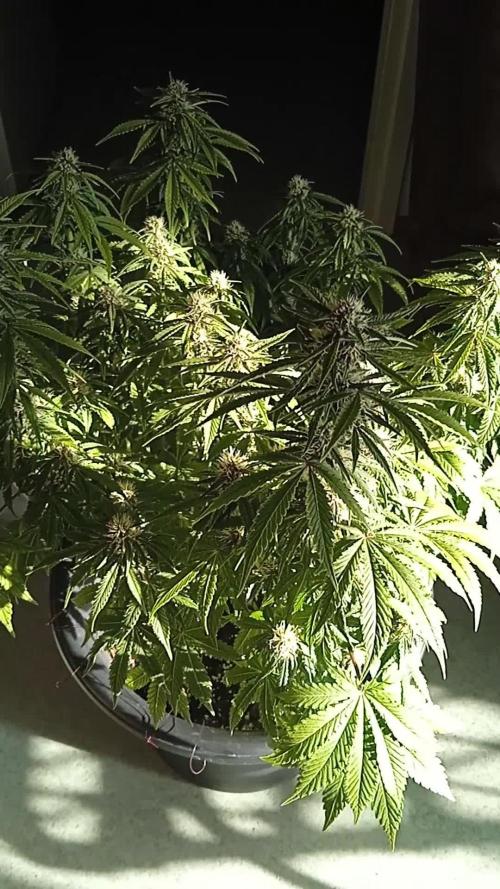
Stopped cal-mag, possibly too much cal-mag causing uptake issues with P&K.


Likes
3
Share

@TheGreenfulOne
Follow
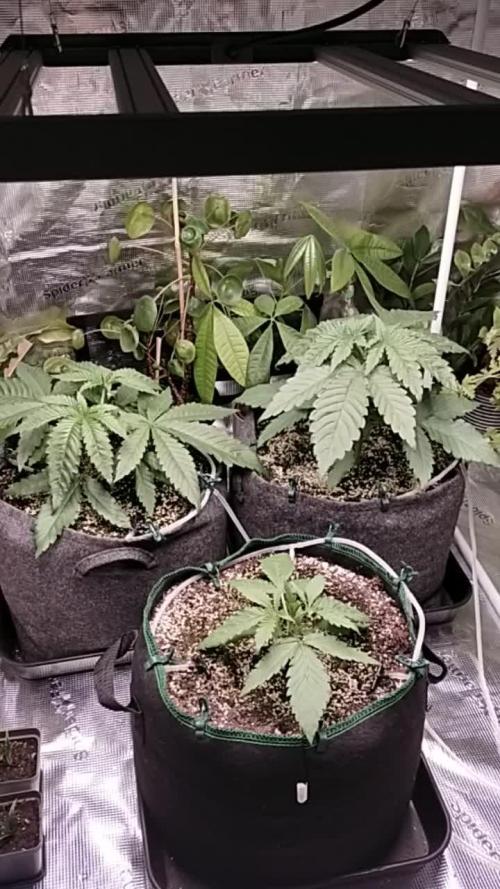
Successful topping performed on the two dominant Bruce Banner phenotypes.
Third Bruce Banner successfully topped; older ones react very good to LST.
Processing
Likes
10
Share

@CanadianFillmore
Follow
Start of week 5! Plants are doing great! Still some P & K deficiencies showing, but overall the bud development is phenomenal on the blueberries and is coming along nicely on the super lemon haze. I am still feeding an extra 2 liters to the Slh, this time at full dosage of part A & B, this seems to have helped with this past week (4). The blueberry are super sticky and smell amazing!
Likes
7
Share


@ZzTooRightOGzZ
Follow
First feeding going well so far .
Day 1 of lst.
Lst going well so far.
Likes
4
Share


@Nutrient_gro
Follow
Day 86, she’s been in the Corner vegging. Cut off all the fan leafs so everything lower are branches.

Likes
5
Share


@420keef
Follow
Had to pull this one out of the tent because i had to make room for the bigger outdoor plants🤷♂️🏻

Likes
10
Share


@Beancultiv8r
Follow
I’m starting to see both the dosi & bride cakes nodes reaching taller everyday, more & more pistils are forming! No signs of deficiencies or pests. I will be keeping these ladies on the Jacks/ Autopot feed but the seedlings shown in the update video are going to be receiving the Athena program via hand watering which I’m very excited about!

Likes
21
Share


@ethnoGrow420
Follow
o Going to flower before my cream and cheese gets to big.
o twice a day watering
o humidifier on
o one oscillating fan one fixed
o added super thrive
o increased bokashi juice

Likes
62
Share


@SimpleGrow
Follow
Hello grow friends,
Today is the start of Week 7 and it‘s day 40 of groth for the plants. It‘s safe to say, they transitioned nicely into flower and spread evenly throughout the tent. It was pretty time consuming to get enough light to the lower branches but it seemes to be paying off. At the start of next week, I have a heavy defolition planed so at day 21 of flower most of the fanleaves will be cut off. This will help tremendously with the high humidity i‘m dealing with. Somehow I still manage to get it down but I still have a job to go to and not much time to devote. Anyways, c you soon guys and have a great start to the week. 🤟🏼

Likes
24
Share


@TerpTurtle
Follow
WEEK 3 FLOWER
-Love the terp profile on this, Has a deep sweet herbal skunk back with a powerful tropical strawberry kush front that carries thru super juicy & loud reminding me of strawberry soda or gushers
-Introducing a 150w HPS bulb as under canopy lighting that will be moved around every few days, I usually will just lay it rite on the pot (not on floor as shown in video) beaming under canopy for 6hr run time mid day in overall flowering light cycle
Likes
9
Share


@eldruida_lamota
Follow
Venga familia que ya viene la cosecha de estas Runtz de ZamnesiaSeeds, que ganas que tenia ya de darles machetazo.
No veas que pinta que tienen estas plantas.
Las flores aparte de prietas se ven bien resinosas.
a sido una genética con la que disfruté bastante cultivarla, no es a mi parecer complicada cultivarla y merece la pena si eres cultivador con o sin experiencia que busque sabores exóticos de genéticas calis
Agrobeta:
https://www.agrobeta.com/agrobetatiendaonline/36-abonos-canamo
Hasta aquí es todo
Likes
6
Share


@Stickygreens420
Follow
8/5/2023 - Day 32 Veg: This is officially the start to week 5. She has been in the earthbox for one week now and I can definitely tell the difference. She has finally started to pick up speed, and it looks like she has grown out of the minor deficiencies I started to notice last week. It was nothing too serious, but the leaf in between the veins was looking a bit light. The foiler feed and compost tea seems to have helped. I'm sure the larger bed of soil is helping too. So far she seems to be looking more indica leaning, with the fatter leaves and she's a little squatty, so I haven't had to do any training yet. I will still probably top her at least once, but I haven't decided yet.
8/9/2023 - Day 35 Veg: did a light watering today with plane water at a ph of 6.
8/10/2023 - Decided to top her today

Likes
22
Share


@Jwjoh
Follow
This was an interesting harvest. Everything was going great and the buds/trichomes were still piling on, when suddenly almost overnight plant "C" shifted to about 20% amber trichomes. So I harvested it, and because the other plant wasn't ready yet I decided to try water curing the first one for 7 days. Then at the end of the 7 days, I figured I'd hack down plant "D" and dry them both on the racks in the tent at the same time before moving into jars.
The water curing was a huge success! After the first day, the water was cloudy with a slight green tinge. Second day was about the same. Then the water was just a little cloudy each change, no green tinge. Compare it to the diary I just opened around water re-curing some cannabis I bought from the government store, where the water is diarrhea brown :O On day 7 of my water cure, the water was perfectly clear so I decided to hack down plant "D" and get them both drying on racks in the tent together.
While water-curing plant "C", I had its trim sitting in a bowl in the freezer. When I hacked down plant "D", I put its trim in the same bowl. After my typical wet-trimming, I hung up Plant "C"'s water-cured buds on the top rack, plant "D"'s buds on the 2nd rack for an old fashioned cure, and random trim from both plants spread out on the bottom 2 racks.
The water-cured buds dried within about 24 hours and went into a jar with a 58% humidipack. The buds are SUPER dense and potent! Nice clean high, doesn't kill my throat. The downside is that the taste is really weak and not that great. But everything has pros and cons. Almost no trichome loss in the bucket during the water curing as well -- I was really worried about that!
The other buds dried in about 36 hours and went into a jar with a 58% humidipack, where I burped it many times a day for a week. The smell and flavour are much more potent than the water-cured bud and it's a little harsher on my throat, but otherwise I'm not sure there's a detectable difference.
However, you can SEE there's a sharp visual difference between the water-cured buds and the jar-cured :) Of course the jar-cured will mature more with time as well.
Once the trim was completely dry, I put it in a bag in the deep freezer and dropped it to about -20. I didn't need to use a grinder this way -- I could just mash it all up in the bag with extreme ease! Sifted it through the kief screen, and pressed down 17 grams of lazy-man's hash!
After processing the trim through the kief screen, I decarbed in the oven at 200F for 1 hour (this converts THC-A into THC or something to that effect -- if you don't do this, the edibles won't get you very high). I put the trim into a big mason jar and back into the freezer along with my bottle of Everclear. Once they dropped somewhere down around -20, I poured in the Everclear, put the lid on, and shook as hard as I could, as often as I could, for 5 minutes or so. I noticed that as I shook it around, the contents inside would alternate between solid and liquid which was kinda cool :) Shake it one way and it freezes, shake it the other way and it thaws... or something to that effect, anyway. I was able to use a double-coffee-filter to extract about 2 cups of dragon tincture!
I threw everything in the coffee filter out -- next time I'm going to do a better job of it as there's a little pile of trichomes that forms at the bottom of the filter which I could put to use. Once I get that down next harvest, I'll have around 99% efficiency milking every last drop out of my harvests!
White chocolate is so yummy, as are candy canes... I wanted to combine the two to make some edibles. Looking around for candy cane crush, I decided to check out Amazon. They had the same candy cane crush I was looking at from popular stores, for only a couple dollars more, so I figured sure why not have it delivered. I was planning to get some white Baker's chocolate, but on checkout of the candy cane crush I got a deal for adding on white chocolate Lindt bars for $1.25 a piece LOL! So I bought 10 of those.
When the Amazon package arrived, I slowly boiled down 1/2 cup of my dragon tincture in a pot, then used a double-boiler setup to melt down 4 of the Lindt bars in the same pot. Once it was mixed well with the hash oil, I set it aside to cool for about 3 minutes before stirring in 1/8 cup of candy cane crush (plus I ended up adding maybe like a tablespoon more), pouring into a pan lined with parchment paper, and putting in the freezer for 30 minutes.
So now I have a nice big chunk of white chocolate candy cane crunch stuff where a piece the size of my thumb gets me super high for like 8+ hours; 17 grams of lazy-man's hash; and 88 grams of bud :) And still enough dragon tincture left over to make 3 more rounds of edibles -- not sure what I'll make next!
From now on I'm going to water cure a large portion of all my buds -- not just the ones I grow myself, but ones I buy from the Gummint too!


Likes
44
Share


@Chedderbob112
Follow
El living la Vida chedda mother Fukin Bob 112 here wee fuking go usual rite troops need tae go see a man aboot a dug


