


Likes
Comments
Share


@Itashish
Follow
28/09/24 mise en pot des graines germés, elles ont toutes pris un beau 100% de réussite en pleine terre!
Elles sont tranquillement dans la box à semis que j’ai construit, il me reste quelques travaux mais faut que j’attende ma perceuse pour faire les trou d’aération pour l’air extérieur et pour la ventilation que je vais relier à l’autre tente, j’aurais une ventilation pour les deux box! Faut je fasse la fixation de la lampe plus le passe de câble, terminer l’isolation lumineuse et elle sera complètement terminé! Le semis vont rester environ 3/5semaine le temps que la récolte soit termine






Likes
19
Share


@DrAnandamida
Follow
El proceso sigue "viento en popa y a toda vela" 🌬️🌿 Aunque me he encontrado un pequeño contratiempo, algunas hojitas están siendo mordisqueadas por pequeñas orugas. Si bien es cierto que sólo he encontrado algunos ejemplares en esta cepa, también hay hojas mordisqueadas en las otras cepas, compañeras de cultivo (Red Pure Auto - Sweet Seeds y OG Kush - Dinafem). El tallo sigue creciendo en tamaño y consistencia, por lo que no necesitamos los soportes/guías, pese a que ha alcanzado los 45cm de altura 🤩 Aumentamos la cantidad de agua, progresivamente, según van pidiendo/necesitando las plantas.
Sigo intentando no utilizar ningún tipo de "ayuda extra", salvo la tierra enriquecida de CANNA Terra Professional Plus donde están plantadas. Seguimos con el agua mineral, luz solar, mucha paciencia y mucho amor!🤞😍 Aunque para controlar la aparición de pequeñas orugas he añadido: 20g de tierra de diatomea (Diatical de TRABE), directamente sobre el sustrato (1-2 veces/mes y se puede aplicar en cualquier momento del cultivo). 50ml de Super Kukulus (fitofortificante ecológico)/1 litro de agua para riego foliar, tanto en el anverso como en el reverso de las hojas (2-3 veces/sem y se puede aplicar en cualquier momento del cultivo has 2 días antes de la cosecha). Además, añadiré unas pequeñas tiras (Yellow Sticky Traps) para mayor tranquilidad, veremos los resultados en las próximas semanas! 💪😅

Likes
15
Share


@I_Identify_As_A_Dan
Follow
Week 4 for gelato 41, shes been topped at the 4th node & has also been transplanted into 5L pot😎The new growth is coming in hotttt compared to last week.


Likes
41
Share


@Ganjagrandaddy
Follow
DAY 28 : Hi all , hope your past week has been a positive one with lots of love and affection.
I am at the point now where flowering should be starting to show throughout the plants usually. Their are many tiny white pistil hairs showing their female genetics across the bracts of them all now so it looks like flowering has begun !!!!
The FC3000 has really given them plenty of light on their perfect spectrum to develop those nice fat fan leaves and now will no doubt take them through a great flowering period. It doesnt produce much heat at all and you can touch it for a while and still not feel too much heat. Ideal for stealthy gardens..
The Tip Spreading has been continued up to this point and it is clear to see how it works on keeping the heights down. By using additional l.s.t that wont slow growth down like the leaf tucking and threading the growing tips above the larger fan leaves that are still being used like solar factories producing copious amounts of food for the developing growth tips. The stems on the majority are nice and thick from the close stacking of the nodes and their is very little popcorn to remove from lower down. I will be keeping them all as open as I can now that we are going into the stretch periods pre flower. The potential is there now to create very chunky bud stacks but I think the Strawberry Pie have ideas of bursting out more . !
They are certainly all a lot more happy than the bonsai Mexican that has emerged in #1. Still very short and half the size ( or less!) than her sister in the next bed. She looks happy and healthy now but her initial shock at the soils make up had a negative impact very early on.
Overall it has been a good week for their tip spreading l.s.t and setting them up for flowering and I hope that our next update will be the bud porn early stages. Be well and prosperous growmies

Likes
36
Share


@TheCannaProphet
Follow
~ Auto Skywalker Haze®️ by Dutch Passion ~
Skywalker Haze x Auto Amsterdam Amnesia
Well friends, here we go on another 'canna-venture' together cultivating Dutch Passion's Autoflowering version of their outstanding Skywalker Haze along with three other incredible autoflowers from Dutch Passion that I'm running separately, so buckle up and hold on! This will be a wild ride for sure!
I've wanted to grow this strain for some time now and finally have an opportunity to see what I can do with it, and I've germinated two so double the fun!
"Auto Skywalker Haze has a very pungent and fruity aroma! The incredibly firm and frosty buds give off a strong lemony, yet sweet, haze-like scent. The citrus and haze notes are clearly dominant.
The combination of the fruity, sour, pungent citrus-dominant terpene profile with the more pungent, spicy haze character makes this a strain for real enthusiasts.
The buds are completely covered in trichomes and in addition to providing a high cannabinoid profile. It also gives a true taste explosion. The terpenes are in abundance and they provide an exceptionally strong fruity haze taste. " **
"Auto Skywalker Haze is currently Dutch Passion's most potent autoflower with THC levels over 25%! 26.2% to be exact! This makes this strain even stronger than most of the photoperiod seed strains currently available worldwide.**
"The feminized Skywalker Haze is a cross of our original and classic Skywalker variety, which consists of a cross of Mazar x Blueberry which in turn is crossed with an Amsterdam Amnesia from the Amsterdam underground scene.
By crossing this photoperiod Skywalker Haze genetics with Auto Amsterdam Amnesia, Auto Skywalker Haze was created." **
"Auto Skywalker Haze produces robust and stable autoflower plants. This Sativa dominant cannabis strain is known for strong and sturdy plants that can take a beating. Most ladies grow into large plants with a real Sativa appearance.
These phenotypes can grow quite tall with wide and long branching, thin leaves and elongated Sativa buds. These phenotypes usually take a little longer to mature. The flowers, which are completely covered in crystals, may have a tendency to foxtail slightly, but that doesn't take away from its true beauty. These buds also become a lot more compact than you might expect from the Sativa appearance.
There are also phenotypes that remain just a little more compact and tend more towards the hybrid side. These mostly Skywalker-dominant phenotypes grow very hard and compact buds, sometimes reaching as thick as a Coke bottle.
All plants have a good flower-to-leaf ratio and trimming the plants is relatively quick. Some plants can even be picked completely by hand and are ready really quickly. The small sugar leaves are also completely full of resin and trichomes, so you don't necessarily have to be very precise. If you want use it, then you have excellent trim to make your own hash, oil or other cannabis concentrate.
Auto Skywalker Haze generally has a short internode distance. The flowers can grow nicely together and completely fill the branches from top to bottom with sticky buds.
Most Sativa-dominant plants usually have a little more space between the buds. This lady can also stretch a lot. Outside we have seen occasional plants that have reached a height of more than two meters in the open ground. That is very exceptional for an autoflower."**
"Auto Skywalker Haze generally takes about 12 weeks from seed to produce fully mature plants ready for harvest. There are two phenotypes of Auto Skywalker Haze that take a little longer, around 13 to 14 weeks.
These are really worth the wait! During the last few weeks the buds get a lot thicker and heavier and the potency continues to increase. Outdoors, Auto Skywalker Haze takes an average of between 12-15 weeks to fully mature." **
**Credit- Dutch Passion.com
______________________________________________________________________________________________________________________________________________________________________________________________________________________________________________________________________________________________________________________________________________________________________________________________________________________
~THE SETUP~
~ Grown in 15L Gronest geotextile pots filled with Mother Earth Grow 70/30 Coco/Perlite with Xtreme Gardening Mykos added.
~ Seeds were germinated directly in the medium without any 'pre-soak'
~ Seeds were planted three days before the Full Moon (Waning Gibbons) and sprouted within 72hrs, on the Full Moon.
~ Feeding will be by Lotus Nutrients (first time using)
~ 24hr light cycle while germinating
~ 20/4 light cycle after first leaves appear.
~ 4x8 Gorilla Tent
~ HLG 650R w/ 30w Supplemental UVA Bar controlled by a Trolmaster Hydro X controller set for a 15min Sunrise/Sunset simulation. (also a HLG Blackbird for additional side lighting if necessary)
~ Supplemental co2 controlled by an AutoPilot APC 8200 co2 controller
~ AC Infinity Cloudline T6 with Controller 67 using a Terrabloom 6x24" carbon filter
~ De-Humidifier and Humidifier when needed.
~ 14k BTU IdealAir portable A/C unit plumbed into tent for temperature control.
~ BlueLab testing instruments
~ Two Hurricane 18" oscillating fans
~ Two 6" Clip-on fans
~ Two 10" floor mounted fans
______________________________________________________________________________________________________________________________________________________________________________________________________________________________________________________________________________________________________________________________________________________________________________________________________________________
As a cannabis grower, I recently had the pleasure of growing two Dutch Passion Auto Skywalker Haze plants indoors. This hybrid strain is a cross between Skywalker Haze and Dutch Passion Auto Ultimate and is known for its strong cerebral effects and uplifting high. In this report, I will share my experience growing Dutch Passion Auto Skywalker Haze and provide some 'High Humor'.
~Growing conditions~
I grew my Dutch Passion Auto Skywalker Haze plants indoors in a 4x8 Gorilla tent. I germinated both seeds directly in the Coco/Perlite medium and both sprouted within 72 hours!
The growing environment was kept on point with the help of an AC Infinity Cloudline T6 exhaust fan coupled with their Series 67 Bluetooth Controller along with two 18" Hurricane fans, two floor mounted 8" fans and a 6" clip on fan providing ample air movement.
Also crucial to this grow was the supplemental Co2 via a 50# tank regulated by an Autopilot APC 8200 Co2 Controller that I set to keep the tent at 700-1200ppm's throughout the run.
Tent temperature's ran between 68-78℉, humidity was kept between 40-60%. I used a lighting schedule of 20/4 for the entire grow with a pair of HLG 650R's that also have supplemental UV bars attached. The exception being the last three weeks, where I added 4 hours a day of UV, and cut the cycle back to 19/5 for a week, and then finally to 18/6 for the last two weeks.
I used Lotus Nutrients for the first part of this grow but became concerned when I noticed that I was getting yellowing I used starting on the #1 plant going from the bottom up indicating to me that their was a problem with the nutrients. Let me say that I'm VERY OCD when it comes to the PH/EC of what I feed my babies, following all of the recommendations from Lotus, but continued to see the yellowing progress. I then switched to Dutch Pro liquid nutrients and within two feeds I could begin to see a noticeable difference in the #1 plants color and overall health! As I continued using the DutchPro nutrients the #1 plants health, vigor and color continued to dramatically improve all the way up until harvest. I can honestly say the I believe switching to DutchPro nutrients saved this grow from a possible dramatic failure!
~Flowering time~
My Dutch Passion Auto Skywalker Haze plants had a flowering time of 93 days from seed to harvest for the #2 plant and the #1 in an unbelievable 113 days! The #2 reached a height of 23" and produced yield of 116g, while the giant #1 plant came in with a whopping 279g total yield and grew to just shy of 40" tall! In addition to all the tasty flowers that these two plants provided, I took the 'sugar trim' from them and ran it through my sift screens resulting in a 24 gram mound of sift on the first sift!
And now for some 'High Humor':
~Growing Dutch Passion Auto Skywalker Haze was a bit like being a Jedi, except instead of using the Force, I used Coco/Perlite and DutchPro nutrients.
~ My Dutch Passion Auto Skywalker Haze plant was so big and beautiful, it could have been featured in the Millennium Falcon's garden.
~When it comes to smoking Dutch Passion Auto Skywalker Haze, it's like taking a ride on the fastest ship in the galaxy - it's a real trip.
In conclusion, the Dutch Passion Auto Skywalker Haze was one of my all time highest yielding and longest growing autoflowers to date. It was a very easy strain to grow, and it only required minimal care and attention to ensure that it grew to its full potential. Cultivating these two Dutch Passion Auto Skywalker Haze plants indoors was a great experience that resulted in two beautiful and high-yielding plants. Smoking the buds provided a strong cerebral high that was uplifting and energizing. I would highly recommend this strain to other growers looking for a relatively easy to grow variety with strong effects. May the Force be with you as you embark on your growing journey... May all your days and grows be Blessed! 😎🙏❤️
References:
Dutch Passion. (n.d.). Auto Skywalker Haze. Retrieved from https://dutch-passion.com/en/cannabis-seeds/auto-skywalker-haze
Leafly. (n.d.). Skywalker Haze Strain. Retrieved from https://www.leafly.com/hybrid/skywalker-haze

Likes
8
Share


@Tweak
Follow
GG12 is putting out buds like crazy even though she’s quite small, I think I’ll still get a decent harvest from her. The Alien OG and Pineapple Express both had a few branches that needed supercropping to keep the canopy nice and even. Stretch looks over and the 3 not named GG12 are just starting to bud out. Girls are Only getting plain water and look super healthy. Excited to see what the next week brings. Thanks for stopping by and add my grow please.


Likes
13
Share

@Shivashamboom1
Follow
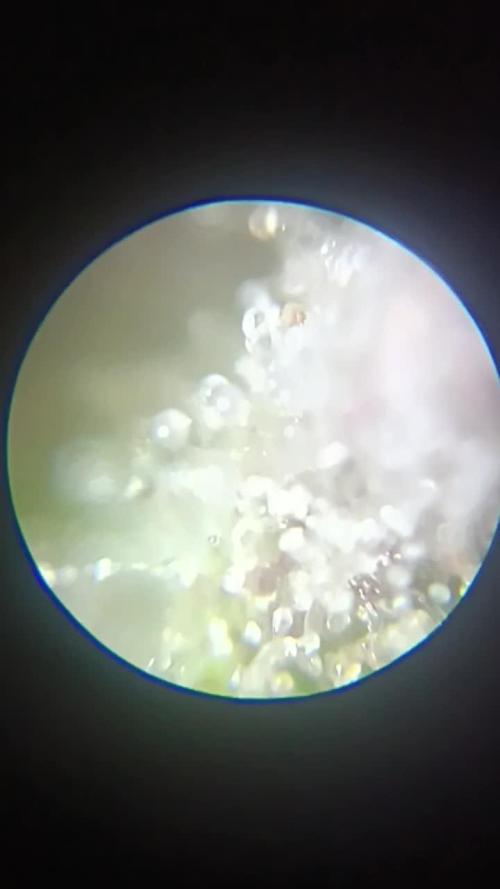
é arrivata al termine anche questa bella creamzilla della original sensible seeds...
su un pacchetto di 3 semi questa è quella che è venuta meglio sia di produzione che di qualità... 🙏🙏🙏🙏


Likes
19
Share


@ScrogFreak
Follow
I finally broke a pound with a single autoflower! Couldn’t have done it without AGLEX cob led’s, Remo Nutrients, and coco coir. They’ve changed my game completely!
This grow started off as a pretty standard grow. I did absolutely no training until the veg period was winding down, and pre-flower was beginning.
As the SCROG net went in, a little later than planned, numb fingers due to cervical spinal issues, and a poorly time muscle spasm, I snapped the main stalk...disaster right? Apparently not! They’re tough plants! Within a day or so she was perked up and sending up new colas from all the growth nodes now exposed to the 2000w AGLEX cob led’s. These lights have transformed my grow process, and increased my yields by over 300% compared to my old led’s, and only draws 408w from the wall. 1.23g/w is quite satisfactory
I didn’t have much tucking to do this grow after the original SCROG. Due to the fact I was a little late getting the SCROG net in place, she didn’t have too much stretch left in her, she certainly fattened up quite nicely though, almost too much so in places. The front left side of the SCROG net got awfully crowded with huge buds packed tightly together. Lesson learned...keep the branches spaced apart slightly further, and maybe allow slightly more vertical growth of the colas to allow slightly better light, and air flow penetration. My issue is I only have 6 foot ceilings in my tents. The ceiling in my grow room is only a little over 6’2”. I managed, through SCROG techniques, without topping or fimming, to keep the top of my canopy 24” from the floor. This allows plenty of space above for the AGLEX cob, and exhaust fan.
After last feeding I flushed with just Ph’ed water for 5 days, then gave the plant 48 hours of darkness, to rid itself of chlorophyll before harvesting on November 4th and hanging in a drying rack. It’s still curing in jars but after trying a few samples, it’s an awesome strain, and hits hard.
It’s not as hard as it sounds to fill a 4x4 tent with a single autoflower, and still pull 18 ounces (504g) out of that tent. With simple SCROG technique, defoliation, quality grow medium you can achieve the same results. Of course you’ll need an AGLEX 2000w cob, but for an 18 ounce return on a $300CAD light, in 3 months, it’s a no brainer folks! You won’t find a better light under $300 Canadian. You’ll also need a quality nutrient line, and it’s hard to go wrong with the Remo Supercharged Kit. The proof of those 2 products quality are in my harvest.
I hope this has helped improve your own grows somehow :) Head over to YouTube and visit my channel, just search for Scrog Freak, or click the link below. Drop a like and subscribe, more videos and logs to come! Recently entered a Gelato OG Grow Off and will be posting updates and instructional videos there. Check it out! Thanks and good growing!
ScrogFreak
https://www.youtube.com/channel/UCDFY6EjqIMqv2peq1d1eM1Q

Likes
29
Share


@Smokwiri
Follow
Welcome to week 4 of my Runtz gum diary by Original sensible seeds.
Growth of the side branches had started, planning to top it in the coming week. Plant is doing fine on organic nutes...
Viparspectra discount:
Amazon: http://url-9.cn/0y9i
Amazon US: https://amzn.to/3e0P2bk
Amazon CA: https://amzn.to/3bTnEJC
Amazon discount Code:
it10smokwiri XS1000 10%
XSsmokwiri XS1500 8%
it20smokwiri XS2000 5%
it40smokwiri XS4000 5%
ViparSpectra 8% DISCOUNT CODE on the viparspectra websites (.com/.eu)
RUFFSELEKTAH
Likes
43
Share


@Sabac
Follow
Última semana de mis plantitas
Hoy corto 12 de 16
Fue un cultivo sin problemas.
Y creo que viene buena producción
Recomiendo 100% los fertilizantes hesi buenísimos.
5 cultivos con ellos y 0 problemas.
El sustrato Biobizz light mix excelente
Las semillas de barneys farm uff pura crema. Eva seeds recomendables y las sweed seeds buenisimas semillas para seguir cultivando. Los Led yxo para ser de un perfil bajo qué no a toda la gente les gusta cumplen la. Función 480w de pura potencia en un espacio de 120x120 los recomiendo para gente que tenga un presupuesto bajo.
Ahora voy por unos sobre 600w aunque los reforzaría estos con unos led de 100w
.
Bueno feliz con los resultados.
Esta semana mostraré los resultados de las plantas cortadas.
Se vienen más cultivos
Salu2




Likes
36
Share


@OGTrauma
Follow
Hello Potheads.
As intended, i hope this will be the last vegetative week , the only thing that can turn on a red alert is lack or overdose of nutrients. By saying this, i aknowledge that some plants are showing some requirements but still GROWING AS MONSTERS.
I Added Barrier to the feeding scheme, because i'm still with nasty plagues, but at a manageable level, but when i go full flower, i would not be able to spray things.
G13: LST finished for these gals, they may by some defoliation before flower.
SANTA BILBO: They pre sexed, showing pistils . GTG.
ELEVEN ROSES: I just Hope that in the remaining days, get a manageable height.
PEACE OUT NIGGAS !


Likes
4
Share

@Selkot
Follow
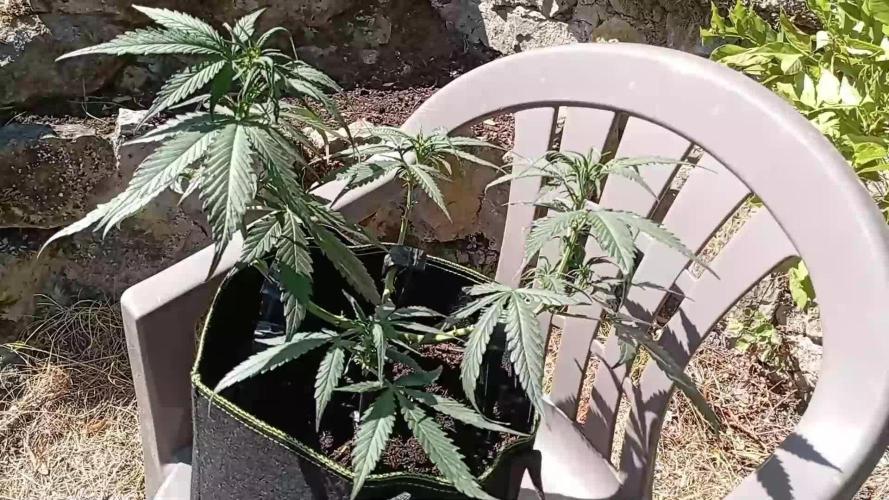
She’s recovering well from the HST and has a nice cross shape with 4 colas ready to take off; the pistils are starting to show, so the timing is good
I’m expecting a good stretch over the next two weeks, as the sun and heat are still going strong. .
Im watering and feeding a little more, and differently, from now on.
Likes
6
Share


@EKWCR
Follow
I attempt to do an early SCROG but the plants are already too rigid for that, so i will train the branches and the trunk slowly to soften the tissues.
My objectif is to do a U SCROG.
Likes
11
Share


@Finsfan
Follow
Everything is dense with tight buds. Decent yield to her, I think.
Nice light green color and smells. Fruity/blueberry scentbto her for sure.
Going to be harvesting in less then a Week.
I started flushing a couple days ago.
I want to let her pot dry out, become lighter in weight, before I chop it.
To ensure she's properly flushed and because I'm going to chop as an entire plant so If I chop it when the container's lighter then heavy, it'll dry faster for trimming/jarring/curing.
All the hairs appear to be orange and curling back in; if not already done so.
I checked with my scope and am beginning to notice amber trichomes far and few.
Another reason im giving her another 4-5 days before taking it down.
Definitely there, but i like to wait a tad bit longer.
Also, I feel the flush is important, although others can say otherwise.

Likes
18
Share


@CBDAutoGrower
Follow
Leaves have started to fade but I don’t think she is ready yet. I’ll leave it another week and see what happens.
