


Likes
Comments
Share


@InsideAz
Follow
Added a second scrog net for the taller plants last Friday. Constantly defoliating to increase light penetration but not trying to stress the plants. (Selective leaf picking)
Plants loved the tea I have them last week. Visual improvements in every plant 2 days later.
Top dressing later this week on 9/29:
5 tablespoons Gaia green 444
5 tablespoons Gaia Green 284
15 tablespoon Wiggle Worm Earth Worm Castings
Light increased to 75%

Likes
8
Share


@Maggie_de_Block
Follow
Didn't have a lot of time this week so she missed her waterings for a couple of days, also didn't empty the dehydrator so humidity was up a few days.
Installed a second cheap blurple led on the side, but doubt this will really help much.
Having some trouble keeping temps up as winter is coming and I dont have a heater in my garage




Likes
17
Share


@FatalFarmer
Follow
Last week of veg, starting 12/12 tomorrow as I'm starting to worry about space.. hopefully stretching isn't too much of an issue.. we shall see. I'm still not happy with my defoliation, I've been mostly removing large/damaged leaves and sucker branches off the bottom of the plants.
I've been experimenting with the fan and scrog placement, placing one large fan oscillating below the canopy and two clip on fans above the tops and mostly using the scrog as a support for branches during flower as I somewhat failed to actually scrog..
Once again, any advice much appreciated and happy holidaze!

Likes
19
Share


@JeyGanesha
Follow
Gente questa weddin cake auto,della korngarden mi sta stupendo giorni per giorno.lei che è nata con 3 cotiledoni ed in più l'ho anche travasato,(cosa che non faccio mai con le auto) sta venendo su bene💪😜vedremo a fine ciclo
Likes
13
Share


@DaddyPrime
Follow
All in all this grow was super easy. I couldve done some things to make it better but she pretty much did all the work. This strain would be perfect for a SOG style grow because it produces mostly a singular main cola nug that's pretty huge and then the bottom nugs themselves are also decently chunky.
4/22 chopped the lower half the plant. Wet it weighs 50grams. Still have the main cola in a dark room for another day or so before im gonna chop.
4/26 bottom half of plant dried in 4 days.
5/2 top cola dried in 5 days. Total weight is less than 20 grams at 19.4
5/12. Ten days of cure and shes looking even better. Spongey thick nugs. Dark red almost brown Pistils with pyramid shaped nugs.
I also wanted to not how fast and easy this grow actually was. She has so much amber I probably couldve chopped her 2 weeks previous. 3 weeks veg and 5 weeks flowering and some would chop.
Review.
Growing 9/10 for ease of growth
Super fast and simple. You can Fuck up and get fat buds lol
High: 9/10 super stoney. No paranoia
Yield:8/10 plant a super short. Like less than a foot. Can probably yield around a zip roughly
Bag appeal: 7/10after cure buds look good. Before harvest buds look fantastic as well


Likes
6
Share


@eldruida_lamota
Follow
Que pasa familia, vamos con la primera semana de floración de estas Wedding Cheesecake Fast Flowering, de FastBuds.
Agradezco a Agrobeta todos los kits obtenidos de ellos 🙏.
El ph se controla en 6.2 , la temperatura la tenemos entre 21/24 grados y la humedad ronda el 50%.Tienen un color espectacular, esta semana cambié el foco a 12-12, iremos viendo cómo avanzan.
Agrobeta:
https://www.agrobeta.com/agrobetatiendaonline/36-abonos-canamo
Hasta aquí todo, Buenos humos 💨💨💨
Likes
Comments
Share


@LuBaldi
Follow
Never ever put an autoflower and a photoperiod in the same grow box. The harvest was fantastic despite my mistake. I have to admit that the Sativa gave me a lot more pleasure than the Skunk as well as a superior final yield. 100% satisfied. Thanks Sensi Seeds.

Likes
58
Share


@Rap_a_cap
Follow
Outdoors........time passes slowly....
Tropical weather here, this week. Hot morning, evening storms , cooler nights, high humidity, wind. What else?
No problems to report, fantastic grow, girls full of life. Lots of work to bend and rearrange plant's shape every day, sometimes twice a day. Defoliation. Plant is responding fantastically.
Special Kush #1 is now in the last days of crazy-stretch phase, is a big plant so I had to move the main top forward again to the opposite point of the perimeter in order to lower the line and give light in the middle.
Likes
11
Share

@All_our_small_plants
Follow
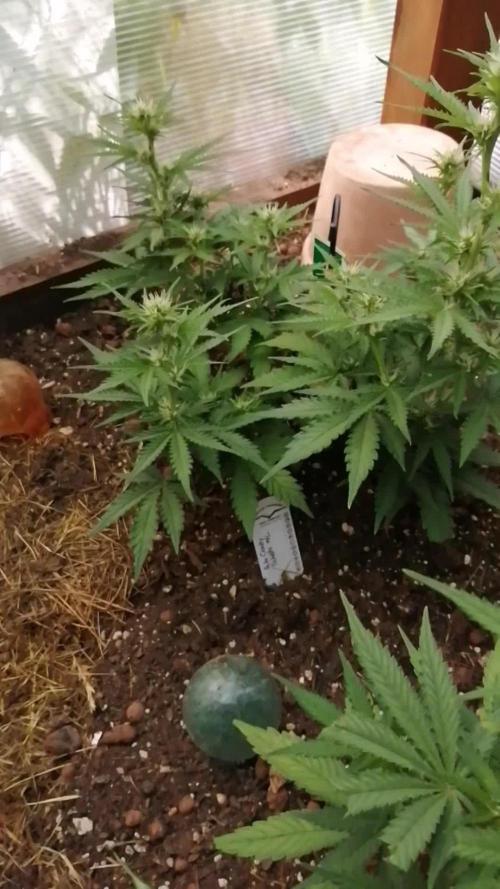
Bewässerung: 5000 ml jeden 3 Tag in der Elften Woche
pH-Wert: 5,8
EC-Wert: 0,4 mS/cm
Temperatur: 20ºC
Luftfeuchtigkeit: 65%
Schädlingsbekämpfung: Diese Woche haben wir ihr Wasser mit Nematoden gegeben da sich doch vermehrt Trauermücken im Bereich aufhalten.
PPFD: Direktes Sonnenlicht
DLI: Direktes Sonnenlicht
-Tag 65 Heute wieder mal gegossen und wir haben den Zaun entfernt und ein Gestell um sie gemacht so können sie sich anlehnen und gleichzeitig auch die Membrana :)
-Tag 69 Heute haben wir die gegossen mir ca. 5l Wasser und 500ml Brenneseljauche

Likes
19
Share

@LST420
Follow
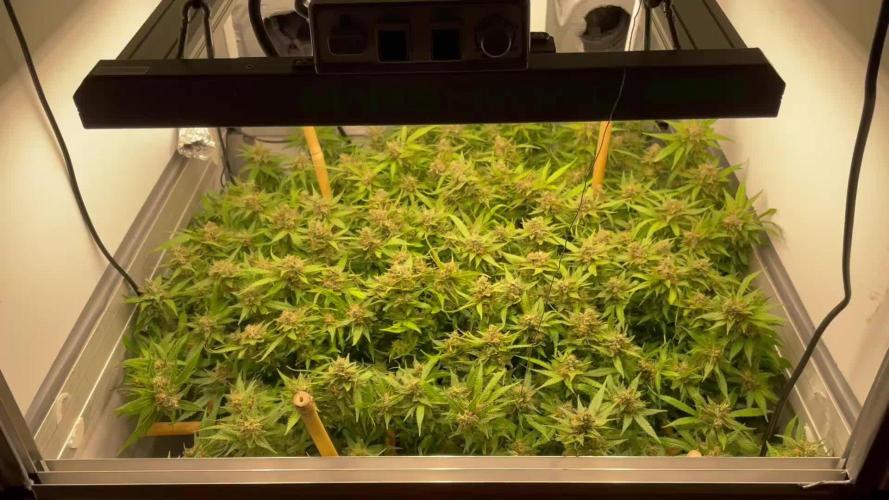
Week 21
I've removed the most recent added Biotab because it's almost time to harvest. Because I wrapped a wire around it I could easily pull it out, see photo.
I might've removed it earlier because common practice says it's better not to have excess Nitrogen in the late stage of flowering. But I like to experiment and also hope that the healthier the plant is the more resilient it is to heat stress and mold.
Her scent is lovely a bit spicy, sweet, fruity and strawberry gum.

Likes
21
Share


@Jays_Not_Here_Man
Follow
A-Day 60, B&C Day 56
A is fattening up! She never did stretch, but then again I had her tied and splayed pretty far out. She has been thirsty, I have been feeding a dose close to 1000 ppm every other feed which has been every other day for her. During the lower feeds, ppm has been around 400. Her tricomes are mostly clear, with some cloudy starting to show. She still has a couple of weeks to go.
B- is going to be a producer! She has so many tips and they are all fattening and developing at about the same rate, she is going to be a beast! Did a defoliation on her, she is appreciating the extra light penetration 😎💨
C- Has stretched up and out! If she stacks as tight as the other two, she will probably be the one with the most weight. Her branches are the tallest and reaching up at least 4-6 inches past both her sisters. I tied her down lightly to allow light to get through, we’ll see how she goes.

Likes
15
Share


@maelxich
Follow
Final defoliation took place and they’re bushy but lights getting through to the lowers and that’s what counts.
I ran out of build a flower, so I just gave them each 1/2 cup of Dr Earth Flower girl topdress. I’ll probably use it til finish if need be.
The smell is starting to come in and they are a GASSY bunch already. Purple ghost candy has a diesely fruit flavor coming in already. Very excited for the next coming weeks


Likes
8
Share


@AutoCrazy
Follow
This plant is really starting to pack on bud size now. Pistils are still nice and white so she has a long ways to go yet.
Dinafem never ceases to amaze.
😎🍿🍻🌱

Likes
23
Share


@deFharo
Follow
Semana 14 desde semilla. La planta sigue creciendo lustrosa y engordando las colas, a pesar de alguna incidencia.
- A mitad de semana comencé a notar pequeñas quemaduras en la punta de las hojas más grandes, hice un riego con agua pura y medí la concentración de PPM en el agua escurrida en el plato. La medida me dió cifras locas de hasta PPM: 7500, es una medida altísima para mis propósitos, pero tampoco se puede comparar con altas concentraciones PPM surgidas de riegos con fertilizantes químicos, donde esas medidas hubieran matado irremediablemente el cultivo.
Los motivos de estas altas concentraciones de minerales y nutrientes en el sustrato son por causa de un exceso de aporte de nutrientes líquidos, sin dar descanso y oportunidad al cultivo de ir digiriendo los nutrientes que le aplico,
- Dos días después de la detección del desequilibro en el sustrato, puse 3L de agua de lluvia (EC: 0,036) y bajo el nivel de PPM hasta 1500. Como se demuestra un lavado de raíces en un sustrato puramente orgánico es mucho más fácil por la poca agua necesaria, ya que el arrastre o disolución de componentes sobrantes es mucho más directa y no necesita tanta agua como para disolver las sales acumuladas de fertilizaciones químicas. Cuando se hace un lavado de raíces como el anterior, se debe de tener en cuenta que, el elemento que más rápidamente se pierde por el lixiviado es el Nitrógeno, en base a esto observar las señales de falta de nitrógeno y corregir en posteriores riegos.
• En base a lo anterior, partir de esta semana comienzo a aplicar otra estrategia para el riego con nutrientes, el cambio lo voy a hacer en todos los cultivos y se trata de esperar al menos 72h desde el último aporte de nutrientes (Sólidos o líquidos) para aplicar nuevos, mientras tanto, si la planta necesita riego, lo haré sólo con agua para de esta manera dar tiempo a la planta a digerir todos los nutrientes convenientemente, voy a bajar también el nivel de EC en todos los riegos durante todo el cultivo, además voy a hacer formulaciones nutricionales más simples y específicas, excepto componentes que sistemáticamente incluyo en todos los riegos como el Ormus, la melaza o la miel, con este cambio de estrategia estaré muy atento a las señales de la planta, el motivo del cambio es primero para reforzar mi autocontrol frente a mi afición a sobrealimentar las plantas debido a mi colección de preparados 😋, aunque no es fácil bloquear dramáticamente una planta cultivada con puros elementos orgánicos, estoy observando un exagerado EC en el agua sobrante de las macetas, esto me indica que los MM están haciendo muy bien su trabajo de disolver los componentes del sustrato, componentes que al añadirlos en demasía enriquecen sin medida el sustrato haciéndolo demasiado denso, perjudicando su eficacia.
😕 DIETA SEMANAL
1) Día 99. Ormus 2%, Bio frutas NP 2%, Lacto fermento MMM 1%, Hidrolizado de Pezuña 0,25% y Melaza. PH: 6.33 EC: 2.0 - 900ml.
2) Día 100. Ormus 1,5%, Humato PK 1,5% y Melaza. PH: 6.3 EC: 1.66 - 600ml.
3) Día 101. Ormus 2,2%, MMA 3%, Melaza y Lixiviado 2%. PH: 6.6 EC: 2.0 - 500ml.
4) Día 102. Ormus 1%, Humato Mineral 2% y Melaza. PH: 6.4 EC: 1.87 - 900ml.
5) Día 103. Sólo agua pura con miel. PH: 6.8 EC: 0.350 - 600ml.
6) Día 104. Agua pura con miel y 1% de MMA y Ormus. PH: 6.37 EC: 0.850 - 800ml.
7) Día 105. Agua de lluvia. PH: 6.8 EC: 0,036. 3L. (Recojo 1,8 litros de lixiviado que uso diluido para regar mis geranios y otras flores)
😂 GROWING TIPS
Lacto fermento experimental con auxinas y enriquecido con minerales y nutrientes NP, para usar desde germinación hasta preflora. Debido a que disponía de 1,2 litros de auxinas líquidas y estaban a poco de caducar he comenzado este bio fertilizante con la intención de mantener una solución de riego rico en auxinas naturales y otros elementos específicos para enraizado y crecimiento vegetativo.
1) Obtención del suero de leche con leche fresca o pasteurizada.
a) Calentar la leche entre 70°C a 90°C
b) Apagar el fuego y añadir el zumo de 1 limón grande.
c) Revolver con madera hasta que se vea la leche cortada.
d) Dejar enfriar 30 minutos.
e) Colar y filtrar para separar el suero de la materia sólida.
f) De 1,5l de leche pasteurizada he sacado 1,2l. de suero.
2) Mezclar el suero con melaza y miel
3) Pesar los componentes sólidos y añadirlos al recipiente digestor. Añado zanahoria picada para garantizar la presencia de Boro.
4) Añadir al suero, Bacterias ácido lácticas (BAL), levadura de pan y Ormus.
5) Añadir la mezcla al barril.
6) Agitar vigorosamente.
7) Añado el agua de auxinas.*
8) Cierro herméticamente el recipiente y coloco la válvula de escape de gases.
9) Lo dejo fermentar al menos por 30 días. Cuanto más tiempo se mantenga en fermentación mejor es el resultado del lacto fermento, como el vino!!
* Para todos mis fermentados y bioles uso agua de un manantial de montaña cercano, este agua es muy alcalina PH: 9.2 y contiene mucho mineral: EC: 0.85, la uso para compensar la acidez de los fermentados y garantizar un aporte seguro de carbonato cálcico y trazas minerales.
El preparado comenzó a fermentar a los 20 minutos de cerrar el barril. Probaré este lacto fermento incluyéndolo en mis procesos de germinación y crecimiento.
Saludos y hasta la próxima semana!! 😷
Likes
14
Share


@Kakui
Follow
15 Noviembre:
-Hoy se instaló el sistema de riego "Drip to Waste" que me permitirá hacer riego de precisión, con protocolo "Crop Steering".
-Se instalaron sensores de humedad de suelo, para saber cuándo y cuánto regar, el sistema manda datos de humedad de suelo, temperatura y humedad ambiente, etc vía internet a mi celular.
-Mañana se comienza con el primer riego de precisión.
17 Noviembre: Segundo día de riego automático, 3.0EC y 5.9pH, las plantas crecen a buen ritmo, las raíces ya están saliendo por los orificios de drenaje a 2 días de transplantadas.
20 Noviembre: Se realizó una pequeña defoliacion de las hojas tipo abanico muy grandes.

Likes
29
Share


@Spliffing_Around
Follow
I am still adding 1 l but there is no run off on all of them. Now I do nutrients -water-nutrients, but the doses vary as well.
600 WATT LED HAS BEEN ADDED. ITS 281 diods,but still decent addition