
Likes
Comments
Share


@Roberts
Follow
Do-Si-dos auto has grown good on a lower nutrition amounts then my normal. The buds were smaller unfortunately. She smells super fruity and good. I have switched her to ph water yesterday. The next update will be her harvest. Thank you Zamnesia seeds, Medic Grow, and Athena. 🤜🏻🤛🏻🌱❄️
Thank you grow diaries community for the 👇likes👇, follows, comments, and subscriptions on my YouTube channel👇.
❄️🌱🍻 Happy Growing 🌱🌱🌱
https://youtube.com/channel/UCAhN7yRzWLpcaRHhMIQ7X4g

Likes
5
Share

@billycardine0420king
Follow
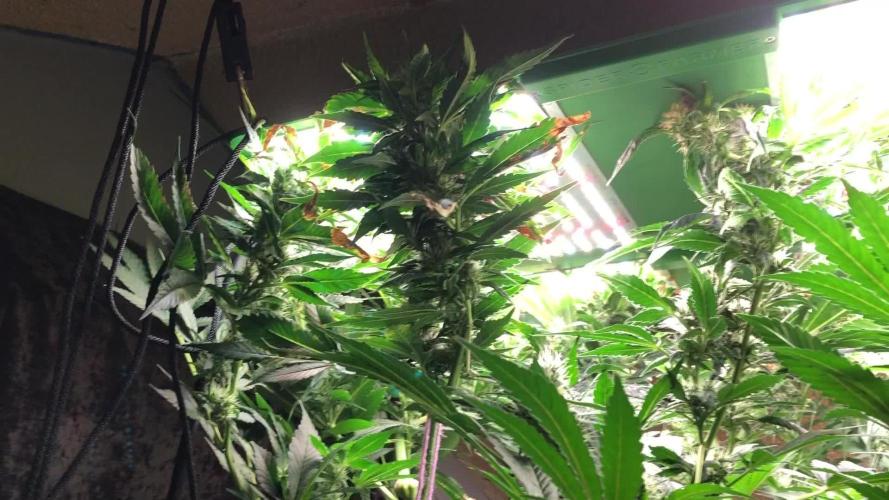
8/23/2025- Emptied and refilled resevoir with the above nutes. Nuggets are smelling stinky now and looking good but I have to be transparent in identifying mistakes, not reporting them only fucks myself in future grows. I have snapped several plants stalks and folded them under my lights as they just grew above the lights to the ceiling. I hated doing this but I simply ran out of room and didnt do any topping or training. That aside, I see lots of fat colas and stinky nuggets, I just blew the sativas a bit by letting them get too damn tall.


Likes
2
Share


@Skinnytalls420
Follow
Day 40-03/09/22 sorry for not updating but haven’t been well and was very busy but again this is second time I’ve grown this now and idk the genetics have a mind of there own but we will see

Likes
10
Share


@TiRobotProds
Follow
J'ai pratiquer sur elles la défoliation extrême qui consiste a enlevé les grosse feuilles nourricière pour permettre une meilleure penétration de la lumière et de la circulation de l'air voyons ce que cela va donner au prochain épisode growers.


Likes
20
Share


Likes
6
Share


@Barcelona_Farmers710
Follow
Llegamos al final, este apartado lo finalizaremos cuando probemos la yerba de momento colores rojizos y azulados, huele como a gas junto un transfondo dulce...una pasada merece la pena probarla!⛽🔥

Likes
11
Share

@sunshinegroww
Follow
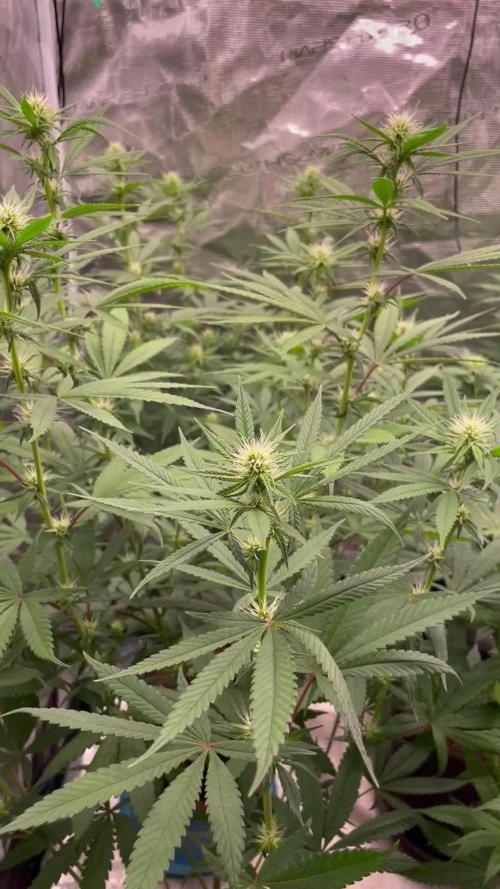
Welcome week 4 she had clean up so more airflow and bigger top flowers she looks happy and in a good shape lets goooo


Likes
248
Share


@Ju_Bps
Follow
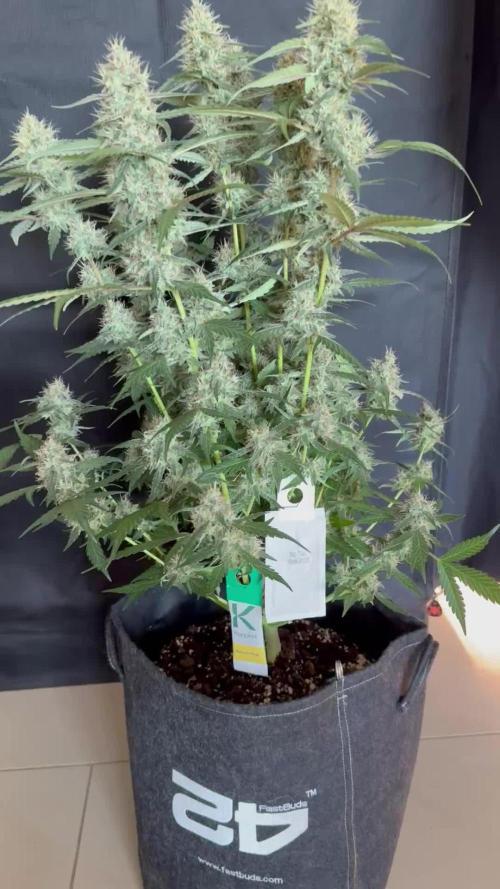
For this grow I've used,
For the growth
1 Mars Hydro TS1000 (150 W)
2 fan 15w
1 extractor 150mm 350m3/h
1 carbon filter 150mm
1 Hydro Shoot 60x60x140
1 timer
11l geotextile pot
20 Hours On, 4 hours off light
For the soil I've used plagron light mix + batmix in the down
For the blooming
1 Mars Hydro FC300 (300W)@75%
2 fan 15w
Extractor + Filter 150mm
1 Mammoth lite 60 box
1 timer
11l pot
20/04
After harvest,
I've put the stuff in a room with 1 fan 15w
Thanks for all my friends!
And again thanks @Fast_Buds , and Mars Hydro, @Coco_Pan2022 ❤️❤️❤️
Likes
4
Share


Likes
12
Share


@SnarkyGoat
Follow
Day one of the 14th week was October 24th. The trichomes on the small bud leafs are still clear resin. The hairs are about 70% dark and many are receding back toward the bud. Harvest time is getting close.


Likes
43
Share

@DE_BW
Follow
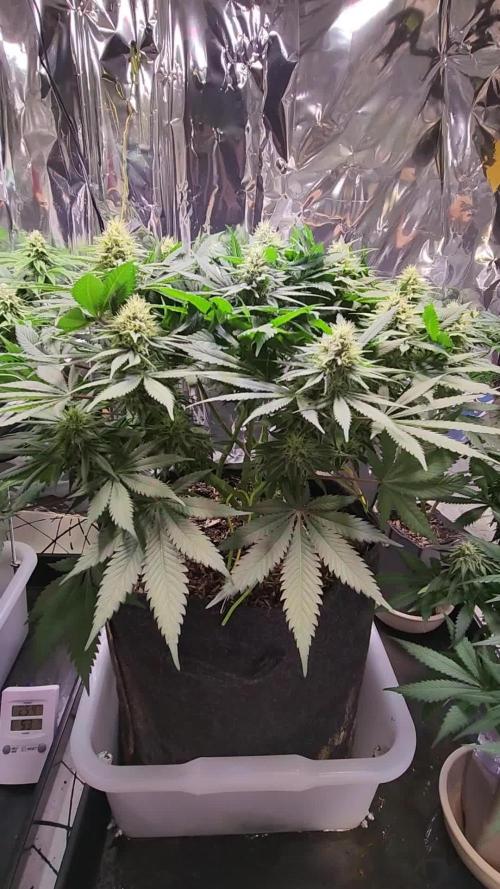
The Guava Runtz has become exceptionally frosty this week, with thick trichome coverage spreading across both the buds and sugar leaves. The top colas are still in a strange transition phase, seemingly caught between bulking up and ripening, while the lower and mid-level buds appear further along. Overall the plant remains very healthy, I have now switched to Overdrive, and based on her current development I expect she will need at least another two weeks before reaching maturity.


Likes
74
Share


@AsNoriu
Follow
Day 40. I was away and now I have this.
Honestly sad picture ... Without TLC autos grow like shit...
Had huge temp swings, you can see in photos ..
My friend was lazy with waterings ...
No training - and you have THIS.......
That grow is officially my smallest and not by quantity,but by size of girls and pity results...
I honestly doubt that some girls will reach even an ounce ...
Maybe some will be tasty at least ....
Gave first feed.
SuperCroped tallest girls and from now I will keep them with love and care ...
Dropped lights, now distance is good, but some girls didn't loved training and intense light at all ...
Thinking to clear all bottoms , they have like 8-10 branches max because off such small size, but some can't be called branches even, toothpicks ;))) hope some feed, love and good guidness will bring them on better track !!!!!
Happy Growing !!!


Likes
85
Share


@BarrieGrower
Follow
Bo more growth, Buds are building nicely and some of the hairs are turning amber.
I built a frame around the plants and stretched them apart to get light in. Looks a lot better and should have not crowded the plants in before. I'm sure this hurt yeild, hope it does not hurt bud size and get airy buds. With four weeks left I hope it turns out well.
Buds seem to be building nicely and getting frosty.
Question, what is a good extra nutrient to put on bud mass?
Thanks for looking.
Cheers


Likes
9
Share


@NewOfficialDrillInvaders
Follow
Smell is very sweet in box i like it they really smells like strawberries and pineapple

Likes
7
Share


@StoneyMelony
Follow
Overview of my grow:
Tent: 4 x 4 120 cm by 120 cm
Lights: 2 x 120 Watt CTlite c4 clusterled
Climat: Dehumidifyer 240 watt
Prima Klima carbon filter
Secret Jardin 20 W osc fan
Pots: 4 x 11 liter airpots
Water : automated water system
Nutrients: Plagron cocos A + B
Plagron PK 13/14
ATA cal/mag
Epsom salt
Week 2 The grow is going very good, The gorilla auto is going fast with some big leaves. At the start of week 2 i was feeding her 0.7 EC coco A + B. By the last 2 days of the week i slowly raised it to 1.0 EC and you can see she likes it. At day 11 i installed my auto water system, i build it myself with some hoses, pumps and automatic sec. timers. i have 2 systems so i can feed 2 different feeding schedules. The moment i install my water system i'm going to give water every day with nutrients (for now every day) a decent amount, i think it is 4 liter water at the moment. This also because i want to have a decent amount of run off water. Tomorrow i will check how much water per sec. my system gives. So here we come week 3
Likes
3
Share

@Oldwied
Follow
The enzymes working well, even the hemp weeds in the mulch are starting to decompose. The plant seems to like it too, as the greenery is overwhelming.
Light Power: 100%
Day 81
Flower day 34
Photoshooting