
Likes
Comments
Share


@Pjm70
Follow
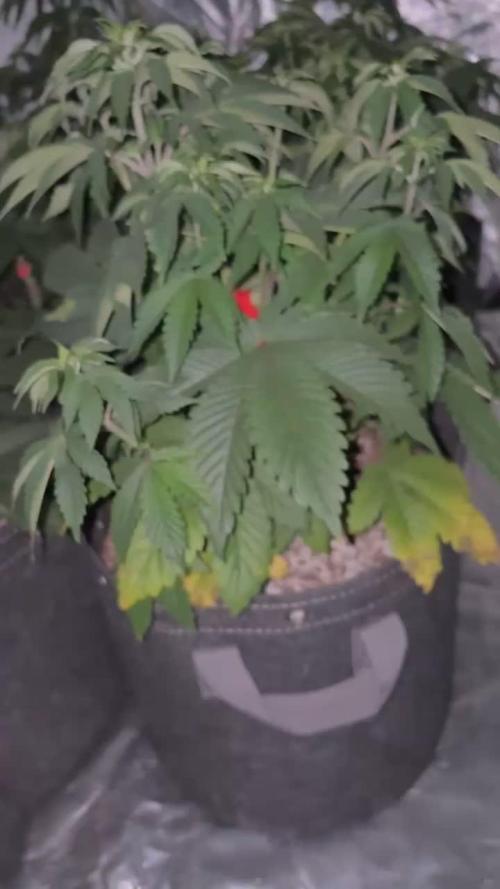
9/29 102 days old. First day of the 5th week. These buds are coming on like a madwoman.
Fed her today fox farm beasti bloomz, blackstrap molasses and Remos natures candy.
Buds smell amazing and are very firm. I’m bad at describing smells. Definitely smell the lemon. Can’t really place anything else other than goodness.
9/2 104 days old. Watered today. Leaves are getting frosted and purple. Buds are very sticky.
9/3 she is putting on weight. No diet for this lady.

Likes
16
Share


@SeshHouseCannabis
Follow
Have been clearing out a lot leaves and branches, decided to just LST on one plant and Fiming on the other one. And training have been applied to all plants.


Likes
4
Share


@Bread_n_Buds
Follow
After the first days of germination, when it was time to fertilize our Fruit Punch Automatic started strong.
In this diary you will find that grow free maximum with the application of some technique that does not involve cuts to preserve its speed. The plant after taking the first food + started like a rocket and is quickly going on internode after internode we will soon go into pre-flowering.
The other will instead be worked with Mainfolding / Mainling as for all strains: 1 Plant Left to grow without cuts and 1 with Mainlining.
The comparison is the salt of the experience.
We have started the Plagron fertilization program, we are in 100% organic configuration, the soil is recycled Promix + 1/3 fresh soil + 10% Perlite + RQS Mycorrhiza Mix (4 mixes, 1 under the small fiber pot).
We are administering // 1 ml/l of Power Roots - 1 ml/l Sugar Royal - 1 ml/l Pure Zym - 3 ml/Alga Grow
https://plagron.com/en
https://www.royalqueenseeds.it/growing/452-easy-roots-mix-di-micorrhize.html
Try this strain, it's one of the best in recent years with a very high THC level
---- https://www.zamnesia.io/it/10965-zamnesia-seeds-fruit-punch-automatic.html
Brief description of Zamnesia // Sativa strains are very rewarding to grow, but their long flowering times and their greater susceptibility to disease and overfertilization can make them a little more difficult to manage. Also, their imposing heights are less suitable for indoor use and can attract unwanted attention if grown outdoors. However, with the arrival of Fruit Punch Automatic, growing sativa strains at home just got a whole lot easier. Combining Skunk #1, Haze and ruderalis, Fruit Punch Auto is 70% sativa dominant and produces up to 21% THC, along with a delicious blend of terpenes. Plus, it can be grown indoors, outdoors and in greenhouses. With their bright green hues, golden pistils and thick layer of resin, Fruit Punch Auto buds always have a great appeal. When you smoke her, you will be amazed by her flavours, aromas and effects! As the name suggests, Fruit Punch Automatic boasts delicious tropical aromas reminiscent of banana, pineapple, mango and citrus. When you open the jars you will feel like you are in a tropical cocktail bar on an exotic beach. Fruit Punch Auto will delight your palate with pungent fruity notes followed by light notes of Skunk and spice on the exhale. Within minutes of your first hit, this potent sativa will stimulate your mind, leaving you in an energetic and carefree state, ideal for morning or daytime sessions, as well as social settings or creative pursuits.
You can find the entire world of growing on Zamnesia and more, just take a look at the site and you will find "all the best that nature has to offer" in various shapes and colors.
The new strains are fantastic and the old ones are no exception...
p.s. no hermaphrodites yet, can you growers say the same?
---- // www.zamnesia.com


Likes
9
Share


@WIKETFOLE
Follow
Everything is going great, the plant is absorbing the nutrition well, and the branches are following me well during the LST technique. I am satisfied so far.
Please write your review about both the plant and the manufacturer.🙏
Likes
1
Share


@Skull
Follow
Both plants showing preflower would have preferred more size before flower but what can U do. DWC produces plants 2+3 times larger

Likes
6
Share


@NiBaMeCa420
Follow
Sup y'all,
Another week with the bubblegun grow, we start to see the first signs of flowering which makes us very happy.
I did a lot of defoliation just before i shot the pictures so that a lot of the precious light can penetrate deep into the canopy so that the lower leaves get some light to.
Overall untill this point the grow is going great you can still see which one of the plants had a minor defect but they came along very nice that makes me happy.
No changes in the nutrients are made and the light is still hanging pretty high i strart lowering it somehere this week
That is pretty much what i can say right now
I hope you are all having an awesome week
Cheers,
Nibameca

Likes
7
Share


@Giovi
Follow
Hi guys. We started flowering with the first week! I am very excited! Plants seem to me to be healthy and grow. With Advanced Nutrient fertilizers it is very important to regulate and control the electrical conductivity of the solution. Next week I will give you more information. I put a net in order to divide the light and give a support in flowering. We'll see!

Likes
119
Share


@DogDoctorOfficial
Follow
It's that time again – the Week 4 report for our Power Buds competition, and let me tell you, it's been an exciting week of growth and cultivation! Our verdant companion, Jelousy, has been flourishing like a botanical superstar.
Now, let's dive into a decision I made this week – the transplantation. While some may opt for the instant gratification of planting directly into their final pots, I've chosen the path less traveled. Jelousy has been gently ushered into a larger pot, not yet her final abode. Why, you ask? Well, let's talk roots!
Transplanting into a larger but not final pot is like giving our plant a roomier apartment without handing her the keys to the mansion just yet. It encourages the development of a robust root system, allowing Jelousy to establish a solid foundation for future growth. It's the horticultural equivalent of laying down the groundwork for a skyscraper.
And speaking of roots, let's chat about the magic touch we've added during the transplant – the Aptus Holland Mycor Mix. This isn't just any mix; it's a microbial powerhouse that works wonders beneath the soil surface. Picture it as the unseen orchestra in the symphony of plant growth.
The mycorrhizal fungi in Aptus Holland Mycor Mix form a symbiotic relationship with the plant roots. They extend the root system, enhancing nutrient and water absorption, while the plant provides the fungi with sugars. It's a harmonious dance of give-and-take, resulting in a healthier and more resilient plant.
Applying this mix during transplanting is like giving Jelousy a team of loyal assistants, working tirelessly to ensure she receives the nutrients she needs to thrive. It's nature's collaboration at its finest.
Now, let's talk visuals! I've prepared a mini video report showcasing the awe-inspiring beauty of Jelousy. Her leaves are lush, her stems are sturdy, and those roots—oh, those roots—are reaching for greatness. Check out the video link to witness the botanical magic in action.
As we soak in the visual feast, let's extend our heartfelt gratitude to Zamnesia and Plagron for making this journey possible. Their support is the compass guiding us through the green wilderness.
And, of course, a round of applause for the incredible Grow Diaries community. Your shared passion and knowledge create an atmosphere of growth and learning.
To my fellow contestants and growers, may your plants continue to thrive, and your dreams of a flourishing harvest come to fruition. Here's to a week of roots reaching deep, leaves stretching high, and the joy of watching our botanical companions flourish. Stay green, stay inspired, and keep cultivating those dreams!
As always, thank you all for stopping by, for the love and for it all. This journey of mine would just not be the same without you guys. The love and support are very much appreciated, and I feel honored and blessed with you all in my life !!!
With true love comes happiness. Always believe in yourself and always do things expecting nothing in return, with an open heart. Be a giver, and the universe will respond in ways you can’t even dream of .
Friendly reminder: all you see here is pure research and for educational purposes only.
Genetics - Jelousy @Zamnesia
Nutrients @Plagron
Light - @viparspectra P2000
Room size - 3x3 - 0,9x0,9
Likes
5
Share


@GrowGuy97
Follow
This lady is getting very tall & starting to smell crazy, already starting to get very frosty as well! Excited for the outcome! Thanks for following & happy growing friends!🙏🏼✌️🏼🌱


Likes
5
Share


@GermGrowFox
Follow
So langsam fangen die Blüten wirklich an schön auszusehen.
Bin zufrieden mit dem visuellen Ergebnis der Blüten. Über den Rest urteile ich vorerst mal nicht haha


Likes
38
Share


@yourbestbud
Follow
I got a new light for these ladies cause it was clear my other lights weren’t doing justice. I went with an affordable option which was a Lumii black 600w HPS light. It made the temp reach 44 degrees luckily I checked on my plant about an hour later and they were looking really sad but they were okay once I moved my tent closer to the window. My temps went down to 33 degrees Celsius which is still to hot PLEASE tell me how I can get This down guys 😭😭😭😭!!!
Anyway they were okay before that growing beautifully and very healthy before I got the new light. I can definitely see the different in intensities


Likes
7
Share


@Reaper
Follow
This strain reminds me of purple kush but then this is the best phenotype, very dark purple buds ready in 70 days


