
Likes
Comments
Share


@Bread_n_Buds
Follow
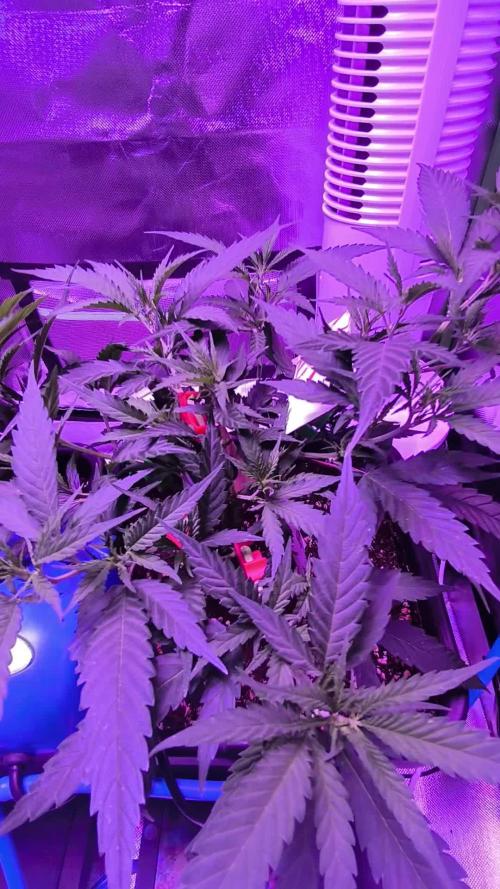
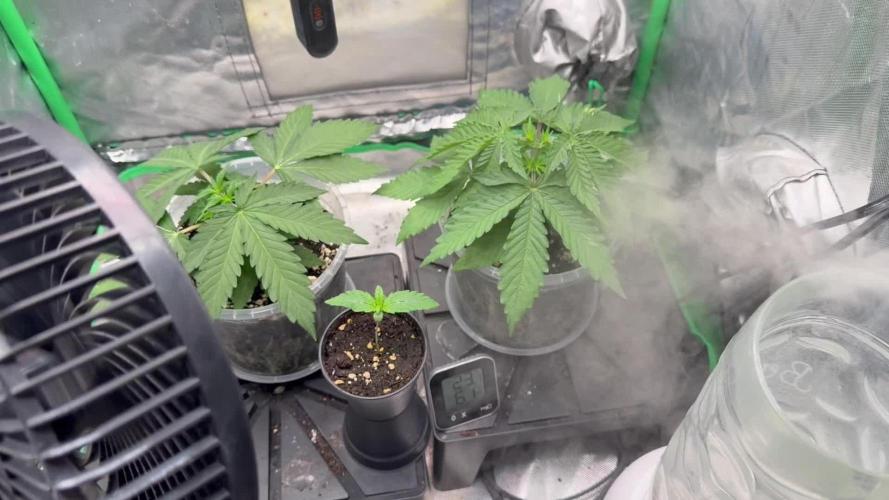
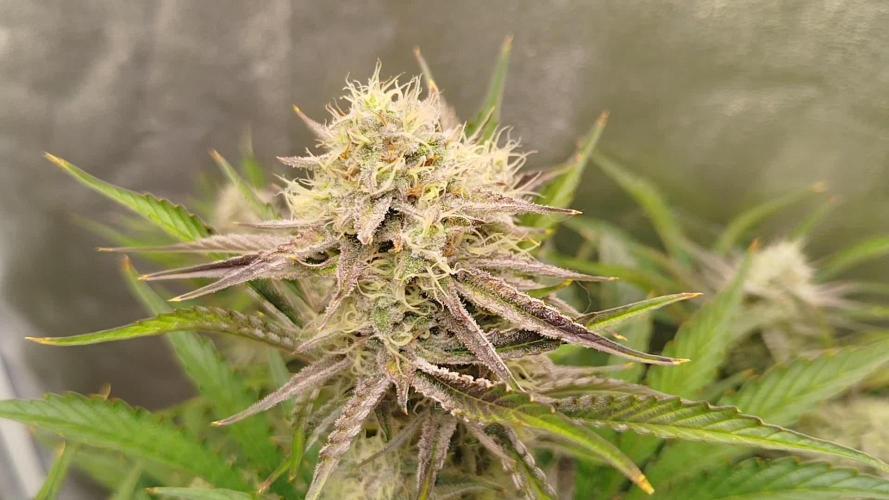
Our Zamnesia autoflowers have been on their journey through the magical flowering period for a while now, this is the second week of flowering considering that autoflowers still flower spontaneously some sooner than others but all around the 3rd-4th week. .
---- The general environmental conditions are good, the heat has increased a bit more but for the first weeks of flowering it is not a big problem, let's remember to never exceed 27 degrees centigrade in the last 4 weeks to avoid compromising the quality of the flowers. If necessary open the growbox but never let it exceed 27-30 degrees
where 30 is already a lot. The positive thing is that as soon as the lights go out the change is already somewhat visible and as autumn progresses we will also improve. The humidity is fluctuating but we try to control it with two dehumidifiers when necessary, pushing both of them possibly not into the growbox but directly into the room. (I dehumidify the room and the air in the growbox should also be dehumidified)
--- I'll start by giving you some information about the Sticky Beast, it's a monster, a real beast in fact, right now in an 11-liter pot it's drinking 2 liters of mush a day and I find the soil very dry, if I give 1.5 dehydrated, incredible, I don't dare to think what's about to happen to these buds, very fast to grow and with a full-bodied plant. We've already noticed that it's a beast, now we're waiting for the other typical characteristic of the finale: Sticky.
--- Fertilization program - The fertilizers are always Plagron and I'm following the table that I generated on the site depending on the chosen substrate. Create your own card and follow it, never be presumptuous my friend as I have been in the past, follow the card and look at the plants, not all need the same amount of fertilizer. We have reached the moment to give a good dose of iron in the first weeks of flowering, already of race life not sprayed but mixed with fertilizers. We have then added the power buds to stimulate the birth and development of flowers.
---- https://plagron.com/it
- Power Roots - 1ml/l
- Alga Bloom - 4 ml/l
- Pure Zym - 1 ml/l
- Sugar Royal - 1ml/l
- Vita Race - 5 ml/l
- Power Buds 1ml/l is now added i have to tribute more than something to this bad guy!
--- The 100% Organic pack by Plagron can be found on Zamnesia at the link: https://www.zamnesia.io/it/11457-pla gron-easy-pack-natural.html
--- Now dehumidifier running keeping the range from 45 to 55% /
/ Strain Description // What happens when three famous strains come together? Sticky Beast Automatic by Zamnesia Seeds is a pure autoflowering composed of some of the best strains. From this combination, where the delicious flavors of Bubble Gum meet the famous OG Kush and the productivity of Critical Auto, a real autoflowering is born that is extremely easy to grow!
// AWARD WINNING STRAIN // First Prize at Autoflowering Highlife CUP 2018
--- Get a seed of this amazing strain --- https://www.zamnesia.io/it/3331-zamnesia-seeds-sticky-beast-automatic-femminizzato.html
- Soil and Fertilizers entirely organic --- https://plagron.com/en buy on www.zamnesia.com
- Growbox and air system --- https://www.secret jardin. com/
- Light — P2000 - https://www.viparspectra.com
- Music and sound --- I made my girls listen to 432hz frequencies and music from www.radionula.com
- Z --- You can find these seeds, much more from the world of cannabis, mushrooms and an incredible series of accessories and gadgets on the reference site not only mine but of many growers
---- https://www.zamnesia.io


Likes
2
Share

@pareto
Follow
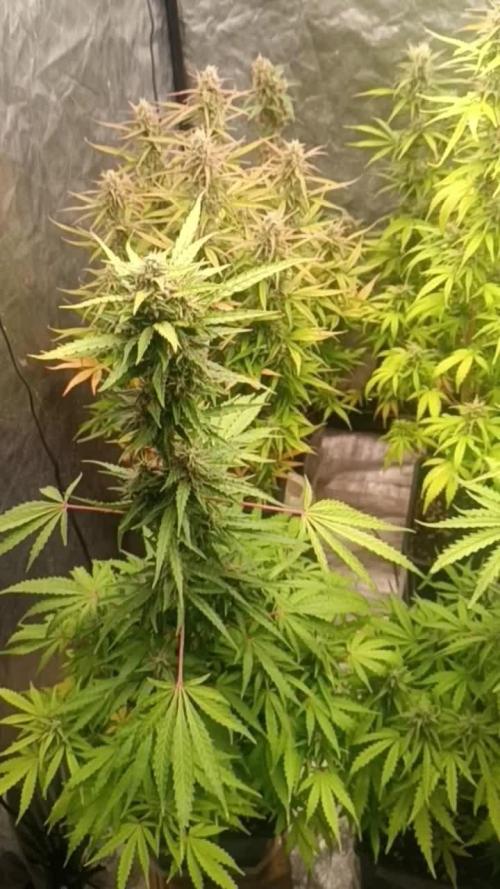
What a roller coaster of emotions. Was a litle early to harvest but since I also got some pollen thats totally fine!


Likes
17
Share


@The_Doctor_Green
Follow
Registro esta semana como la primera de floracion ya que se nota con facilidad donde van a crecer los cogollos!.
Espero que sean grandes!!🤞🤞🤞😁😁😁🚀🚀🚀🤪🤪🤪.
2da semana de floracion al 09/02/24 los futuros cogollos ya se ven como van creciendo, de floracion rapida me ha dicho el grower y se nota la diferencia con el otro diario.(en el otro diario se puede ver q los cogollos ni forma tienen😅)
Esta semana hice riego foliar con aceite de neem, para evitar plagas.En el suelo regue con micorrizas 1ml x litro de agua, aumente la dosis de agua de 1.8l a 3 litros, para que el mismo riego se drene y asi poder medir el ph y ec.
El ph del drenaje me dio 6.3 y la ec 1100ppm.
Esta semana también quite algunas hojas y ramitas bajas que no valía la pena que se desarrollen.

Likes
7
Share


@Stickygreens420
Follow
1/16/2023 - Day 14: not much new to report. All 6 plants are continuing to look healthy. The Grand Prix seem to be a bit smaller than the Frozen White Runtz and Ice Bath. They all look good though.
1/18/2023 - Day 16: clipped a leaf off each Grand Prix to send it in for a genetic test to determine the sex. I used Farmer Freeman. Nothing else to report at this time.
1/20/2023 - Day 18: watered all 6 plants and foliar fed with the same water. Ph was 6.6, and mixed with ThermX-70, FishShit, Rootwise Micro Complete, Pure Protein Dry organic fish fertilizer, BuildASoil Big 6, Rootwise Enzyme Elixer, Fermented Comfrey Extract, and Yah-Whey Thrive. I know I went crazy, but might as well use it if I have it.
1/21/2023 - Day 19: Plants are looking happy. They obviously loved the feeding yesterday


Likes
27
Share


@Wicked_Stix
Follow
This girl has completely filled the tent up and I dont think shes done stretching yet. I have super cropped a few colas already and I think there will be more of this before it's over. Picked off a few more pollen sacs. She doesn't seem to be producing a lot but I'm sure there are plenty that I haven't found. Shes looking pretty healthy though. Stacking up some buds. Got her on 24 hour irrigation with .5 tsp maxibloom per gallon. Ph running a steady 6. Shes drinking about a gallon a day.
Likes
1
Share

@gse314
Follow
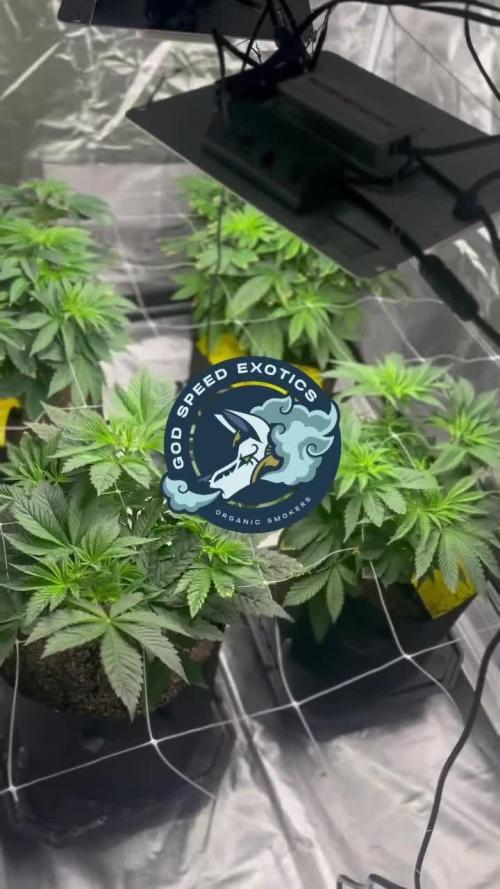
Did a lil experiment and clip the top of each was looking to see a increase veg


Likes
7
Share


@Chubbs
Follow
420 Fastbuds Week 7
Gorilla Cookies Auto
Hello everyone. I hope all is well. Weekly update for these two beautiful ladies. They're definitely advancing nicely with flower sites getting bigger daily it seems. No big issues that I can see besides the fading in the leaves which this far into flower is expected. All in all Happy Growing.
Likes
6
Share

@Bergi
Follow
Letzte indoor woche der Umzug ins Gewächshaus startet am Wochenende
Mitte der Woche getoppt

Likes
63
Share


@AsNoriu
Follow
Day 126. Really day 90 from seed, part of Control Garden.
Amazing how they Bulk, 3 weeks of veg only, crazy strain !
If i ever wanted anything from this strain, she was like "Let's do it ! "
8 sisters were amazing, now i used last two biggest beans and those had no training, no light, nothing, but went into absolute overdrive smells amazing, branches hard to hold while trimming ...
Love them, maybe this time taste will be better, different nutes used ...
Its so funny to hear branches slowly bending and cracking under own weight with no support left ... Amazing sound for grower ;))
Control Garden is an absolute success even with Strawberries hermie part ..
Cure day. 250 g total. Insane for 3 weeks veg, one cola lost to budrot, no direct light and early harvest which led to a bit airy Monster Bulk buds, she could make 150 easy without budrot and one more week of flower ...
Will update on night shift ;)
Day Unknown. Decided to try out finally last girls for diary records, but ...
After a month of intense cure buds got angly/pyramid type forms ... ?????
Any idea ?
First two weeks moved at least twice a day.


Likes
3
Share

@Ekoms
Follow
All good .. watering every 3-4 days ..light on 100 % power when i see a problem a raise up on 55 cm ..now is 40 cm from plants
Likes
32
Share


@TheBloomer1
Follow
Leider ist nach der Keimung mein Handy kaputt gegangen, weshalb ich für die woche 2 und 3 keine bilder mehr habe.
Likes
Comments
Share

@Snipes420
Follow
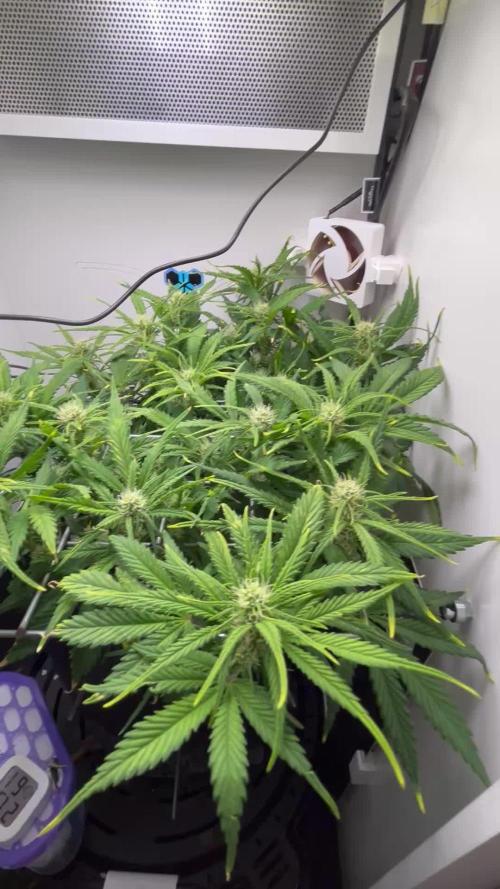
Plant has grown a lot recently. I think the stretch might be over as i havent seen a lot of difference in height recently.
The budsites are developing really well. I have fed her today with some nutrients (easy grow tablet mixed with 8l of water). She received around 500ml i would say in total
I have to refill the self watering base every 2 days. She is very thirsty.
Besides that she is looking healthy. This is my very first grow but everything is going good. Plant has some yellow leaf tips. I dont really know what caused it but it doesnt seem to appear on newer leaves and if it does it stays at yellow tips.
She doesn’t have any terpenes smell yet. It smells like a plant but thats about it.
Im only struggling with humidity. It is around 63-70%. My minigrow says the RH is 70% while my amazon hygrometer says 61%. Idk which to trust more. I have defoliated the lower canopy again for better airflow.
Vpd is around 0.8-0.99kPa
Likes
19
Share


@pifflestikkz
Follow
Day 83
Day 41 Flower
This Royal Creamatic has done amazingly well.
I'm very impressed royal queen seeds!!
She has finalised, soil has returned to dry, I also did 24hrs of darkness on last day to help boost trichome development, not sure if worked or not but she is very tasty looking!
Trichomes now seeing amber and pinks they look amazing, the smell is unreal, a caramel sweet hint then BANG straight gas to the nose and throat 😂 safe to say she'll be a hitter 💪💚
Overall I'm impressed with what I achieved from a 3gal fabric pot, on a whim I threw 3 seeds in, kept 2.
Topped one, and found this strain prefers to just have lst and support during flower as she does present some dense flowers 🙌
I have a wet bud weight of 570g.
Trimmed wet buds are 423g
Wet trim 47g
I will be hanging for 7-10 days, possibly 14 due to size of nuggets 😅.
I'll update dry weight then 🤞
Bud dry weight 287g!!
It smells incredible!
Gassy, pungent straight to the nose, but then it's a sweet caramel / vanilla tone.
Smoking - 😍😋, damn, my partner only had 4-8drags normally, but she described this one as a caramel biscuit ice cream, that tasted that good she smoked past the high 🤦♂️😂🤣🚀🚀
She was off, half a joint and done.
Giggles, munchies, sex sleep.
I enjoyed. It on the other hand, straight the eyes, dry throat, munchies as soon as stubbed out. Then we had amazing connection s+x 😁.
One of my favourite strains I've done so far.
Thanks everyone for following, comments and the likes 🙏
Stay high growmies ✌️💚
Likes
14
Share

Processing
Likes
30
Share


@Jersyn
Follow
Day 47 and I switched ferts completely. I wanted to find something besides 20 additives so I'm trying jack's. Old timers know what they are talking about and swear by this stuff. They are responding great to it already in 2 days!!
So easy too. I also changed bulbs from a well known brand to a denkyu bulb. This bulb is awesome and is way brighter.
Not sure why neither one of my blackberry have turned any color.

Likes
62
Share


@nonick123
Follow
Día 15 (04/11) Las plantas se muestran esplendidas después del 1er riego e introducir la 1ª Bio Tab! 😍
Subo a DLI 35
Día 16 (05/11) Las plantas se muestran espectaculares y radiantes!
Un color verde intenso y sano! 😍
Día 17 (06/11) CBD Auto 20:1 #1 tiene un crecimiento increíble!
El resto tiene un desarrollo perfecto para sus días 17 días de vida!
Día 18 (07/11) Mudanza y riego!
Las plantas se mudan al armario definitivo de 60 x 120 cm por varios motivos:
- CBD Auto 20:1 #1 está empezando a tocar las paredes del armario pequeño
- CBD Auto 20:1 #2 ha tenido una ventilación menos adecuada que sus compañeras, ya que el ventilador quedaba justo encima de ella, y el flujo de aire era inadecuado
Esto ha provocado que la maceta de CBD Auto 20:1 #2 no se seque a la misma velocidad que el resto. Espero que no afecte a su crecimiento
- Las plantas pasan a tener dos lámparas a su disposición (230W + 100W) ajustadas con el regulador al 60%
- Mantenemos DLI 35 tras varios ajustes (tener 2 lámparas simultáneamente es más complicado de ajustar!)
- Colocamos dos ventiladores oscilantes para que el flujo de aire sea adecuado dentro de la carpa
Riego: 4 días después del 1er riego, las macetas se muestran "ligeras" excepto CBD Auto 20:1 #2 por la falta de ventilación comentada arriba
Riego con 750 ml de H2O RO excepto CBD Auto 20:1 #2
Día 19 (08/11) Las plantas se muestran esplendidas y creciendo mucho!
Día 20 (09/11) Macetas poco pesadas, pero no lo suficientemente ligeras para regar
Día 21 (10/11) Introduzco la 2ª Bio Tab a 5 cm de profundidad, lado izquierdo
Riego con 750 ml de H2O RO a todas excepto CBD Auto 20:1 #2 que se riega con 1 Litro
Aplicación foliar de Boom Boom Spray 5 ml/L. Aplicar justo después de encender la iluminación.
Aplico LST a CBD Auto 20:1 #2
💦Nutrients by Bio Tabs - www.biotabs.nl/en/
🌱Substrate PRO-MIX HP BACILLUS + MYCORRHIZAE - www.pthorticulture.com/en-us/products/pro-mix-hp-biofungicide-plus-mycorrhizae
"GDBT420" 15% DISCOUNT code for the BIOTABS Webshop https://biotabs.nl/en/shop/
Likes
11
Share

@GreenEldritchGardens
Follow
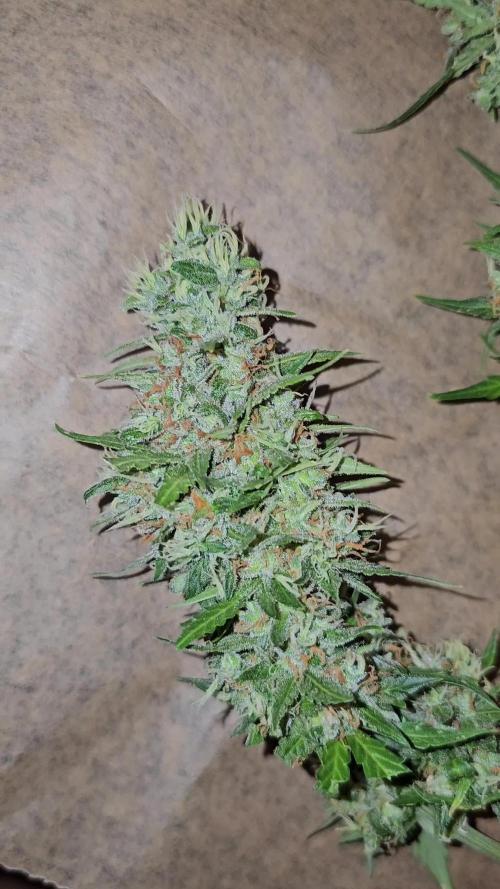
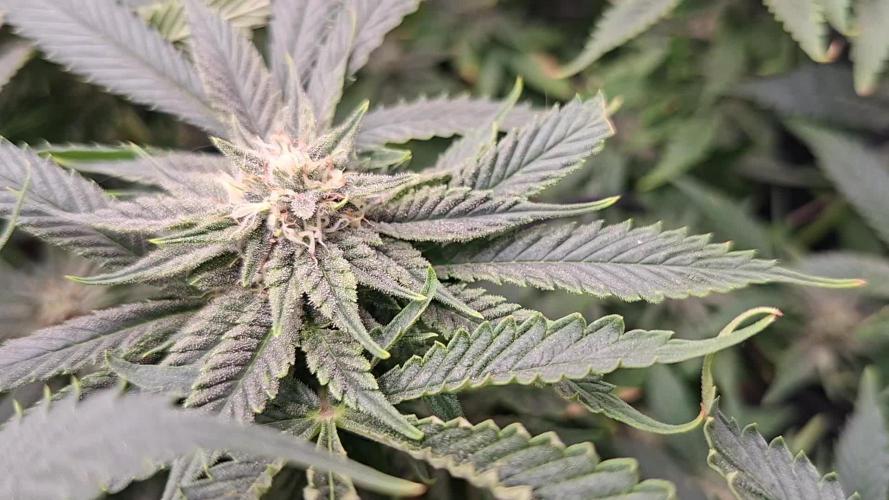
Going amazing and smelling great. It's funny how this strain has an Anise touch to its smell.
I see some amber trichomes so next week I may cut her depending on the situation.
