
Likes
Comments
Share


@pifflestikkz
Follow
Day 165
14/10/24 Monday
De-chlorinated tap water pH 6 with calmag today
Starting to see new growth showing purple and dark tones 🤩🖤
Picture and video update 📸💚
Day 167
16/10/24 Wednesday
Another feed today using de-chlorinated tap water pH 6.
I may as well make it last out this week and see how she is again. I'm thinking she may end up being a 10-12 week flower because of size.
Picture and video update 📸💚
Day 169
18/10/24 Friday
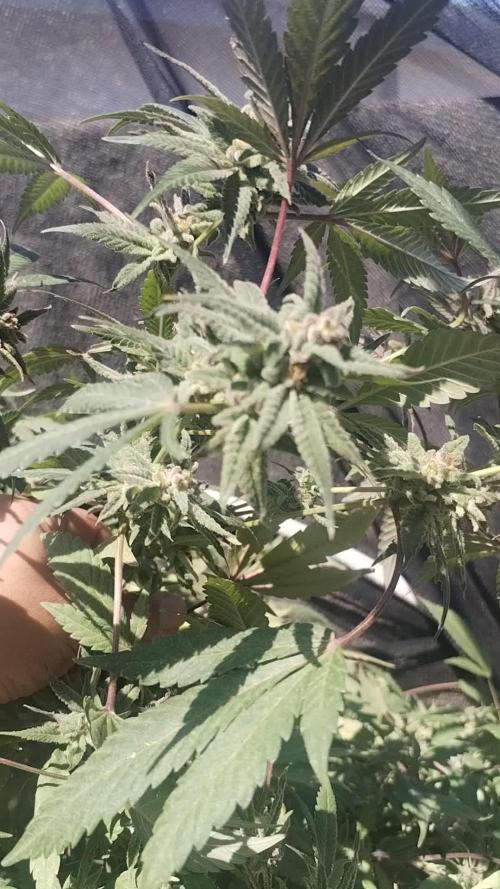
De-chlorinated tap water pH 6 only today. She is starting to put weight behind her buds now...
I went through and did a deep lollipop and defoliation because of what happens to Euphoria in my previous diary, I am not risking mould again!!!
She is doing well!
Her colours are coming through nicely now.
Day 171
20/10/24 Sunday (End of week)
Another feed to finish the week 💪 she is taking it like a champ.
De-chlorinated tap water pH 6 after nutrients.

Likes
28
Share


@SooSan
Follow
Dans l'ordre :
Blueberry
Dutch Passion
Blueberry
00 Seed
Blueberry
PEV Seed
Blueberry
Bulk Seed
Animal Cookies x Blue Monkey
Exotic Seed
Red Hot Cookies
Sweet Seed
DoSiDos x Purple Punch
PEV Seed
Purple Shot
Exotic Seed


Likes
12
Share


@UK420hydrogrow
Follow
Ok had a long week various problems with humidty and temp issues led me to upgrade tent from 1.2 x 1.2 to a new 2.4 x 1.2 x 2.0 also changed the flower lights to the x 2 viparspectar 450 reflectors along with the new white lighting 315 watt cdm all in one light with there 4k flower pro bulb the plants are loving the new space and abundance of lights any tips comments etc feel free to msg

Likes
9
Share


@HollowSource
Follow
She is trying hard to keep up with the amnesia but I think she is also destined to be short and fat. The tops look primed to develop into lovely fat buds, a lot broader than the others. She is starting to get a nice minty scent to her.

Likes
2
Share

@Riboh
Follow
Week 8 and the Tart Pops girl is looking frosty and fragrant — sweet candy terps with a tangy twist filling the tent. Buds have packed on some serious weight over the past two weeks, with dense colas coated in a thick layer of sticky trichomes. The colors are starting to show hints of purple and pink under the sunlight, giving them that “dessert shelf” look.
Pistils are about 70–80% turned, and trichomes are mostly cloudy with a few clear still hanging around. Feedings are being tapered down, and the plants are cruising into their final phase before the flush begins.
Estimated harvest window Day 63–70 (Week 9–10) depending on trichome maturity. A few more days to let those terps peak and resin fully ripen before the chop. The Tart Pops are almost ready to live up to her name — sweet, sticky, and seriously tempting.

Likes
107
Share


@MrJones
Follow
I was very impressed with the yield from 1 plant, 88 Grams, the smell when you open the curing tote is phenomenal, the buds have plenty of trichomes, and get you stoned as hell. I grew this plant in y super coco, with only a few late flower top dressings, straight forward and very easy. I would recommend these seeds to anyone!

Likes
3
Share


@Therbalist
Follow
Completely back into Veg again growing slowly for some most are thriving!
Had around 20+ seeds off a zkittles and chocolate skunk will be using them indoors on my next cupboard grow!
Likes
21
Share


@Rollex420
Follow
Dos Si Dos # 33 ready for drying in the jar, honest weight (53,5g) seeing the structure which was very small I would have expected something less..
but I am very satisfied. the quality of this weed is absolutely at the top, the taste is very well defined.. when smoked it makes your nose tingle,flavor it is mainly pure lemon with a hint of mint in it. even the strong smell induces an entire room in a few seconds without even smoking it yet.
I also collected a 0.4g of scissor hash which turned out very well.
it is my favorite in this crop because it surprised me in everything both for its unique terpene profile and for its yield that I never expected given its size compared to wedding cakes.
the total weight therefore of all three plants is (135.5g) and a total trim of (44.9g)
that according to the calculations even of these crops I reached (1g/watt) precisely. (And im not a pro)
I am certainly satisfied with that. 🙌🏻💚


Likes
4
Share

@PhinolaGreen
Follow
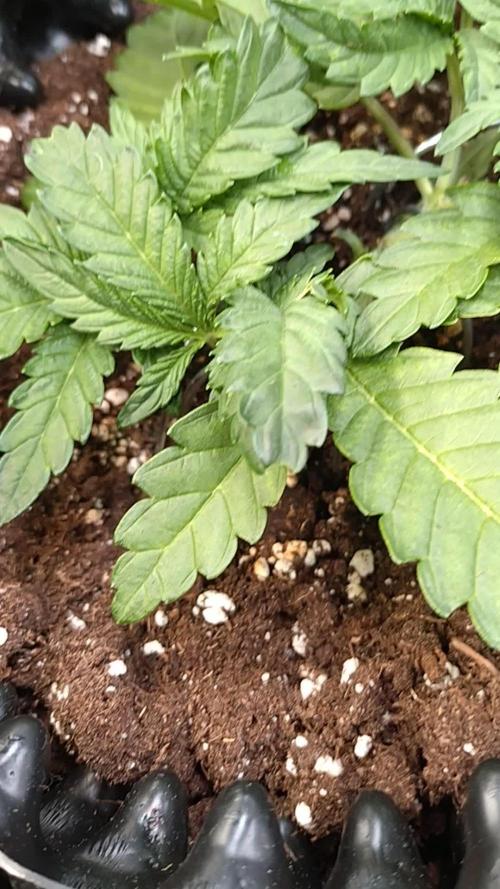
4. Woche
So langsam geht es voran, sie wurde mittlerweile 3x getoppt und ich lass sie so jetzt wachsen, jetzt darf sie Groß und Stark werden 😀
Likes
89
Share


@BioBuds
Follow
This is the sister diary of the Runtz showdown, in which we pit two great performing strains created by two highly acclaimed and respected breeders, in a duel to the death.
This diary features the RUNTZ XL AUTO strain by SweetSeeds. In the meantime, all seeds have germinated and seemed to have a level start.
Also here we loaded the grow with our magical intentions as we sowed on Imbolc, the celebration day of the Goddess of spring: Bridget.
We cant wait to see where this will lead us. Both strains will have the exact same conditions, lighting, care and nutrition.
The Lights
Also here we use our trusty Mars Hydro SP-3000, where we are trying to get over 600 grams (2x gram per watt) we succeeded almost on the previous grow, where we got to 1.5 grams per watt.
We are starting in the regulars when these strains have only 4 to 5 weeks left to go, to double up on the 18hr light schedule.
The Soil
Our trusty organic super soil recipe which I will include in the images
The Genetics
SweetSeeds Runtz XL
Variety: SWS88
Indica: 47,1%
Sativa: 52,5%
Ruderalis: 0,4%
THC: 17-25%
CBD: 0,5%
Indoor Yield: 400-550 g/m²
Outdoor Yield: 50-175 g/plant
Indoor/Outdoor Harvest: 8 weeks from germination
Height: 60-120 cm
Effects: Relaxing, Stimulating, Creativity
Taste: Sweet, Fruity
Thank you for following us again and all the support on our previous grows! We love you!
Hug Biobuds and Sunshine.
Likes
16
Share


@Big_Rade_SCLA
Follow
The solstice. Here we go! I hope to start seeing some action soon and pulling out males. I have my hunches, but haven't confirmed any pollen sacks. The plants got over watered so I have laid off the watering for now. I will be preparing my last transplants soon so I modified pot size to show 30 gallon. So far so good. No changes yet. Considering LST for the 4 plants growing together. I indicated weak smell, but you can begin to get subtle hints of lemony/orangey aromas. Happy Growing grow-mies.

Likes
3
Share


@UrbanBoer
Follow
This one is going to be weirdly exciting like all grows… but nothing beats growing strain you know nothing about down to to it’s ID. This is why this diary is dubbed Unknown Strain, and a lot more journals will be dubbed unknown strain.
eg.
Unknown Strain #1 - these strains are seeds I’ve collected and forgot to catalogue
Unknown Strain (dealer/grow name #1) - I have it this way,to indicate where or from whom did I get the seed, but failed to get the accurate information regarding the strain. Alike this particular diary. I received seeds from my friend saplug16.20_exotic_genetics. Check out his work on instagram, his my mentor in growing. But I go overboard when it comes to growing.
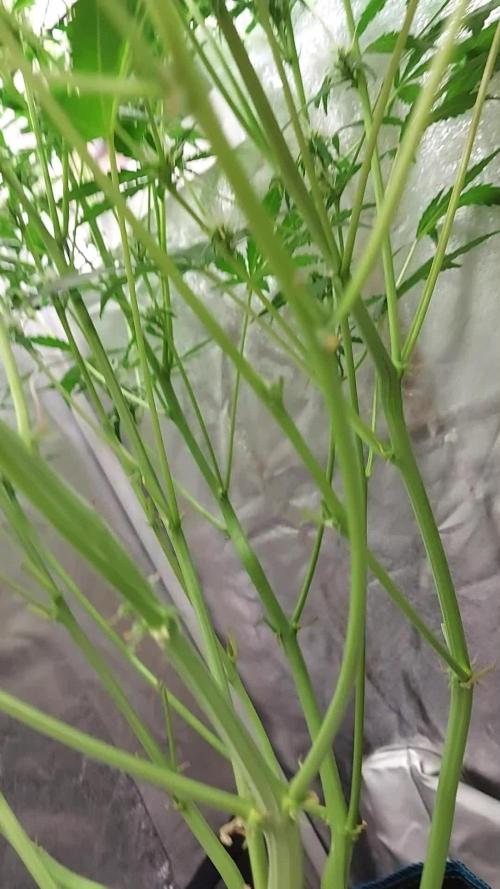
Ever since I’ve seen YouTube videos of growers growing weed plants like bonsais, I started growing my plants like I am growing actual bonsais, LST them in shapes and size while using defoliation and topping to achieve aesthetics. This type of growing is not focused on yield more for the hobbyist who grows for themselves and close friends. But I want to see if I can get more yield with this type of growing bud.
Likes
13
Share


@Canadian
Follow
I will continue to update once they are dry and ready for cure .
I have cut down in jar everything the wait was 114 grams please consider that when it comes to my weight I wait until the main stem breaks with a loud crunch and the buds are really dry to the touch reason for it I have a very busy life and at the end of the day this is just a hobby so I cannot be opening those jars many times a day at most one in the morning and one in the night so I want to avoid mold on them so I push in a Boveda pack to keep them nice . I will update with flavours and other details once I try it I've I have been smoking a different strain that I will review today .
After 4 weeks curing in jars the smoke it is very smooth very nice taste like tropical citrusy with a hint of skunk buds are very smelly and hybrid density to them very enjoyable to have .
thank you for reading have a happy grow

Likes
122
Share


@Y0ink
Follow
26/10:Im Struggling a little bit whit temps,i have to open some cms the tent,but if i do it,RH gonna decrease.im compensating by nebulizing and leaving a cup of water inside + humidifier. im preparing water whit nutrients for later.
inorder to fix temp issue,before the night i changed setup whit a spudnik i hope i made the right choice. let's see what happen at 19:00!
27/10: increased ph from 5.5 to 6 and increased ppm from 500 to 600.

Likes
11
Share


@DeepRootsGrowTrees
Follow
FORBIDDEN 🚫 RUNTZ by FASTBUDS
Week #4 Overall June 22nd-29th
Week #3 Veg
She's looking good this week she's a busy plant with side growth no issues this week. Stay Growing!!
Fastbuds FORBIDDEN 🚫 RUNTZ
Likes
58
Share

@squalino
Follow
🌿 Journal de Culture : Mac 1 Autoflower – "Bee Happy" 🐝 (Semaine 7)
Grand départ en vue ! Sur un coup de tête total, on a décidé de s'accorder 4 jours de vacances à Rimini en famille. Du coup, j'ai dû faire le tour des installations et prendre mes photos un peu à la va-vite avant de boucler les valises. Heureusement, avec les Autopots, je pars l'esprit tranquille.
Paramètres de Culture & Évolution
Taille :
Elle s'est stabilisée à 1 mètre .
Croissance verticale :
À l'œil nu, on voit clairement qu'elle a enfin freiné sa course vers le plafond. Contrairement à sa sœur qui continue de grimper, "Bee Happy" semble avoir terminé son stretch. C'est une excellente nouvelle pour mes 45 cm de marge restants au-dessus de la lampe après avoir monté la lampe au maximum !
Climat & Environnement :
Paramètres avec la lampe calée à 45 cm,
des températures à 24°C jour / 21°C nuit et le déshumidificateur qui maintient la pièce à 60% d'humidité.
Nutrition :
Anticipation avant les vacances
Pour ne pas la laisser en plan pendant notre absence, j'ai dû bousculer un peu mon calendrier :
Boost Floraison :
Hier, j'ai avancé sa ration de nutriments de 2 jours en lui donnant 4 ml de Liquid PK 5-8 de Biotabs.
Objectif :
Lui apporter le phosphore et le potassium nécessaires pour entamer le gros du gonflement des têtes pendant que je serai sur la côte italienne.
Les vannes de l'Autopot vont assurer le relais en eau claire.
Analyse de la structure
Le fait qu'elle ait arrêté sa croissance verticale se voit tout de suite sur sa structure : elle se densifie à vue d'œil. La plante est extrêmement développée avec un réseau impressionnant de branches secondaires qui se sont parfaitement alignées sous le filet de SCROG.
Les têtes commencent à prendre une vraie forme. Les bouquets de pistils se regroupent pour former des pompons bien blancs et bien distincts à chaque extrémité.
Le feuillage est lourd, vigoureux, et les légères marques de la semaine dernière semblent s'être stabilisées après l'apport de Calmag.
À mon retour, je m'attends à trouver une canopée bien plus givrée !
Un immense merci à @mia_biotabs, à Mrs_Larimar et à toute la communauté qui reste fidèle au poste ! On se retrouve dans 4 jours au retour de Rimini pour voir comment "Bee Happy" aura profité de son petit boost de PK. Bon grow à tous !

Likes
Comments
Share

@TheCalyxLaboratory
Follow
Weekly Update: Dialing it back in and managing the stress! 📊
This week has been a bit of a bumpy ride, but we are back on track! 🚀
Current Setup & Metrics:
pH: 5.7 💧
EC: 1.8
PPFD: 700 💡
What happened this week?
We ran into some visible stress symptoms on the leaves because my EC meter broke, which caused the nutrient strength to secretly spike up to 2.3 EC for about two days. As you can see, the girls didn't love that high-concentration shock, but we caught it, replaced the meter, and stabilized the EC right back down to 1.8. 📉
Plant Development & Bud Structure:
Despite the brief hiccup, they are pushing through the flower phase nicely, though they are showing different structures:
The first plant is forming very airy colas at the top, but looking significantly denser and tighter as you move further down the branches. 🌲
The more compact plant is developing exceptionally well overall, putting out really solid, compact, and frosty buds. ❄️
Now that the parameters are locked back in at 700 PPFD and 1.8 EC, we are ready for a smooth cruise through the rest of bloom! Let's see how they swell up. 🔥

Likes
35
Share


@Paulolo03
Follow
Day 80, harvested 1 plant, she didn't really look good, the buds are very smelly and dense though. Some trichomes were brown so decided to chop her (the smallest buds only had milky trichomes, even not even milky for some). It wasn't one of the biggest so I hope for bigger yields for the other plants !
Now drying, got 145g after the wet manucure.
The rest of the plants are still in the grow box, they're healthier and they'll be ready in few days, I thought I would harvest before but mother nature is the boss.. will keep you guys updated !

Likes
15
Share


@Mr_Prawn
Follow
Las Ak parece que tienen un problema creo que tiene que ver con CalMag pero no estoy seguro, la otra no está afectada. Bajé la EC pero no se si tengo alguna carencia exceso u otra cosa. El dia 21 subo altura de luces al máximo el día 22 bajo la potencia de los quantum boards de 440w a 350w
Likes
29
Share


@Ukfarmer420
Follow
Hi guys sorry for a late post this week.
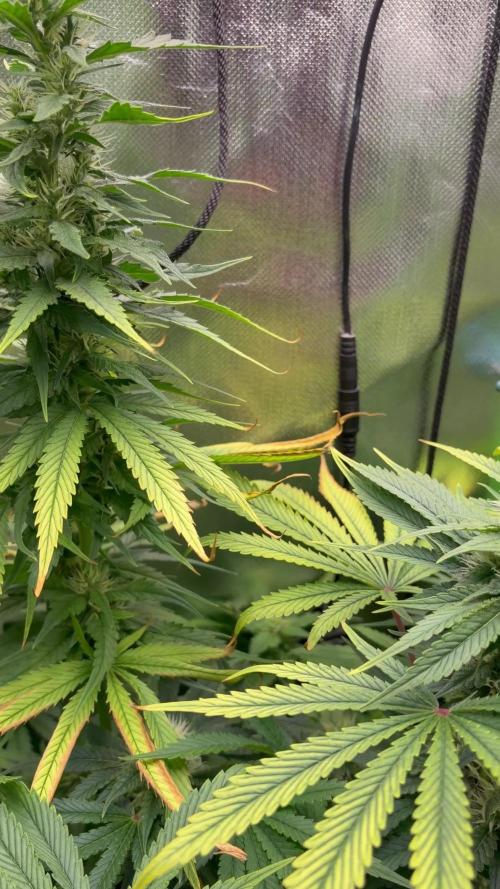
So started flushing all the plants now and they all.smell.amazing and getting some nice colours coming thru.
Really frosty buds on these autos and really impressed so far.