


Likes
Comments
Share


@Jardineiro_Br
Follow
Essa planta vou tocar sem treinamento pois acho wireless o caule está frágil na base.

Likes
41
Share


@Growing88
Follow
Cambio timer a 12/12 cambio spettro,e con il controller cerco di imitare il sole di fine estate,uso le co2 tabs nella soluzione dei nutrienti


Likes
4
Share

@ChitownCannaChica
Follow
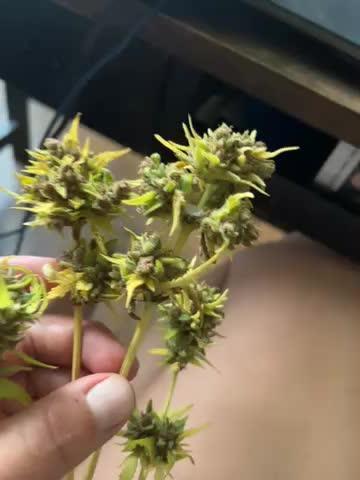
The smell is amazing believe it or not! Didn’t have high expectations when the weather was super cold at the beginning and super hot at the end with high humidity, no rain, lots of rain— outdoor is just so darn hard. At least I’ll get a couple of good joint out of it! More to follow!
Likes
9
Share


@Krissci
Follow
Day 2 - LST and topping if possible before transition to flower.
Slow for separate branches to grow


Likes
9
Share


@pascal_dop
Follow
Ich war letzte Woche ziemlich im Stress weshalb ich die kleine Prinzessin, bis auf tägliches gießen natürlich, sich selbst überlassen habe. Ich habe jetzt nochmal die größeren Blätter entfernt und frische Erde ausgefüllt, damit sie jetzt ins Finale starte kann. Ich bin froh, trotz der wenigen Vorerfahrung zu diesem Punkt gekommen zu sein. Nun dauert es nichtmehr lange 😬

Processing
Likes
5
Share


@Ensign420
Follow
Week 02 Introduction
This week has been a bit of a struggle. Had my first experience dealing with slime and brown algae. But I think adding enzymes and increasing the beneficial bacteria helped to fix the issue. Also experienced nutrient burn for the first time. My nutrient solution strength got as high as 671 PPMs. So backed it down to about 430 PPMs during the end-of-week reservoir change. Also cut Hydroguard (expired?), CaliMagic, and Superthrive from this grow. Now she's still stunted, but is starting to recover. Hopefully...
[START OF WEEK 02]
Day 01 - Monday - 08/10/20 - Total Days: 008
-----------------------------------
- [0830]: Still looks a bit yellow. But getting larger!
--- Solution strength was at 248 PPMs.
--- Just topped off with a bit of distilled water
--- PH went up to 6.1 so PH'd down to 5.8
--- Ran the top feed for a bit to wet the hydroton.
- [2130]: She's looking even more yellow now.
--- Even the new leaves are really yellow.
--- Decided to add more base nutes.
--- Added 4ml of Sensi A
--- Added 4ml of Sensi B
--- Now at about
--- Solution Strength went up to 304 PPM.
--- PH was at 6,
--- Also raised the water level a bit more.
--- I really hope it's a nutrient deficiency and not an over-watering issue.
--- Please live!
Day 02 - Tuesday - 08/11/20 - Total Days: 009
-----------------------------------
- [0830]: Looking less droopy. But still yellow.
--- Decided to do a reservoir change.
--- 4.5gal of distilled water
--- 8ml of Sensi Grow A
--- 8ml of Sensi Grow B
--- 8ml of Voodoo Juice
--- 4ml of B-52
--- 4ml of CaliMagic
--- 4ml of Hydroguard
--- 4 drops of Superthrive
--- PH'd down to 5.8
--- Solution strength: 302 PPM
--- Since I didn't want to risk over-watering the rockwool, I did not to do a top feed, may do one tonight after the sleep cycle (lights are still set to go off at 10am and back on at 4pm).
--- As I was doing a reservoir change, I noticed that the tubes and bucket were a bit slimy. Didn't really stink or anything. Is this normal? Maybe due to the Hydroguard and Voodoo Juice?
--- I hope she gets better soon!
- [2215]: Getting larger! But still yellow.
--- Also can see a root growing through the net pot! Tiny little thing but it's there! Will have to start dropping water once more appear.
--- After looking over a few DWC diaries using AN nutes, seems like my solution strength is still too low. Most around this stage average around 500 PPMs with about 4ml per gallon.
--- Top fed for a minute to wet the top of the hydroton.
--- Solution strength went down to 263 PPM.
--- Added 8ml more of Sensi A
--- Added 8ml more of Sensi B
--- Now base nutes are at 16ml for 4.5 gal of water.
--- PPMs went up to 411.
--- Still lower than 500 PPMs, but that's okay.
--- PH was at 6. Not sure if I should adjust PH using AN nutes. So going to not ajdust unless PH goes above 6.1.
Day 03 - Wednesday - 08/12/20 - Total Days: 010
-----------------------------------
- [0830]: Looks like more root growth!
--- She still looks yellow. But leaves are perky.
--- PH was at 6.2 so lowered down to 5.8.
--- Solution strength was at 394 PPMs
--- Since roots are still growing, I decide to lower the water level a bit. Now water level is a bit below the net pot.
- [2200]: Root is getting longer!
--- Slime is returning. Not sure why.
--- Solution strength: 357 PPMs
--- PH: 6.1
--- Decided to add an enzyme along with more beneficial bacteria to hopefully cure the slime.
--- Added 16ml of Sensizym
--- Added 5ml of Hydroguard
--- Added 8ml of Voodoo Juice
--- New solution strength: 430 PPMs
--- New PH: 6.1
--- Top fed for a minute.
--- This slimy residue is really freaking me out! I hope the added enzymes will help eliminate the slime.
--- Going to do a full reservoir sterilization/nutrient change over the weekend. Please survive until then girl!
Day 04 - Thursday - 08/13/20 - Total Days: 011
-----------------------------------
- [0930]: I think the enzymes worked! There is little to no slime now!
--- Although I think the root was also dissolved in the process. It's now just a little stub sticking just below the net pot. The enzyme is also suppose to dissolved dead roots too but guess that root was too weak? Not sure what happened there. But I think the slime is cured!
--- Solution strength went down to 395 PPMs. Decided to add more base nutrients.
--- Added 8ml of Sensi A
--- Added 8ml of Sensi B
--- Added 4ml of B-52
--- Solution strength went up to 598 PPMs.
--- PH was at 6.1
--- As long as the PH is between 5.5 and 6.3, I'm not going to use PH Up or Down. But still will monitor PH levels.
- [1715]: Checked up on her after her nap and shes looking alive but stunted. But no slime!
--- Decided to add some sugars to help maintain the enzymes and beneficial bacteria.
--- Solution strength was at 587 PPMs.
--- PH was at 6.2
--- Added 8ml of Bud Candy
--- Solution strength went up to 671 PPMs.
--- PH also went up to 6.3
--- Lowered water level a bit to hopefully promote more root growth.
--- Top fed for a minute.
--- She is getting bigger, but still looks yellow.
Day 05 - Friday - 08/14/20 - Total Days: 012
-----------------------------------
- [0915]: Leaves look a little burnt on the tips. Still no slime.
--- Going to back off on the PPMs to hopefully fix the nutrient toxicity.
--- Solution strength was at 632 PPMs
--- PH was at 6.3
--- Added/Removed water until PPMs were at 536.
--- PH was still at 6.3
--- Raised water up a bit, then top fed for a minute.
- [2200]: Looking better. Still yellow though.
--- Solution strength: 514 PPMs
--- PH: 6.5
--- Added PH down.
--- New solution strength: 518 PPMs
--- New PH: 5.2
--- PH was kind of high. So decided to PH down. Had to use quite a bit to bring it down. But eventually got it to drop down to 5.3. A little low, but so far, the PH has always gone up so wanted to start it really low.
--- Ran the top feed for a minute to re-saturate the top of the hydroton.
Day 06 - Saturday - 08/15/20 - Total Days: 013
-----------------------------------
- [0830]: She looks stunted. leaves are still yellow.
--- Solution strength: 514 PPMs
--- PH: 5.6
--- Top fed for a minute.
--- Not sure what to do at this point. Going to do another reservoir change soon. Hoping she lives until then.
- [2145]: Looking pretty much the same.
--- A bit of slime has returned. Since I've been diluting the nutrient solution, the enzyme ratio has dropped. So I guess this is expected.
--- Also noticed that slime build up was on the air-stones. Never really checked the stones so not sure how long that has been there. Looks brown too, which can't be good.
--- Going to do an H202 sterilization of the system (minus the net pot) tomorrow so did not add anything.
--- Lowered the water level to below the net pot.
--- Then top fed for a minute.
Day 07 - Sunday - 08/16/20 - Total Days: 014
-----------------------------------
- [0900]: STERILIZATION DAY!
--- Decided to skip today's night cycle for a deep clean.
--- I'm hoping that skipping a night cycle won't be too stressful.
--- Temporarily moved her to a new bucket.
--- Used about a half of gallon of straight distilled water to flush out the net pot.
--- Drained the system and wiped up all the brown sludge. Also removed the air stones and cleaned up all the goo.
--- Filled the system with 2 gallons of distilled water and at least 30ml of food grade hydrogen peroxide (35% strength).
--- Yea its a lot, but since I'm not going to sterilize the system overnight, I went with a really high doseage. Basically I kept adding until I started to see little bubbles start to form.
--- Then I ran the water pump.
- [0915]: Boiled the air stones in tap water for about 10 min. Then reconnected them to the airlines.
--- I let the air stones and hose soak in the sterilization solution for about 5 minutes so the peroxide can absorb into the stones. Then ran the air stone to help mix and agitate the solution.
--- Occasionally, I'd repeat the process of turning the air pump off for a few minutes to let the stones soak.
- [1000]: Covered the top two row of holes of the net pot with some aluminum tape. Hopefully this solves the light leaking in through the hydroton.
- [1200]: Used an old toothbrush and scrubbed the pump clean. Then drained the system.
--- Refilled with more distilled water and peroxide. Again added a lot.
--- Ran system again to sterilize even more.
- [1530]: Drained the system and refilled with distilled water to rinse.
--- Ran the system for a few minutes, then drained and rinsed again.
--- Did this a few more times over about an hour.
- [1630]: Added 4 gallons of fresh distilled water.
--- Added 15ml Sensi Grow A
--- Added 15ml Sensi Grow B
--- Added 12ml of B-52
--- Added 16ml of Voodoo Juice
--- Added 16ml Sensizym
--- Solution strength was at 430 PPMs
--- PH was at 5.6
--- I was going to add Hydroguard, but I think the bottle is expired. Since 2017 or 2018!? I think Hydroguard is good for up to 2 years from the date on the bottle or 6 months after opening. So not going to use from now on. I wonder if this could have contributed to the slime build up.
--- Also removed the CaliMagic and Superthrive too. Going to only use AN products to eliminate the chance of incompatible nutrients.
--- Placed her back in the bucket and top fed for a minute.
--- Here's hoping for the best. Going to let it ride until morning! Please feel better!
[END OF WEEK 02]

Likes
52
Share


@Ogchemst
Follow
Quick kush is called quick for a reason 👌, nice big indica leaves starting to grow and stretch pretty fast, i had to re pot one of the girls so one of them might look a bit sad but she will get better (its the salts)
Flushing and Buffering-
I am personally using Canna Coco Coir,mix with one brick of plagron coco coir(had one left).
1. Why you Should buffer your Coco. Lets get to reading! (Its Worth it for those that dont know about it)
There are cation exchange sites in coco that will interfere with nutrition until they are buffered. The cation exchange sites in coco naturally come loaded with sodium (Na) and potassium (K) cations. However, the Na and the K are only weakly held to the exchange sites. In the presence of calcium (Ca) or magnesium (Mg), the sites will release their Na or K cations and lock onto the Ca or Mg. These processes are known as “cation exchanges”.
Buffering coco is accomplished by soaking it in Ca and Mg. This allows the cation exchanges to take place prior to adding plants. Simply soak your coco in a solution of Cal/Mag water and the exchange sites will release their K and Na cations and lock onto the Ca and Mg. When the cation exchange sites bond with Ca and Mg rather than Na and K, it is “buffered”. The bonds that hold the Ca and Mg to the sites are very strong and cation exchange will largely stop. This means that all of the nutrients that you add to the water will be available to the plant at the ratios that you provide them.
2. Alot of growers Grow in Unbuffered coco coir and its a big mistake guys, I myself was a "victim"😬of unbuffered coco and it does cause alot of problems... now i am going to try and fix them!
-----GROWING IN UNBUFFERED COCO---
Many growers are unaware of the need to buffer the coco and they try to grow plants in unbuffered coco. In unbuffered coco, the cation exchange sites will strip the nutrient solution of the Ca and Mg and replace those cations with Na and K. This creates a sub-optimal Nutrient Element Ratio (NER) and renders Ca and Mg unavailable to the plant.
Failing to buffer the coco is why so many growers suffer calcium deficiencies in coco grows. Manufacturers of prepared coco products try to exploit these problems and convince growers that only their proprietary products are suitable for growing. However, it is actually very simple to properly buffer your coco yourself. This tutorial walks you through the process and provides all the information you need to turn even the cheapest brick of dehydrated coco into a superior growing medium.
I hope i Helped out someone who didnt know about this link on how to Buffer your Coco Coir is Here https://www.youtube.com/watch?v=OQi8AMMIyyA&t=18s
14/02/2019- I Decided tp raise up the amout of nutes and im giving them 1,5 ml per L so 15 ml's for 10 L / 2 Gallons of water

Likes
4
Share


@18six12twelve
Follow
Euphoria Week 5 Of Veg Starting To Pick Up A Bit Now But No One's Fault But By Own As I Had My Lights A Little To Far Away, But Starting To Pick Up A Little Bit Now


Likes
6
Share


@CarpediemOK
Follow
I had to travel, as soon I arrived(3 days with no water) they look with all leeds failed down, I put water on she refused but few hours after she becomes like this, really healthy

Likes
22
Share


@Grass_castle2020
Follow
Day 50 girls a growing so good
Day 51 girls are so happy watered and they are happy
Day 52 wow got some awesome pictures and got a video of our girls.
Day 53 girls growing got watered
Day 54 girls got so much water yesterday they didn’t need any today
Day 55 watered the girls man the drank it up
Likes
21
Share


@DRO420
Follow
Switched to flowering . Plants are making their final stretch before producing buds.

Likes
12
Share


@GrowGuy97
Follow
Will post dry weights & more comments soon! Sorry for the lack of updates but Thanks for following & happy growing friends!✌️🏼🙏🏼🌱
Likes
20
Share


@LaGrassaFarm
Follow
Buenas, las plantas ya pasaron la fase de pre-floración, justo a los 21 días le hice la última defoliación.
He intentado dejarle solo un par de nudos o tres, por arriba, estilo lollipopping, está técnica de poda agresiva, está mas vista en América, no tanto por aquí, por
España. Estaremos atento a ver como le va esta poda a este cultivo🙌
Le aumenté la base de fertilizante, ya que en esta fase, la planta necesita más alimento, para cambiar su metabolismo, para florecer en óptimas condiciones.
Ahora comienza el engorde de la flor, espero veros de nuevo la semana que viene por aquí😊
Un saludo y buenos humos!


Likes
37
Share


@BnV405
Follow
Great week popped in a day! Germination took 1 day also! Growing fast! Fastbuds!
Likes
51
Share


@eldruida_lamota
Follow
Bueno resumiendo cookies gelato es una variedad híbrida muy fácil de cultivar pero ojo, cuidado con los últimos riegos si no queréis perder cosecha por moho. Lo demás de 10 pegada heavy sabor increíble, cogollos duros como rocas y bañados de una gran capa de polen.
El ambiente del secado se mantuvo en 23 grados de media y la humedad estuvo por debajo de los 45% en todo momento.
Poco más la verdad estuve encantado de poder cultivar una genética tan potente .
Un saludazo que paséis un final de año increíble y por supuesto buenos humazooos💨💨💨.

Likes
17
Share


@Brickie74
Follow
This week went very well. She grew another 7 +/- inches. A little bit of stretch but not too bad, I'll keep an eye on it. If i didn't already have 2 more SD growing, I probably would have kept this plant for a mother plant. I'm just starting to do a little cloning. I like SD but i don't want 7 plants right now. With the little bit of LST i did, my canopy is pretty even height wise.