




Likes
3
Share

@AestheticGenetix
Follow
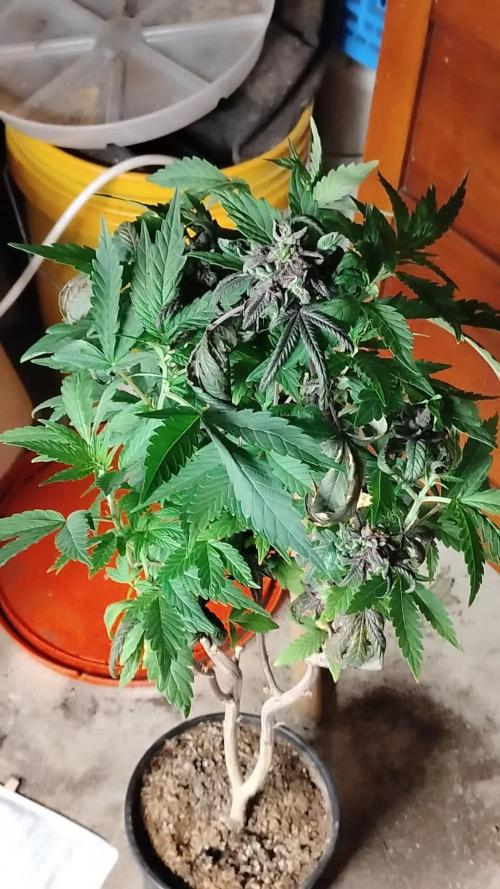
Looking better and better each day
Hopefully starting 12/12 before the plants fully revegged isnt super detrimental to the whole process.
Likes
6
Share


@Smokwiri
Follow
All looks good, smell is good,
flushing with ec 1.4
I could have harvested last week already, but i like to let it stay a little longer
harvest wont be impressive, but it's an trained autoflower, on normal potting soil, and lights very low.
quality looks very nice, smell too, I hope it tastes the same too.
Likes
19
Share


@lakocinka
Follow
hello, quick update.. I got another fan which is amazing.. čubičky (my plants) looks healthy and that's most important.. <3

Likes
46
Share


@D33jW
Follow
🍋🍌 Persian Pie - Green House Seed 🍌🍋
Today was a great day in the grow room! I did some transplanting and used a couple of new products that I'm really excited about.
I used Extreme Mycorrhizae and mix it with clean soil for the first time.
I'm confident that this addition to my routine is going to take my plants to the next level.
In addition to the transplanting, I decided to trim back two of the upper fan leaves,
to allow the lower shoots to start growing more vigorously. It's all about maximizing that growth potential!
Hope all will go this way to the end 🙏
THX for watching and see you next week 👊

Likes
1
Share


@NeanderStrainhunter
Follow
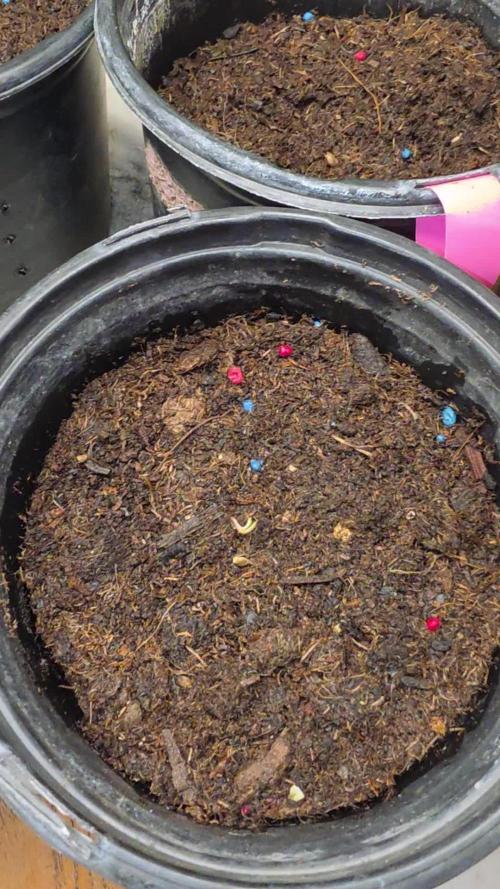
Die Pflanzen haben das LST gut vertragen, sind fast alle auf einer Ebene und etwickeln sich gut. Ich habe etwas PH-Down eingesetzt um den PH-Wert auf 6,0 zu reduzieren.


Likes
10
Share


@jenijane
Follow
Glad I kept a record of my first grow. I bought the clones on a whim to observe their growth cycle. Enter free time. Significantly less bud than I thought but I did have way more time vegetating than flowering... forced to trigger it early.


Likes
36
Share


@GYOweed
Follow
Thanks Tom @Seedsman U.S.A shipped under a week for these delicious beans and promos!
Just for fun did 2 in glass of water then directly into soil, 3 in water then in paper towel 2 days then in soil.
Like I figured, if the seeds tap and are fresh just puttem in prepped media.

Likes
3
Share


@Jay_thegr8
Follow
This is the week right before the 24 hour dark period and switch to 12-12 looking very healthy

Likes
11
Share


@adam_pawloski87
Follow
Pre98 Bubba , oh how I’ve missed you for so many years! These ones came out absolutely gorgeous! Loving the the purple phenos 😍 ! These ladies liked to stretch quite a bit so you’re gonna want to use some LST on em but I also recommend topping at least 6 times to get a better bang on your yield ! Expect nice tight purple buds with a tremendous amount of frost covering, some of the frostiest Bubba I’ve ever had! Over all I give it 10 stars an would definitely over an over run this strain!

Likes
1
Share


@Hashsmokinslasher
Follow
Most of them are displaying male characteristics unfortunately. Got the two females and the three that haven't developed sex organs mainling in my greenhouse as of may 26th.
Haven't put a grow light on them yet but I should be able to set that up this week
Likes
6
Share


@midnitrtoker
Follow
Almost at harvest. This is the last week of feeding then on to flush. I have it an extra week as I said before was not really satisfied with the overall performance of drip hydro. Buds seem to small and not dense as other nutrients I’ve used. I will definitely run drip hydro again see if I can get better results. The real test will be at harvest after weighing. See you all soon.
Likes
38
Share


@Cariboo_OG
Follow
Utopia Haze is a rare heavily sativa dominant hybrid (90% sativa/10% indica) strain created through back crossing Brazilian Sativa strains. This tasty little bud took home 1st Place for Best Sativa in the 2008 High Times’ Cannabis Cup and for good reason – with its potent 18-22% average THC level and long lasting cerebral effects, Utopia Haze is one powerhouse smoke. The Utopia Haze high comes on soon after you finish your first toke, hitting you with a strong cerebral lift that infuses you with a sense of hazy relaxation.
Type: Feminised/Photoperiod
Cultivation: Indoor/Outdoor
Flowering Time (days): 70-75
Indoor Yield (g): Up to 650
Feminised Outdoor Harvest Month: October
Feminised Outdoor Harvest Month Week: 3rd-4th week
Aroma: Citrus, Woody, Pungent, Mint
Effect: Cerebral Lift, Hazy Relaxation, Sleepy
Welcome Everyone to the Final Entry of my Utopia Haze Grow !
There is so much to discuss ! I have been extremely busy as of late trying to get this Harvest together, but i am happy to have it here for you now !
I Seriously under estimated the amount of time, help from others, and my own necessary skills to pull this off.. and i still kind of screwed it up lol !
But its worth noting i have never actually done this before and trying to document it during....was extremely hard.
It is next to impossible to work an iPhone with rubber gloves on !
First I want to discuss everything step by step so before you jump straight into the comments on how the end product is so small in "quantity"
Rest assured i am happy with its"quality"...and thats all that matters to me because Life is a journey not a destination! and i have learned so much from this grow that I couldn't be any happy even if i messed some things up :)
But at the very least I hope you read through this entry in its entirety with an open mind and focus more on the process, rather than just the outcome!
I ran out of Ice & i was only able to wash three times..(normally I've heard you should go sometimes 5-6 washes)
Preparation is Key & things will be much better next round :)
Photos 1-22
These are pretty self explanatory but for those of you just tuning in now.. this is what happens to a very happy plant when you don't have the necessary tools to monitor key components of growing cannabis.. Ph, as well as EC levels play a very key role in the outcome of your grow lol that being said I was just able to save this plant by purchasing both tools but that doesn't mean the plant didn't suffer because of the prior events.. This was a Huge reason behind me choosing to turn this harvest into what i would consider
"Solventless Hash Rosin" from "Ice water extracted Bubble hash".
Pictures 23
The idea here is the process of using "fresh Frozen Cannabis" this has been discussed many a time online on such sites as instagram and here on grow diaries as well.. I personally have Never tried the process so i decided to try it out and make a judgement for myself..
Video 24
The Cannabis has now been in the freezer for 72 hours making it very well frozen.. as you can tell i struggled getting it all into the 25u Screen Wash Bag. One thing of note i would do differently is i will de-stem my next batch as i also believe this played a part in the amount of plant matter that escaped through the sieves.
Photo/Video's 25-28
The idea here is "ice water Seiving" & especially with the bags that I am using here that are only have screen material on the bottom portion of the bag it is very important to have spaces in-between the screens to allow the water to pass directly through the screens into the bottom bucket with the least amount of resistance.. because the hash is so extremely temperature dependant if it gets warm on the side of the bag.. it will stick there and not make it to the bottom to become use able product..
29
You do not need to use as much Ice as i used here lol... the idea is to keep everything very cold..i certainly achieved that but at the sacrifice of using so much that i ended up grinding product and producing "contaminants" but in the end they are just plant matter that i would be smoking when i rolled up my joint either way so.. I'm not super disappointed..
But it should be noted that what you want to achieve here is a Layering effect where you have the wash bag between two small layers of ice while the "water current" washes the Trichomes away allowing them to be separated by the screens setup below :)
Before Starting the machine you should allow some time (i.e.;10-12minutes pre soak to allow the product to become saturated) before the first cycle.
By video 32 I have just ran out of ice lol..
Video 33-34
Here I have a tip for you.. to separate the screens that you sieve through.. cut 5 gallon buckets to stretch them across nice and tight.. it'll make scooping your Bubble that much easier ! i learned this from the many "Frenchy" videos I have watched :)
Picture 35
Here in lays the problem for most people.. drying your hash without loosing vast amounts of "Terpenes" whilst also stay ever vigilant against mold !
Thanks to all those videos I've watched on youtube.. id like to think this was one of my most successful parts of this process..
Things to Note; Terpenes start to seriously evaporate at temperatures 68F or 20C
you need to stay as cold as possible whilst bringing the Relative Humidity in the space down into the 40-30% to stay away from that nasty mold !
I used my cold storage room in the basement.. with a dehumidifier running to keep the space at 45% RH & staying at a constant 15c.
All while spreading the hash as thin as possible across parchment paper, on top of the white screens with a fan moving air across both sides of the paper.
Pictures 36-38
These are some macros i took in the middle of my drying session I fell in love with the colour.
Yes i know the black spots are plant material but they will get caught when i bag the hash & squish the oil out.
Thing to Note; at this stage it is important to ensure you 'micro plane" the hash down as fine as you can whilst staying weary of the temperature... any "chunks" will hold pockets of moisture.. that lead to potential problems..ie; mold ...
Picture/Video 39-41
Successfully planed bubble hash ready to be bagged and Squished !
Picture 42
Ive decided to follow Pedro.. from Pedros Grow Room and double bag to be on the safe side so i don't have any blow outs.
So thats One 25u bag inside one 160u bag ! :)
Pictures 43
This is almost 3 grams of the bubble hash from above, already melting in the bag.. this is where i ran into trouble again lol things started getting to warm in the house and i was only able to get one of the three squish's i did on video :( things started getting sticky.
Picture 44
This is basically just a photo of the equipment I'm using; 3x5 LowTemp Cage in the frame I built myself, with a 20Ton bottle jack.
Something to note here is this is an older Lowtemp model with only a single heating zone which is which i have it closed here heating Both sides of the press :)
As well as the importance of having adequate pressure on your plates.. my rig is very overkill for the size of hash bags..lol
Video 45
Here is the lovely press video.. its didn't quite work the way i wanted either lol my directional folding wasn't quite tight enough for a big "drip" :)
&the Press was set to 65°c
Photo's 46-50 are pretty self explanatory :) I had a blow out.. but still managed to pull an 80% return from the hash once squished...& yes it tasted amazing :)
Was it worth it in the end... that could be debated.. for some..i understand..its not your thing, but for those of us that are interested in making our own concentrates.. free from Solvents...
I wouldn't make it any other way :)
If even ONE of you reading this diary finds it helpful to reference for ANYTHING.....even if its "what not to do" ill consider it a success !
Thanks again for tagging along on this garden adventure.. its been one heck of a journey !
Much Love from B.C. Canada,
Until Next time,
Cariboo

Likes
9
Share


@SmokinTees420
Follow
Week 4 of flower started on 4/25. Did another moderate defoliation on the larger dark green fan leaves to open the canopy up for more light. Hoping to get bigger buds this go round.
Likes
3
Share


@Trinidad
Follow
20.06 25. Day 30
Took some leaves off lower part of plant. Used plant training clips to bend branches in effort to LST. I will update tomorrow. One love 🏼
Likes
16
Share


@ChewiesGrow420
Follow
Today on day 17 from date of birth Iam preparing a worm casting tea. In a cheese cloth bag ,Made up of 2 cups of worm castings 2 tablespoons of unsulfured molasses,2 tablespoons of mineralized phosphate (bat shit) ,2 tablespoons of soluble seaweed extract . 2 tablespoons of alfalfa meal 2 tablespoons of all purpose 4-4-4 all Gia green products other than. I also sprinkled in some great white premium mycorrhizae inton2 gallons of water. Tea will brew for 24 hours before applying.
Processing
Likes
20
Share


@Sugarnugolia
Follow
Started doing some light defoliation a bit each day on the very low level offshoots and any big leafs blocking main bud sights.
Looking back I should have done a bit more earlier on as these are very heavy and leafy plants.
At the start of the week my light was at 55%, on 13 Nov I put it to 100% to see how they react. I will monitor to see if they are ready for it but they really took off this last week.
My one plant in the back left always appears droopy compared to the others because the leafs on it are so big it weighs down the whole plant.
The plant in the back right was always janky and I considered not even growing it. The seed came through a few days later than the rest and I almost wrote it off. Figured I would use it as an experiment and try and learn from it instead.

Likes
35
Share


@MS2845
Follow
day 44 size 38cm she looks good. im waiting to arrive bio bizz bloom to try on her see if gets better.
guys what you think about her? leave your opinion thanks
update..
day 46... 44cm

Likes
7
Share


@Unpluggy
Follow
Hi there Friends🕊️
Banana Purple Punch doing good. The side on which the stem Broke seems to have pretty much fully recovered🙌
Some leafs start to get more colourful
Cant wait for the next weeks to see of she purples up more😁