
Likes
19
Share


@DrGr33nThumb
Follow
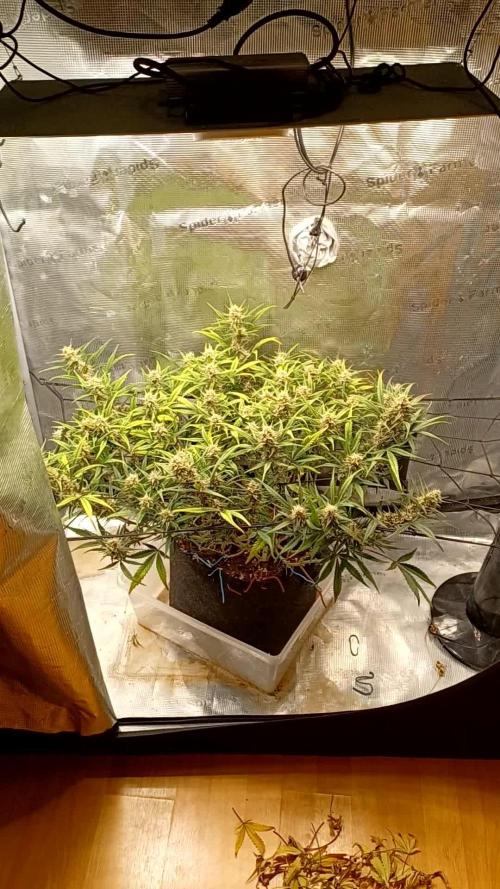
So heen away a while not too sure what day I'm on but the weeks are correct lol... photo and vid dump I'm getting super excited at how well it's doing.
Dropped in abit of calmag to the feed this week as its was showing signs of deficiency.

Processing
Likes
10
Share


@StarletBud21
Follow
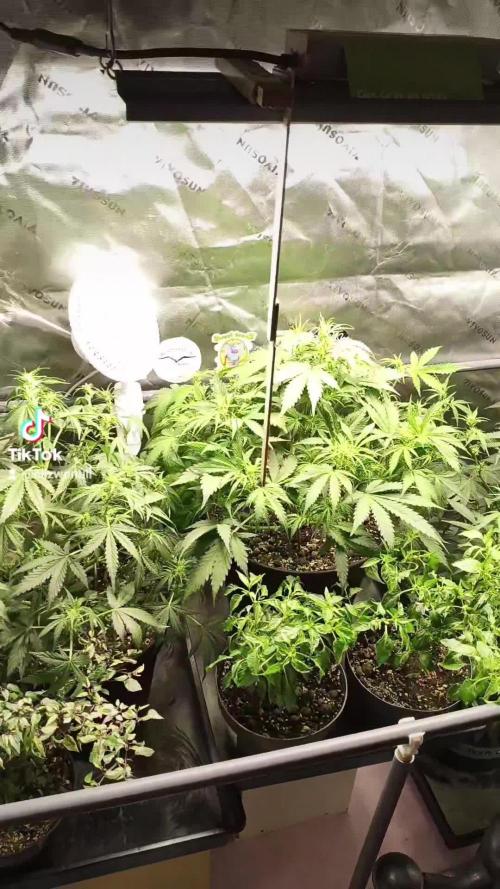
Woop happy with how the grow is coming along had fun trimming the girls down shitting myself at the same time though😝 still on an 18/6 schedule as I didn’t want to over stress the plants following defoliation and scrog .
Scrog setting up wasn’t too bad hope I done it right 😅 the screen is slowly becoming very green haha .. I’ll keep looking around on the web to widen my knowledge but for now it seems all is good my plan is to switch to 12/12 starting week 6 and around this time I should look into adding bloom to feed the autos as I’m sure they’re in pre flower stage right now but if ever in doubt I shall ask
Some cool photos to look at as well
Happy growing ☠️


Likes
2
Share


@aquaMan
Follow
End of Week 7 and finally the 2nd 250W Lamp is here!!!
Tropicana Cookies going strong, the Skittlez seem to wanna grow a little more before coming into flowering. Will change the Lightning to 12/12 if it doesnt get better.
Plants drank wel over 40L of Nutrients this week.

Likes
10
Share


@AestheticGenetix
Follow
7/1/25 Good lord yall. The dang frost factor om this lady. Good lord, thank you for blessing me with this heavenly genetic. 🙏
i cant wait to refine my process with her and get the best out of her. This is round 1. just a rough draft. Next round ill try more lollipopping and then less amongst other things.

Likes
6
Share

Likes
12
Share


@AtomicOrgy
Follow
She's getting bigger, the colas are beautiful, but the lower buds are small. Are they going to grow more? How many more weeks to come? Honestly, I'm afraid the yield is going to be small. The way I consume cannabis, 50 grams aren't enough for a month...


Likes
5
Share


@CherChezLaGrow
Follow
Week 5 and the deficiency is gone. The feeding schedule is 2 times a day. I used the scrog very close to train the plants. I will keep it low but not that low. I need to be able to get in and hand water my girls. Keep it Green

Likes
1
Share

@Crazy_Doofus
Follow
Gaining, will be 5gr dry I presume
Turned purple
Aside the cost per seed, this pot hold 2 plants, so let's see how much per pot I can produce
25/01 Trichomes just started a bit of amber, gonna wait another day
Likes
3
Share


@Passionatos
Follow
I lost the pics for the first weeks of veg unfortunately but the most important time the flower is all on film;)

Likes
40
Share


@nijuana
Follow
Last days for this beast !! I'm flushing it , in 2 days she is done ✅ the buds are so big that I can take all on one pic 😅
~5-10% are amber high quality pics bellow
Likes
8
Share


@Yukon_Pico
Follow
So far so good. Seems to have taken well to the LST. I did notice the early signs of CO² deficiency and added an organic CO² producer on day 37. Hopefully that spurs the growth.
Last frost is in a little over a week. After that I hope the power of the Yukon sun can really give it a boost in its final weeks.
Likes
96
Share

@ElNass
Follow
Hello everyone 🌱
I’m writing this while walking by the sea, reflecting on the next run.
I’m currently smoking some White Russian from my last grow, and I have to say… it really surprised me.
I’ve always had a simple philosophy: life is short, so I try to grow as many different strains as possible instead of repeating the same ones.
But this time, Serious Seeds really got me. White Russian, Bubblegum, AK-47… these are not just strains, they have a very strong identity.
In particular, I found a White Russian phenotype that I would definitely keep and grow again. I regret not cloning it.
That experience made me appreciate even more the work behind these genetics.
Each strain expresses something unique, both in structure and effects, and that’s something I’m starting to understand more deeply.
⸻
About this run
I honestly didn’t expect this opportunity.
I reached out to Serious Seeds without big expectations, and they gave me the chance to test one of their new strains:
👉 Fruity Durban (Serious Mimosa × Durban)
This is currently a test strain, so I’ll be growing it almost completely blind.
I deliberately avoided researching too much about it. I want to observe it for what it is, without external influence.
⸻
Constraints & approach
Due to where I live, I can only run one plant, which means I won’t be able to explore different phenotypes or evaluate stability.
So this will be a more focused test, centered on a single expression.
At the same time, this run will be more challenging than usual:
• I’ll likely be harvesting in mid-summer
• high temperatures could impact terpene preservation and plant stress
⸻
Living soil system
I grow in a living soil system (113L pot), which I like to think of as a bioreactor.
Before starting, I reactivated the soil by:
• adding fresh worm castings
• light top dress amendments
• reintroducing clover as cover crop
The goal is to rebuild microbial activity before transplanting.
⸻
Philosophy for this run
Unlike my previous grow, where yield was very high, this time I want to focus on:
👉 terpene expression and overall quality
For this reason, I’m considering a very light-touch approach:
• minimal training
• possibly a single topping (to avoid excessive main cola density)
• otherwise letting the plant express itself naturally
I don’t want to interfere too much. I want to observe.
⸻
Germination
I started by placing the seed directly in a glass of water.
I decided not to use H₂O₂ this time, in my experience it can help, but it’s not essential.
Now we wait.
⸻
I’m really curious to see how this strain will behave in this environment, especially in these conditions.
This will be a journey focused on observation, learning, and quality over quantity.
Let’s see what comes out of it 🌱

Likes
51
Share


@Chumpkilla
Follow
12/30/23 - Day 54 - Hello All! I started this week a day early. I wanted to update everyone on something I have been thinking about a lot. Curing. I feel if there was a hole in my growing skills it would be curing. Last grow there was more than I had anticipated. I was not set up for curing 1 lb. I threw in an audible at the last minute. It worked out but I know I can improve with some trial and error and hands-on experience. So after reading a ton, and going off of some of my prior builds for drying, I came up with this design.
I have a controller that will turn the air on and will run when the contents inside the box hit whatever RH% I want to set it at. I think the first week I will set it for 78%RH, then every couple of days go down a % until I hit 62%.
The thought is that if the bucket gets above the set RH% then the air will kick on and distribute air across the buds until the RH% is back down to where you want it. It will force the humidity out. I won't need to worry about burping. It will happen on its own.... in theory.
Ill update tomorrow with some pictures after the water change.
12/31/23 - Day 55 - Everything is looking good. The water change completed this morning while I was in the shower. Its adding nutes now and will do so over the next hour or so. She is starting to get stinky. I had to add the extra carbon filter to the room. I've got some pics up top of that.
Happy New Year! Next time I post it will be in 2024! Have a great night and be safe! Dont drink and drive, your life and anyone else involved in an accident is too important! C' YA!
1/4/24 - Day 58 - I have been thinking of trimming her for a while.... I got a comment on the bushy-ness and I got self-conscious and gave her a trim. Lol I have been going bath and forth for a while and that gave me the push to give her a little trim.
She looks great and is growing really quickly. Ill update with more pics as it goes along.
Likes
36
Share


@pifflestikkz
Follow
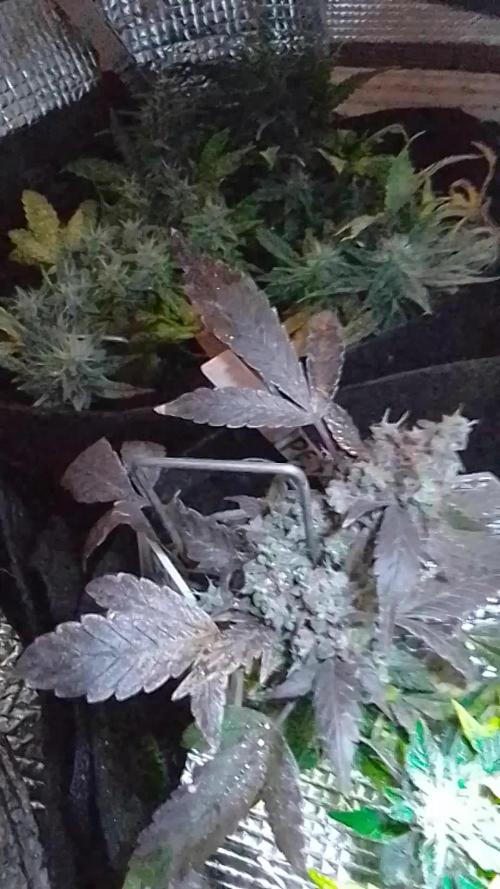
Day 200
18/11/24 Monday
It's her last day today of light, no more watering. She will then enter 48 HR dark period. Her trichomes have reached a nice amount of amber's, and flooded with cloudy trichomes... The end is so close 🤤😋😂
The smell is intoxicating, sweet pungent guava fruity smell. It's amazing. Seeing her colours fade out on the fans is like watching a sunset.
Deep oranges radiating against her red veins, with purple and violet tipped buds, engulfed in trichomes and orange pistils, but she holds a deep dark green underneath in the core of the buds.
She is a menace to look at 😈💞
It's been fun to grow this, and I won't lie, trouble free. Easy with nites she took what I gave, next time around I'll be lollipoping a shit load more to encourage them fatter tops 💪💚
Sorry for the shit quality video this week so far, soon as she enters her dark period I'll get some nice flash pics and video tomorrow and upload 🙌💚
Day 201
19/11/24 Tuesday
She entered her dark period at 5am this morning. She is still relatively moist so the next 48 hours should be fine to dry off in the dark too.
Noticed a couple more mildew spots on leaves, removed these now. Don't want it wasted in the last 2 days 🤦♂️😅💚
Next update will be the chop on Thursday.
Updated pictures 📸💚
Day 203
21/11/24 Thursday
Its finally time 🙌!!
She has had 48 hrs of dark and more mildew started to set in so thank goodness I chopped her today!!
Have not had time to weigh her yet, but wet trim, and deeper wet trim of sugar leaves affected with mildew have been removed.
She is now hanging in tent to dry, with heat mat, and extraction on low. Humidity is 66% and 18'c.
Her colours have deepened and her aroma is potent!!
Strong sweet floral smell , similar to the perfume 😍
Uploaded pics and a short vid of before the chop. Will update harvest tomorrow with wet weigh.
Thanks for following along my journey, big shout out and thank you to @Divineseeds for this cultivar. Next time , bigger pot, more lollipoping 😎💪💚

Likes
10
Share


@SnoopyShaggy
Follow
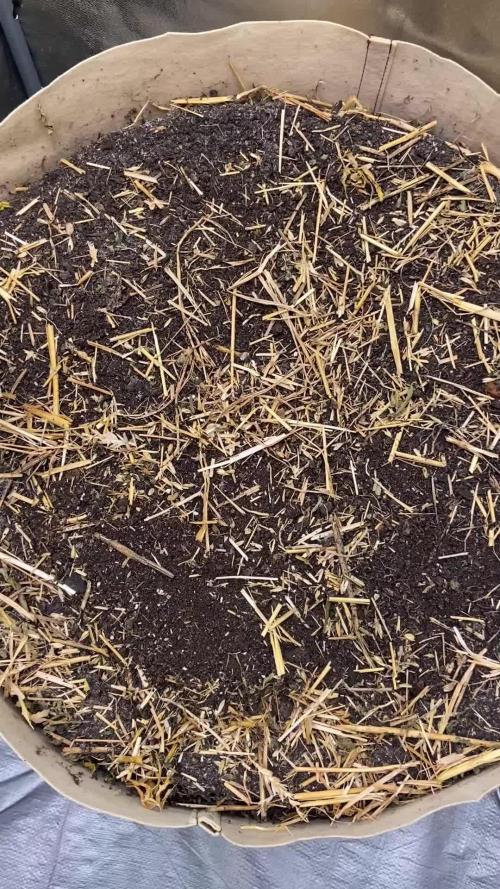
Some leaves are alredy yellowing indicating harvest time is nearing. I also shock stress the plant by reducing nutes to avoid harshness from my smoke. Just banana compost tea+plain water. Since this grow is in a supersoil, dropping the BigBud nute off in last 3 weeks to allow the microbes do its work.
In 2weeks once trichomes are ready, i will chop one of the plant.
Them colors on the strawberry is magical. Cant wait to dry them and cure to see the effects.
Likes
6
Share


@Nillenium
Follow
Jetzt kommt der langweilige Teil des Grows. Wachstum findet quasi nur noch in den Blüten statt. Veränderungen sieht man wirklich nicht unbedingt Täglich.
Es gibt ein letztes mal Bio PK 5-8 als Top Dressing 10ml auf 500ml Wasser
Processing
Likes
21
Share


@JuicyFruit
Follow
Day 55 - 18/11/19
i still think another 1-2 weeks for this one, getting a jewelers loupe for the beginning of week 9 so i can tell exactly where were at in terms of harvest :) anyone got any thoughts on this little plant? have a look at the photos and videos and let me know in the comments below :) oh and i finally nailed what this strains smell is - tropical hubba bubba gum with cheese :'D
Day 59 - 22/11/19
Got my jewelers loupe 2 days ago and ive been having a look at them. its pretty hard to see for a newbie grower. ive looked at harvest guides online and seen pictures of clear, cloudy and amber trichomes. mine look mostly cloudy (60%) and slightly glassy (40%) with barely any ambers. i may be wrong but the reason i think its cloudy is that it looks white against the leaves instead of see through or like glass. so going on this for my first trichome inspection im gonna harvest in the middle of next week.
Smell is getting strong enough to stink out a room, still that tropical cheese smell, although its just so pungent it lingers in the rooms after bringing it out of the tent to inspect it. smell isnt a problem if you put it back in the tent and spray some air freshener stuff in the next room. the carbon filter is doing its job exactly as described along with the fan.
The fan leaves started to get yellow patches and sugar leaves starting to curl. and a friend thinks its nearing the end of its life.
I flushed yesterday and will flush again today to drain out any excess salts and nutes.
Thanks for following along.
im excited for week 9!
Happy Growing!

Likes
35
Share


@valiotoro
Follow
A wonderful genetic thank you Fast Buds ❤️🔥🤩
The trim was super easy the buds are FAT & FROSTY full of resin 🤤
I’m very happy with the harvest 103g !!
For the light i’ve used the Spider Farmer SE-7000💡
Likes
8
Share


@Thepiedpiper
Follow
Lots of hairs this week had a bit of an airline issue on the airstones I fixed it and the leaves stopped curling downward so they are looking alot better did my usual weekly feeding 6 oz of each remo nutes and ph water 5.8 added as well cannazyne for the breakdown of old dead roots helps keep things clean and productive lots of hairs and new top development through each plant right plant started getting some yellow leaves I defoliated then and will continue to monitor for any issues but also going to re defoliate and take out those bottom useless larfe nugs
