





Processing
Likes
14
Share


@CommanderCannabis
Follow
Had very good growth this week in height and pistils. Roots are also doing well with more growth and nice color so I will keep my fingers crossed that they continue to do well. The MP3 player was not working again. I used a MicroSD card and put a Velvet Underground Album on it and stuck that into the newest speaker. This one is the smallest and easiet yet plus it has continuous play so the album plays all the time without stopping like the MP3 player did. Am getting a bigger SD card to put more Velvet Underground on. I also defoliated a small amount and don't expect to cut anymore. The Grow Chamber continues to perform nicely and I hope to start building the first real Model Type soon. I also had to make a new top drip system because the older one was not dripping water. I am also CO2 enriching the Chamber for a couple of hours every two days. Looking to see more pistil growth this week. I've also added my data charts for January. Everything was in range and moving forward.

Processing
Likes
22
Share


@BladeCutter
Follow
~~~~~~~~~~~~~~~~~~~~~~~~~~~~~~~~~~~~~~~~~~~~~~~~~~~~~~~~~~~
==> Comments From Other "Living Soil/Super Soil" Growers Are Always Welcome <==
~~~~~~~~~~~~~~~~~~~~~~~~~~~~~~~~~~~~~~~~~~~~~~~~~~~~~~~~~~~
INTRODUCTION
I am very excited about this grow as it is the first time with a new setup. I have added a new light and am going to try a super soil grow for the first time. I have a Mephisto Genetics Double Grape between paper towels and waiting to sprout. The space is about 18 inches by 24 inches. The ceiling slopes down, so I don't have much room at the rear of the space. For medium I am using Fox Farms Happy Frog augmented with perlite. The bottom third contains 0.5 pounds autoflower blend of a "super soil" additive from Nature's Living Soil. (https://amzn.to/2PUHc6k) I am using three-gallon cloth pots. The light is a Horticulture Lighting Group 135W QB V2 R-Spec LED kit.
NUTRIENTS
Tap water pH’d to 6.5. pH lowered using 1.5 TBS unsulfured blackstrap molasses and apple cider vinegar. One-half TBS of vinegar lowered pH about 0.5 points.
The medium was very dry. Slowly watered to allow the moisture to be equal throughout the soil
ISSUES
My while I have yet to put the seed in the dirt, I am concerned about temperatures. They are currently running at about 86F. I would like to get it down to about 80F.
DAILY LOG
DAY -2: STARTED SEED
* Started seed in my traditional manner. Between paper towels soaked in 5% bleach solution, 0.25 tsp/0.5 Cup water. Temp 82F.
DAY -1: ACTION
*The smallest of tip has appeared. Will put in soil in a few hours.
Day 0: SEED PLANTED.
* Refrigerator filtered water. pH 6.5. 1 cup (250ml) added very carefully.
* Covered with humidity dome.
* Light from Soil: 32.5”
* Temperature: 82F
DAY 1: SPROUT
The sprouted seed has shown itself above the soil. A nice Christmas morning surprise. Now I can start counting the days.
* Watered with about 200ml of water at pH 6.5. Used apple cider vinegar to lower the tap water pH.
* I was pleased to find that my tap water does not contain chloramine. I was reading bad things about chloramine and "living soil." It can kill beneficial microorganisms. All I did was ask my water company and they replied saying "we found no mention of chloramine use in the system:" Just what I wanted to hear.
* After looking at other diaries using 250W LEDs, I moved my light down to 25 inches.
DAY 2: NO WATER FOR YOU
* No watering today. There is plenty of water in the soil and I want the roots to stretch and work.
* Working on increasing the humidity and getting more control over the temperature.
DAY 3: WATER PLANT, NOT POT. ADDED MYCORRHIZAE.
* Following the GrowWeedEasy watering suggestions for Kind Soil
* 500ml water at 6.5 pH, around the plant and not across the full 3-gallon bag.
* The fan gently moves the seedling to keep it strong.
* Had minor unexpected run-off. I hope to avoid that in the future.
* Added 1/8 tsp Great White Mycorrhizae dissolved in 100 ml of 50 ml water/50 ml molasses mix. Did not pH as it is such a small amount of solution compares to the watering earlier today.
DAY 4: NO WATER, NO PICTURE
* Nothing really new. So no reason for a picture.
* The soil is dry on top, but the bottom of the pot is still damp. So I will watch it, but I don't expect to water today.
* Adding a small intake fan has dropped the temps to about 82F, I think they can live with that.
* A humidifier arrives tomorrow and I think that will be my last step to improve the environment.
DAY 5: 500ml WATER, LOOKING GOOD
* The plant is looking good. The second set of true leaves has a bend, but nothing to worry about.
DAY 6: 500ml WATER. NEW HUMIDIFIER
* It wasn't really necessary to water today, but I did simply to stay on the schedule I am using.
* Given the lightness of the soil and the moving air, I don't anticipate any problems.
* Added a humidifier yesterday evening. It's bringing the humidity up, but I need to keep the space closed and I'm a bit concerned about having to provide it with distilled water frequently.
~~~~~~~~~~~~~~~
WEEK ONE IN REVIEW
~~~~~~~~~~~~~~~
* Watered with 750 ml pH's tap water. Watered slowly to avoid any runoff.
* The plant is looking very healthy. It looks as if the roots are really starting to work as the plant is darker green.
* Balancing temperature and humidity is tricky, but I think I will be able to get it stabilized with a bit more work.
* Target Relative Humidity: Seedlings - 65-70; Vegging - 40-70; Flowering - 40-50
==> Beginning Next Week I Will Only Post Twice A Week, Mid-week And End Of The Week. <==

Likes
Comments
Share

@frigo_camelo
Follow
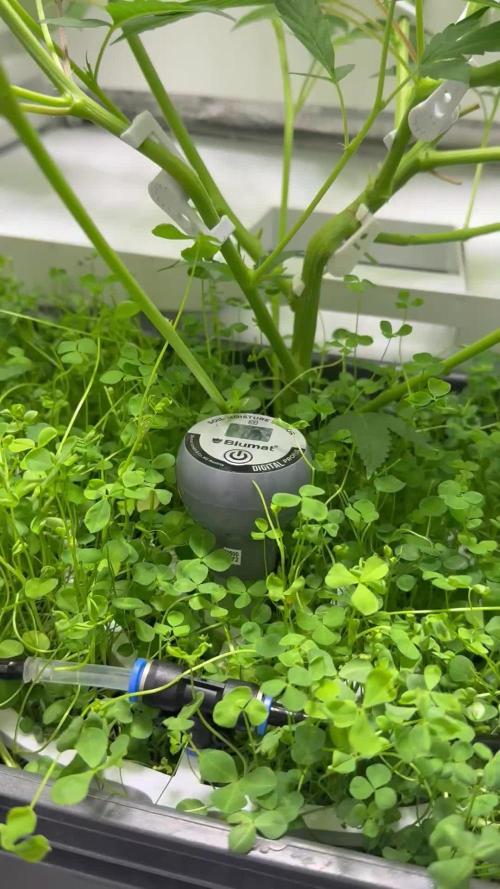
end of week 1 flower | plant looking really green | changed from using blumats to the good old drip ring in the closed loop config | hope i now got better controll over the humidity in soil | plant grew very nicely to be spread under the net | installed the scrog end of week 1 | now 2 weeks of holiday | hope for the best
Processing
Likes
3
Share


@Mr_nugs_lover_David
Follow
She popped out completely 48hs after being planted so looks like she's developing very quickly,let's see how sher performs. So excited about this strain by the masters of Dutch passion! 💚 🌱 ✌️

Likes
7
Share


@Drtomb
Follow
Just back from a vacation. Plants are looking amazing. However I did notice slower development of buds on the opposite side of the tent. I relate this to an issue with the swap out between H2O2 and bleach for sterilization of my reservoir and roots. I will be discontinuing bleach and using H2O2 if needed in fact I'm going to be adding a different product to the girl going forward I'm testing out a product called Hydro bio. This item contains microorganisms, humic acid, folic acid, sea kelp, and molasses. The guy at the grow store claims this item will also clean your Reservoir and the supplying tubes as well as keep the roots healthy. Let's give it a go stay tuned to my next girl to see that one with it right from start
Likes
20
Share

@SugarandTerps
Follow
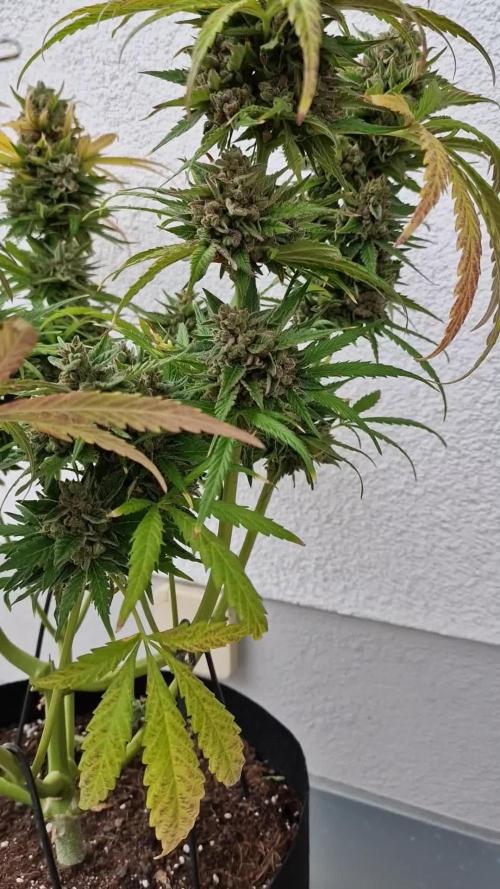
Bloom W8 Fastbuds Mendo Frost ❄️❄️
23.7
Heute wurde mit 2,5L Wasser gegossen. Ph-Wert wurde auf 6,4 eingestellt.
Blätter und Blüten bekommen eine schöne Farbe. Es wird immer mehr bunt 🤗
24.7
Heute habe ich Schädlinge an den Unterseiten der Blätter an manchen Haupttrieben gefunden. Habe stark Betroffene Blätter entfernt und werde dies im Auge behalten. Kurz vor der Ernte kann ich kein Neemöl benutzen 😕
25.7
Gegossen wurden 2,5L PH-WERT auf 6,4
28.7
Die Temperaturen steigen wieder etwas an. Heute hatten wir 29°C. Morgen soll es über 30°C werden. Es wurden noch mal 3,0L gegossen.
29.7
Heute durch die hohe Temperatur wurde noch mal 2,0L gegossen. Dies war das letzte mal vor der Ernte.

Likes
15
Share


@emeraldlabs
Follow
Interesting week; she’s packing on and the trichromes are getting cloudy. She has been on a regular watering schedule (every other day) for awhile now. Woke up yesterday and a handful of branches were nearly parallel to floor. Using some plant yoyos (for first time) so prevent that happening again.
Will begin the flush at next watering.
Photos/video taken 91 days after breaking soil, day 49 of flower

Likes
44
Share


@Roberts
Follow
So I switched to Athena nutrition 48 hours ago. As you can see the plant was not liking the Xpert Nutrients solution mix. I honestly don't think the mixture was strong enough. Regardless I had to switch to save the plants. I will try the Xpert Nutrients again on another grow. She did start showing more life since the switch. Hopefully she bounces back fast. Thank you Medic Grow, Xpert nutrients, Athena, and Fast Buds. 🤜🏻🤛🏻🌱🌱🌱
Likes
17
Share


@Justjewit
Follow
So it's the start of week 3 , to say the plants had a very randomised environment up until this point , and 2 plants are in 1 pot ...... all 3 aks are looking good . Soo I'm going to keep them in the room , can just make friends with my new strains I want to put in there .... sure they will get along

Processing
Likes
12
Share


@ELPIRATA
Follow
🙏
Ha comenzado la semana Nº7, Se han acentuado mas los olores en el cuarto de cultivo,
se logran apreciar diversos botones, Espero logren crecer de manera desmedida y robusta.
El día 20/06/2020 se han regado 3 plantas en macetas de 11 litros:
X2 Semillas Auto Lemon Kix= 1L [1MlBLOMBASTIC+1.5mlKnactive+5ml/L ATAGrowth-C+5mL ATAFlower-C+1mLAutoTop] PH 6.2(?) / EC= 1.84Tº=23
X1 Semilla Auto Tutankhamon= 1L [1MlBLOMBASTIC+1.5mlKnactive+5ml/L ATAGrowth-C+5mL ATAFlower-C+1mLAutoTop] PH 6.2(?) / EC= 1.84Tº=23
*El día de hoy se han regado 1 planta en macetas de 7 litros:
X1 Semillas Auto Lemon Kix#3 = 800 ml [1MlBLOMBASTIC+1.5mlKnactive+5ml/L ATAGrowth-C+5mL ATAFlower-C+1mLAutoTop] PH 6.2(?) / EC= 1.84Tº=23
*Se comienza a usar Bloombastic en semana 6, dia 42 (0.5 ml/Lt)
😈
Buenos humos!


Likes
1
Share

@Black_Widow
Follow
Привет садоводы
Началась новая неделя
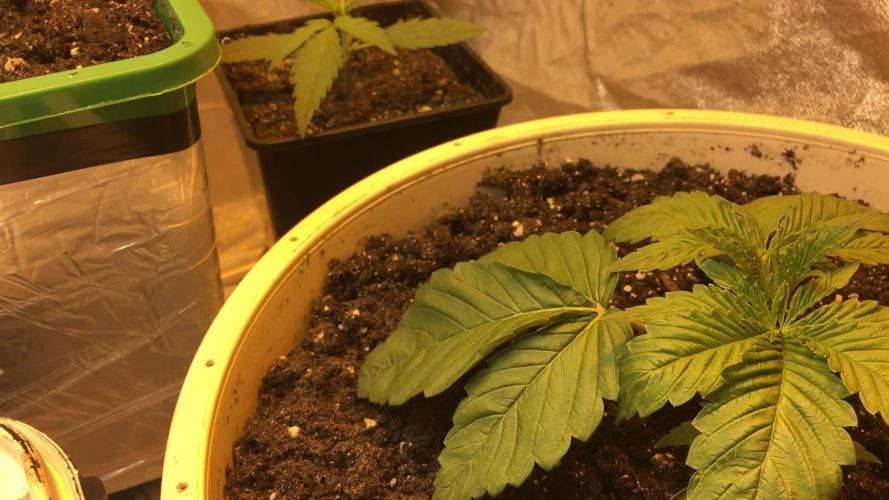
растения прошли начальную стадию роста и уже пересажены в свои горшки
растения чувствуют себя хорошо
в гидропонике раствор разведен на 600 ppm
в нем поддерживается ph 5.6
хочу еще немного подождать когда растения подрастут и начать их тренировать LST

Likes
2
Share


@Glen1818
Follow
The first is already peeking out of the ground, the other should follow.
I used Plagron Lightmix.
LED @ 24W

Likes
12
Share


@Marijuanaisland
Follow
Desculpe não atualizar antes mais muito trabalho neste fim de ano adoro as cores da Red Hot tive ao total 3 Red Hot mais só fiz o diário de uma três feno tipos diferentes todos reds aromas diferentes em todos doce, pungente, frutas tropicais, owwwwww good Nice, a sweet zkitllez está muito bem também tive outras que não fiz o diário. Obrigado a todos

Likes
46
Share


@ernest_twwg
Follow
April 12th:
I wonder...
I wonder if Wedding cake has Ice Cream Cake as a parent....
*Quick google search*
Nope, turns out, it's a Cherry Pie pheno crossed with Girl Scout Cookies. Well, there goes that hunch. Ice Cream Cake is a 12+ week flowering cultivar, which is why i was wondering, since this current Bubba Cheesecake pheno is Still not ready. No noticeable senescence other than a tiny bit of purple on a few sugar leaves.
Wedding Cake usually takes 9-12 weeks, depending on which genetics lab is claiming flowering time.
Exodus Cheese takes at least 10 weeks, from the research i've done.
Pre-'98 Bubba Kush takes around 9-10 weeks to finish flowering, as well.
Now it makes sense! Why my plant is on week 11 and not showing many signs of slowing down yet, that is.
She drank a gallon of well water this week. I probably should've watered her again today, but oh well. I'll give her some more water tomorrow,
Light intensity is still at 100%.
I was hoping to be able to smoke this on 4/20, but you know what they say: Hope in one hand, poop in the other...
Either way, i still find myself staring into my bloom room, at this plant. All those curves 😍

Likes
6
Share

@Weed_Wizard
Follow
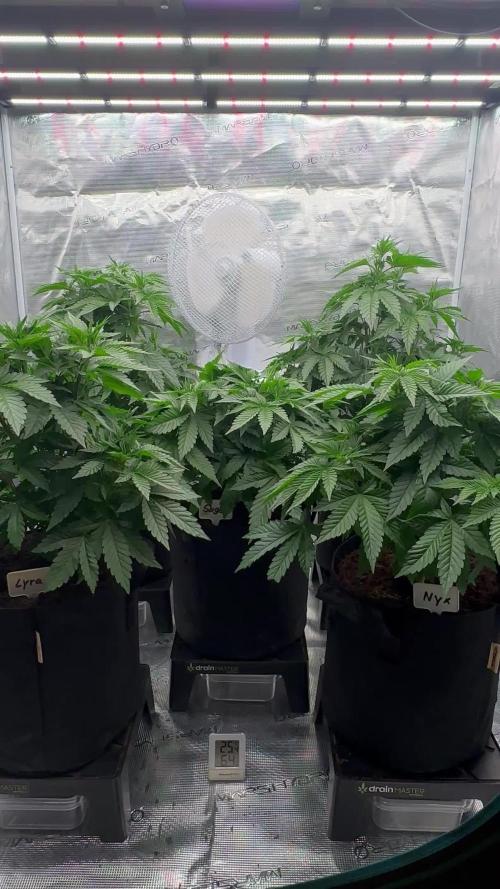
After a few days the LST has an effect. They grow nice and bushy. Still trying to get some drain in these massive 12l pots. At the moment I’m watering every 3 days with 3,5l of nutrient solution. Still no drain. I also removed some leaves at the bottom and the big ones, so light can break through better. We’re working on it 🧙♂️✨
Edit: I flushed them today with 5 liters of pH neutral water and we finally had drain 💦
I also lollipoped and defoliated them so the Girl Scouts get a better light intake ☀️🌱✨ let’s see how they’ll do. I’ll change the light to 12/12 next Tuesday, when we start week 7. Happy flowering

Likes
Comments
Share
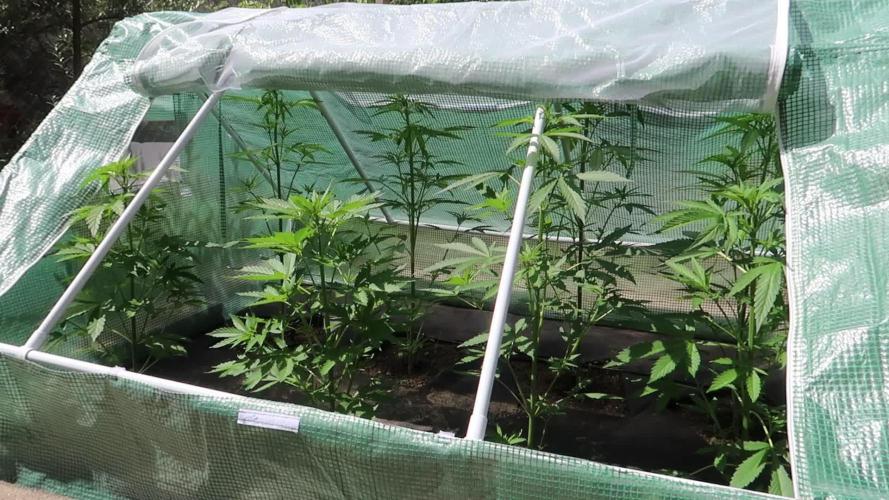

@Durango
Follow
Update from 30.5 2026. I already had to remove the plastic greenhouse. Plants measure from 64cm to 85cm.
Lemon Cherry Cookies 1. 62cm
Lemon Cherry Cookies 2. 63cm
Lemon Cherry Cookies 3. 82cm - sativa pheno,leaves narrow like sativa
Strawberry Gorilla from 68cm to 85cm


Likes
42
Share


@Master_weeda
Follow
Bonjour à tous les padawans et les maîtres jedis
Cette plante est vraiment exceptionnelle! Elle représente la force et j'en suis fier 😍
La semaine 4 est déjà la ! Ma plante est saine le LST ce passe relativement bien je l'ajuste tout les jour je le combine avec la technique du pincage d'Apex cela me permettra d'avoir une canopé plus homogène donc une meilleure pénétration lumineuse et par conséquent un meilleur rendement.
Le pinçage est une pratique courante en horticulture.
Beaucoup de cultivateurs l'utilisent pour améliorer le rendement de leurs plantations cannabiques ou autres.
Il est souvent question de 'taille' des bourgeons apicaux.
Cette taille se pratique également mais il n'est plus alors, à proprement parler, question de pinçage.
A l'instar d'une taille, le pinçage va permettre de stimuler le développement des ramifications tout en préservant les sommités en vue de la floraison.
Il est très utile pour uniformiser une canopée.
Pour réaliser le pinçage, il vous suffit de presser 'fermement' la tige [entre le pouce et l'index] aux environs de l'apex jusqu'à sentir un léger 'crAck'.
Cela aura pour résultat d'endommager les vaisseaux impliqués dans la circulation de la sève [situés dans le pourtour de la tige], la tige conserve toutefois une certaine rigidité.
Pour obtenir le même résultat, il est également possible de vriller légèrement la tige sur elle-même.
L'interruption du circuit d'alimentation entre le ou les apex et le reste du plant va provoquer un déséquilibre hormonal qui aura pour conséquence le développement des ramifications antérieures au point de pinçage.
Jour 25 j'arrose mon pot normalement avec un quart de son volume en eau toujours avec un PH de 6.3 à cette eau j'ajoute 0.7 gramme de greenhouse feeding enhancer pour favoriser son développement racinaire.
Par la suite je n'aurai plus qu'à ajuster mon LST jusqu'au stretch et surveiller mon arrosage, Je pincerai mes apex suivant la pousse de la plante pour uniformiser la canopé.
Petit rappel de ce que est le LST et comment le pratiquer le plus efficacement possible:
Quand commencer à appliquer la technique LST
De nombreux cultivateurs commencent la manipulation dés que les plantes possèdent entre 3 et 6 nœuds ou une paire de feuilles. Durant cette première étape de la croissance, le tronc encore flexible est pliable sans risque qu’il ne se casse, même si au fur et à mesure du développement de la plante il sera de plus en plus difficile de le plier. Nous pouvons continuer à guider la croissance des branches durant toute la culture, même durant la floraison, ce qui pour cette étape représente un grand avantage face à la taille, qui n’est pas du tout recommandé une fois que la formation des têtes commence, cela stressera en effet la plante, ce qui aura pour effet de retarder la récolte.
Comment appliquer la technique de guidage LST
Si nous sommes prudents, la flexibilité naturelle des fibres du cannabis permet de plier leur tronc et branches avec une relative facilitée, même durant la floraison des plantes.
En utilisant une corde fine, nous pouvons accrocher la pointe de la plante à la base du pot par exemple ou à un tuteur que nous aurons planté dans le substrat. Nous plierons le tronc avec précaution et nous le fixerons avec la corde, à partir de là, nous pouvons augmenter progressivement la tension de la corde, chaque jour un peu plus, jusqu’à obtenir la position souhaitée. Soyez attentif à la réaction de la plante, essayez de ne pas appliquer trop de pression sur la corde et rappelez-vous que la flexibilité des branches peut varier d’une plante à l’autre.
Pour obtenir de meilleurs résultats, il suffit de suivre quelques règles simples. Pour commencer, nous devons choisir une corde fine mais pas trop pour ne pas blesser les troncs au fur et à mesure qu’ils grandissent et qu’ils deviennent plus gros.
Nous pouvons utiliser des crochets en plastique souple ou de n’importe quelle autre matière flexible pour éviter d’endommager les plantes. Spécialement en intérieur, utiliser des cordons en plastique de couleur (voir les diaries de @Silky) est très pratique pour voir facilement les accroches et faciliter le travail au milieu du réseau formés par les cordes, les tuteurs, les mailles ou les supports que nous aurons dans la culture. Bien entendu, en culture extérieure et surtout en guerilla nous ferons juste le contraire et nous utiliserons des matériaux de couleur qui n’attirent pas l’attention pour que notre jardin reste discret.
Pour stresser les plantes au minimum, la mieux est de réaliser ces manipulations le soir ou juste après que les lampes en intérieur s’éteignent, ce qui leur permettra de se remettre durant la nuit. Normalement, le jour suivant nous pourrons observer comme les pointes des branches que nous avons pliées se dressent de nouveau vers le haut à la recherche d’une source de lumière.
Je combine un pincage d'Apex (explications plus haut) au LST cela me permettra d'avoir une canopé plus homogène donc une meilleure pénétration lumineuse et par conséquent un meilleur rendement.
Que la force soit avec vous 💪